This page provides information about the Grid texture in V-Ray for Blender.
Overview
The V-Ray Grid texture generates a procedural grid texture.
UI Path
||Node Editor|| > Add > Textures > Grid
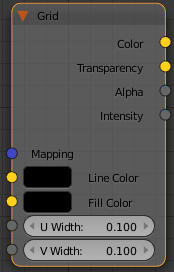
Node
Line Color – Controls the color of the lines in the grid procedural texture. When a texture is selected, it overrides the color as long as the texture checkbox is enabled.
Fill Color – Controls the main non-line color of the procedural grid texture. When a texture is selected, it overrides the color as long as the texture checkbox is enabled.
U Width – Controls the horizontal line width.
V Width – Controls the vertical line width.
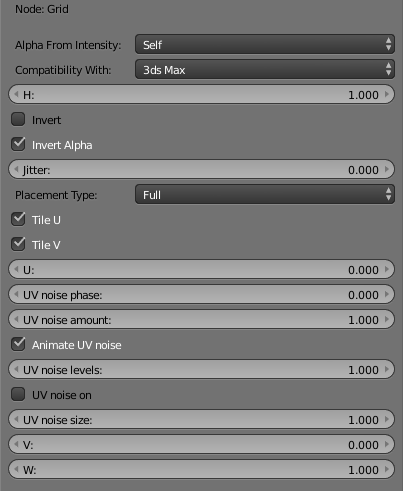
Parameters
Alpha From Intensity – Specifies where to take the alpha from.
Bitmap alpha – This is the default setting. With this option selected, V-Ray renders the material the same on both sides.
Color intensity/luminance – Renders the back side of polygons as invisible for the camera.
Force opaque – Renders the back side of polygons as invisible to all rays, except shadow rays.
Compatibility with – Select the compatibility type of the exported map from Max or Maya.
H – Specifies the height of the texture sector.
Invert – Enable to invert the color of the texture.
Invert Alpha – Enable to invert the texture alpha. Please note, that the Invert option has to be enabled, otherwise only the color is inverted.
Jitter – The amount of random placement variation.
Placement Type – Select how to place the texture.
Full
Crop
Place
Tile U/V – Enable to choose between a horizontal or vertical tiling.
U – U coordinate of the texture sector.
UV noise phase – Specifies the UV noise phase.
UV noise amount – Specifies the UV noise amount.
Animate UV noise – If enabled, the noise is animated. Use the UV noise phase to animate the noise.
UV noise levels – Specifies the UV noise iterations.
UV noise on – Enables the noise.
UV noise size – Specifies the UV noise size.
U/W – Specifies the U/W coordinates of the texture.