This tutorial walks you through the steps of creating a shadow/matte catcher.
Overview
A shadow catcher is a matte object, which is not directly visible in the scene, but shows the received shadows. This approach is ideal for achieving a photorealistic render, compositing a 3d object with a shadow on top of the environment map or just a backdrop.
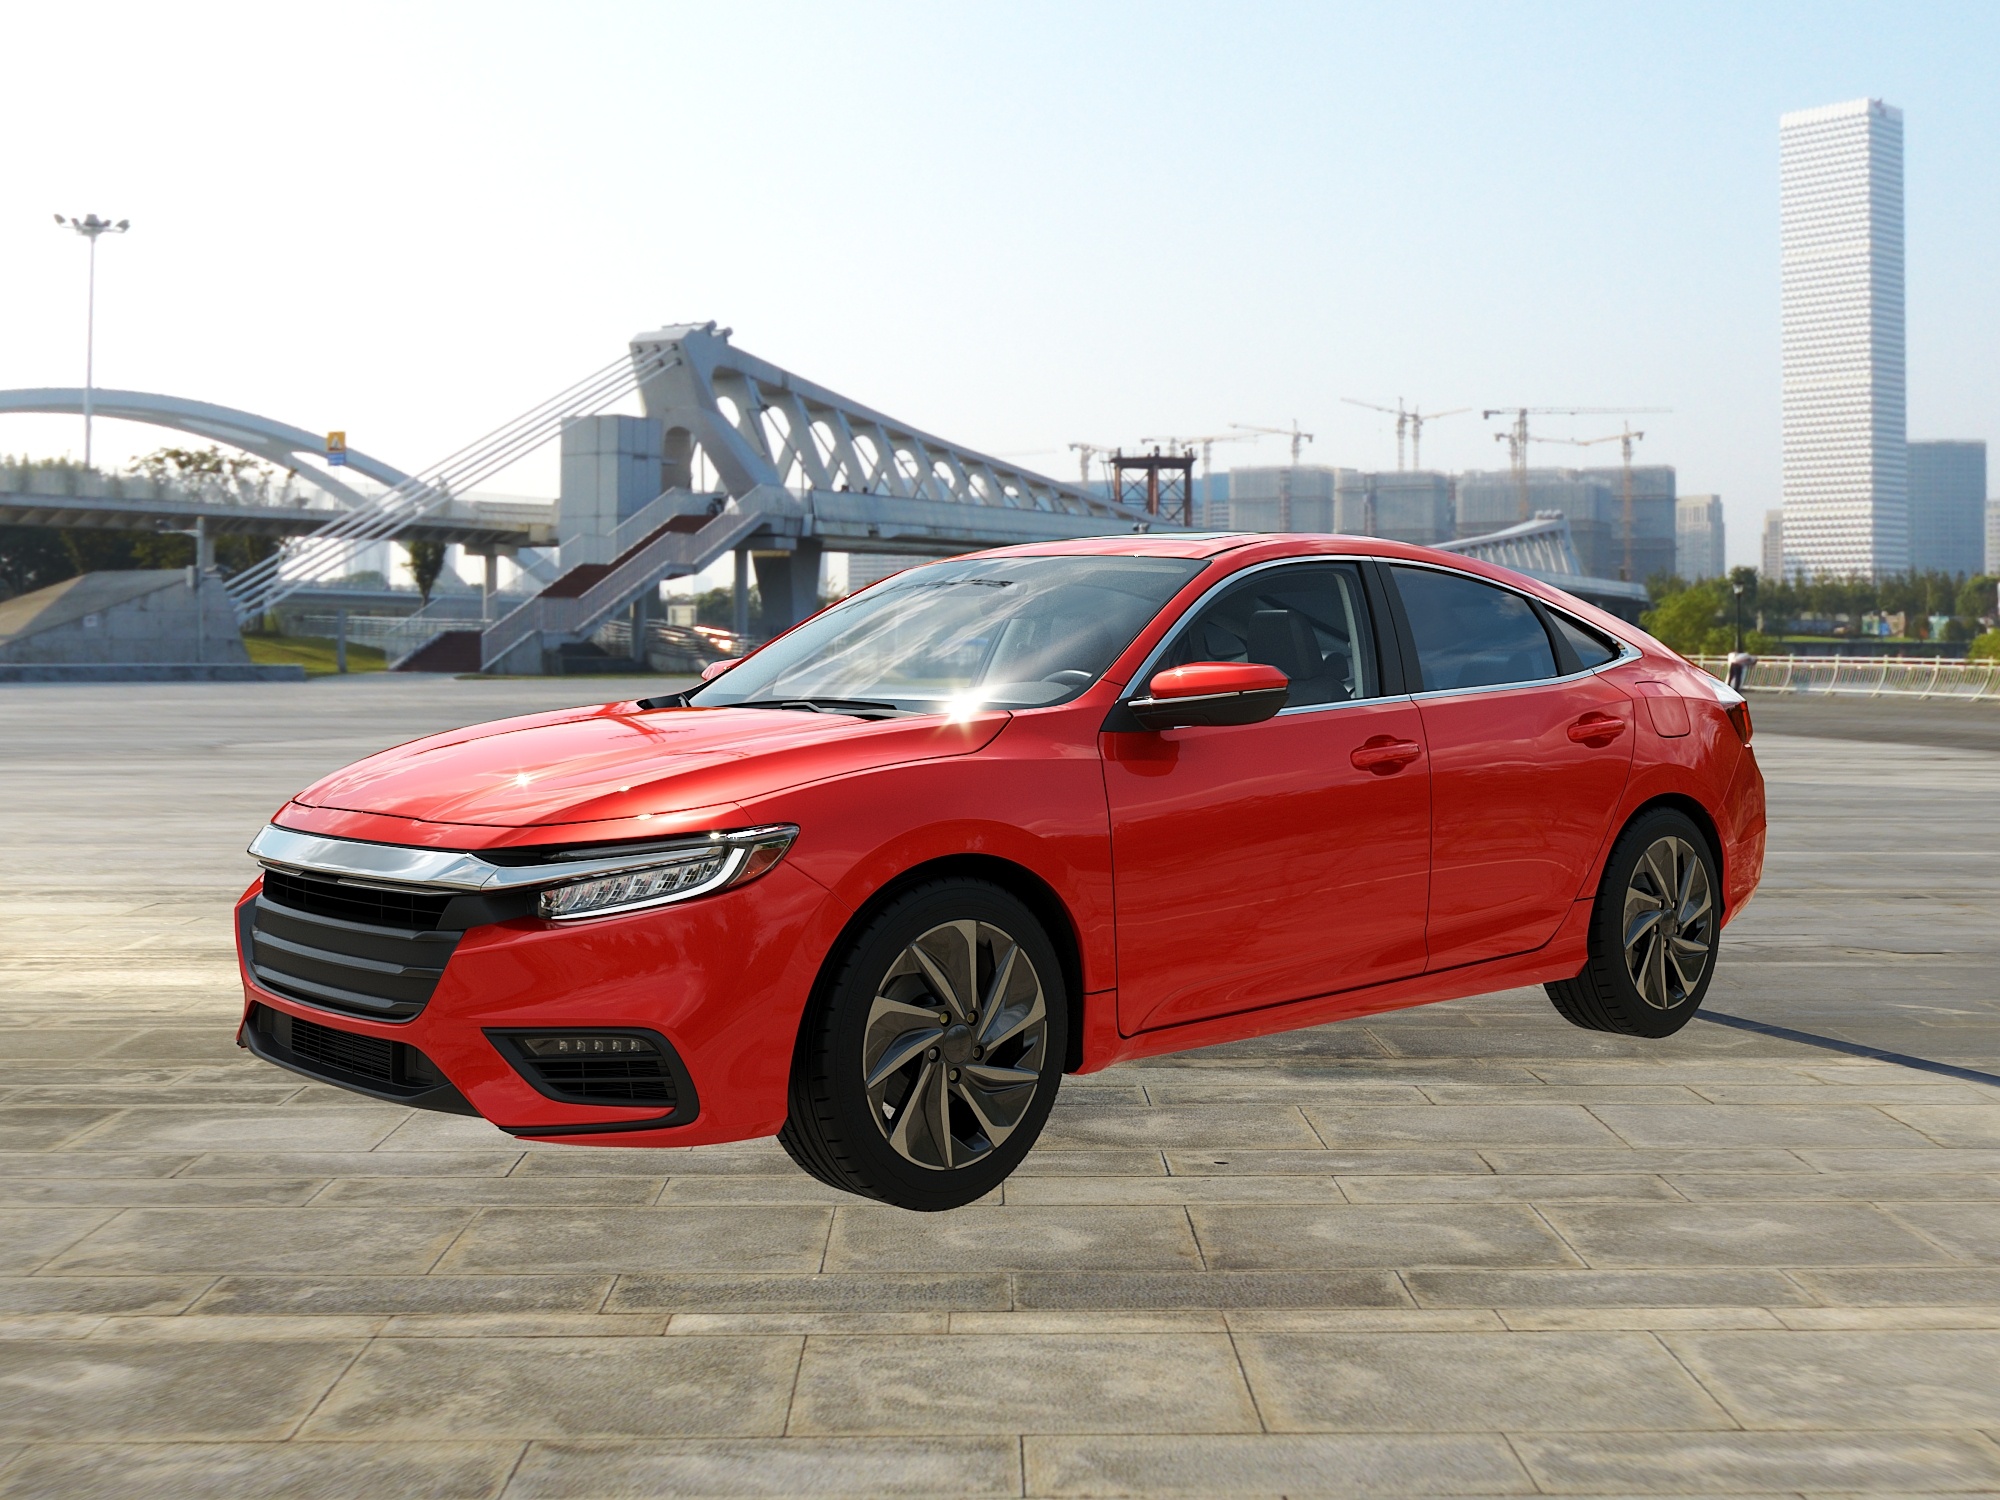
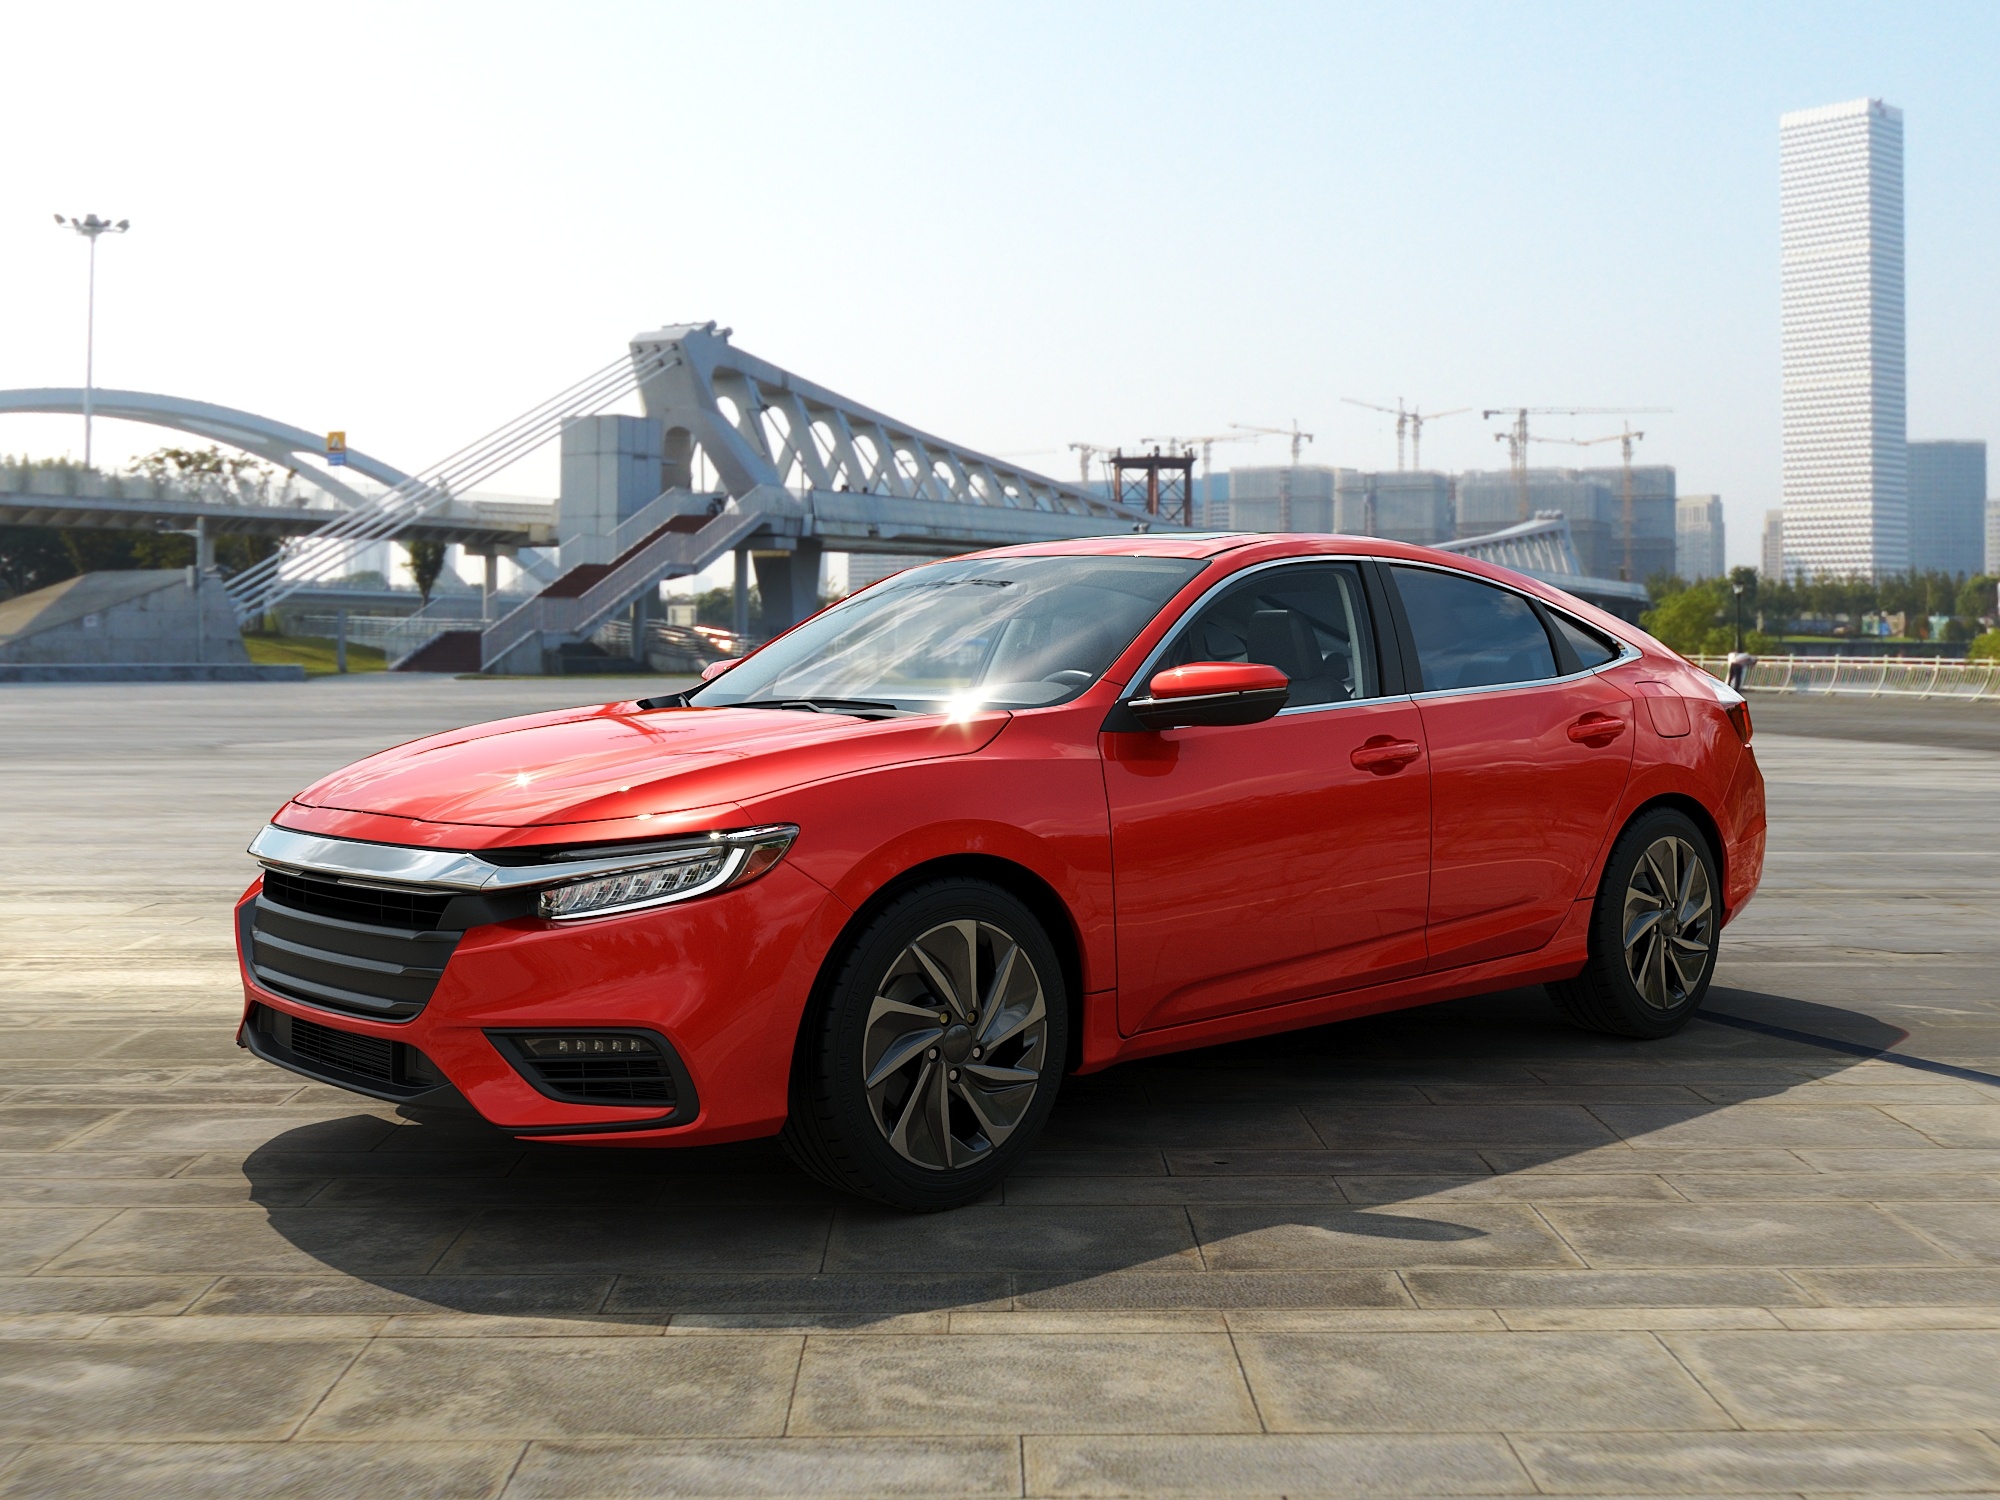
For the purpose of this tutorial, we use car geometry from our Chaos Cosmos 3D content library. The scene lighting is achieved with a V-Ray Dome light loaded with an HDRI, and another HDRI from Poly Haven used as an environment.
The renders on the right illustrate what a great difference a shadow catcher usage adds to the final image.
Workflow
In this tutorial, a plane becomes a shadow catcher/matte object. There are two ways to do that:
- by applying Matte/Shadow object properties to the plane
- by using the V-Ray Wrapper material
Open the scene you will use for this tutorial and let's delve into each method.
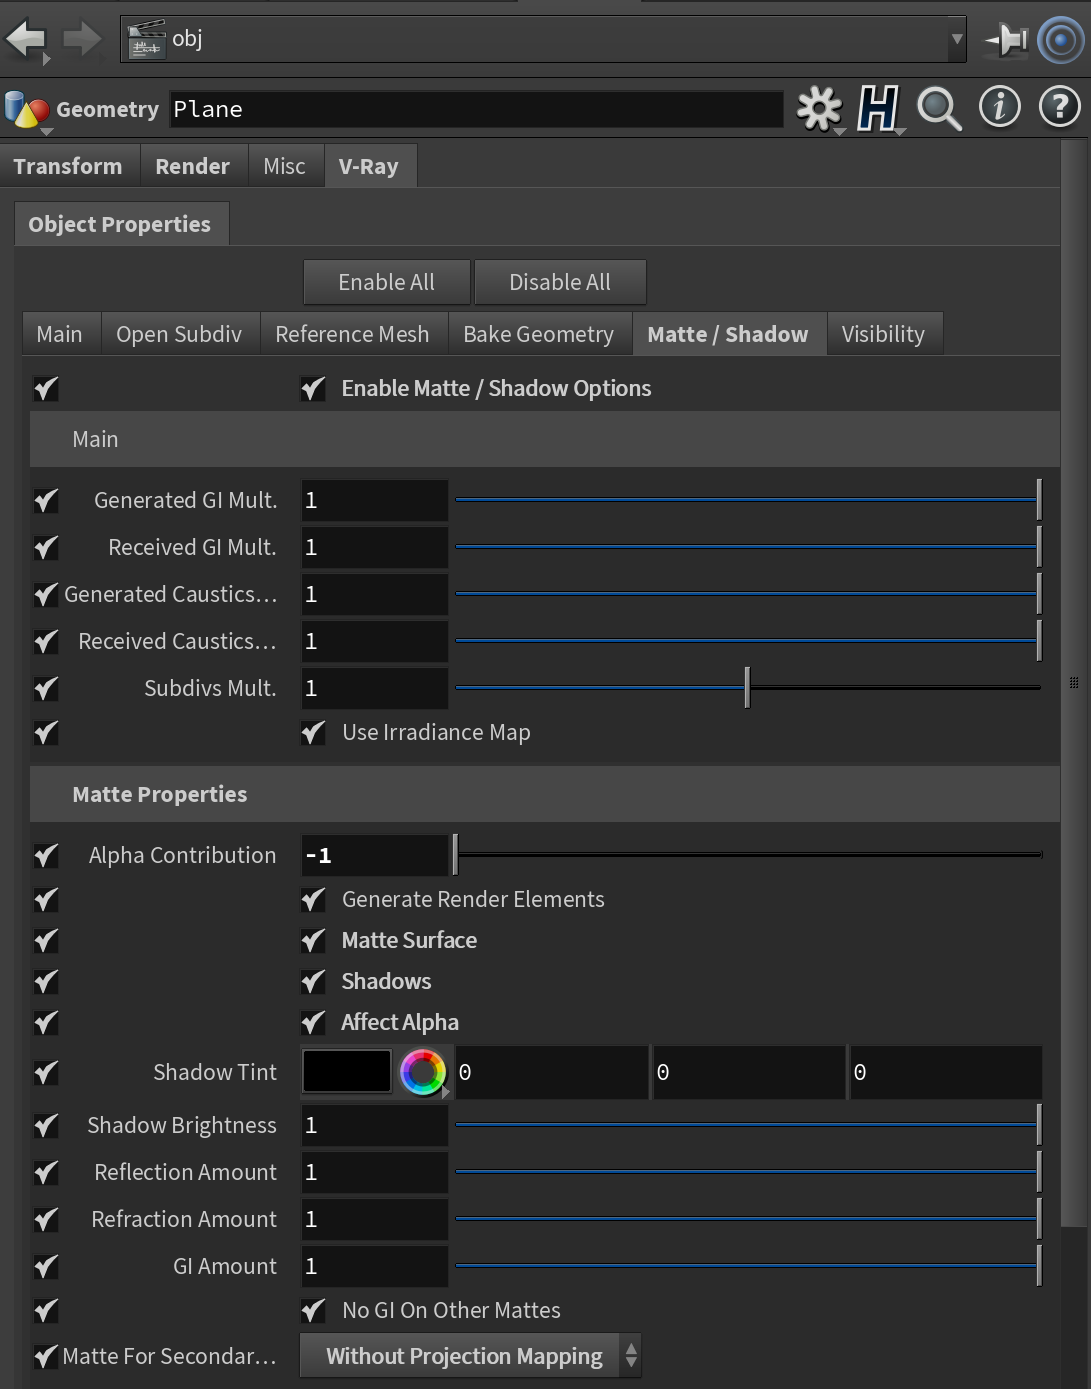
Using V-Ray Object Properties
Select the object, which will become a shadow catcher. In this particular case, select the plane.
Click the Object Props button from the V-Ray Shelf, or go to V-Ray top menu > Object Properties > Common to assign object properties to the selected plane.
Next, go to the plane parameters and under the V-Ray tab > Matte / Shadow tab set the following settings:
- Enable Matte /Shadow Options.
- Enable Matte Surface.
- Enable Shadows – this option allows the object to receive shadows.
- Enable Affect Alpha – this option determines whether the received shadows affect the alpha. The Alpha Contribution specifies whether to add to the alpha, when set to 1.0. When the option is set to -1.0, it takes away from the alpha. When set to 0.0, it leaves the alpha unchanged.
- Set the Alpha Contribution to -1.0. This allows the received shadows to take away from the alpha information for later compositing.
For increased realism, set the Matte For Secondary Rays option to With Projection Mapping. This enables the matte object to project the environment back onto other objects in the scene.
All these steps turn the plane into a Matte object. This means that it is not directly visible in the scene; instead the background color is shown in its place.
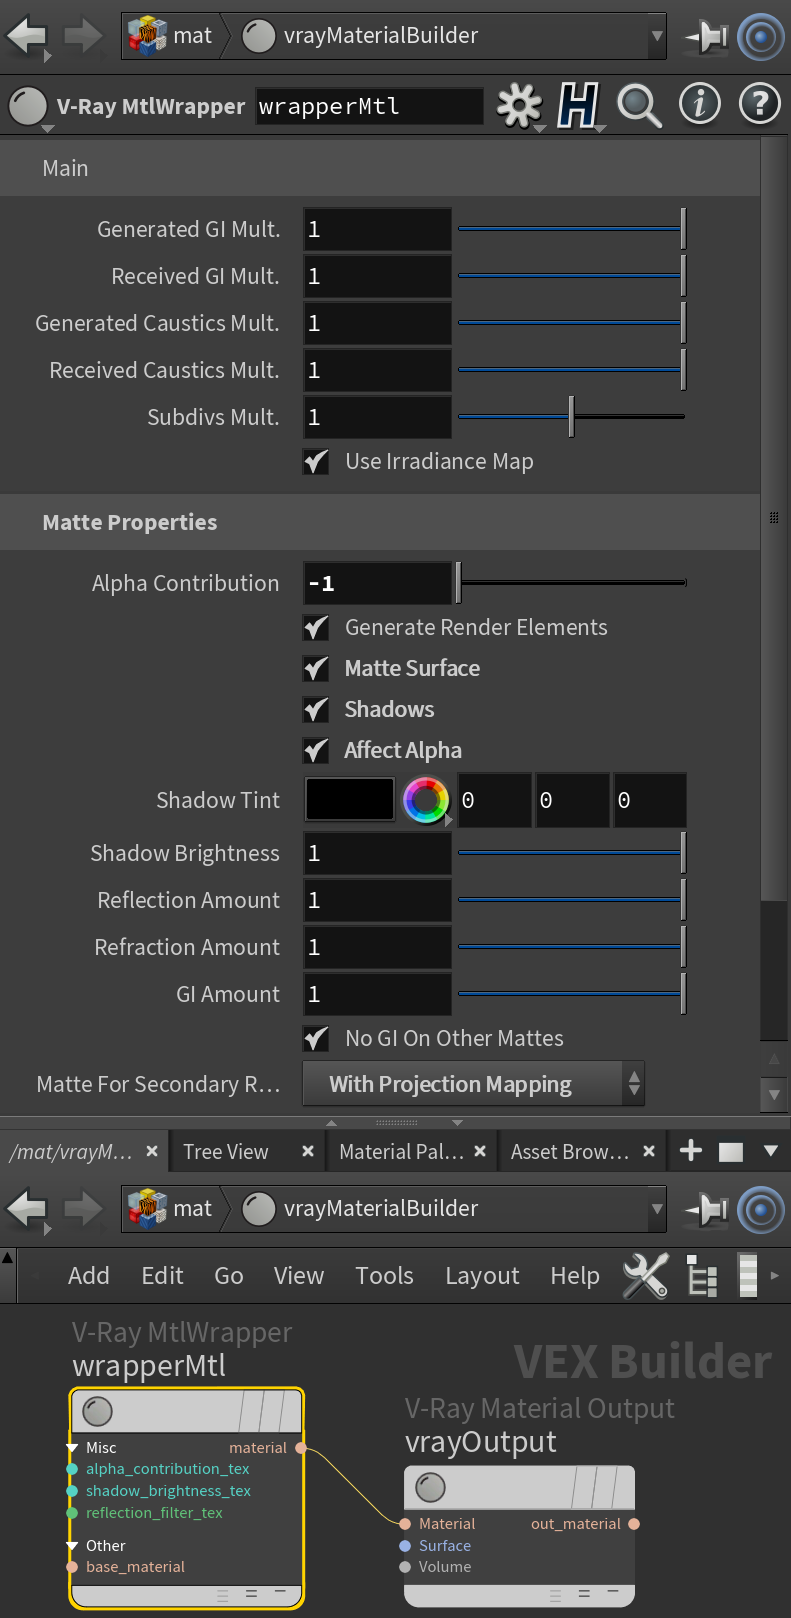
Using V-Ray Wrapper Material
Another way to achieve the shadow catcher effect is through the use of V-Ray Wrapper material.
In the mat Network, create a V-Ray Wrapper and assign it to the shadow catcher. In this case – to the plane.
Enable the same options for the V-Ray Wrapper material as the ones outlined in the previous approach:
- Matte surface
- Shadows
- Affect Alpha
Set the Alpha contribution to -1.0.
For increased realism, set the Matte For Secondary Rays option to With Projection Mapping. This enables the matte object to project the environment back onto other objects in the scene.
This turns the plane into a Matte object. This means that it is not directly visible in the scene; instead the background color is shown in its place.