![]()
Page History
This tutorial walks you through the steps of creating a shadow/matte catcher.
Overview
...
| Section | |||||||||||||||||||||||||||||||||||||||||||
|---|---|---|---|---|---|---|---|---|---|---|---|---|---|---|---|---|---|---|---|---|---|---|---|---|---|---|---|---|---|---|---|---|---|---|---|---|---|---|---|---|---|---|---|
|
Workflow
In this tutorial, a plane becomes a shadow catcher/matte object. There are two ways to do that:
| Fancy Bullets | ||
|---|---|---|
| ||
|
Open the scene you will use for this tutorial and let's delve into each method.
Note that the scene shows only the workflows in Houdini.
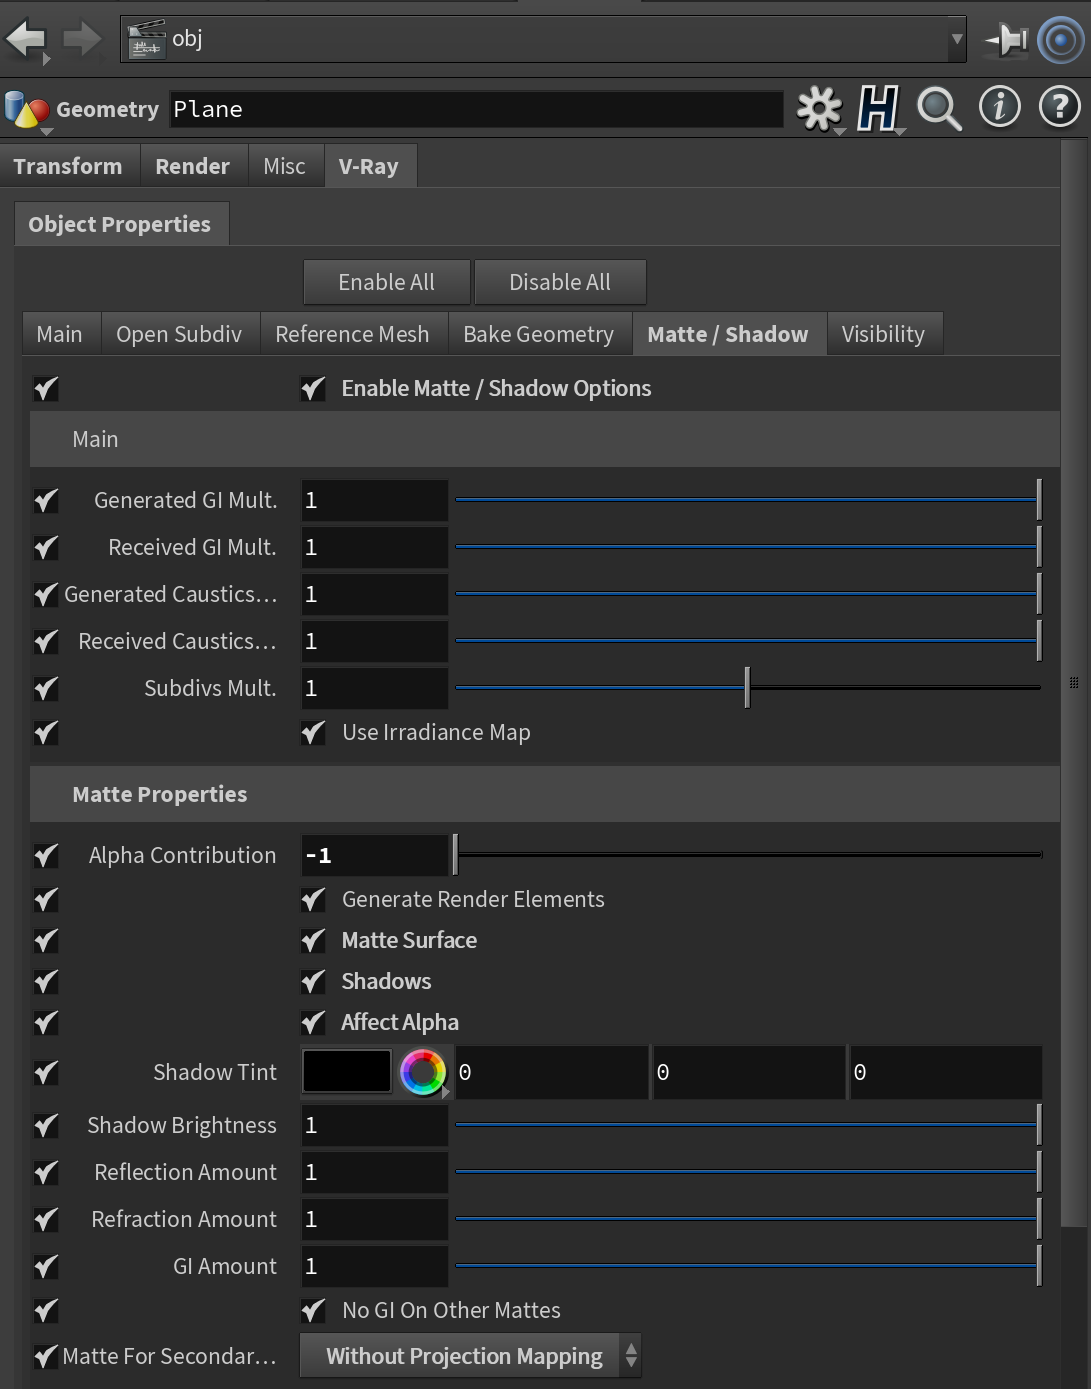
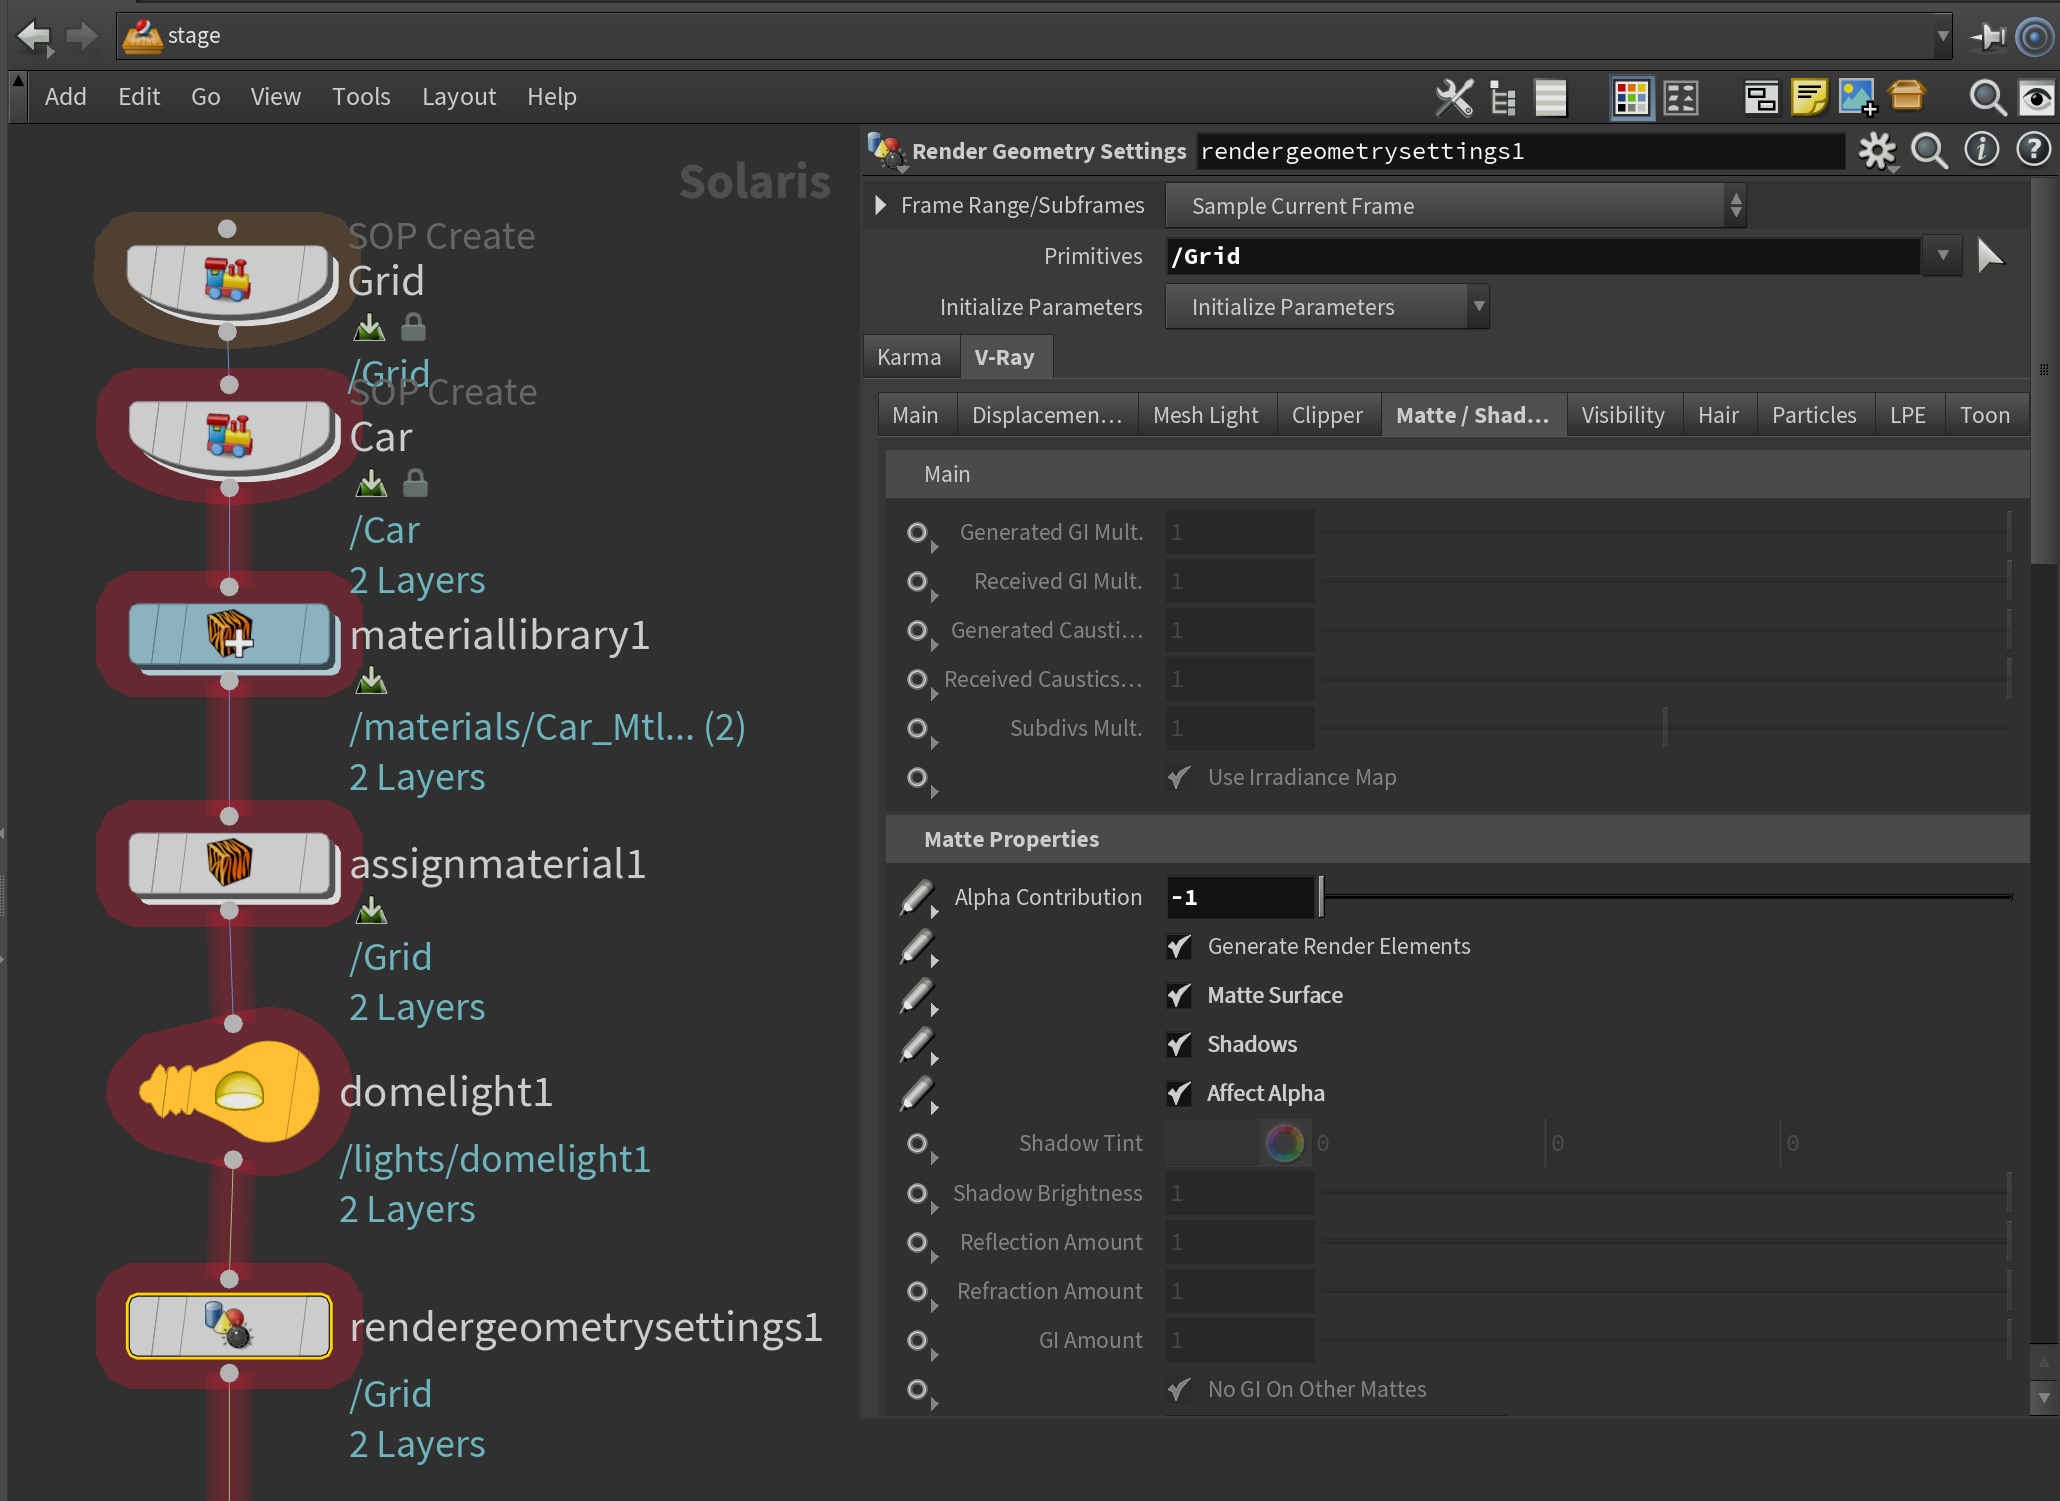
Using V-Ray Object Properties
| Section | |||||||||||||||||||||||||||
|---|---|---|---|---|---|---|---|---|---|---|---|---|---|---|---|---|---|---|---|---|---|---|---|---|---|---|---|
|
...
| Section | ||||||||||||||||||||||||
|---|---|---|---|---|---|---|---|---|---|---|---|---|---|---|---|---|---|---|---|---|---|---|---|---|
|
...
...
|
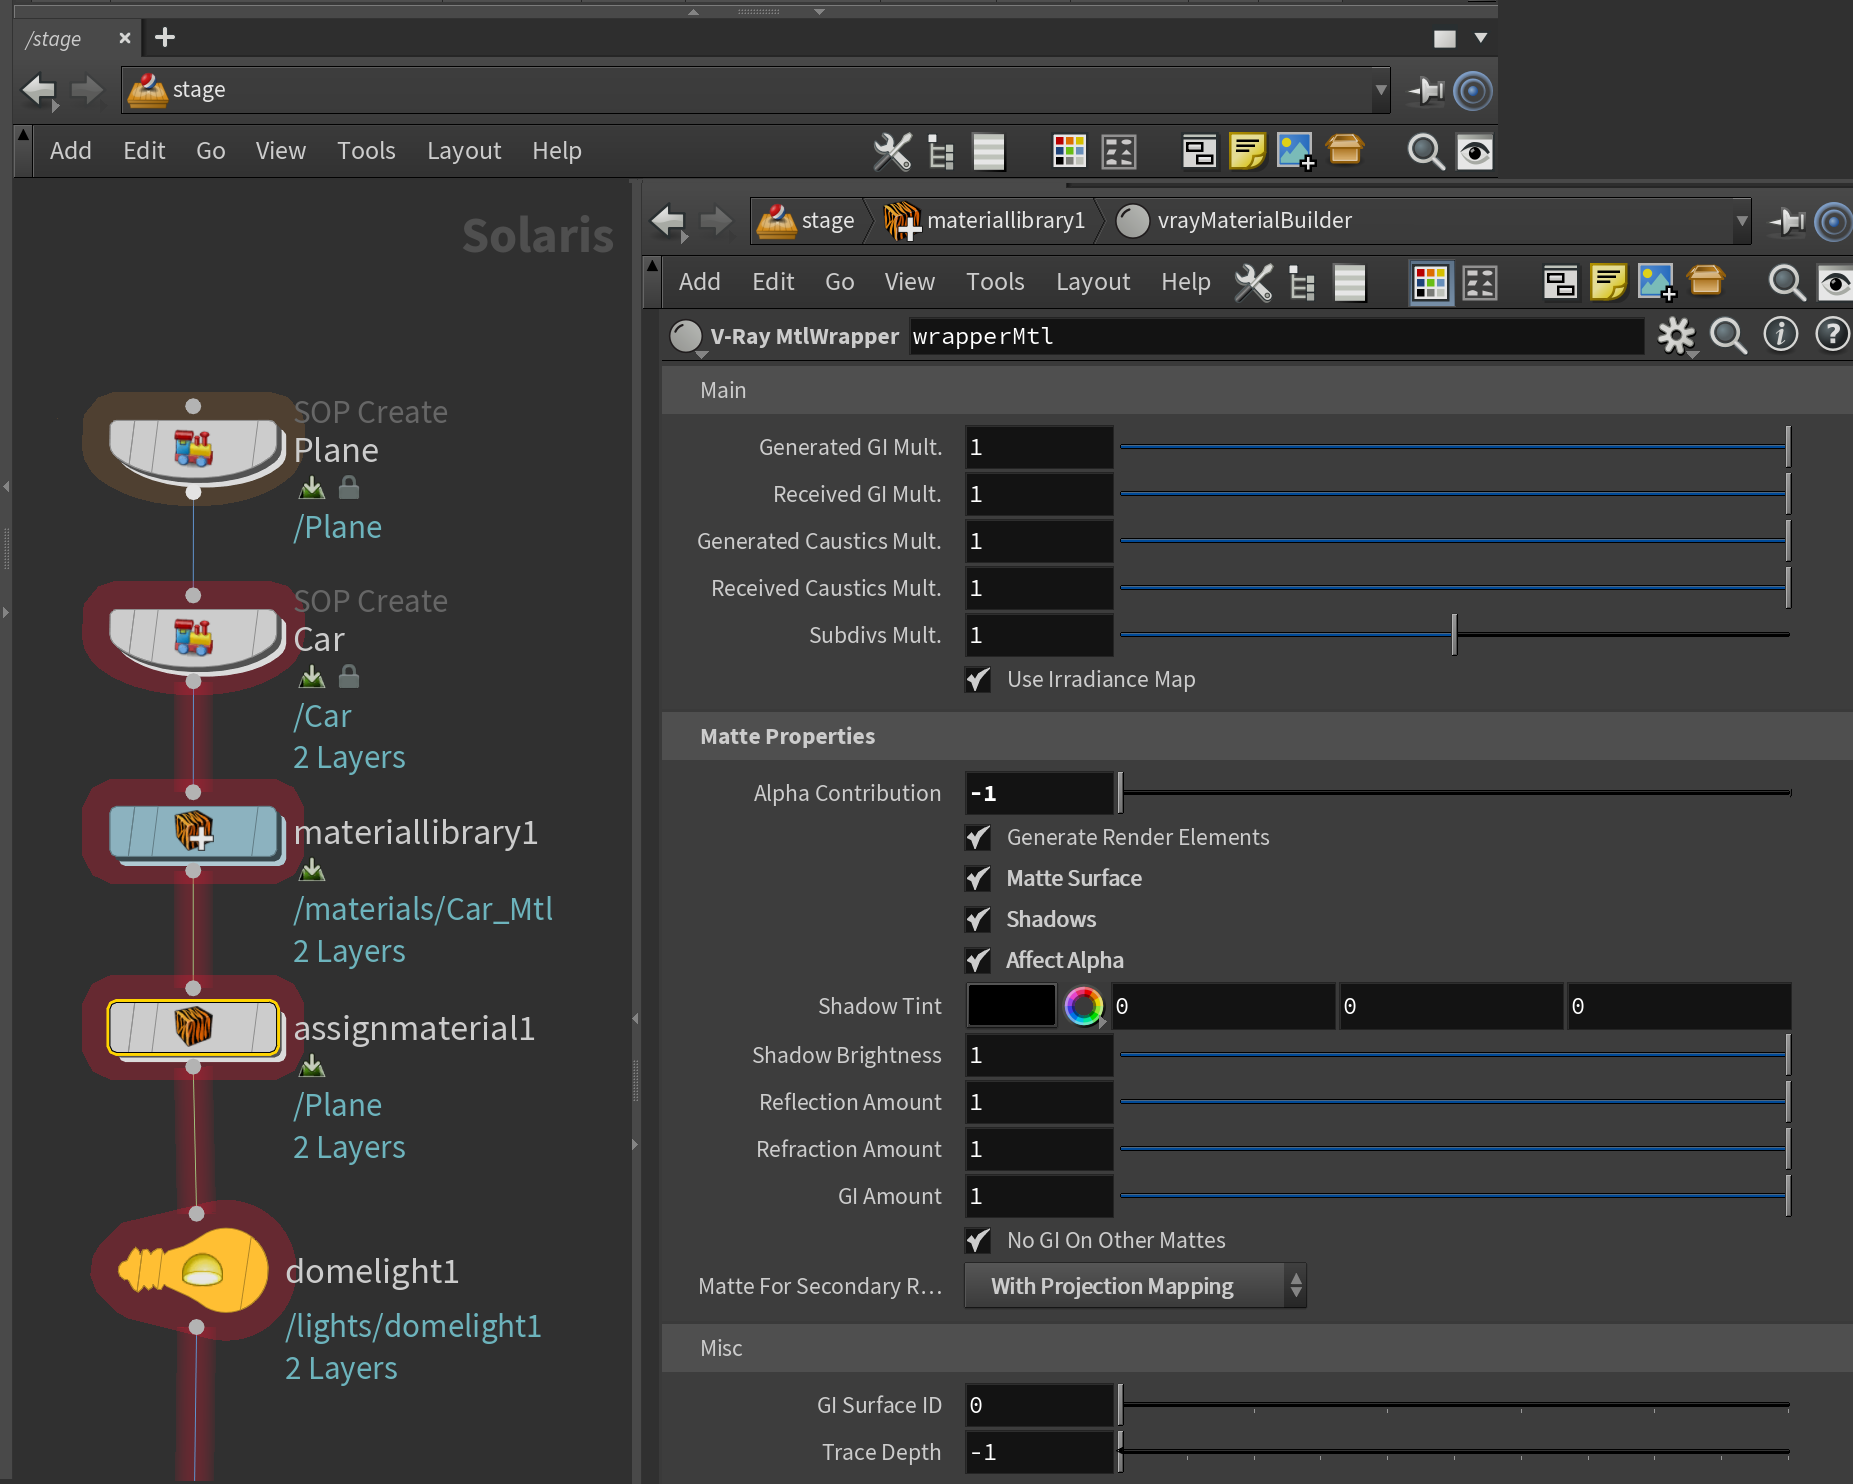
Using V-Ray Wrapper Material
| Section | |||||||||||||||||||||||||||
|---|---|---|---|---|---|---|---|---|---|---|---|---|---|---|---|---|---|---|---|---|---|---|---|---|---|---|---|
|
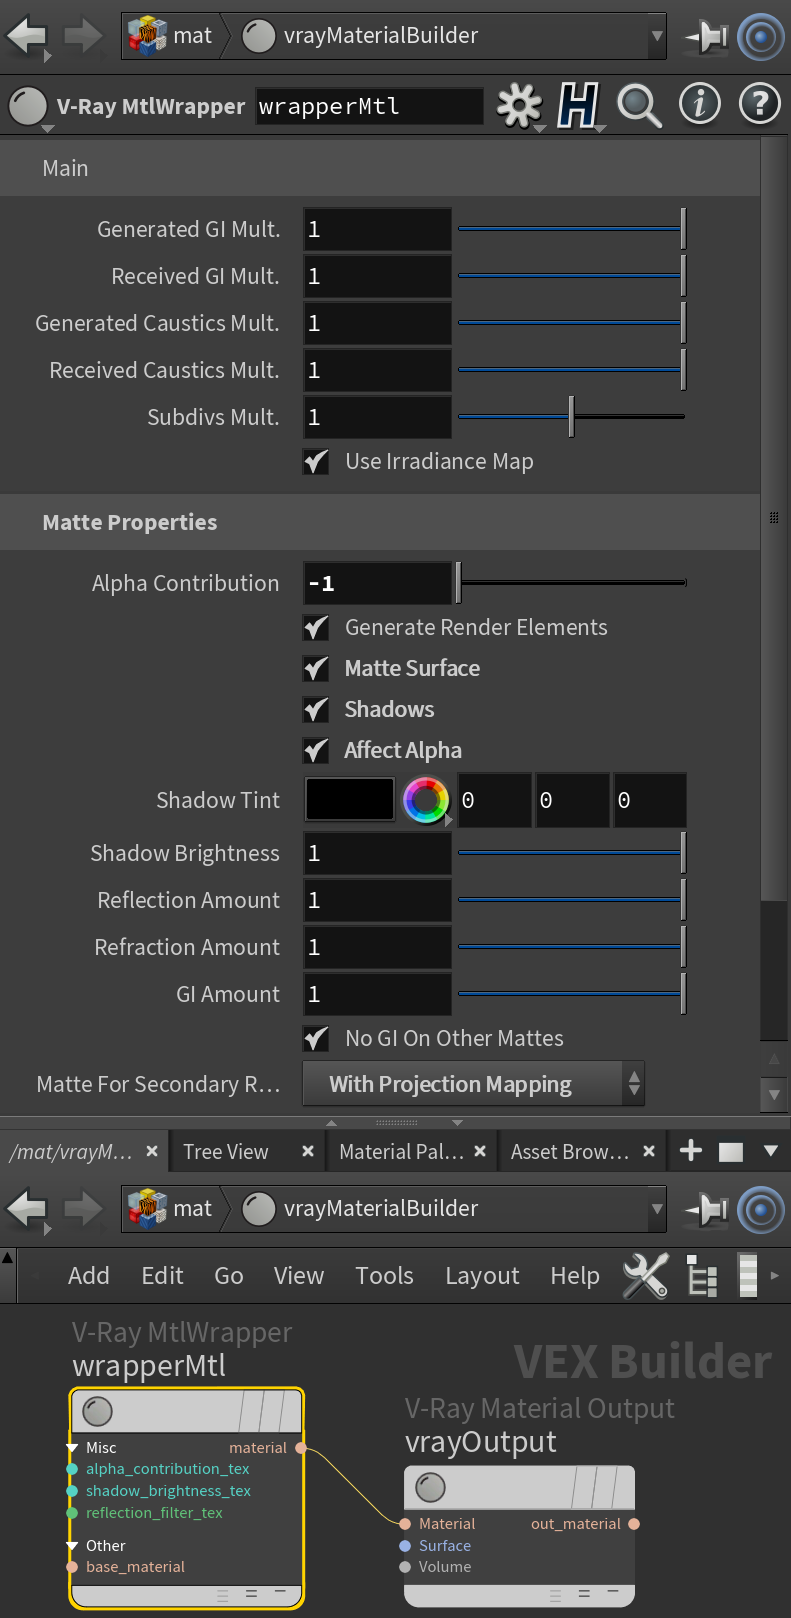
...
| Section | ||||||||||||||||||||||||
|---|---|---|---|---|---|---|---|---|---|---|---|---|---|---|---|---|---|---|---|---|---|---|---|---|
|
...
|