Requires Phoenix 3.11.01 Nightly Build ID 28305 and V-Ray 3.60.04 Official Release for 3ds Max 2015+or newer. You can download nightlies from https://nightlies.chaos.com or get the latest official Phoenix and V-Ray from https://download.chaos.com. If you notice a major difference between the results shown here and the behavior of your setup, please reach us using the Support Form.
In this tutorial, we guide you through the creation of a fusion effect resulting from the splash of two fluids - milk and chocolate. For this goal, we create two liquid emitters, one for each liquid type. By using a Blend Material, we set the appearance of the mixture.
The two liquids are simulated with different RGB each, and then the grid RGB channel is extracted via a Phoenix Grid Textureand used as a mask for the Blend Material. We use Surface Tension to keep the liquid particles packed together in a smooth mesh and only allow them to break up into larger droplets.
To make the liquid mesh look even smoother, as a real milky-looking liquid, we use the Phoenix smoothing tools found in the Input and Rendering rollouts of the Simulator.
The Download button below provides you with an archive containing the start and end scenes as a reference.
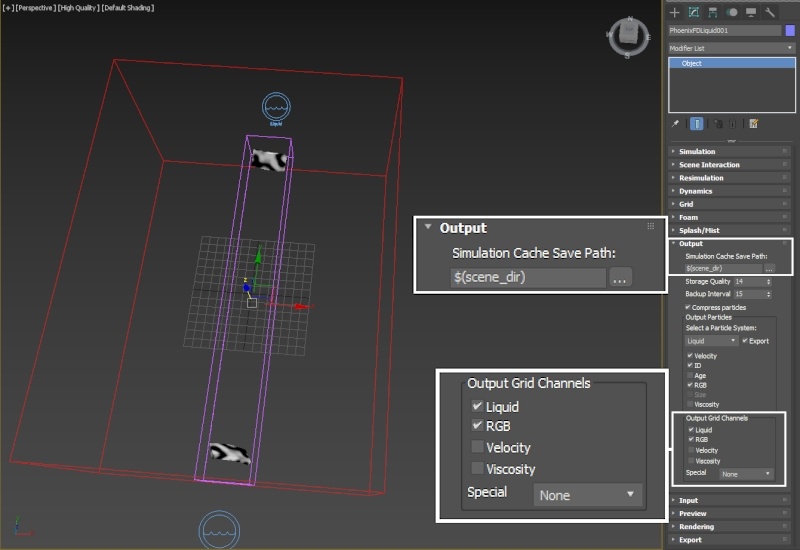
Enable RGBchannel export from the Outputrollout of the Phoenix Simulator.
If disabled, the RGB channel will not be cached to disk and cannot be queried by the Phoenix Grid Texturelater on.
Column
width
60%
...
...
Section
Column
width
40%
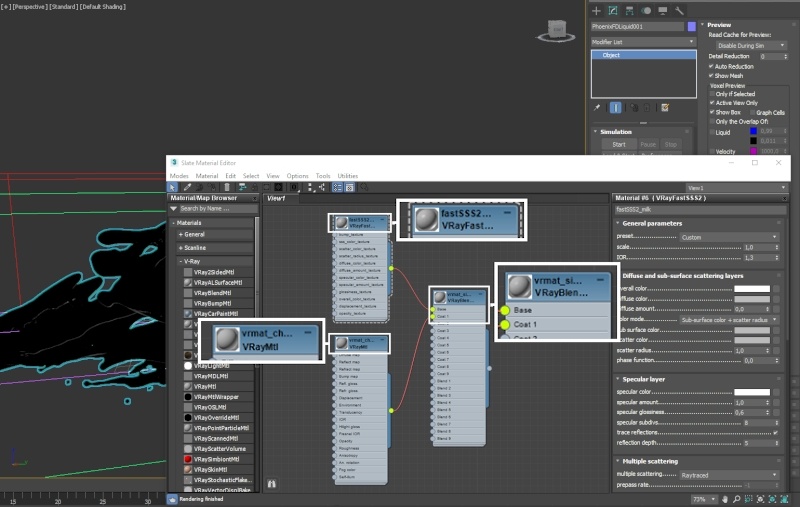
Create a VRayBlendMtl and assign it to the Phoenix Simulator.
Then, create two more materials - a VRayFastSSS2 material and a VrayMtl.
Plug the VRayFastSSS2 into the Base slot of the Blend material.
Plug the VRayMtl into the Coat1 slot of the Blend material.
Here's how this setup is going to work: we use a Phoenix Grid Textureto read the RGB channel of the Simulator and use that as the blending factor between the two materials. The VrayFastSSS2 material will be revealed where the RGB channel is black, the VRayMtl will show where the RGB is white, and the RGB values in-between will produce a mix between the two.
Column
width
60%
...
Section
Column
width
40%
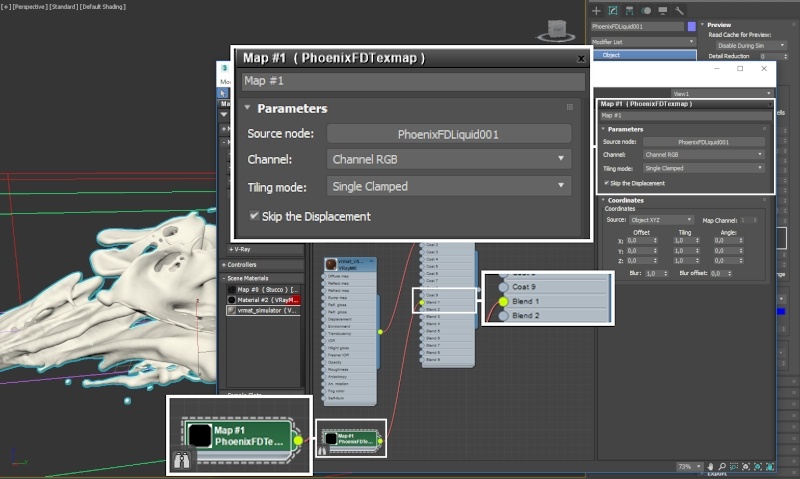
Lastly, create a Phoenix Grid Textureand plug it into the Blend 1 slot of the VRayBlendMtl.
Set the Channel parameter to Channel RGB so the grid texture knows to read the RGB channel of the simulated cache files.
As previously stated, the logic here is fairly simple - the Base (milk) material will appear where the RGB channel is white, and the Coat (chocolate) material will appear where the RGB is black.