This page provides information on the Hair Properties in V-Ray for Houdini.
Overview
The Hair Properties can be used to fine-tune the rendering of hair with V-Ray. They allow you to control the hair shader and the hair tessellation during render times.
To add the Hair Properties, select the Geometry node and click the Hair Properties button residing in the V-Ray shelf, or use the V-Ray menu in the top menu bar. This creates a spare parameters folder under a V-Ray tab on the Geometry node.
When rendering a heavy hair/fur setup, you may benefit from reduced RAM consumption when the 'Render as Smooth Curves' option is enabled. This will instruct V-Ray to perform an optimization step prior to rendering the groom. The optimization step will remove redundant vertices and keep only as many points as are needed to preserve the shape, similar to the way Houdini's Resample SOP can be used to optimize point count for polygon lines.
For more information on the hair properties under V-Ray Object Properties SOP, see the V-Ray Object Properties SOP page.
UI Paths:
||Select object(s)|| > V-Ray Shelf > Hair Props (with the curve/points selected) > V-Ray tab > Hair tab
||Select object(s)|| > V-Ray menu > Object Properties > Hair
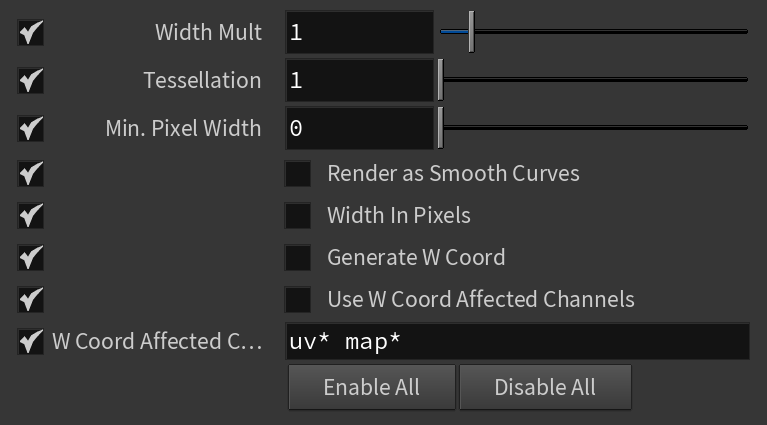
Hair
Width Mult – A hair width multiplier. It is used as base width if a "width" attribute is not found.
Tessellation – Allows manual control over the number of subdivisions when intersecting the spline based hairs.
Min. Pixel Width – Sets the minimum pixel width of each hair strand to help ensure samples are taken consistently between pixels. A value of 0 means no minimum width is applied, but increasing it helps make sure each strand is consistently rendered. This additional calculation increases render times, but smooths the hair width.
Render as Smooth Curves – When enabled, hair strands are represented as splines instead of line segments.
Width In Pixels – When enabled, the Width Mult parameter is calculated in pixels.
Generate W Coord – When enabled, V-Ray generates a W mapping coordinate that represents the position of the shaded point along the hair strand. This is useful for mapping a ramp texture, for example.
Use W Coord Affected Channels – When enabled, V-Ray generates a W mapping coordinate only for channels in the W Cord Affected Channels list.
W Coord Affected Channels – А list of space-separated channels that are affected when generating a W mapping coordinate.
Enables All – Enables all parameters at once.
Disables All – Disables all parameters at once.