This page gives information on the Bercon Distortion texture in V-Ray for Blender.
Overview
The Bercon maps were originally developed by Jerry Ylilammi ( http://www.ylilammi.com/2013/09/berconmaps/ ) as open-source plug-ins for 3ds Max. Source code ported to V-Ray Standalone by Chaos Software Ltd.
UI Path
||Node Editor|| > Add > Textures > Bercon Distortion
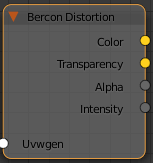
Node
Uvwgen – The uvw generator for the texture.
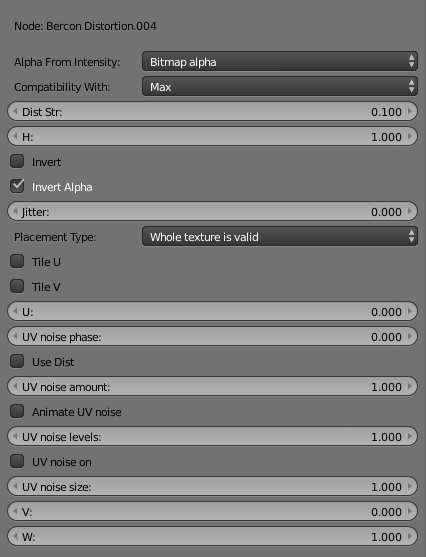
Parameters
Alpha From Intensity – Specifies where to take the alpha from.
Bitmap alpha – This is the default setting. With this option selected, V-Ray renders the material the same on both sides.
Color intensity/luminance – Renders the back side of polygons as invisible for the camera.
Force opaque – Renders the back side of polygons as invisible to all rays, except shadow rays.
Compatibility with – Select the compatibility type of the exported map from Max or Maya.
Dist Str – The distortion strength.
H – Specifies the height of the texture sector.
Invert – Enable to invert the color of the texture.
Invert Alpha – Enable to invert the texture alpha. Please note, that the Invert option has to be enabled, otherwise only the color is inverted.
Jitter – The amount of random placement variation.
Placement Type – Select how to place the texture.
Whole texture is valid
Crop
Place
Tile U/V – Enable to choose between a horizontal or vertical tiling.
U – U coordinate of the texture sector.
UV noise phase – Specifies the UV noise phase.
Use Dist – Enable to use distortion.
UV noise amount – Specifies the UV noise amount.
Animate UV noise – If enabled, the noise is animated. Use the UV noise phase to animate the noise.
UV noise levels – Specifies the UV noise iterations.
UV noise on – Enables the noise.
UV noise size – Specifies the UV noise size.
U/W – Specifies the U/W coordinates of the texture.