This page provides information on the V-Ray Bitmap Texture.
Overview
The V-Ray Bitmap can be used to load high dynamic range images (HDRI) and map them onto the environment. V-Ray supports most of the standard HDRI-environment mapping methods. This texture can also be used to load other file formats.
UI Path: Texture > V-Ray > VRayBitmap

Tiled OpenEXR and TIFF Files
This texture can also be used to efficiently load tiled OpenEXR and tiled TIFF files (tiled TIFF files usually have a .tx or .tex extension). Tiled OpenEXR and TIFF files allow only portions of the textures to be loaded at various resolutions. This allows V-Ray to load only the parts of the textures that are needed for the rendering.
You can convert many common image file formats to tiled OpenEXR files using the img2tiledexr tool. You can also convert all files in a scene using the V-Ray Bitmap to VRayBitmap converter script. Conversion to tiled TIFF can be done using the maketx tool from the OpenImageIO library.
Tiled TIFF files have the advantage that they can store 8-bit color components, whereas OpenEXR stores at least 16 bits. This means that tiled 8-bit TIFF textures are smaller on the disk and take up less RAM while rendering.
Tags and Environment Variables in Bitmap Names
VRayBitmap allows the use of named tags, enclosed with the characters < and >, which are replaced at render time with other strings.
Tags for Multi-Tiles
Some modeling applications allow specifying a different bitmap file for different portions of a model, based on the UV coordinates of that model. For example, one file may be used for UVs in the range [0,0] x (1,1), another file may be used for UVs in [1,0] x (2,1) and so on. There are several ways to specify the correct file for each tile, and in each case, a different format for the file name is used in the File node. This is done by using special tags in the file name, which are replaced at render time with a particular string, based on the UVs of the current shading point.
In the following section, we assume that each UV tile has unique integer coordinates (u,v) based on the integer part of the UVs inside it. For example, the UV tile [0,0] x (1,1) has coordinates (0,0), the UV tile [1,0] x (2,1) has coordinates (1,0) and so on.
Upper-case tags usually assume the tile coordinates start from 1, whereas lower-case tags assume the tiles start from 0.
The $U and $V Tags
You can also specify the u and v coordinates of the tiles separately by using the $U and $V tags. Each of them is expanded to the respective 1-based coordinate of the tile. For example, if the file name is specified as my_texture_$U_$V.exr, this becomes my_texture_1_1.exr and so on. You can use lower-case tags to make the tile coordinates start from zero, instead of 1, for example my_texture_$u_$v.exr becomes my_texture_0_0.exr and so on.
You can put a number right after the $ sign to specify how many digits you want in the resulting tile coordinates, for example my_texture_$2U_$2V.exr is expanded to my_texture_01_01.exr and so on.
The <frameNum> tag
The frameNum tag can be used to specify an image sequence. V-Ray loads a sequence from the same path. To use the frameNum tag, just add <frameNum> to your texture filename.
For example, if the first image in the sequence is located at C:\textures\myImage.0001.png, change the string to C:\textures\myImage.<frameNum>.png and V-Ray looks for an image that corresponds to each frame within the animation range.
Environment Variables
You can include environment variables in the form ${VAR_NAME}, which are replaced with the value of the respective environment variable during rendering. For example, if the file name is specified as ${TEX_PATH}\${PROJ_FOLDER}\mytexture.exr, then V-Ray looks up the environment variables TEX_PATH and PROJ_FOLDER and replaces the tags with their values. Suppose that TEX_PATH is set to c:\textures and PROJ_FOLDER is set to proj1, then the final bitmap file name is be expanded as c:\textures\proj1\mytexture.exr
Bitmap Properties
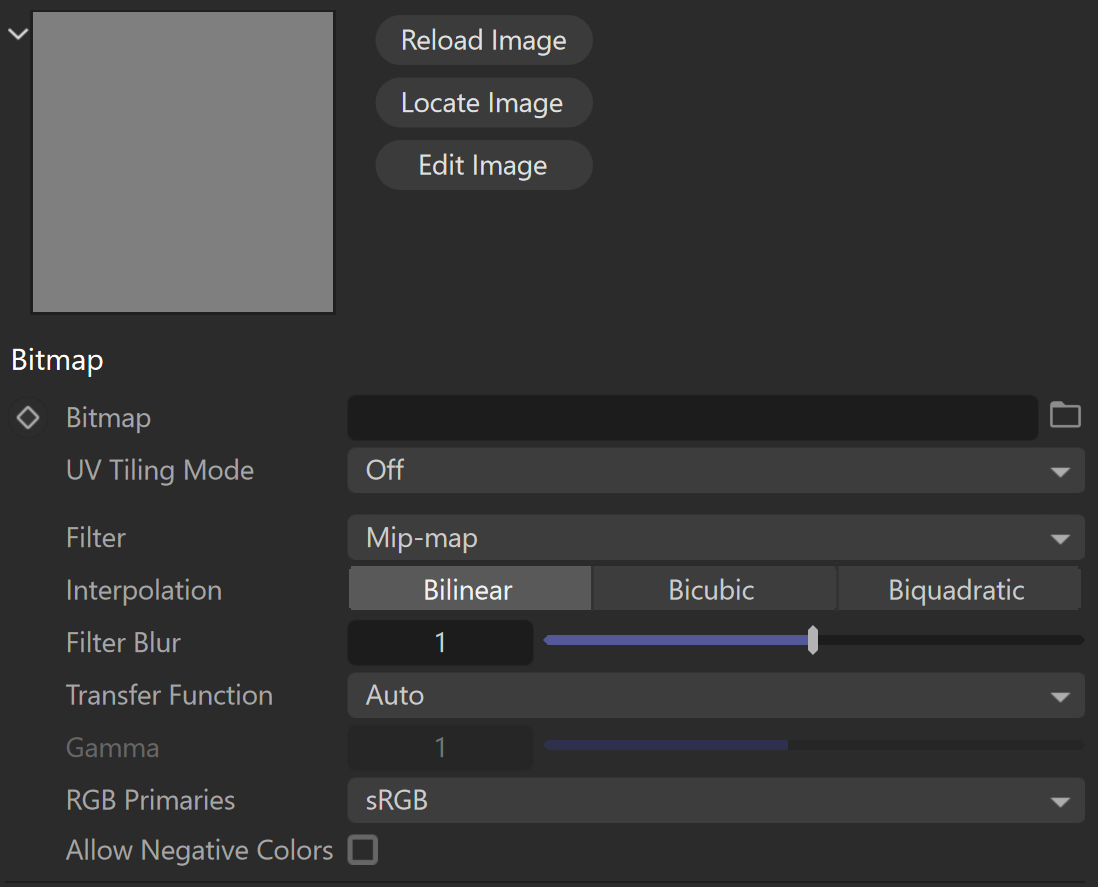
Reload Image – Reloads the attached image file.
Locate Image – Opens the location of the attached image file.
Edit Image – Opens the attached image file in the system's default image editor.
Bitmap – Specifies the name of the file, from which the bitmap is loaded. Currently supported formats are HDR, EXR, PNG, BMP, TGA, SGI, JPG, PIC, TIF, PSD, VRIMG. Image file lists in the form of IFL files are also supported.
UV Tiling Mode – Specifies the type of UV tiling used by the texture. You can also do this manually, see the Tags for Multi-Tiles section. In brackets are examples of texturing tools that support the mode.
Off – Disables UV tiling.
0-based (ZBrush) – The UV coordinates start at 0.
1-based (Mudbox) – The UV coordinates start at 1.
UDIM (Mari) – Uses UDIM tiling for the texture.
Filter – Specifies the V-Ray internal texture filtering method. Possible values are:
Nearest – The nearest texel from the map is taken without any interpolation.
No Filter – Does not apply any filtering.
Mip-map – Pyramidal MIP map filtering is used to compute the texture color. Can be blurry for textures seen at grazing angles.
Area – Applies an anti-aliasing area filter.
Elliptical – High-quality anisotropic MIP map texture filtering that reduces blurring and aliasing artifacts. Can be slower compared to the Isotropic filtering.
Sharp Mip-map – Sharper and more accurate version of the Mip-map filtering. Produces results that are closer to the results with disabled filtering but with less AA samples are required.
Interpolation – Determines how the image is interpolated from the pixel values. Possible values are:
Bilinear – Image values are interpolated from four pixels in the bitmap. This is the fastest interpolation method, but the result is not continuous (non-smooth) and may produce artifacts when the map is used for displacement or bump mapping.
Bicubic – Image values are interpolated from sixteen pixels in the bitmap. This is the slowest method, but the results are smooth without too much blur.
Biquadratic – Image values are interpolated from nine pixels in the bitmap. This method is faster than the Bicubic interpolation, but may smooth the image too much.
Filter Blur – Additional multiplier, which controls filter blurring, especially useful with the mapping source feature. The higher the value, the more blurred the texture renders and the less render time it takes, and vice versa. A value of 0.01 means no filtering, but leads to increased render times. If a Bitmap is connected to the VRayBitmap as a mapping source, the Filter option serves as a multiplier for the Blur parameter of the Bitmap. For example, if the Bitmap Blur parameter is set to 10, and the VRayBitmap Filter multiplier is set to 0.1, the texture's blur amount is effectively, 1.
Transfer Function – Specifies the transfer function for the loaded image file.
Linear – No correction is applied.
Gamma corrected – The transfer function is controlled through the Gamma parameter.
sRGB – The loaded image is considered in sRGB transfer function;
Auto – Automatically determines the color transfer function. If a bitmap file name contains the string "_srgb", the transfer function is sRGB. If a bitmap file name contains the strings "_lin_srgb" or "raw", no correction is applied. For bitmap files with 8 bits per color component and 3 or 4 color components (like png, jpg and other), the transfer function is sRGB. In all other cases, no correction is applied.
Gamma – A gamma–correction value for the image. For example, if the bitmap was saved to disk with a 2.2 gamma correction, you need to enter 0.4545 to remove that correction for the rendering.
RGB Primaries – Allows you to manually override the RGB primaries of the VRayBitmap. The RGB Primaries are, by default, inherited from the current global active color space in V-Ray. To change the global RGB Primaries, go to the Color Management sub-tab in the V-Ray Render Settings. The automatic RGB Primaries inheritance can also be disabled from the Preferences V-Ray Menu.
Raw – No transformation is applied to R|G|B colors. This option is suitable for normal maps, linear textures, and floating value parameters.
sRGB – The loaded image is considered in sRGB color space.
ACEScg – The loaded image is considered in ACEScg color space.
Allow Negative Colors – If disabled, negative colors are clamped. Enable to allow negative colors.
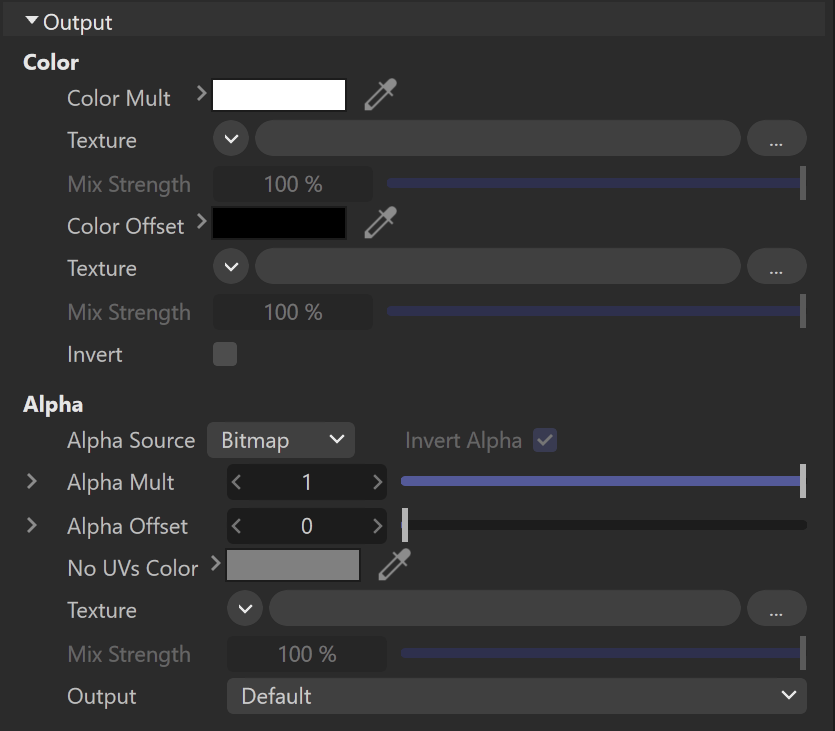
Output
Color Mult – Corrects the color of the texture by multiplying the RGB color values in the texture with the RGB color values specified here. A texture map can be assigned here.
Color Offset – Corrects the color of the texture by adding the RGB color values specified here to the RGB color values of the texture. A texture map can be assigned here.
Invert – Inverts the output map's hues.
Alpha Source – Determines how the texture alpha is computed:
Bitmap – From the alpha channel of the bitmap image, if present (and returns 1.0, if the image has no alpha channel);
Intensity – The alpha is taken from the intensity of the bitmap image colors (red+green+blue)/3;
Opaque – The alpha channel of the bitmap image is ignored and the VRayBitmap texture always returns 1.0 for alpha.
Alpha Mult –
Alpha Offset –
No UVs Color – Specifies a default color used for polygons with no valid UVs. In case the map is not tiled, specifies a default color that is used outside the texture square. When a texture is selected, it overrides the color.
Mapping
Tile – Specifies how the texture is repeated:
No tiling – No repetition is done;
Tile in UV – Repeats the texture in both U and V axis;
Tile in U – Repeats the texture only on the U axis;
Tile in V – Repeats the texture only on the V axis;
Tile in UV - No Filter
Placement Type – Specifies how the mapping controls below work:
Full – Uses the whole bitmap.
Crop – Uses a section of the bitmap.
Place – Adjusts, according to the position of the image.
Tile U/V – Adjust the tiling along the U and V axis.
U/V – Adjusts the texture location - specifies the location of the top left corner of the image.
Width/Height – Adjusts the width and height of the texture or crop area.
Jitter – Introduces random offset.

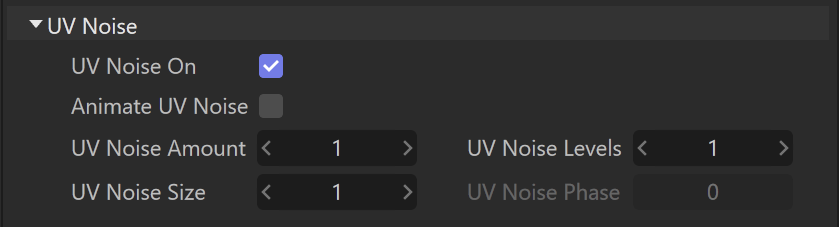
UV Noise
UV Noise On – Enables noise in the pattern of the texture.
Animate UV Noise – Enables animation of the noise effect.
UV Noise Amount – Specifies the strength of the noise. A value of 0 means no noise, while higher values introduce increasing noise.
UV Noise Levels – Specifies how many times the noise is applied to the texture.
UV Noise Size – Allows you to scale the noise, according to the object with the selected texture.
UV Noise Phase – Allows you to control the animation speed of the noise effect, if the noise is animated.
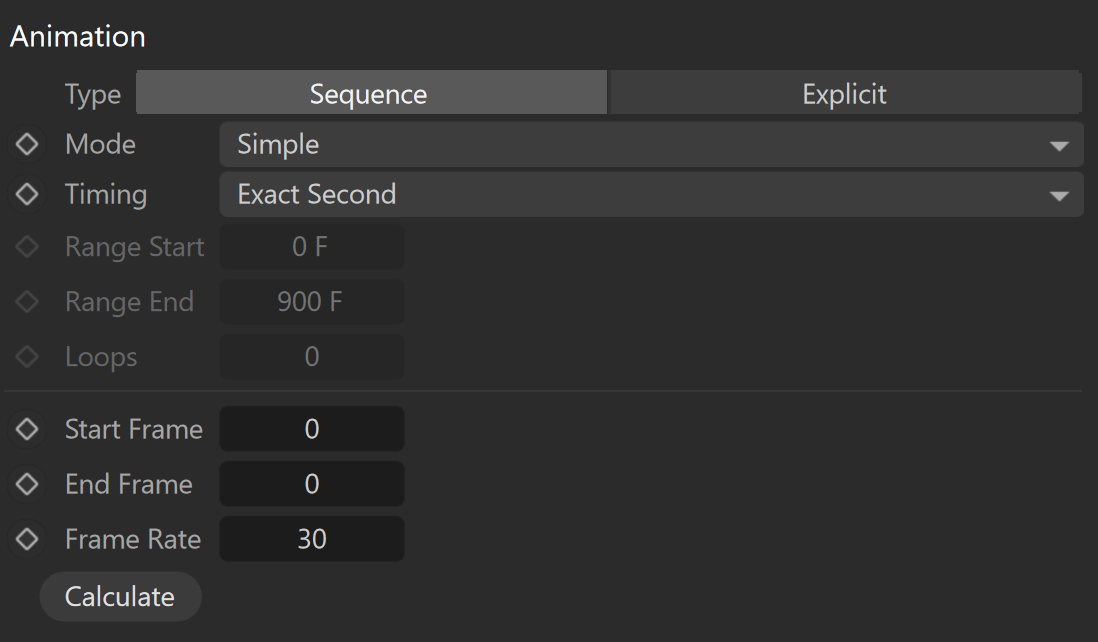
Animation
Type – Determines whether the files are treated as an image Sequence or an Explicit animation. The Sequence Type reads the files as a whole animation, while the Explicit type allows you to select a single frame from the texture animation and use it as a static shader. Parameters are different for each type.
Sequence
Mode – Determines how the animation is played.
Simple – Plays the animation once from start to finish.
Loop – Plays the animation from start to finish infinitely.
Ping-Pong – Plays the animation from start to finish, then from finish to start, and continues like this infinitely.
Timing – Determines the playback speed of the animation.
Exact Frame – Plays one frame of the animation per frame of the render. With this mode, no frames are dropped. If the project and the texture animation have a different Frames Per Second (FPS) setup, the project speed overrides the animation speed.
Exact Second – Matches each second of the animation to each second of the project. This mode ensures that the animation's original speed is kept.
Range – Determines a custom frame range for the animation to play. Use this mode when you don't want the texture animation to play from the first frame.
Range Start and Range End determine the first and last frame of the animation when the Timing is set to Range.
Loops – Determines the number of times the texture animation repeats from the start.
Start Frame – Allows you to manually determine the first frame of the texture animation.
End Frame – Allows you to manually determine the last frame of the texture animation.
Frame Rate – Allows you to manually determine the rate of frames per second of the texture animation.
Calculate – Automatically determines the texture animation's Start Frame, End Frame, and Frame Rate. When rendering sequential images, this information is determined from the images with the lowest and highest number. A frame rate of 25fps is assumed. Other rates have to be entered manually.
Explicit
Frame Sequence – Enables reading the image sequence.
Use Current Animation Frame – Syncs the timeline frames to the image sequence numbers. This is similar to how the Sequence Type behaves.
Frame Number – Selects a single frame from the image sequence to be displayed as a static shader. The frame number is equivalent to the number in the file name.
Frame Offset – Adds this value to the Frame Number, offsetting the static image to a new frame from the image sequence. Negative numbers can be used here.
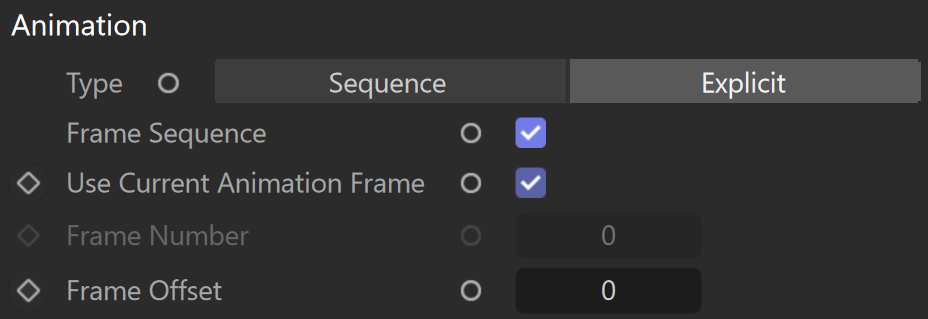
Image File List (.IFL)
This rollout allows you to manually set the properties of your animated texture when using .ifl files.
Start Frame – Determines the first frame of the animation.
Playback Rate – Determines how many frames per second and played back.
End Condition – Determines the playback mode of the texture animation.
Loop – Plays the animation from start to finish infinitely.
Ping Pong – Plays the animation from start to finish and then from finish to start. Loops like this infinitely.
Hold – Plays the animation once from start to finish.
