This page provides information about the Sun light in V-Ray for Cinema 4D.
Overview
The V-Ray Sun and VRaySky are special features which are provided by the V-Ray renderer. Developed to work together, the LightSun and VRaySky reproduce the real-life sun and sky environment of the Earth. Both are coded so that they change their appearance depending on the direction of the LightSun.
When using the LightSun in combination with the VRaySky, it is recommended to use directly the V-Ray Sun with Sky system, which is automatically set when created.
UI Path: ||V-Ray|| > Lights > V-Ray Sun

General
Sun
Enabled – Turns the sun light on and off.
Intensity – Specifies the brightness of the sun. Since the sun is very bright by default, you can use this parameter to reduce its effect.
Size – Controls the visible size of the sun. This affects the appearance of the sun disc as seen by the camera and reflections, as well as the blurriness of the sun shadows.
Filter Color – Shifts the hue of the V-Ray Sun and Sky system towards the specified color.
Color Mode – This mode affects the way the Filter Color hues the sun and sky light.
Filter – Shifts the V-Ray Sun and Sky hue towards the color specified by the Filter Color.
Direct – Takes the Filter Color for the V-Ray Sun light. In this case, the light intensity is controlled by the Intensity multiplier and it does not depend on the Sun's position in the sky.
Override – Takes the Filter Color for the V-Ray Sun light, however the intensity is controlled by the position of the V-Ray Sun in the sky.
Sky
Sky Model – Determines the procedural model used to generate the VRaySky texture:
PRG Clear Sky – The VRaySky procedural texture is generated based on the Improved method which has enhanced sunrise and sunset sky.
Hosek et al. – The VRaySky procedural texture is generated based on the Hosek et al. method.
Preetham et al. – The VRaySky procedural texture is generated based on the Preetham et al. method.
CIE Clear – The VRaySky procedural texture is generated based on the CIE method for a clear sky.
CIE Overcast – The VRaySky procedural texture is generated based on the CIE method for a cloudy sky.
Ground Albedo – Sets the color of the V-Ray Sun and Sky system's ground.
Horiz Illum – Specifies the intensity (in lx) of the illumination on horizontal surfaces coming from the sky. This parameter is enabled when one of the CIE Sky Models are selected.
Blend Angle – Specifies the angle in degrees where blending will occur between the horizon line and sky. Values close to 0.0 produce a sharper horizon line, while larger values produce a softer horizon line.
Horizon Offset – Allows the user to manually lower the horizon line.
Turbidity – Determines the amount of dust in the air, which in turn affects the color of the sun and sky. Smaller values produce a clear, blue sky and sun similar to what is seen in rural areas, while larger values make the sun and sky more yellow and orange as seen in a big city.
Ozone – Affects the color of the sun light. Available in the range between 0.0 and 1.0. Smaller values make the sunlight more yellow, while larger values make it bluer.
Clouds
On – Enables the cloud system.
Ground Shadows – When enabled, casts shadows from the clouds. See the Clouds Ground Shadows example for more information.
Density – Controls the density of the cumulus and stratus types of clouds. A value of 1 fills up the sky with clouds. See the Clouds Density example for more information.
Variety – Controls the variety of the cumulus and stratus types of clouds. See the Clouds Variety example for more information.
Cirrus Amount – The maximum value of 1 fills the sky with cirrus clouds. Decreasing the value, lowers the presence of such clouds. When set to 0, the cirrus clouds are completely gone. See the Clouds Cirrus Amount example for more information.
Thickness (m) – Lower values make the cumulus and stratus types of clouds thin and sheer/lucent, while higher values make them full and heavy. See the Clouds Thickness example for more information.
Height (m) – Determines the Clouds position in height. See the Clouds Height example for more information.
Longitude Offset (m) – Moves the cloud system by the X axis. See the Clouds Offset example for more information.
Latitude Offset (m) – Moves the cloud system by Y axis. See the Clouds Offset example for more information.
Longitude Phase (%) – Controls the phase by the X axis, can be used to fine-tweak the cumulus and stratus clouds appearance. The appearance of the clouds loops at 0, 100, 200, etc. This parameter can be animated to resemble natural clouds appearance.
Latitude Phase (%) – Controls the phase by the Y axis, can be used to fine-tweak the cumulus and stratus clouds appearance. The appearance of the clouds loops at 0, 100, 200, etc. This parameter can be animated to resemble natural clouds appearance.

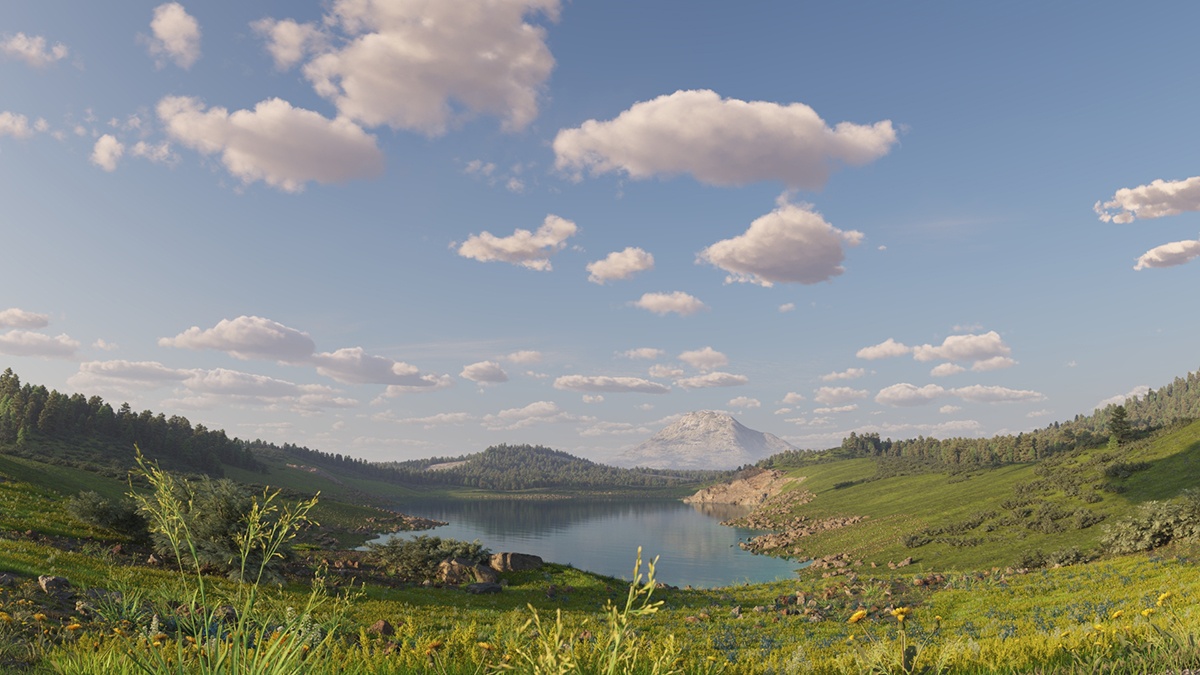
Example: Clouds Density
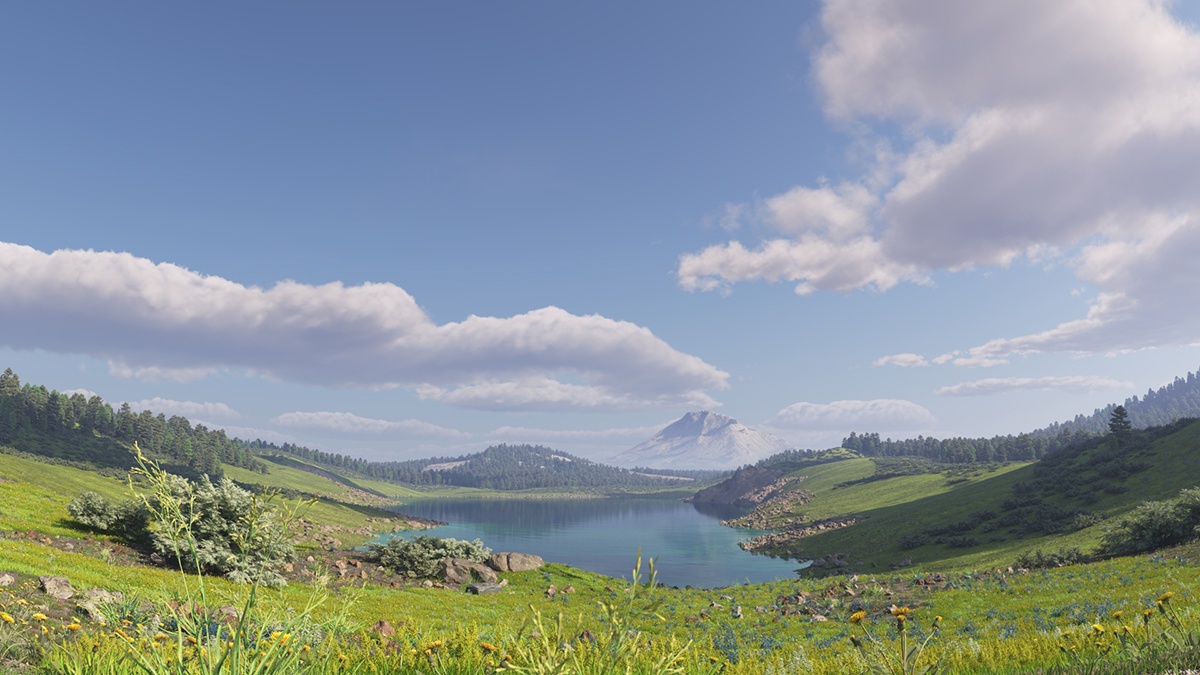
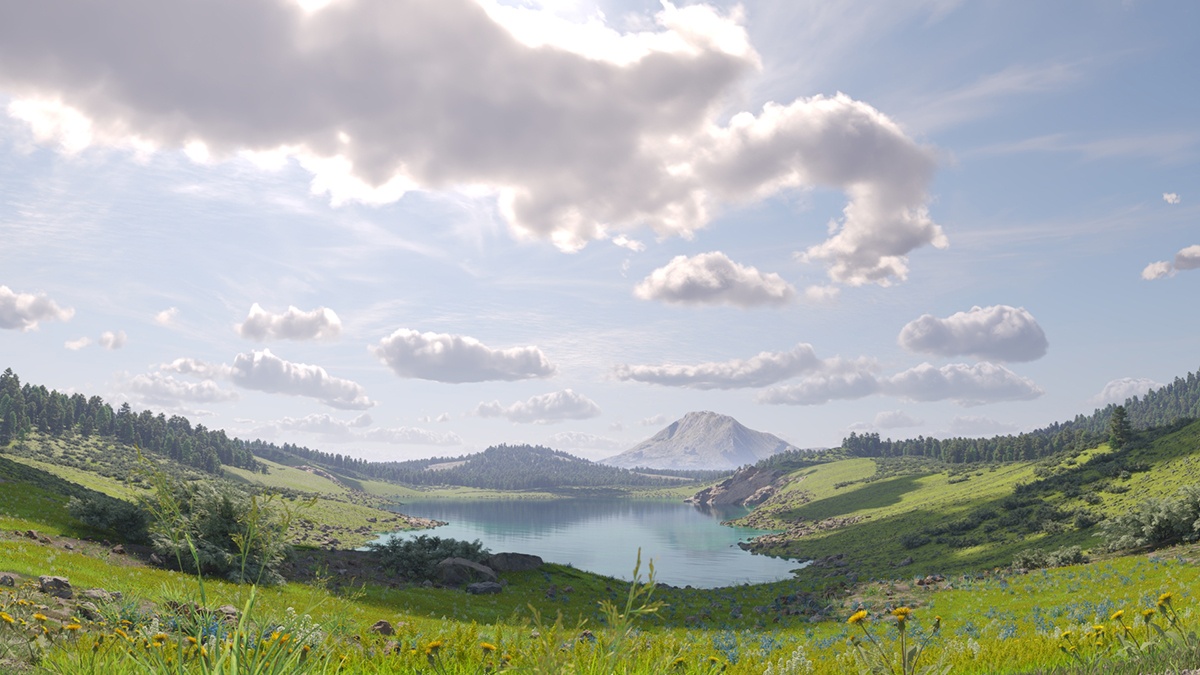
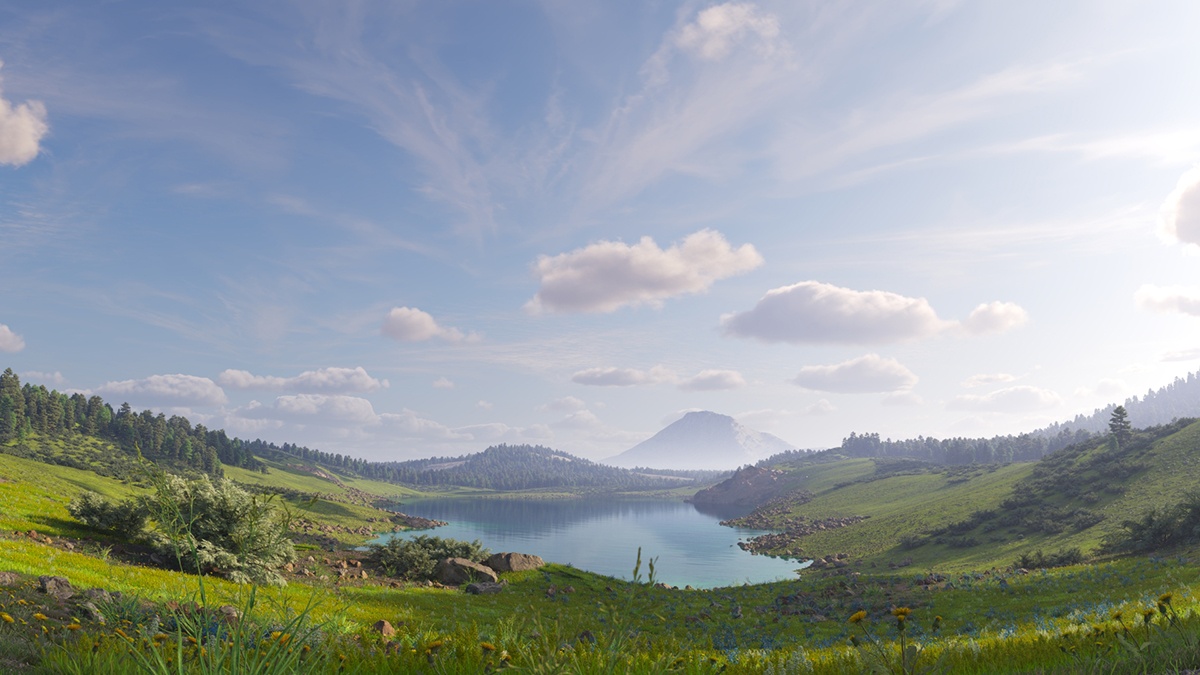
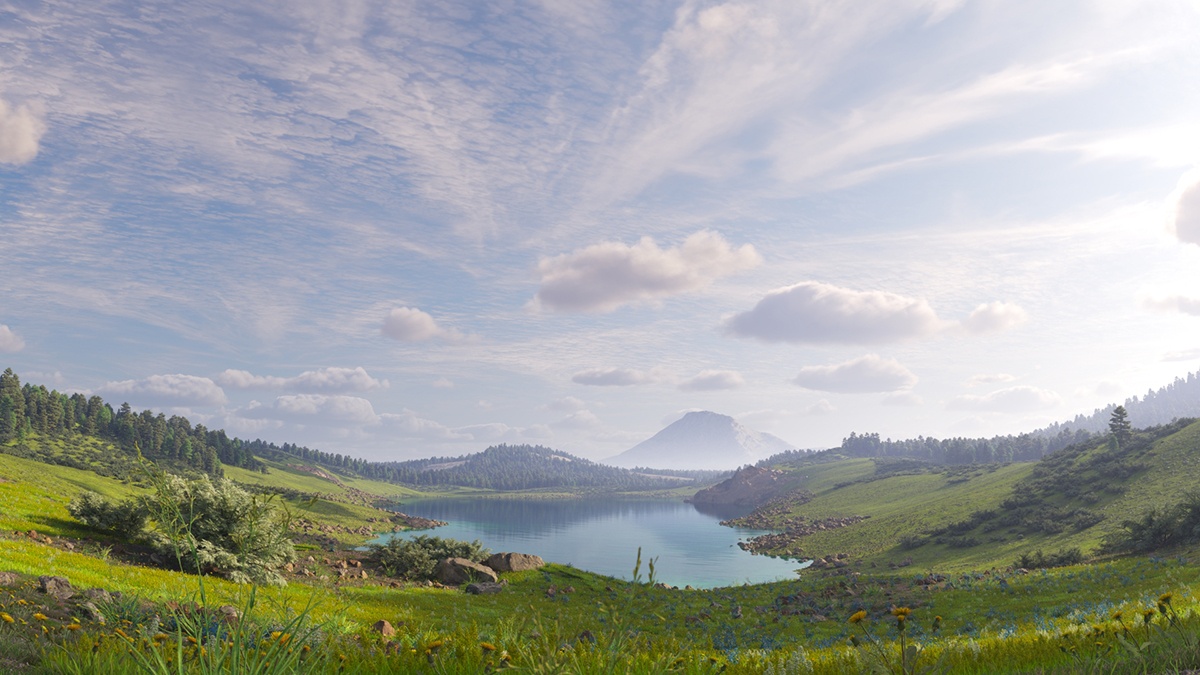
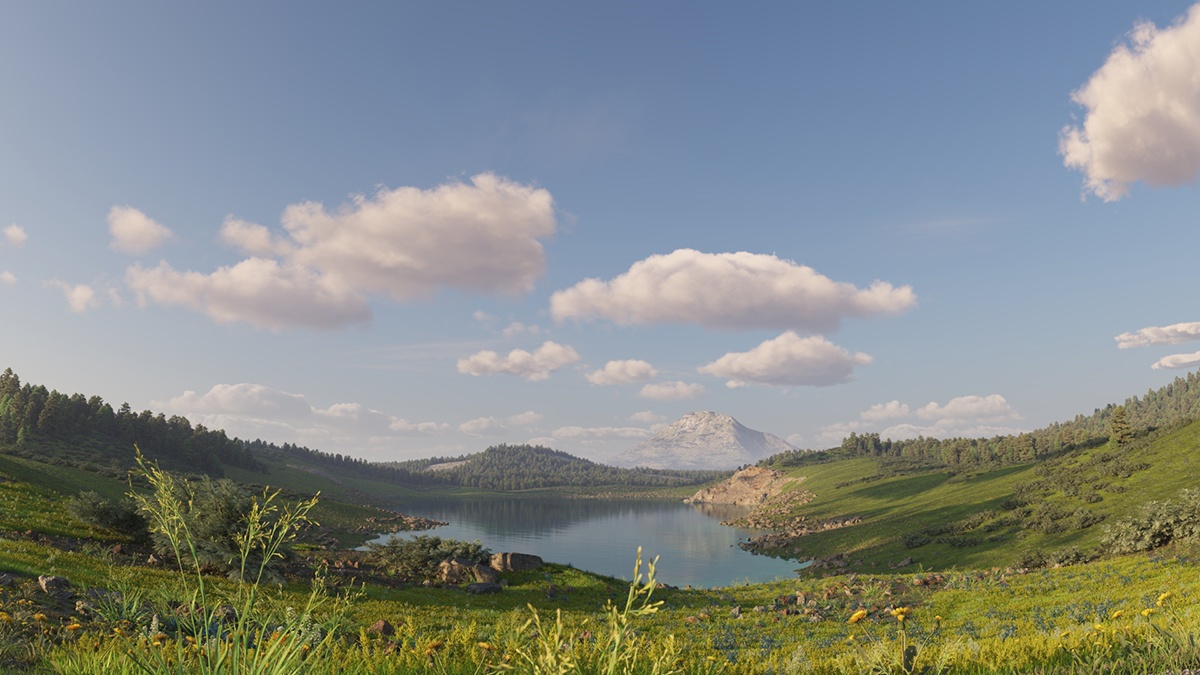
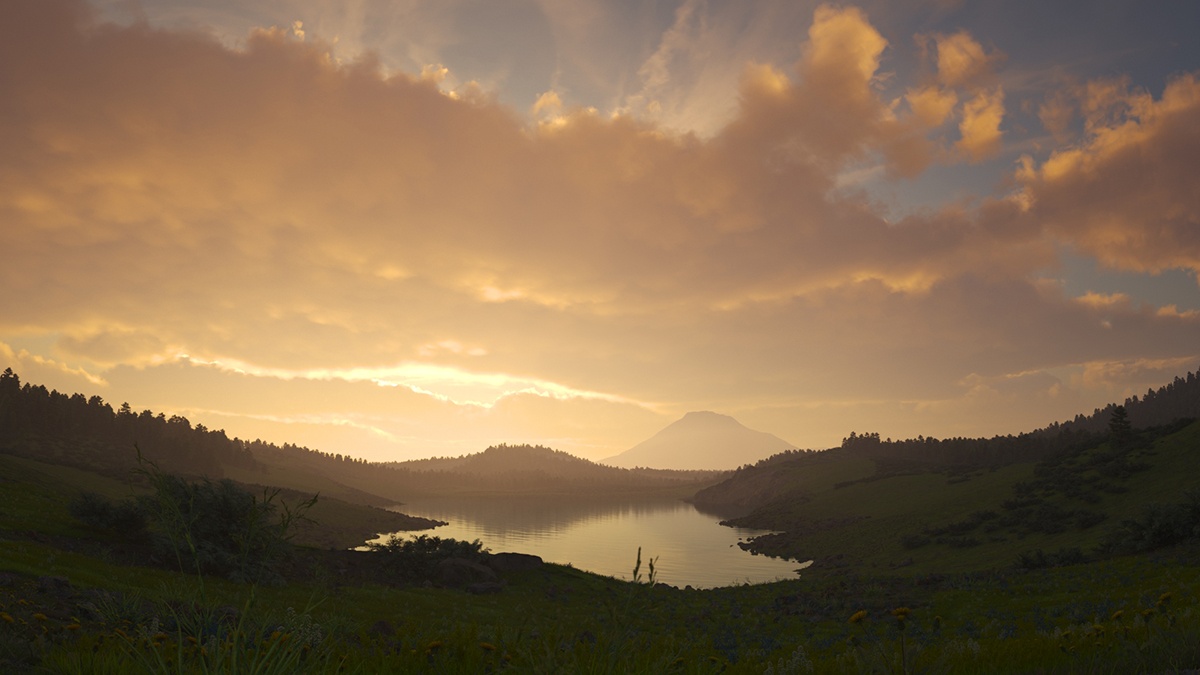
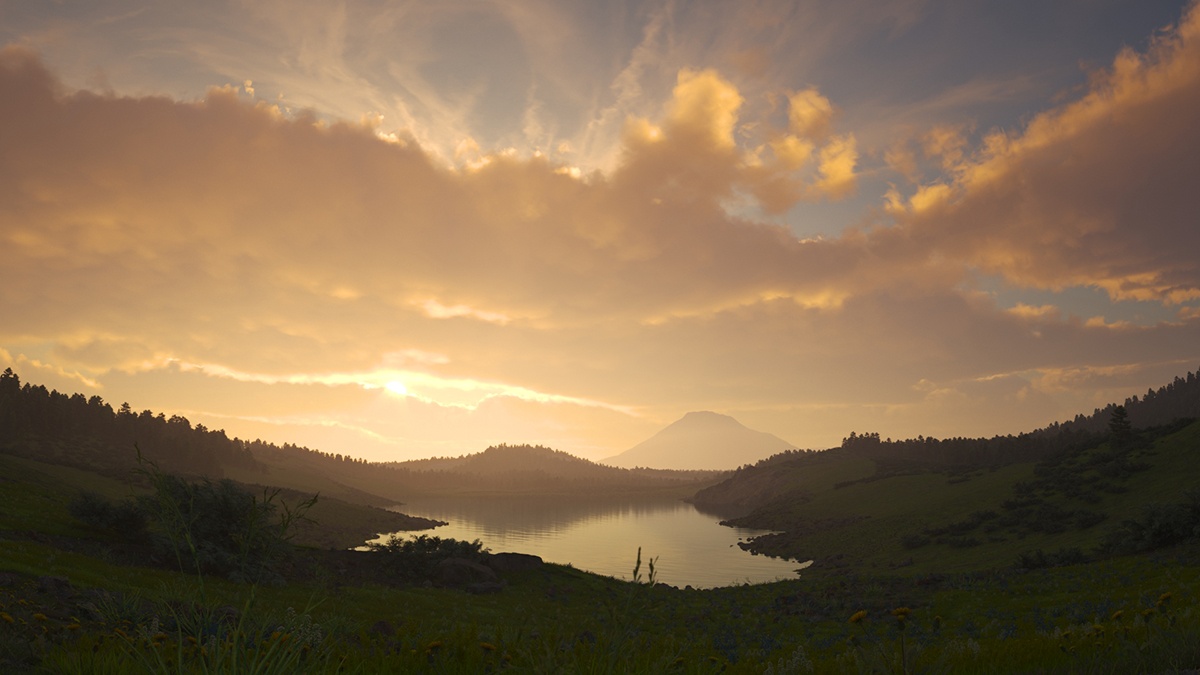
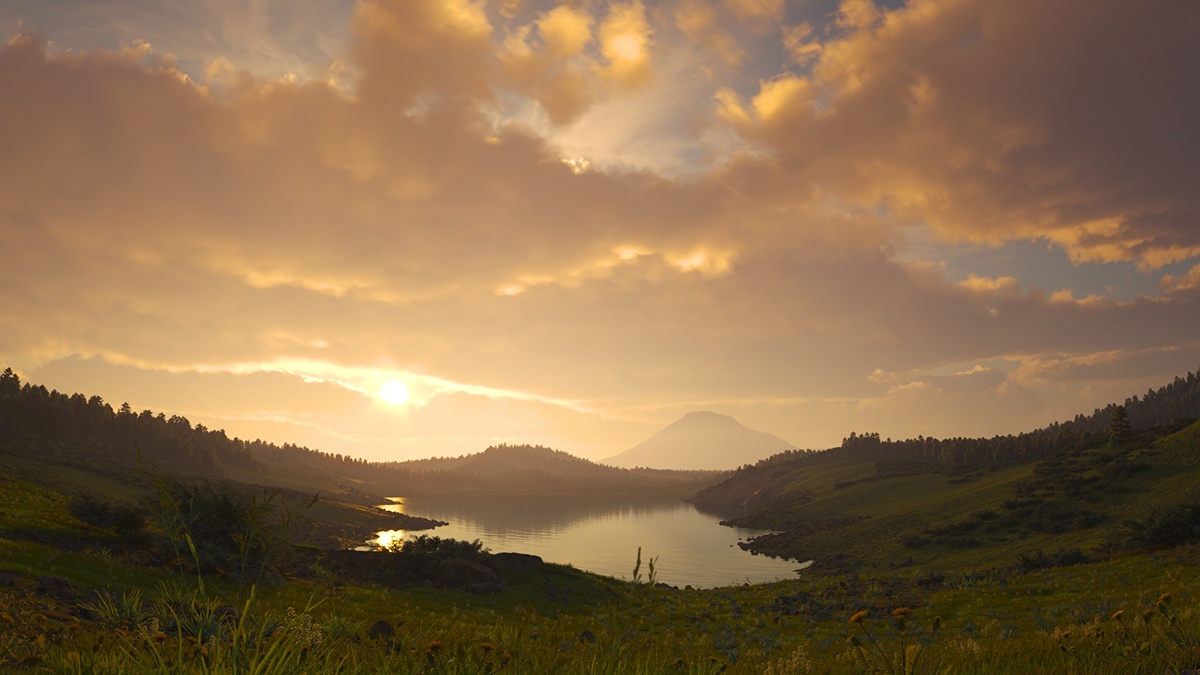
The Clouds Density parameter controls the amount of clouds in the sky. The higher the value, the more clouds appear in the render.

Clouds Density = 0
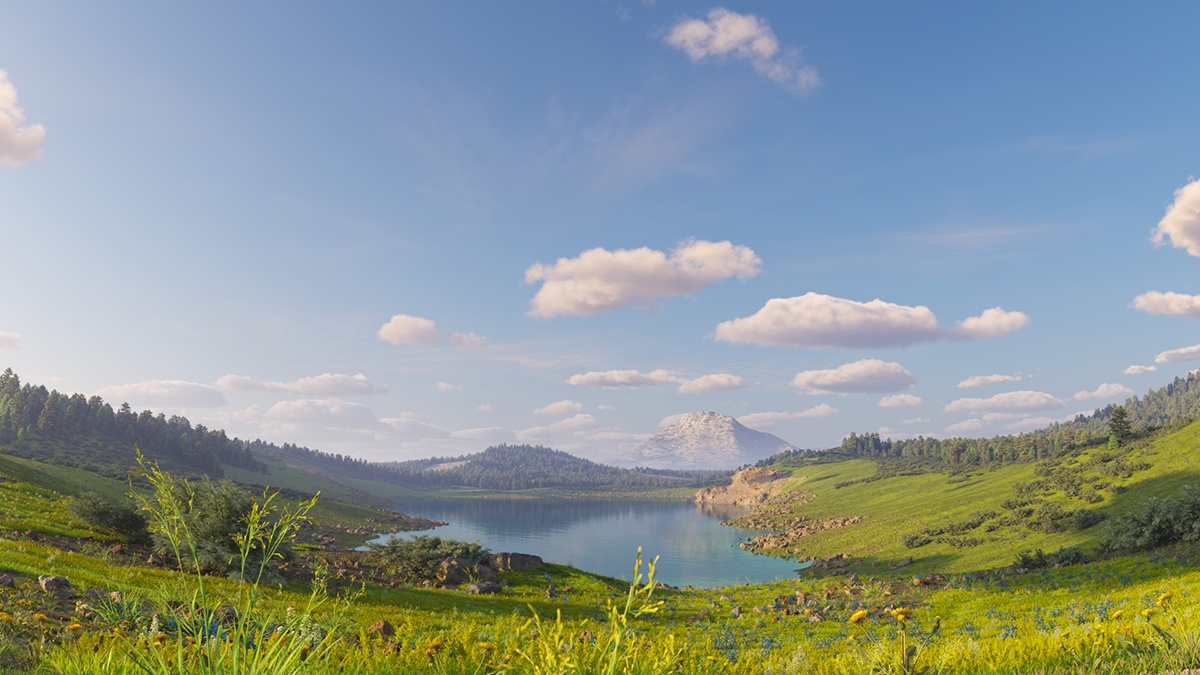
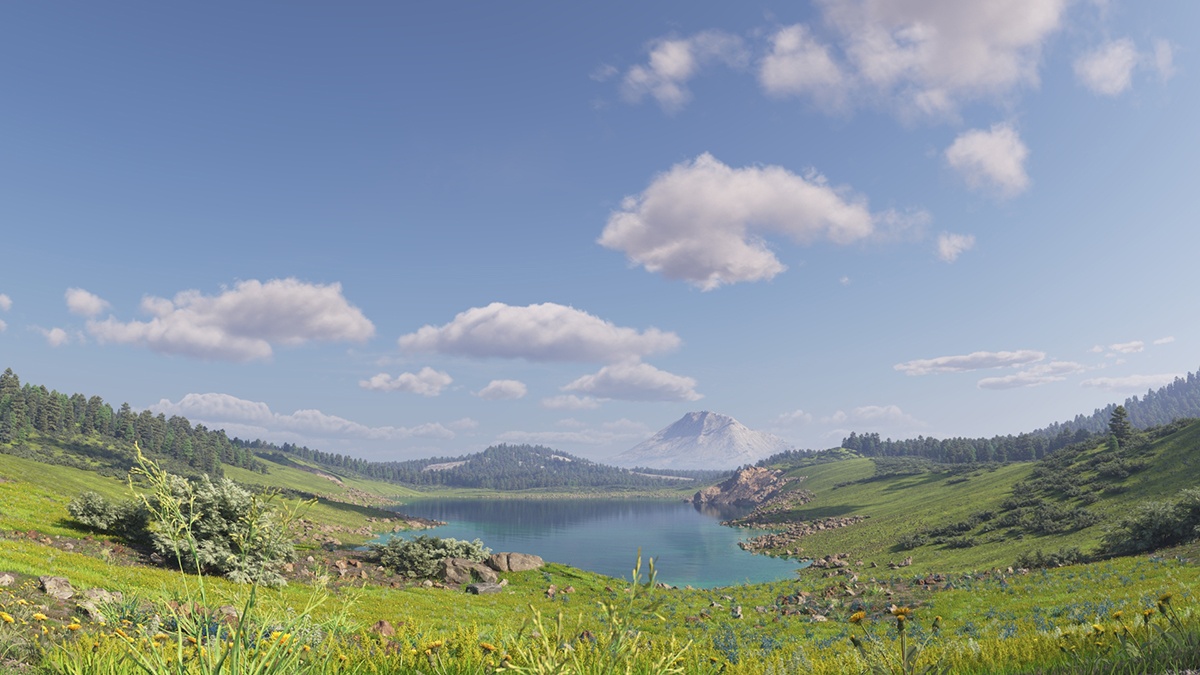
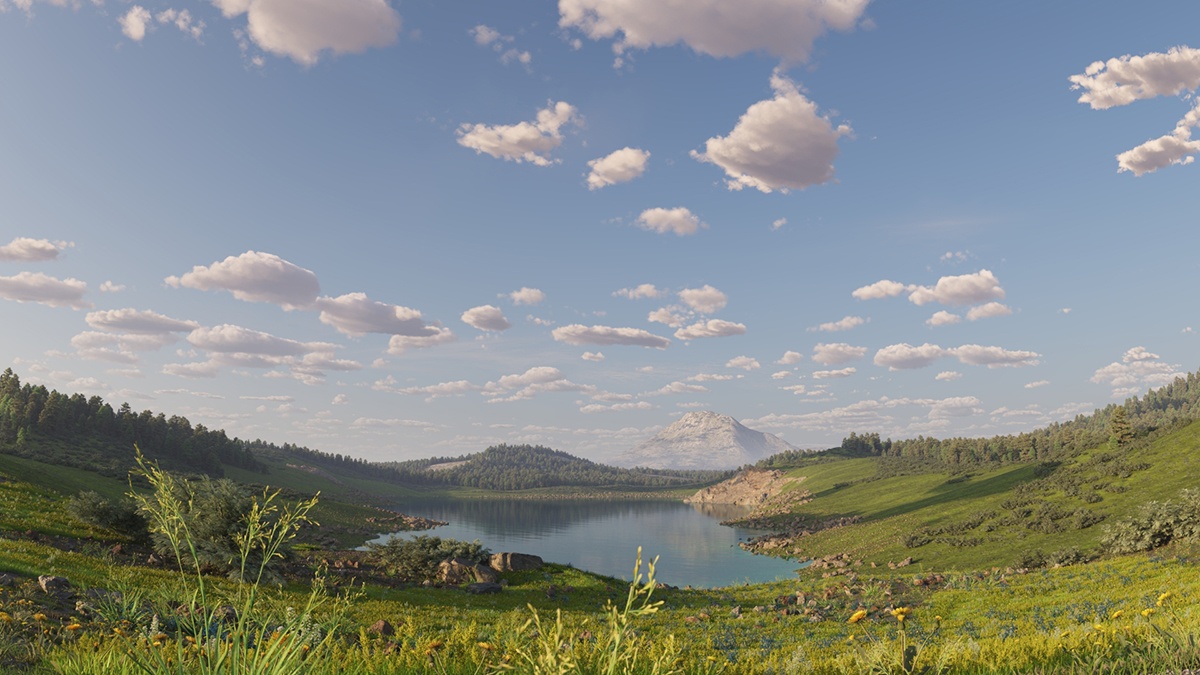
Clouds Density = 0.4
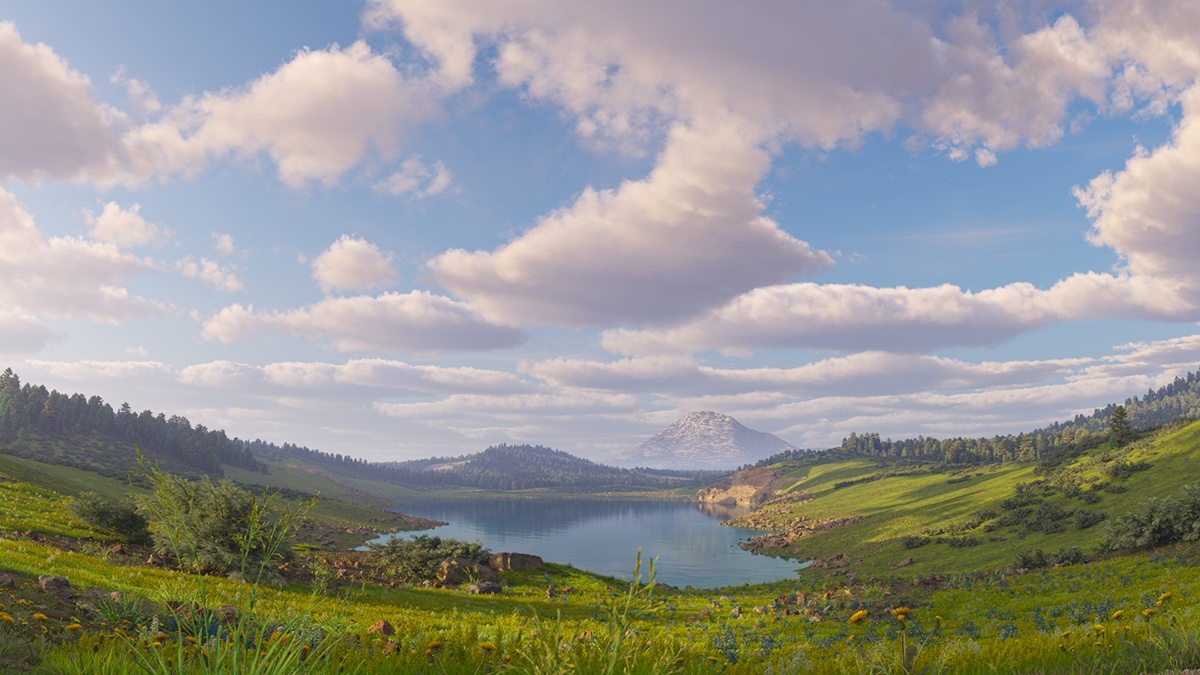
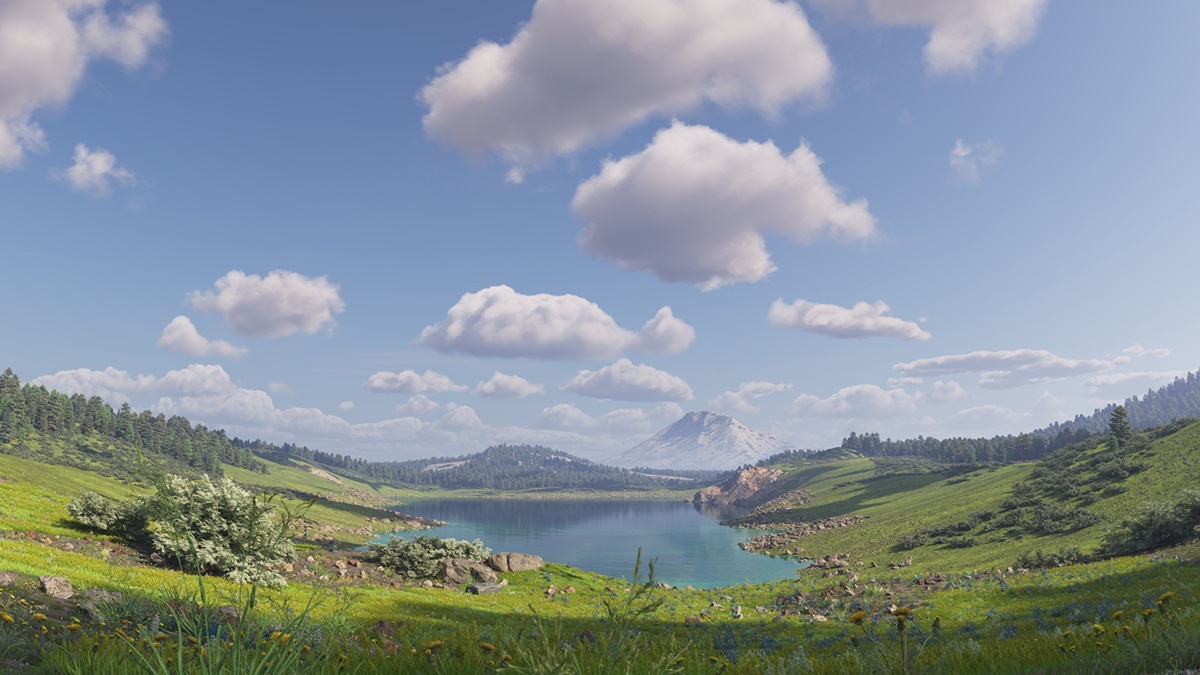
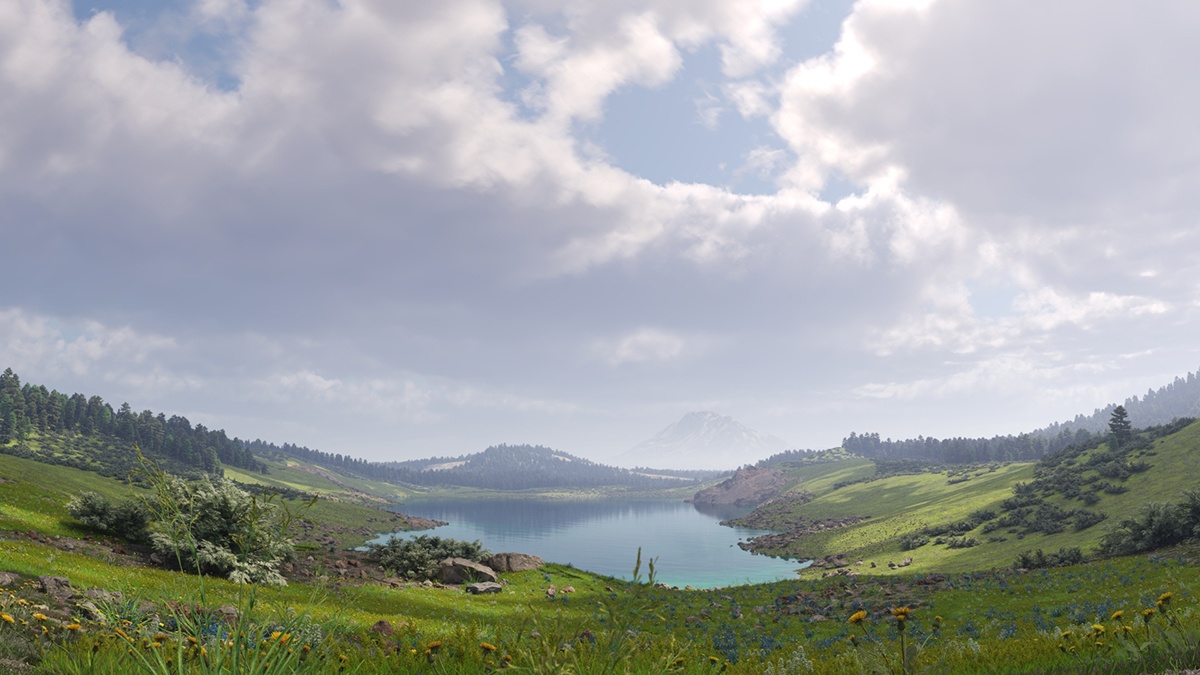
Clouds Density = 0.8
Move the slider to see the example renders.
Example: Clouds Variety
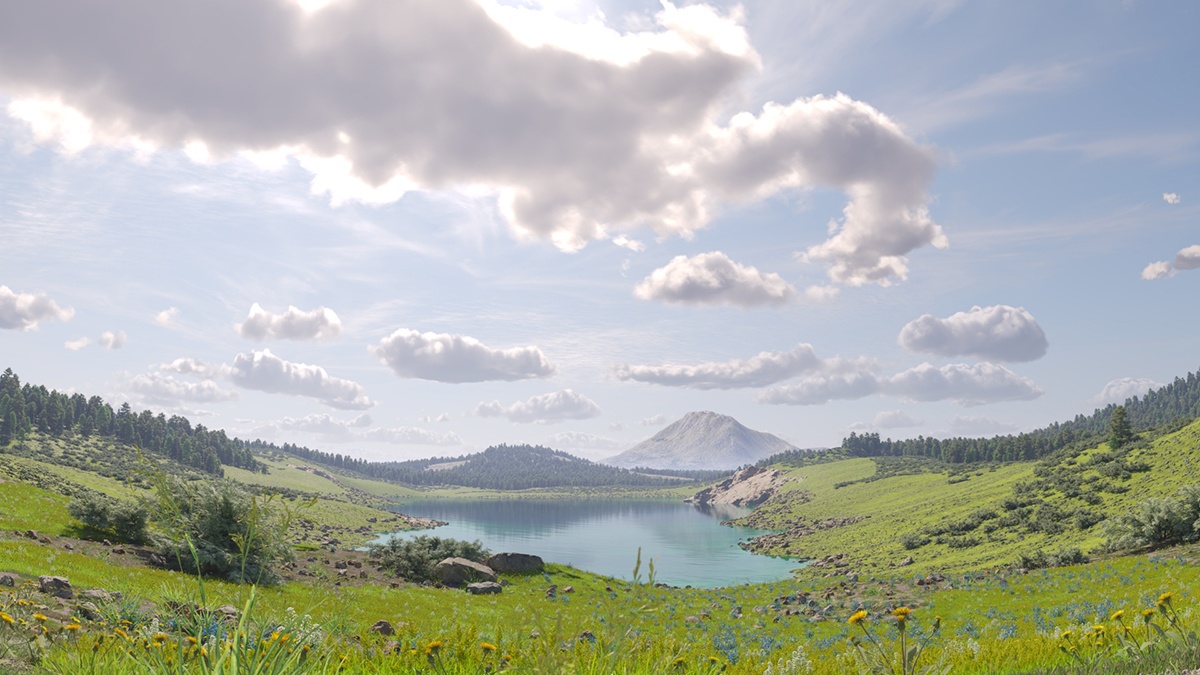
This example shows the effect of the Clouds Variety parameter on the clouds' distribution and look.
Clouds Variety = 0
Clouds Variety = 0.5
Clouds Variety = 1
Move the slider to see the example renders.
Example: Clouds Ground Shadows
The Clouds Ground Shadows option controls whether or not the clouds cast shadows in the scene.
Example: Clouds Cirrus Amount
This example shows how increasing the Clouds Cirrus Amount increases the appearance of the cirrus clouds in the render.

Clouds Cirrus Amount = 0
Clouds Cirrus amount = 0.5
Clouds Cirrus amount = 1
Move the slider to see the example renders.
Example: Clouds Height
This example shows how the clouds change their position in the sky with increasing the Clouds Height value.
Clouds Height = 500
Clouds Height = 1000
Clouds Height = 1500
Move the slider to see the example renders.
Example: Clouds Thickness
The Clouds Thickness parameter specifies how full the clouds are. Lower values make them thinner and sheerer, while higher values make them look heavy.

Clouds Thickness = 200
Clouds Thickness = 500
Clouds Thickness = 800
Move the slider to see the example renders.
Example: Clouds Offset
The following example demonstrates how changing the Clouds Longitude Offset and the Clouds Latitude Offset parameters affects the appearance of the clouds.
No offset
Clouds Longitude Offset = -250, Clouds Latitude Offset = 0
Clouds Longitude Offset = -250, Clouds Latitude Offset = 500
Move the slider to see the example renders.
Options
Invisible – When enabled, makes the sun invisible, both to the camera and to reflections. This is useful to prevent bright speckles on glossy surfaces where a ray with low probability hits the extremely bright sun disk.
Affect Diffuse – Determines whether the Sun is affecting the diffuse properties of the materials.
Diffuse Contribution – Controls the Sun's contribution to the diffuse illumination.
Affect Specular – Determines whether the Sun is affecting the specular of the materials. The multiplier controls the suns contribution to specular reflections.
Specular Contribution – Controls the Sun's contribution to the specular reflection.
Affect Atmospherics – When enabled, the light influences the atmospheric effects in the scene. This option is not available with V-Ray GPU.
Atmospherics Contribution – Determines the amount of influence the light has on the atmospheric effects.

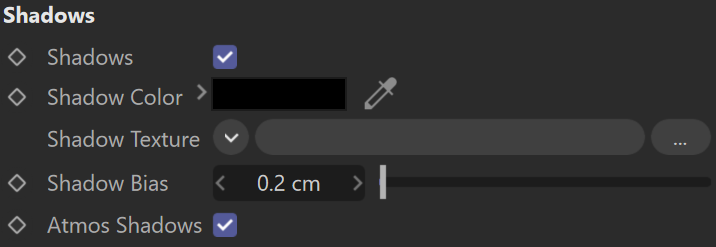
Shadows
Shadows – When enabled, the objects in the scene cast shadows.
Shadow Color – Controls the color of shadows for this light. Note that anything different from black is not physically correct.
Shadow Color/Texture – Specifies a color or a texture map for the shadows.
Shadow Bias – Moves the shadow toward or away from the shadow-casting object (or objects). Higher values move the shadow toward the object(s), while lower values move it away. If this value is too extreme, shadows can "leak" through places they shouldn't or "detach" from an object. Other effects from extreme values include moire patterns, out-of-place dark areas on surfaces, and shadows not appearing at all in the rendering.
Atmos Shadows – When enabled, the atmospheric effects in the scene cast shadows.
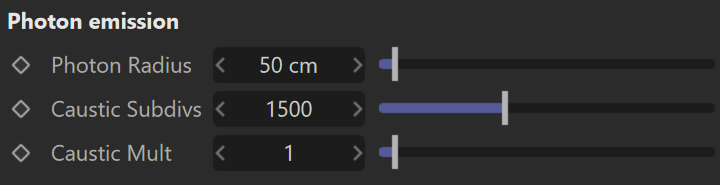
Photon Emission
Photon Radius – Determines the radius of the area in which photons will be shot. This area is a cylinder around the Sun's ray vector. It is not visible in the viewport but it can be determined by creating a sphere with the same radius around the Sun-Target. The sphere is where photons will be shot. This parameter has effect when photons are used in caustics.
Caustic Subdivs – Used by V-Ray when calculating Caustics. Lower values mean more noisy results but will render faster. Higher values produce smoother results but take more time.
Caustic Mult – Used by V-Ray when calculating Caustics. This multiplier controls the brightness of the caustics.
Aerial Perspective
Starting with V-Ray 6 for Cinema 4D beta version, Visibility Range and Atmospheric Layer Height are calculated in meters.
Enabled – Turns the atmospheric effect on or off.
Visibility Range (m) – Specifies the distance, at which the fog has absorbed 90% of the light coming from objects behind it. Lower values make the fog appear more dense, while larger values reduce the effect of the aerial perspective.
Atmospheric Layer Height (m) – Controls the height of the atmosphere layer. Lower values can be used for artistic effects. The value is in the current Cinema 4D units.
Inscattered Light Multiplier – Controls the amount of sunlight scattered from the atmospheric effect. The default value 1.0 is physically accurate; lower or higher values could be used for artistic purposes.
Affect Environment – When disabled, the atmospheric effect is applied only to camera rays that hit actual objects, but not to rays that hit the sky. This is because the VRaySky texture already takes into account the amount of scattered sunlight. However, it is possible to enable this option for artistic effects, especially with low visibility ranges.
Affect Background – Specifies whether the effect is applied to camera rays that hit the background (if a background other than VRaySky is used). This option is enabled by default, but some interesting effects are possible when disabled.
Affect Alpha – Specifies whether the effect is applied to camera rays that hit the alpha channel. This option is enabled by default, but some interesting effects are possible when disabled.
Filter Color – Affects the color of the unscattered light.
Primary Visibility – Specifies whether the effect is seen by the camera rays. When disabled, the aerial perspective effect is seen only by secondary rays (e.g. refractions, reflections, etc.).

Project
Project is used to create a list of objects that can be excluded (or included) from the light's effects such as illumination or shadow casting.
Mode – Specifies whether the objects in the list are considered included or excluded from the light's effects.
Objects – Creates a list of objects to be excluded or included.

Cinema 4D Sun Tag