Introduction
This tutorial covers the basic workflow for creating a gasoline explosion simulation in Phoenix FD for 3ds Max. By the end of it, you will be able to create your own explosion simulation and know the basics of editing some of the main settings of the sim.
To follow this tutorial, you will need to have the Phoenix FD for 3ds Max plugin installed. This tutorial is a companion to go along with the QuickStart video posted on our YouTube channel and available here:
Tutorial Assets
To download the files used in the last part of this tutorial, please click the button below.
Tutorial Steps
This tutorial shows how to create a gasoline explosion simulation with both the toolbar preset and manual steps for greater flexibility and control.
Units Setup
We will begin by first adjusting the scene units.
To prepare your scene for rendering an accurate large-scale explosion simulation, make sure you are using appropriate scene units. For this example, we will be using meters. Scene units can be accessed through Customize > Units Setup.
Display Units set to Meters.
System Units set to 100.0 cm
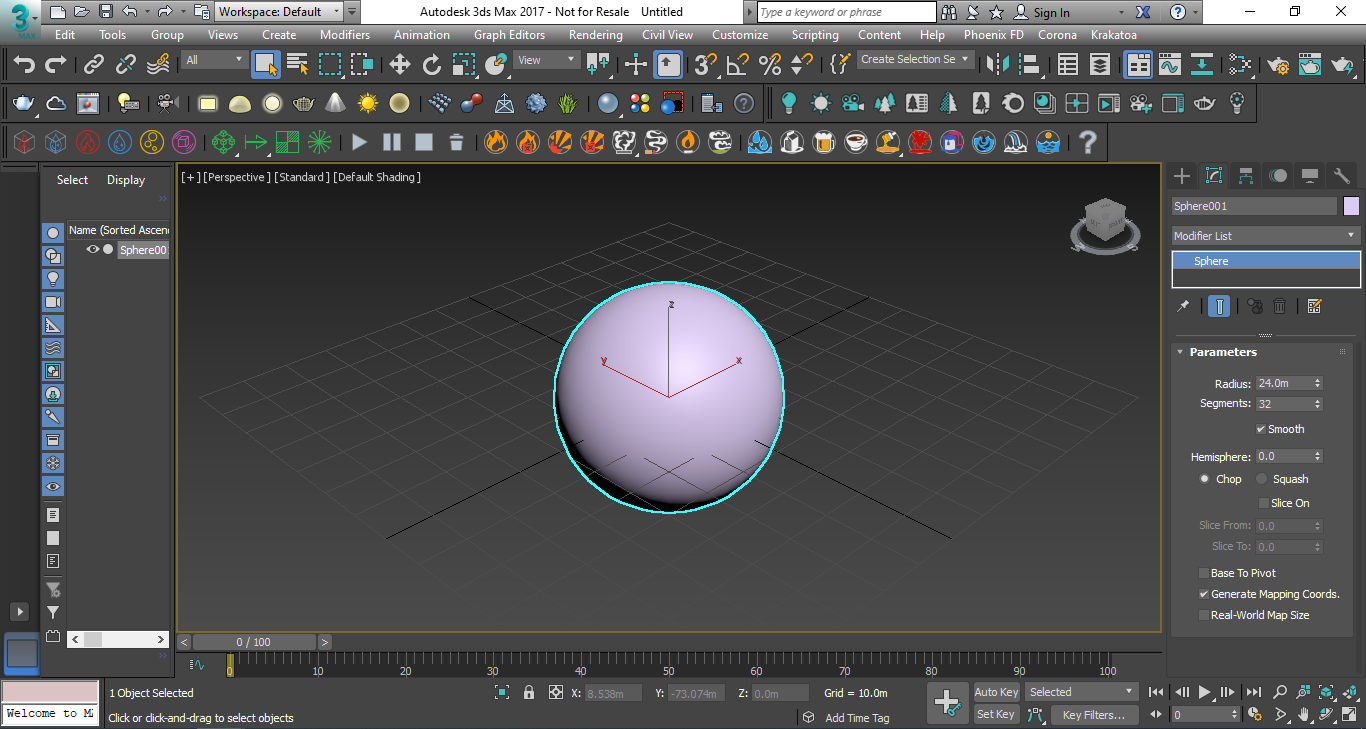
Create a Sphere with a Radius of 24.0 meters. This sphere will be the source of the explosion.
With the sphere selected, click and hold on the Explosion preset button from the Phoenix FD Toolbar to expand the drop-down menu. Select the second icon, which is the Gasoline Explosion preset.
Now click the Start Simulation button in the toolbar.
Click Stop Simulation to halt the simulation as it starts to expand beyond the container.
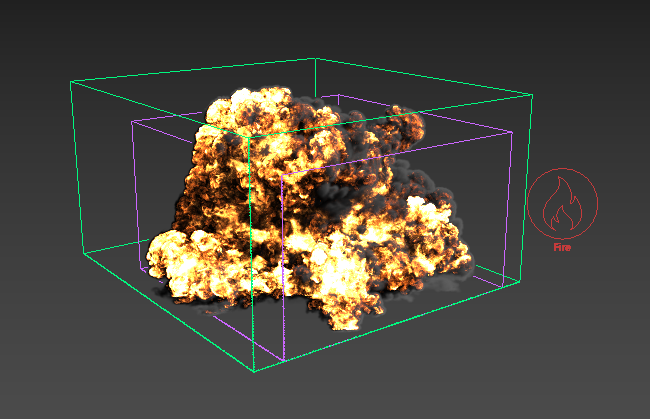
The simulation is complete.
Manual Explosion Setup
Now we did that easily by using the gasoline explosion preset, so let’s take a look at setting this up manually to have more control.
If you are continuing from the preset steps above, select the explosion simulator and source objects and delete them from your scene. Make sure to go to the Phoenix Toolbar and delete the previous simulation cache.
If the sphere has been deleted, create a new Sphere with a Radius of 24.0 meters.
Click on the Create a Fire Simulator button in the toolbar, and click and drag in the viewport to create a volume to encompass the sphere and leave room for the explosion to spread. The volume should be about 229 x 219 x 123m.
If necessary, adjust the size of the grid volume using the X size, Y size, and Z size parameters in the Grid rollout. Don't scale the grid with 3ds Max scaling tools as this will disrupt the relationship between the Cell size and X/Y/Z size parameters.
Move the sphere near the bottom of the simulator's volume space. Make sure the sphere is still inside the volume.
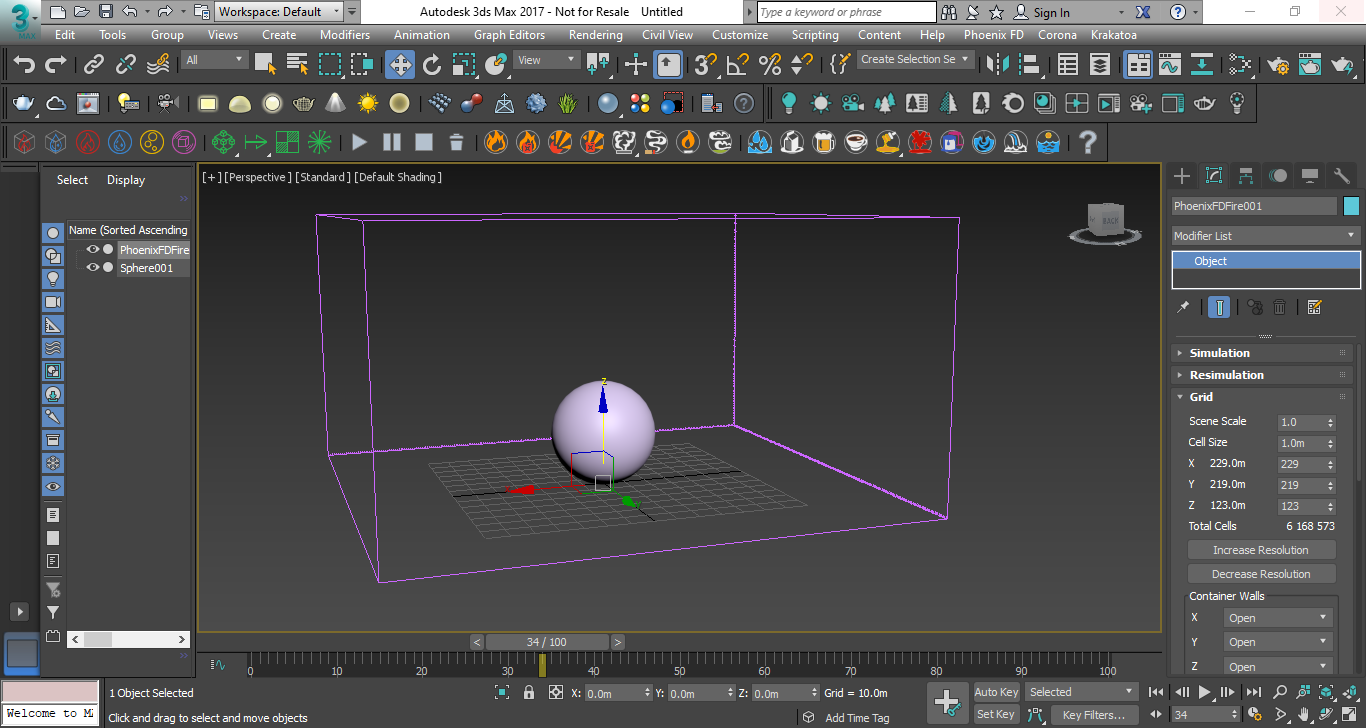
Look in the Grid section of the Simulation properties. Currently, there are about 6 million total cells. To save on simulation time during the iteration process, click Decrease resolution several times until the total cells are around 825,000. For more information regarding simulation resolution, please refer to the Basic Liquids QuickStart page page.
Click the Create a Fire Source button on the toolbar and place the source anywhere in your scene.
In the Command Panel for the Liquid Source object, click the Add button and select the sphere. This will add the sphere to the Emitter Nodes list, enabling the sphere to be the emitter of the liquid.
Within the Fire Source menu, we will disable Temperature and Smoke, as they will not be needed for this demonstration. Make sure Fuel is enabled.
Since we are creating an explosion that will use a large amount of fuel very quickly, we will need to increase the Outgoing Velocity. The higher this number, the more fluid will be generated per second. In order to create the short but powerful burst of fluid, we will animate the Outgoing Velocity number. Make sure you're at Frame 0, turn on Auto Key, and change the Outgoing Velocity value to 2000.
Move to Frame 1 and change the Outgoing Velocity to 0.0, then turn off Auto Key.
Click the Start Simulation icon, and notice that the explosion does not happen. Select the Fire Simulator and navigate to the Fuel settings. Select Enable Burning.
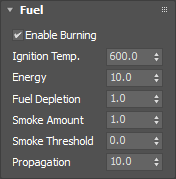
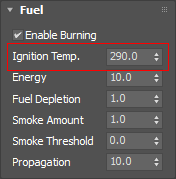
Once again, if you click Start Simulation, you will see that the explosion is still absent. This is due to the Ignition Temperature being set at 600.0. This temperature is rather high. By default, Phoenix uses 300.0 as a default ambient temperature. Change the Ignition Temperature to a value slightly lower: 290.0.
Start the Simulation and you will see a puffy preview. To see the explosion more clearly, navigate to the Preview window and turn on GPU Preview by clicking Enable in Viewport.
GPU Preview disabled
GPU Preview enabled
Currently, the explosion is being cut off at the top and sides by the simulation box. Adjust this in the Grid settings by turning on Adaptive Grid by Temperature. Lower the Threshold temperature to 600.0 to ensure expansion based on the temperature of the fluid inside when it meets the specified threshold.
If you experience clipping of your smoke, set adaptive to Smoke with a Threshold of 0.02.
To prevent the explosion from expanding the bottom, select Jammed ( - ) in the Z axis under Boundary conditions. This will act as a floor.
Start the Simulation. The resulting explosion looks very uniform.
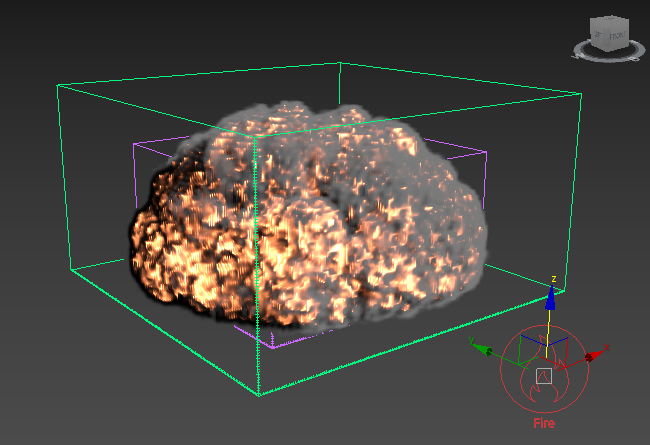
To add variation, select the Fire Source and increase the Noise value to 10. Notice the variation this begins to add to the simulation.
Start the simulation once more. While it is running, select the Simulator and go to the Rendering settings and select Volumetric Options.
Under the Fire settings, there are a few Fire Opacity Modes available: Use Smoke Opacity, Fully Visible, and Use Own Opacity. Select Use Own Opacity, and stop the simulation. When you use Own Opacity mode, the fire curve will control the opacity of the fire instead of the intensity. The intensity in this mode is controlled by the color gradient and can be boosted or lowered using the Fire Multiplier.
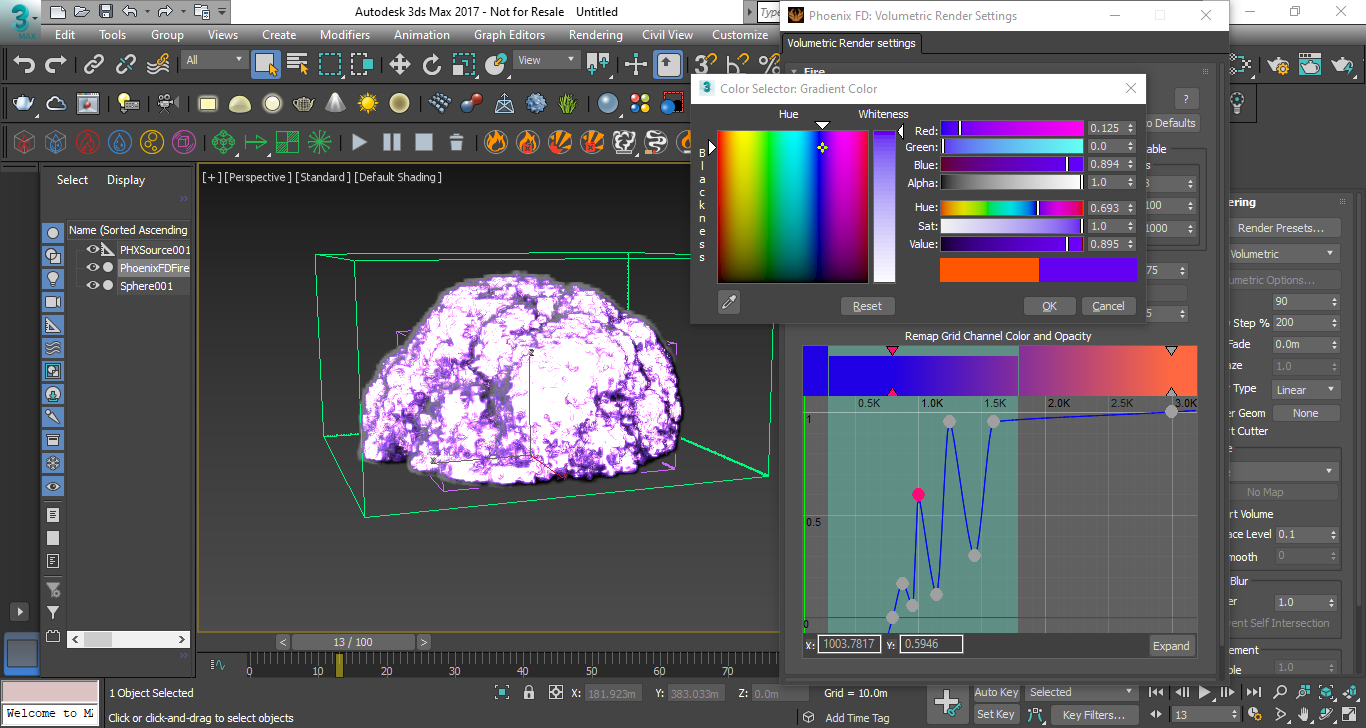
The graph here controls only the opacity of the fire. Double-click to add a new point to the curve and drag it down to reduce the opacity of the fire, revealing more of the internal fire content and making it look brighter. Drag the point up to increase the opacity and hide more of the internal structure. Add points in the middle for a gentle curve. Click the Expand button for a larger graph to work with.
You can further adjust the opacity with the Opacity Multiplier above the graph. For this example, we will lower this value to 0.5, and notice how the fire increases in brightness.
The Physically Based setting blends between artistic and physically accurate results. Change Physically Based to 0.75 and observe the more "fiery" look in the simulation. This parameter balances between how much of the fire intensity comes from the color gradient plus the fire multiplier versus how much is calculated using the physically-based black body shader.
To change the color of the fire, double-click on the carrots above the graph and select a new color. Select Cancel to return to the previous color.
To adjust the explosion to look less contained, navigate to the Dynamics rollout and under Conservation, adjust the Quality setting. This setting allows the simulation to spread more and gives it a swirling motion. Increase Quality to 80. Note that increasing this value will increase simulation time. Start another simulation.
The explosion is breaking up a bit more, but it's not quite there yet. Open the Volumetric Options in the Rendering rollout again. Disable the Fire for now. We can see there is a lot of smoke as a result of the fuel burning so much. Stop the simulation to address this.
In the Fuel settings of the simulation, reduce the Smoke Amount to 0.4 to allow for more burning and a brighter fire, and also increase the Smoke Threshold to 1.0 The smoke threshold will lessen how much of the fuel is created as smoke. Reduce Propagation of the fuel to 2 to reduce how fast it propagates through the simulation.
In the Volumetric Options, remember to set the Fire's Based on parameter back to Temperature before restarting the simulation.
The fire now looks too hot. Reduce the Fuel's Energy to 5 and restart the simulation.
Energy: 10.0
Energy: 5.0
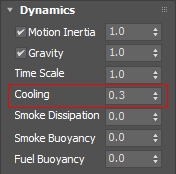
The explosion is starting to look good, but it stays hot for too long. We need to increase the cooling of the fire by going to Dynamics and increasing Cooling to 0.3.
Our smoke looks very thin. In Volumetric Options, expand the Smoke Opacity rollout and increase Simple Smoke Opacity to 0.9.

Simple Smoke Opacity: 0.5
Simple Smoke Opacity: 0.9
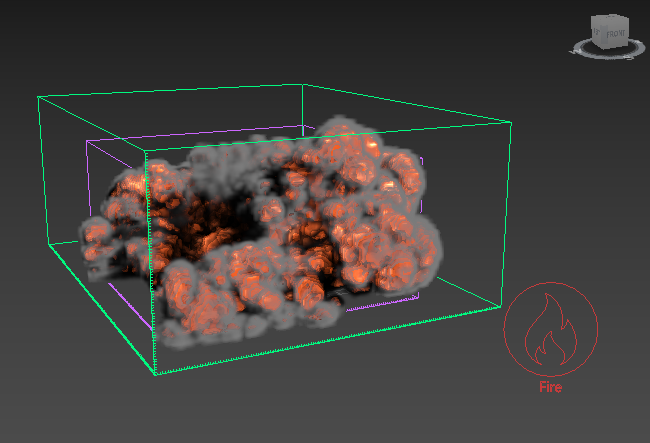
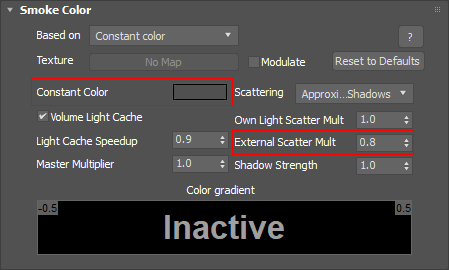
Expand the Smoke Color rollout and reduce the Constant color slightly to make darker smoke. In this example, we used a Value of 29. Also, lower the External Scatter Multiplier to 0.8 so that the light inside the smoke scatters less.
The fire looks a little weaker now. Under the Fire rollout in Volumetric Options, increase the Fire Multiplier to 5.0 so the fire is hotter inside the explosion.
Rendering
Make sure V-Ray is set to the current renderer in Render Setup. Render the result.
We need a ground plane, so create a floor by navigating to the Create menu > V-Ray > V-Ray Plane, and place it in the scene. Set it a little lower than the simulation and give it a gray color. Do another render.
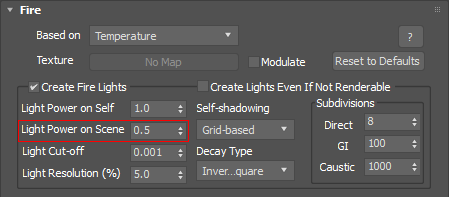
Notice some areas of the floor are too bright. You are able to control this in Volumetric Render Settings, under the Fire rollout. Set the Light Power on Scene value to 0.5 and re-render the frame. By reducing this value, the light is more evenly distributed.
To get finer detail for a final render, increase the resolution of the Grid. In the Modify Panel of the simulation, go to the Grid rollout and click Increase Resolution three times to have about 6.1 million Total cells again and re-run the simulation.
Final render.
Applying the Sim Setup to a Real-World Example
Now let's apply what we've learned to a real-world example and make these barrels explode!
To do this part of the tutorial, download the tutorial file as instructed at the start of this page.
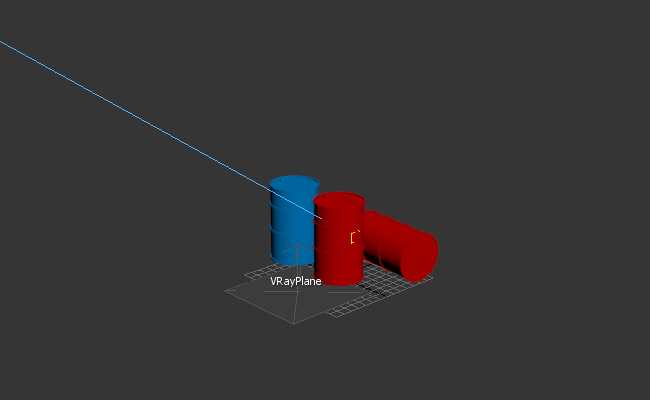
Select the blue barrel, pCylinder3, and apply the Gasoline Explosion Preset.
Select the Simulator and change the Cell Size to 0.03 meters. This will decrease the Total Cells to around 573,000 and enable faster simulation.
Start a simulation and you'll see that the blue barrel explodes. Now we will focus on the other barrels. Stop the simulation and select the Fire Source. Shift-drag to create a copy.
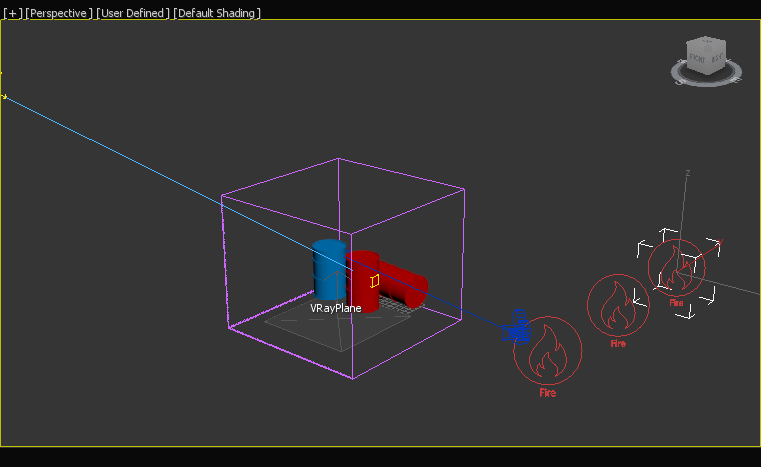
In the Fire Source, Add the red barrel, pCylinder2. Notice that this barrel laying on its side is slightly outside of the Fire Simulator. Select the Simulator box and move it over to hold all three barrels.
When you start the simulation now, you will see that both barrels explode at the same time. Stop the simulation.
To offset the second explosion so that it looks like a chain reaction, select the second Fire Source and navigate to its keyframes. Select both keyframes and drag them over so that the explosion is triggered at Frame 5.
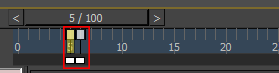
To make sure the explosion is not triggered earlier, step back to Frame 4, turn on Auto Key, and change the Outgoing Velocity of the Fire Source to 0. Then turn off Auto Key.
Now when you start the simulation again you will see two explosions, the second being delayed by five frames. Stop the simulation.
For the third barrel, shift-drag the second Fire Source to make a third copy and add pCylinder1 to it.
For this last barrel we are going to let the explosion cool off some before ignition, so with the third Fire Source selected, move the timeline slider and the source's keyframes up to Frame 40.

Start the simulation and let it run. The third explosion starts as the first two are cooling off.
Do a test render to see the results. If the fire is too bright, go into the Volumetric Options and decrease the Fire Multiplier value.
To make the final simulation, go into the Grid settings and increase the Cell Size to 0.015 meters. This will increase the Total Cells to about 4.5 million.
Restart the simulation and make a final render.