This page provides a tutorial for setting up a simulation to emit only while moving.
Overview
This is an Entry Level tutorial which requires no previous knowledge of Phoenix. A basic understanding of Maya would be helpful but is not a prerequisite for being able to follow along.
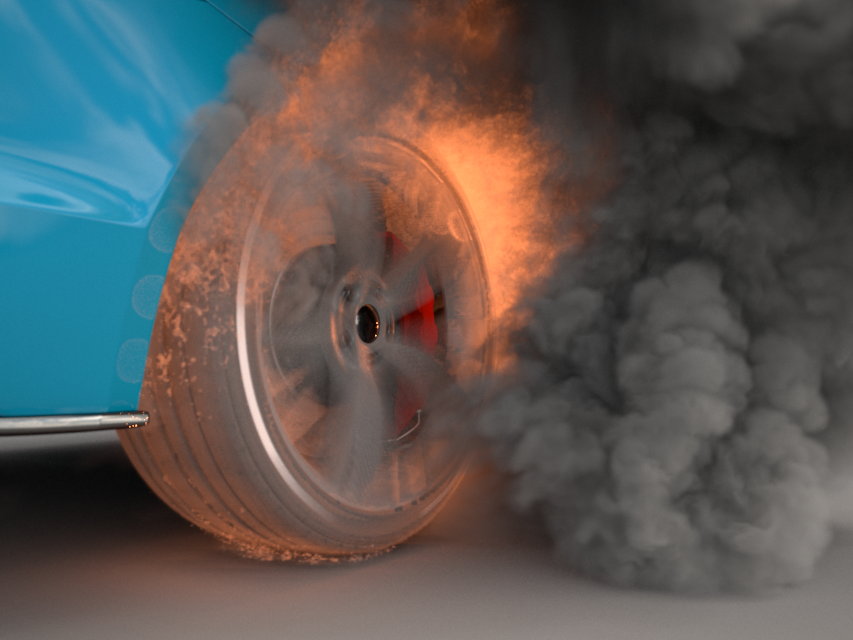
The instructions on this page will guide you in modifying a fire simulation so that it emits only when the emission object moves. This can be useful for effects that occur with animation and leave a trail behind, such as smoke trails from a vehicle or sparks flying from a magic wand.
Steps
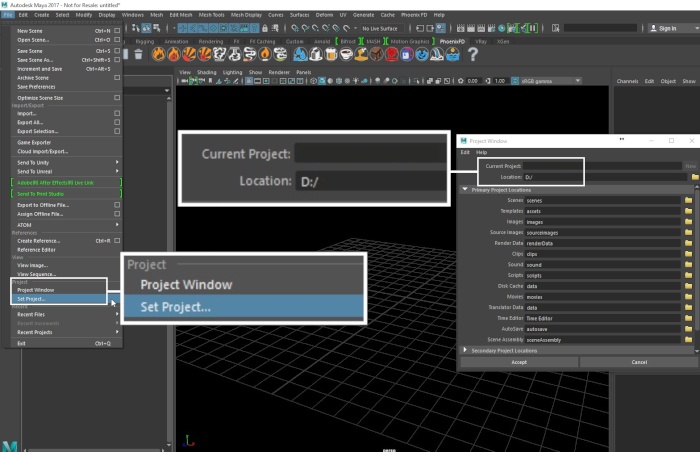
Start by creating a new project from File → Project Window.
Click the New button at the top right corner of the window and give it a name.
This is important because Phoenix stores the simulation data in the data directory of the currently selected project. You can manually point to a different project directory from the File → Set Project... dialog.
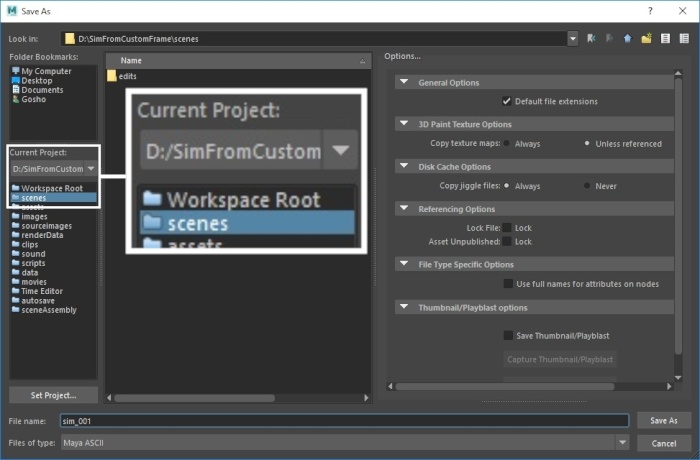
Go to File → Save As and select the scenes directory of your current project.
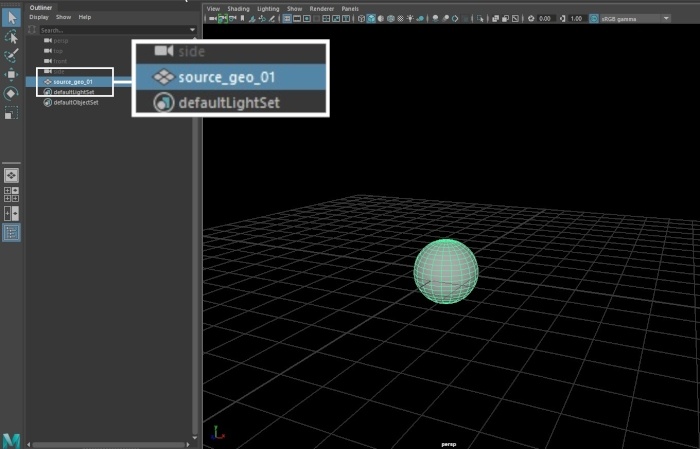
Create a piece of geometry to use as an emitter. In this example, a default poly sphere is used.
Rename the geometry to source_geo_01.
With the source geometry selected, click the Fire preset button on the Phoenix Shelf.
This will automatically generate a fire setup that you can play with.
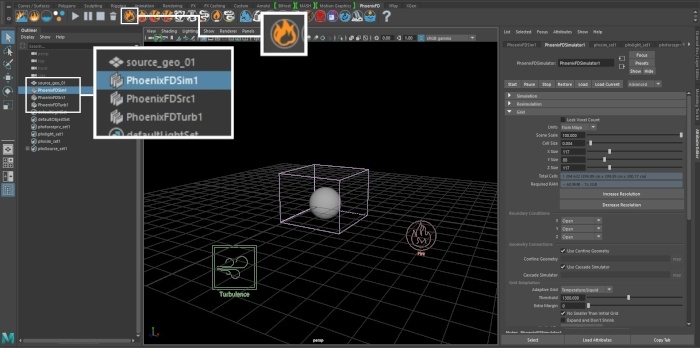
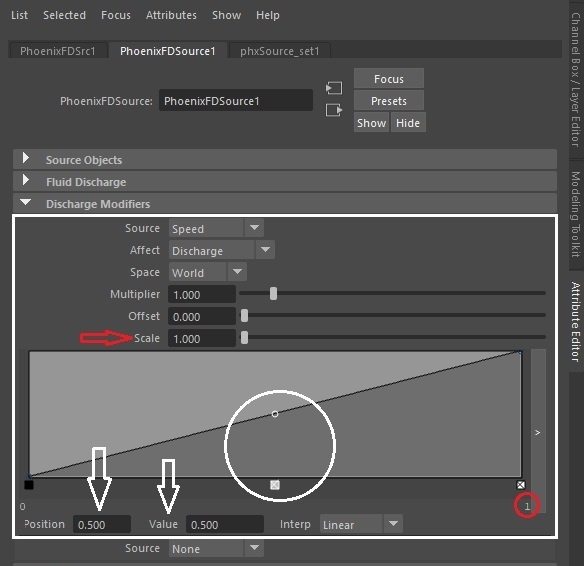
Select PhoenixFDSrc1. In the Attribute Editor, go to the Discharge Modifiers tab and next to Source, select Speed from the dropdown menu.
Take note of the options that appear. The Scale parameter extends the X axis of the graph thus providing finer control over the emission.
Speed is computed for each frame as the length of the vector the object or vertex is travelling along. Depending on the scale of your scene, this may be a very low or a very large value.
Set the Space to World and the Scale to 1.
The Y axis on the graph is the value produced for the corresponding point in X.
In this example, a Speed of 0.5 world units per frame produces a discharge multiplier of 0.5.
Start the Simulation.
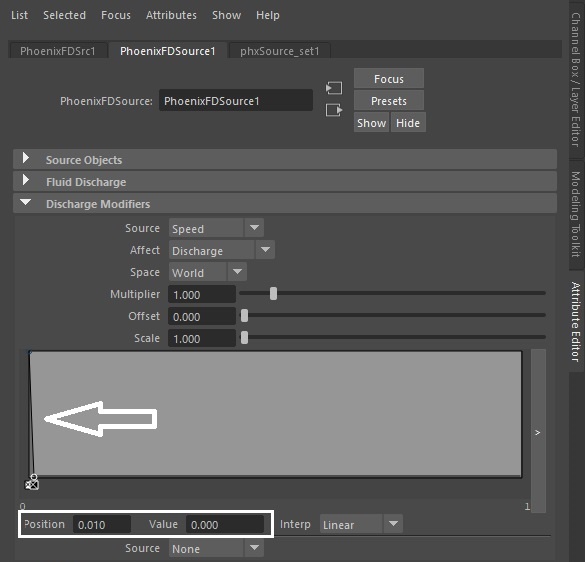
Note that no fire is produced. This is because our object is stationary and the modifier is multiplying the discharge by 0.
Increase the Value for Position 0 on the Discharge modifier's ramp to 1, and for Position 0.01, set it to 0.
This means that whenever the object is at rest, emission will occur but the moment the object starts moving, the Discharge will be 0.
Add some animation to your object and Start the simulation to test this.
At the moment, the object is emitting fire only while stationary.
To reverse this effect (i.e. to have it emit fire only when moving), you need to reverse the Discharge diagram.
The X-axis of the diagram is the input values, the Y-axis is the result. Therefore, for input values of 0 (i.e. speed is 0, object is stationary), the Y-axis value should also be zero. When that condition is met, the object won't emit when its standing still because its speed is 0.
You can see this setup on the image to the right.

You can hit Start to see how that looks.