This page provides a tutorial for manually creating fuel and burning effects for a fire simulation.
Overview
This is an Intermediate Level tutorial. Even though no previous knowledge of Phoenix is required to follow along, re-purposing the setup shown here to another shot may require a deeper understanding of the host platform's tools, and some modifications of the simulation settings.
The instructions on this page will guide you in modifying a fire simulation to add fuel and burning effects. The emitter object will emit fuel which ignites and produces smoke.
The Burning Fuel with Smoke Quick Simulation button on the Phoenix Shelf will produce a similar but more refined result to the steps below.
Steps
Start by creating a new project from File → Project Window.
Click the New button at the top right corner of the window and give it a name.
This is important because Phoenix stores the simulation data in the data directory of the currently selected project. You can manually point to a different project directory from the File → Set Project... dialog.
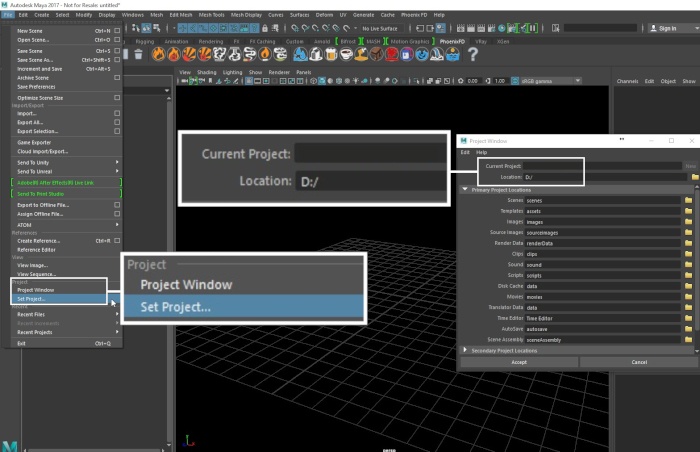
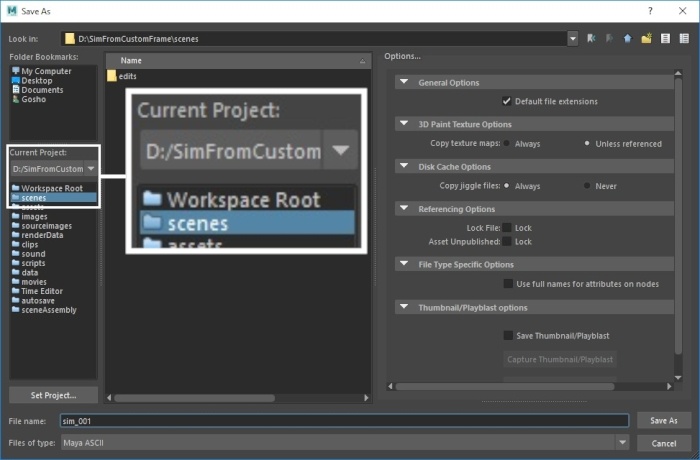
Go to File → Save As and select the scenes directory of your current project.
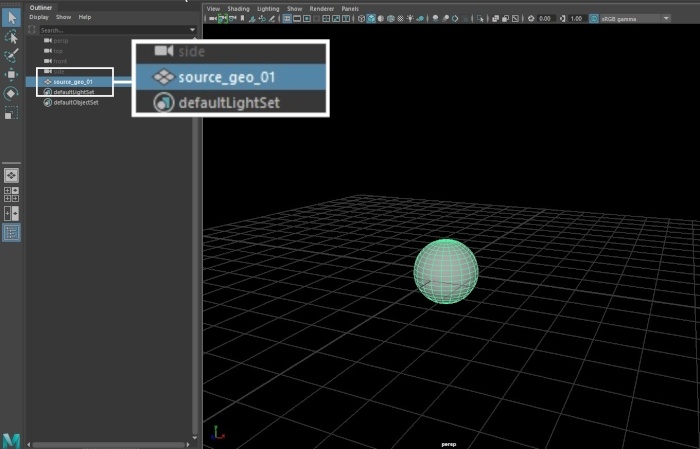
Create a piece of geometry to use as an emitter. In this example, a default poly sphere is used.
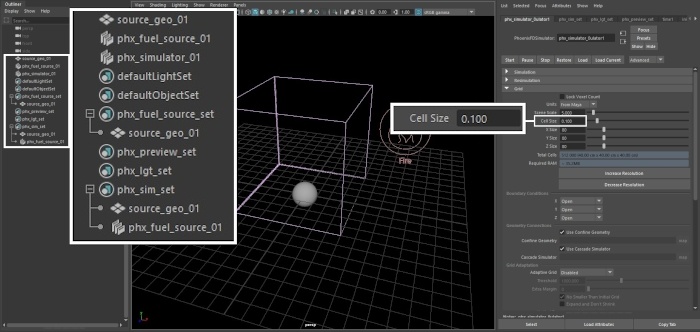
Rename the geometry to source_geo_01.
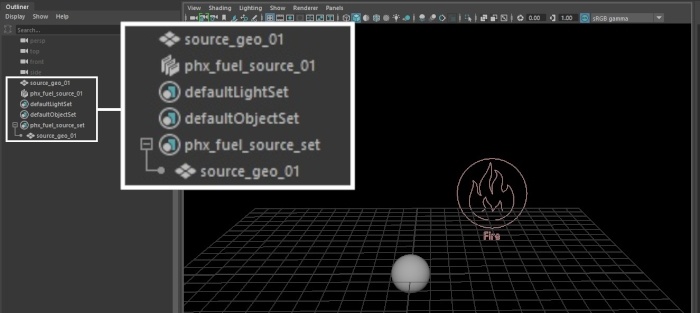
Add a Phoenix Fire/Smoke Source.
Rename it to phx_fuel_source_01 and the generated set to phx_fuel_source_set.
Middle mouse drag the source_geo into the fuel source set.
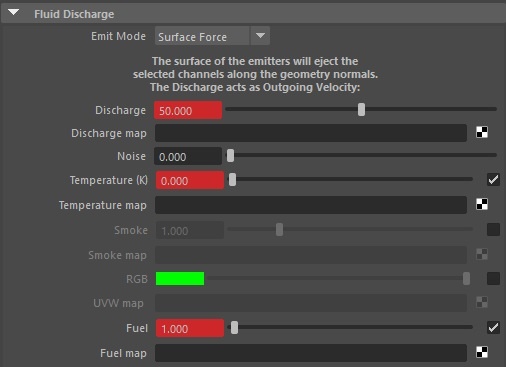
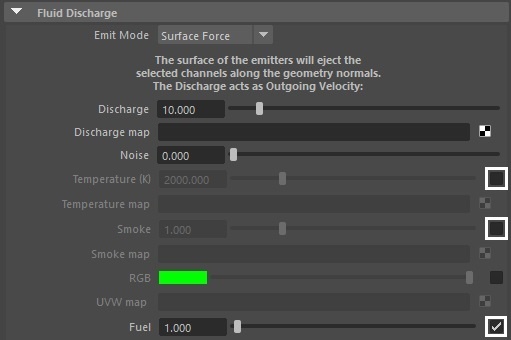
With the Fuel source selected, go to the Attribute Editor and disable Temperature and Smoke emission.
Instead, Enable Fuel.
Using Temperature and Smoke to generate fire and explosive effects is a perfectly valid approach. However, this tutorial is focused on setting up a simulation that uses Fuel to produce burning which in turn adds smoke and heat into the container.
Create a Phoenix Container and position it around the source geometry.
Reduce the Cell Size to 0.1.
Rename the automatically generated sets to phx_preview_set, phx_lgt_set and phx_sim_set.
Middle mouse drag the source geometry and the Phoenix fuel source into the sim set.
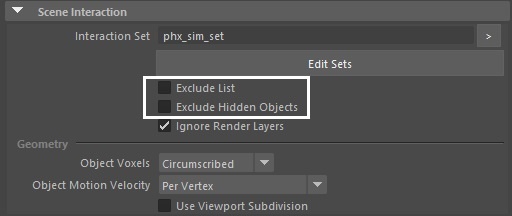
In the Scene Interaction tab, uncheck Exclude List and Exclude Hidden Objects. This gives us full control over what goes into the Phoenix simulation and thus, if any issues arise, makes troubleshooting much easier.
Now that Exclude List is unchecked, the phx_sim_set works as an include list - in other words, you need to add any geometry or source that will be used in the simulation.
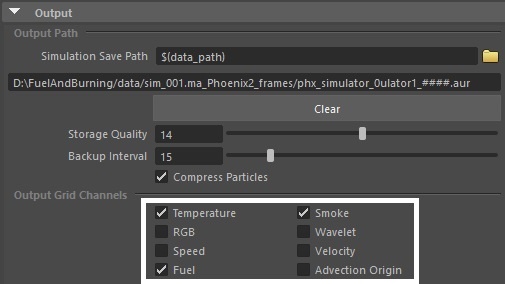
Head over to the Output tab and enable Fuel export.
Any channel that you want to preview in the Viewport has to be cached.
If your intention is to render the simulation with Motion Blur, Velocity channel export has to be enabled as well.
Start the simulation.
If everything is set up correctly, you should now be able to preview the Fuel channel by selecting Fuel in the Preview tab of the Simulator.
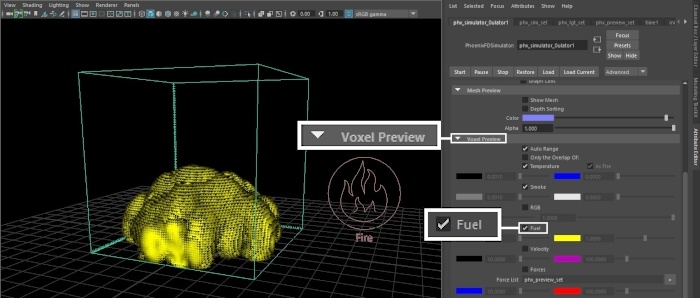
Note that despite having a lot of fuel in the container, no reaction is taking place. We need to enable burning.
In the Fuel tab of the Simulator, select Enable Burning.
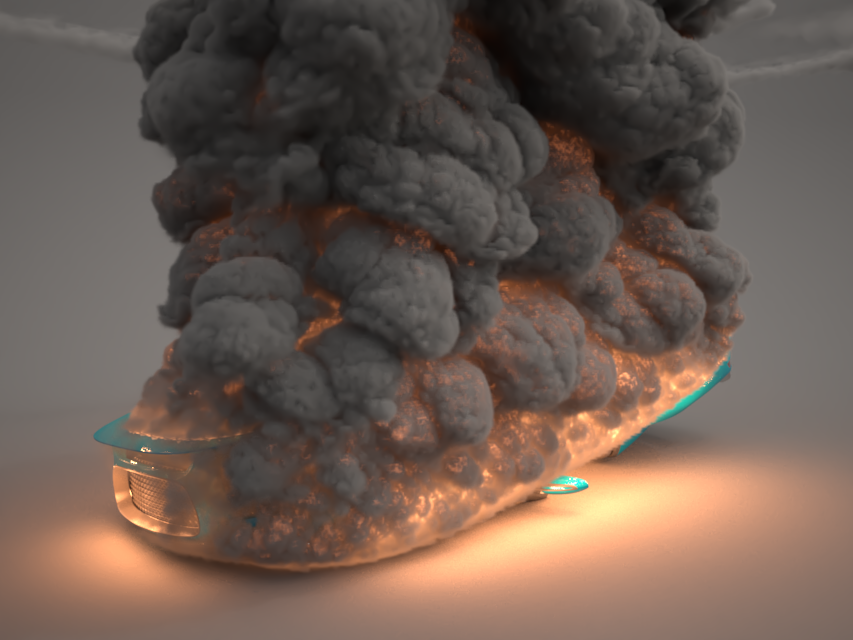
The burning process in Phoenix converts the fuel into smoke, releasing heat and increasing the volume. The amount of heat produced is controlled by the Energy parameter, and the volume growth is controlled by the Propagation parameter.
The burning process consumes oxygen. The oxygen level is not entered directly. Instead, the oxygen level is calculated as complementary fraction up to 1.0 for fuel, smoke, and oxygen combined. As an example, if the fuel value is 0.3 and smoke is 0.2, then oxygen is automatically calculated as 0.5 to give a sum of 1.0 for all three values.
In other words, you should be mindful of the amount of smoke produced by the simulation.
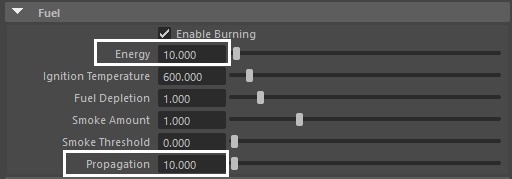
Energy - Specifies the energy released from burning a unit of fuel.
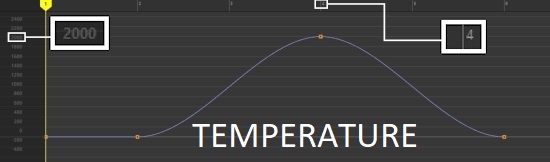
Ignition Temperature - Ignition temperature in degrees Kelvin. Keep in mind that the environment temperature is 300K.
Fuel Depletion - The rate at which the fuel burns out.
Smoke Amount - Multiplier for the amount of smoke produced during burning.
Smoke Threshold - When the oxygen is less than the fuel, this value controls how much of the burning fuel produces smoke. Higher values cause less of the burning fuel to produce smoke.
Propagation - Controls the propagation speed of the ignition front.
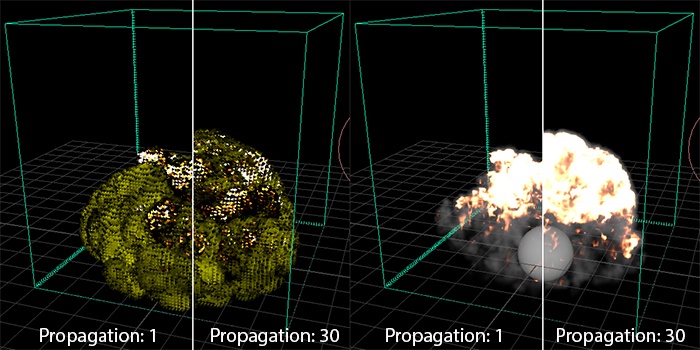
A high Propagation/Energy value produces an explosive effect.
To ignite the fuel, you need a source of Temperature.
You could either add an additional Phoenix Fire/Smoke source and disable the emission of all channels but Temperature, or alternatively, you could use the same phx_fuel_source_01 node and enable Temperature emission there.
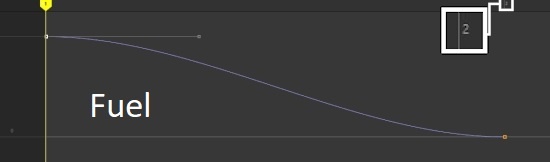
In this example, the Discharge, Temperature and Fuel parameters are animated such that Fuel is sourced into the simulation for the first 2 frames and then the Temperature emission starts.