This page provides information on the V-Ray light bake process with V-Ray for Unreal.
Overview
V-Ray Light Bake or just V-Ray Bake is the process of creating lightmaps with complex light interactions and diffuse interreflection using the V-Ray render engine and it's GI and Lighting calculations.
The light bake quality depends on the following:
the lightmap resolution of the meshes;
the lightmap UVs quality, better unwrapped UVs better bake quality;
- the V-Ray settings in the settings tab.
Please check the following before V-Ray Bake:
- Read the System Requirements
- Set GPU Render Device to GPU only
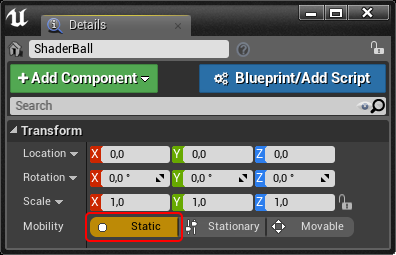
- Set all Actors ans Light in level to Static
Bake Settings
Below are mentioned all the settings and parameters that modify the quality of the V-Ray Bake.
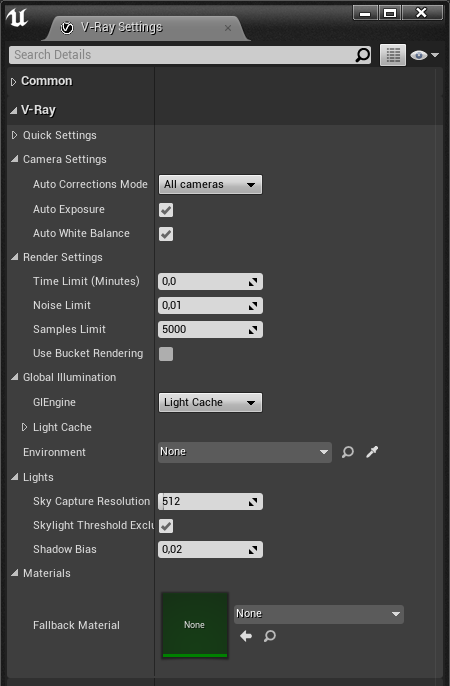
Camera Settings
Auto Correction Mode – Specifies which camera to use the automatic exposure and white balance setting.
All cameras
Cameras without exposure only
Auto Exposure – Automatically determines an appropriate exposure value for the render. It requires Light Cache to be set as a GI engine and Interactive turned off.
Auto White Balance – Automatically determines a suitable white balance value for the image. It requires Light Cache to be set as a GI engine and Interactive turned off.
Auto Exposure and Auto White Balance work only when using Light Cache as GI solution.
Uncheck Auto Exposure and Auto White Balance for faster bake.
Render Settings
Time Limit (Minutes) – Specifies the maximum time (in minutes) for refining the image.
Noise Limit – A threshold that determines when to stop refining a pixel. Higher values allow more noise in the image, but the render is faster. Lower values help reduce the noise, but take more time to render. A value of 0.0 traces the entire image unconditionally.
Sample Limit – Specifies the maximum number of samples per pixel for refining the image. V-Ray performs adaptive sampling on the image, trying to put more samples into areas with more noise.
Global Illumination
GI Engine – Specifies the type of secondary engine. Note that Brute force is always used as a primary engine.
Brute Force
GI Depth – The number of bounces for indirect illumination.
Light Cache
Subdivs – Determines how many paths are traced from the camera. The actual number of paths is the square of the subdivs (the default 500 subdivs mean that 250,000 paths will be traced from the camera).
Sample Size – Controls the size of the individual light cache samples.
Retrace – Enables retracing of GI near corners. This helps prevent light leaks and flickering. The value specifies the extent to which GI near corners is retraced instead of being read from the light cache. A value of 0.0 disables retracing. A value of 2.0 is good for still images. Higher values will result in more rays traces at render time.
For better parity between Render and viewport we recommend to use Brute Force as a GI solution
Utilization
Low GPU Thread Priority – When enabled, V-Ray will try to lessen the load on GPUs working on displaying graphics to the monitor(s). This frees more resources to complete other processes and tasks for the OS. This is done by internally using a lower value for Ray bundle size for those GPUs with attached displays (Rays per pixel is still the same for all GPUs). This can affect the overall performance, and the render speed might be reduced. It is recommended to utilize a separate GPU for the display, if possible.
Rays Per Pixel – The number of rays that are traced for each pixel during one image pass. The greater the value, the smoother the picture from the very beginning of the rendering with GI, but interactivity might be significantly diminished. Increasing this value also reduces the amount of data transferred from the render servers back to the client machine..
Recommended value is 16 or higher. Rendering might take longer than usual with lower values.
Rays Bundle Size – Controls the number of rays that are sent to the V-Ray render servers for processing. When using distributed rendering, smaller sizes cause more frequent client-server communication with smaller network packets, thus decreasing the speed of the renderer but increasing the interactivity. Conversely, larger values increase the render speed, but decrease interactivity. Note that this number is not the exact amount of rays, but is proportional to it. It is not recommended to increase this value beyond 512.
Trace Depth – The maximum number of bounces that will be computed for reflections and refractions. The individual material reflection/refraction depth settings are still considered, as long as they don't exceed the value specified here.
Textures
Max Size – When the Mode parameter is set to Resize, this value specifies the resolution to which textures will be resized.
Distributed Rendering
On – Enables or disables distributed rendering for V-Ray for Unreal. Use the Render Servers list to specify the machines that will be used for distributed rendering.
Render Servers – Specifies the render servers. Click the + button to manually add a server by entering its IP address or network name followed by its port number (default is 20207) (e.g. 127.0.0.1:20207)
Usage Examples
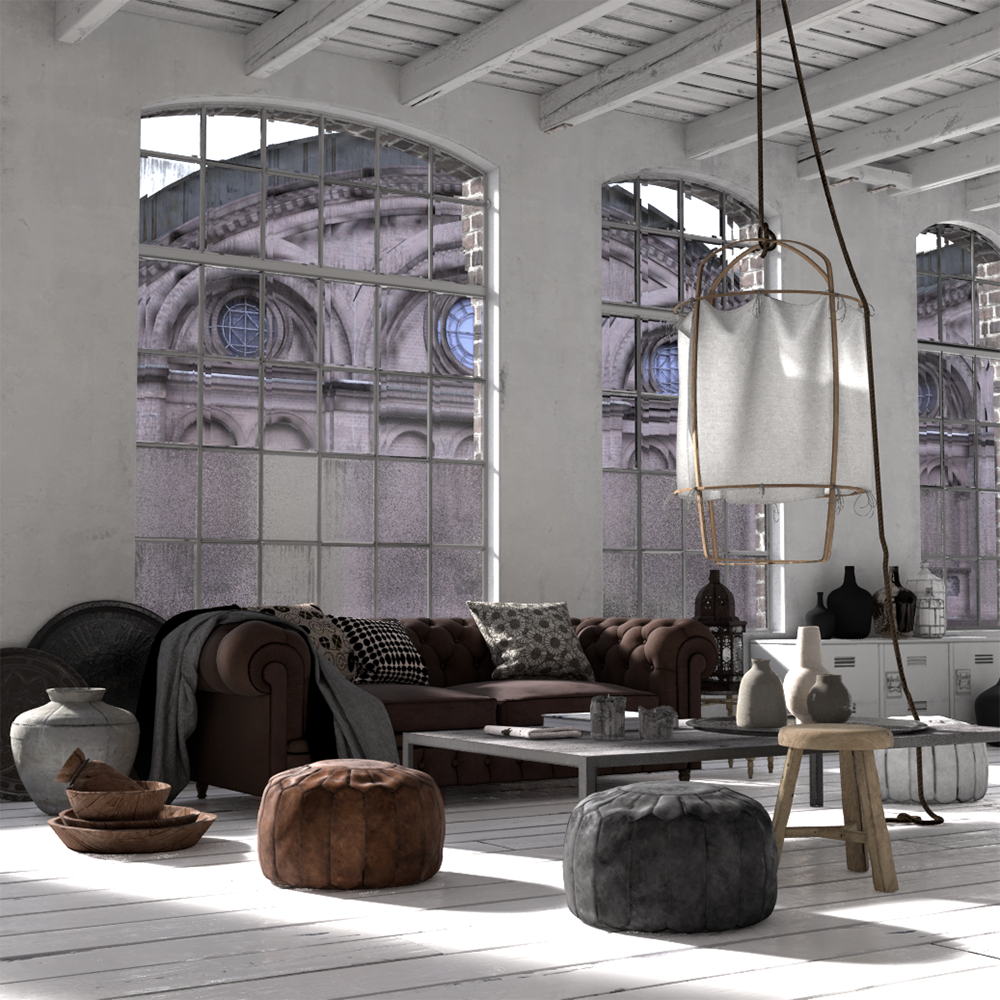
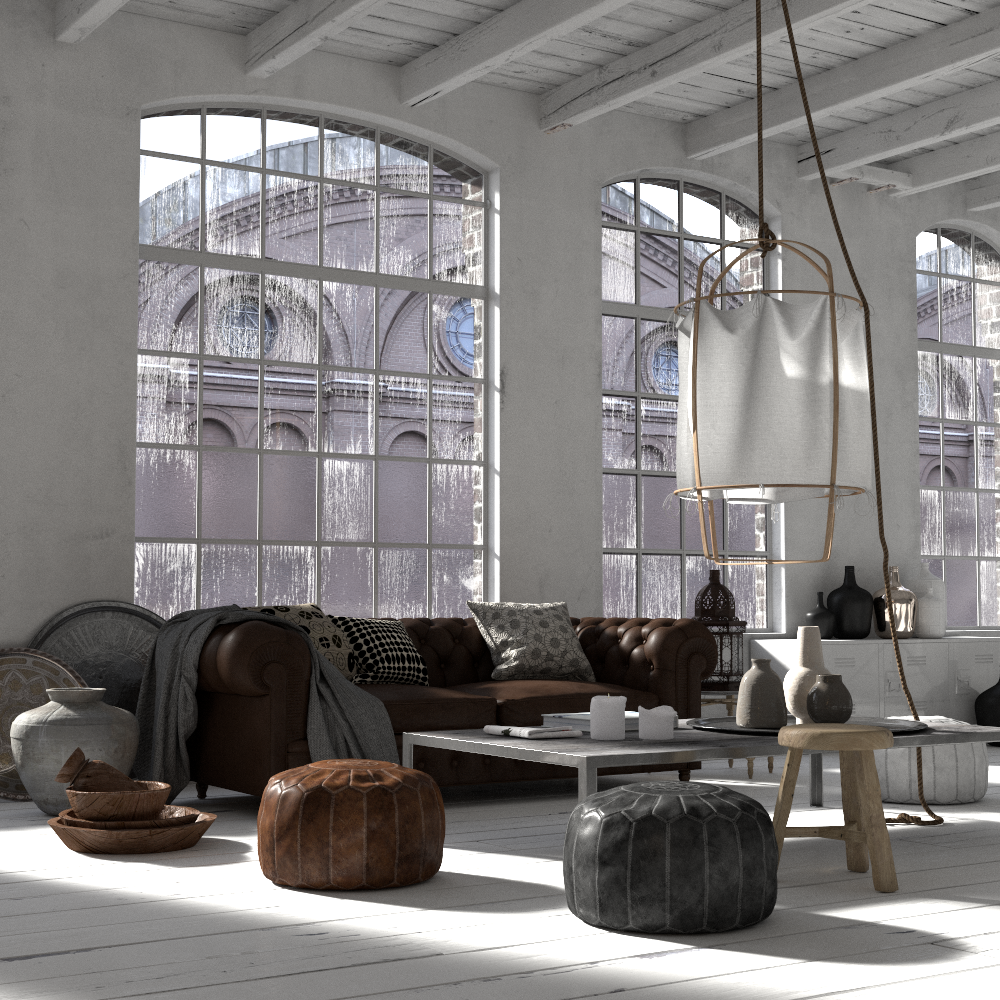
In this short example, a .vrscene file is loaded. Before we bake the lighting we first make sure that all lights in the scene are set to Static. Next we click on the Bake button in the V-Ray drop-down. The VFB pop up and the lightmaps begin to render. When it is done they are encoded ad imported into Unreal. Finally we start the IPR rendering and start walking around to see the parity between the lightbake and the actual render.