![]()
Page History
This page provides information about the Velocity Color Channel.
Overview
...
| Section | ||||||||||||||||
|---|---|---|---|---|---|---|---|---|---|---|---|---|---|---|---|---|
|
UI Path
...
||Node Editor|| > Add > Render Channels > Velocity
Node
...
| Section | |||||||||||||||
|---|---|---|---|---|---|---|---|---|---|---|---|---|---|---|---|
|

Suggested Workflow
...
A common workflow for using this render element is to first locate the frame in the sequence that has the most motion, render the frame with the Velocity render channel enabled, and then note the Max Velocity in last frame value, which is displayed in the parameters for this render element. Finally, enter this value (or a slightly larger value) for the Max Velocity parameter when rendering the entire sequence. This workflow provides the maximum range of colors in the Velocity channel for the most flexibility during compositing.
Common Uses
...
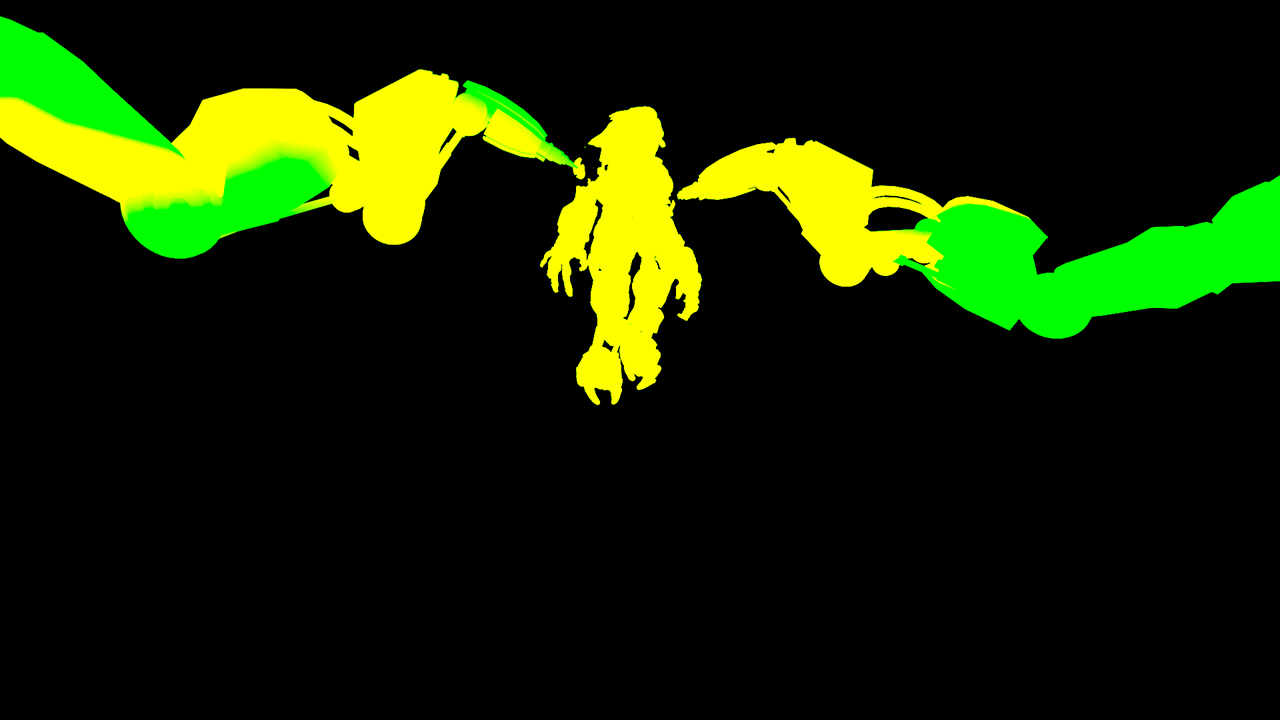
The Velocity Color Channel is useful for adding motion blur in post production at a composite level without the need for re-rendering. In the composite shown below, motion blur was added based on the amount by which the color differs from medium gray. The Robot arms and the creature that were given a pale yellow color in the render element are the most blurred.
| Section | ||||||||||||||||||||||||||||||||
|---|---|---|---|---|---|---|---|---|---|---|---|---|---|---|---|---|---|---|---|---|---|---|---|---|---|---|---|---|---|---|---|---|
|


Notes
...
| Fancy Bullets | ||
|---|---|---|
| ||
|