
This page provides information about the Velocity Color Channel.
Overview
The Velocity Color Channel stores surface velocity for moving objects in the scene with different colors representing different velocities. Each moving object is rendered with a flat color or gradient. It is commonly used to create mattes for adding motion blur in a composite.
The shading in the Velocity is determined by the degree of motion for each object's pivot point. The object's motion between the current frame and the next frame on the X, Y, and Z axes is mapped to R, G, and B components, with movement along the negative axis as 0 and movement along the positive axis as the maximum value. For example, a white object has moved at the maximum velocity on all three axes in a positive direction, while a black object has moved at the maximum velocity in negative direction on all three axes. A pale yellow object has moved a great deal on all three axes in the positive direction, but mostly on X and Y, while a dark purple object has moved on the -X and -Z axes. A medium gray color indicates no motion.
Because of the relationship between XYZ motion and RGB colors, the Velocity Render Element can be easily split into R, G, and B components during the compositing process and each direction can be handled separately or together to add motion blur.
UI Path
||Node Editor|| > Add > Render Channels > Velocity
Node
Name – The name of the render element.
Max. Velocity – When the Clamp Velocity check box is enabled this value specifies an upper limit for the velocity.
Max. Last – Specifies an upper limit for the velocity in the last frame of the animation.
Clamp Velocity – Enables the clamping of the velocity information to a certain upper limit specified by the Max. Velocity parameter.
Ignore Z – When enabled, the movement in the directions towards and away from the render camera is ignored when exporting the velocity render element.
Filtering – Enables or disables the AA filtering for the current render channel.

Suggested Workflow
A common workflow for using this render element is to first locate the frame in the sequence that has the most motion, render the frame with the Velocity render channel enabled, and then note the Max Velocity in last frame value, which is displayed in the parameters for this render element. Finally, enter this value (or a slightly larger value) for the Max Velocity parameter when rendering the entire sequence. This workflow provides the maximum range of colors in the Velocity channel for the most flexibility during compositing.
Common Uses
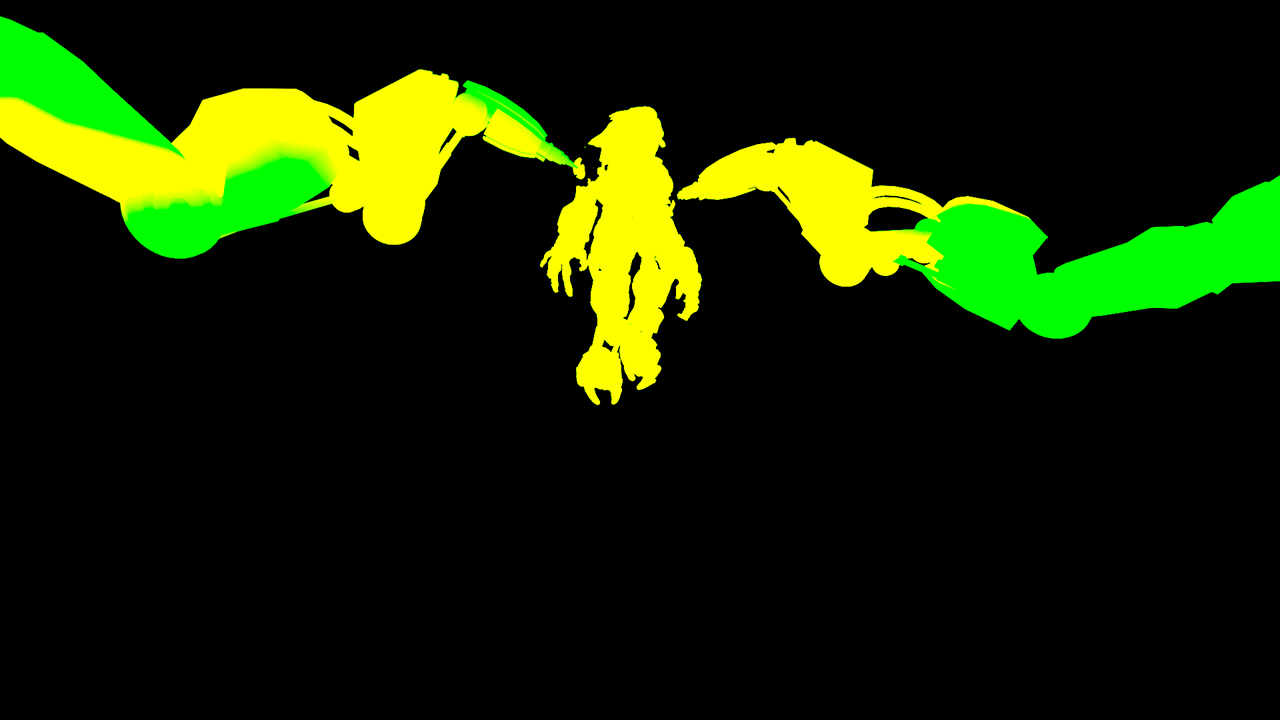
The Velocity Color Channel is useful for adding motion blur in post production at a composite level without the need for re-rendering. In the composite shown below, motion blur was added based on the amount by which the color differs from medium gray. The Robot arms and the creature that were given a pale yellow color in the render element are the most blurred.
Velocity Render Element

Original Beauty Composite

Beauty Composite with motion blur added using the Velocity Render Element
Notes
- It is recommended to disable this Render Element when rendering with Motion Blur. This channel generated when 3D motion blur is enabled in V-Ray. However, the element will also be motion blurred along with the rest of the image. This will make the Render element not usable in compositing.