![]()
Page History
...
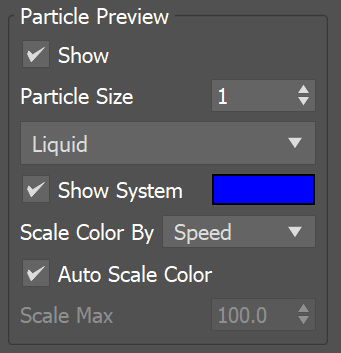
Meanwhile, the Particle Preview section lets you to control the visibility of different Particle Types, such as Drag particles emitted from a Fire Source, and manage their preview color.
...
| UI Text Box | ||
|---|---|---|
| ||
UI Path: ||Select Fire Smoke Simulator | FireSmokeSim object|| > Modify panel > Preview rollout |
...
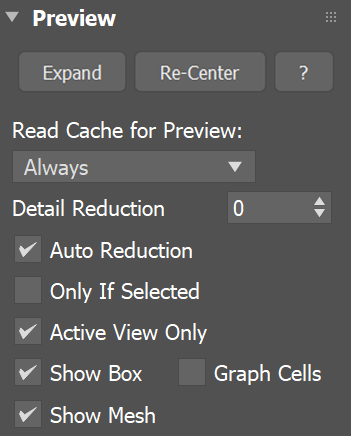
General
...
| Section | |||||||||||||||||
|---|---|---|---|---|---|---|---|---|---|---|---|---|---|---|---|---|---|
|
| Anchor |
|---|
...
|
...
|
...
GPU Shaded Preview
...
| UI Text Box | ||
|---|---|---|
| ||
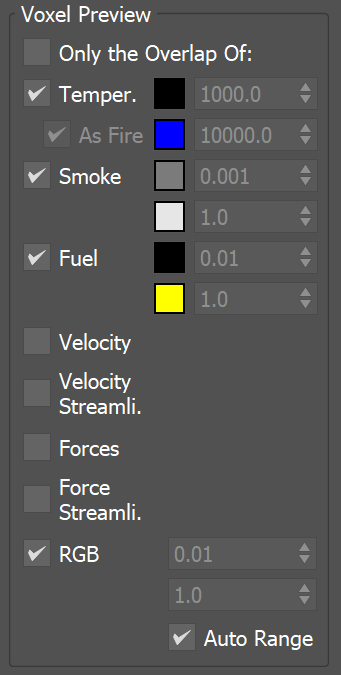
The Voxel Preview displays the Grid Channel content of each cell. Phoenix can only preview the channels present in the cache file for the current frame. All enabled channels are drawn if their content is between the corresponding thresholds. To see the list of available channels and their ranges for an input sim cache, go to the Cache File Content section of the Simulation rollout. You can also find more info on the Grid Channel Ranges page. Phoenix GPU Preview shows a detailed Viewport Preview for Fire/Smoke simulations, by shading the Simulator directly inside the viewport, using the current Volumetric Options. The preview works in real time, so you can use it to quickly preview how changing volumetric options and curves affects the look of the simulation. You can analyze their effect on the simulation’s appearance and make further iterations, without having to render. The GPU Preview can also be used as an extremely basic renderer, since it can automatically save out images during simulation. This can be a useful and fast way to do a previsualization of your sequence, and review your simulation in motion. |
| ui-textui-text-box | ||
|---|---|---|
| ||
Note that you can also specify the Voxel Preview value range for any Grid Channel, if you disable the Auto Range option. For example, you could enable only Smoke, and specify the range to be between 0.7 and 1.0, so that you can see where the smoke is getting thicker. Grid Smoke Channel values that are below 0.7, or above 1.0, would not appear in the preview at all. |
| Section | ||||||||||||||||||||
|---|---|---|---|---|---|---|---|---|---|---|---|---|---|---|---|---|---|---|---|---|
|

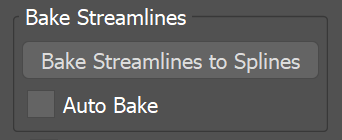
Bake Streamlines
| Section | |||||||||||||||
|---|---|---|---|---|---|---|---|---|---|---|---|---|---|---|---|
|
Particle Preview
| UI Text Box | ||
|---|---|---|
| ||
The parameters here control the visualization of Particle Types generated by the Simulator. Phoenix can only preview the Particle Types present in the cache file for the current frame, such as Drag particles emitted using a Fire Source. |
GPU Preview is not a replacement for rendering. In order to display in real time, the preview ignores Displacement, as well as any volumetric texture mapping of the Fire or Smoke. There are also some limitations as to how it displays volumes when geometries intersect the sim, or are inside the grid. Finally, all lights are treated as directional, so using dome lights, area lights or global illumination would produce different render results than the GPU Preview. If you need to iterate on the final look of the simulation with complex lighting setups, you should use V-Ray GPU IPR, or another interactive rendering solution. |
| Section | |||||||||||||||||||||||||||||||||||||||||||||||||||||||||||||||||||||||
|---|---|---|---|---|---|---|---|---|---|---|---|---|---|---|---|---|---|---|---|---|---|---|---|---|---|---|---|---|---|---|---|---|---|---|---|---|---|---|---|---|---|---|---|---|---|---|---|---|---|---|---|---|---|---|---|---|---|---|---|---|---|---|---|---|---|---|---|---|---|---|---|
|
| UI Expand | ||||||||||||||||||||||||||||||||||||
|---|---|---|---|---|---|---|---|---|---|---|---|---|---|---|---|---|---|---|---|---|---|---|---|---|---|---|---|---|---|---|---|---|---|---|---|---|
| ||||||||||||||||||||||||||||||||||||
|

| UI Text Box | |||||||||||||||||
|---|---|---|---|---|---|---|---|---|---|---|---|---|---|---|---|---|---|
| |||||||||||||||||
|
Particle Preview
...
| UI Text Box | ||
|---|---|---|
| ||
The parameters here control the visualization of Particle Types generated by the Simulator. Phoenix can only preview the Particle Types present in the cache file for the current frame, such as Drag particles emitted using a Fire Source. |
| UI Text Box | ||
|---|---|---|
| ||
You can specify a Particle Channel to use as a basis for adjusting the particle preview color, using the Scale | ||
| UI Text Box | ||
| ||
You can specify a Particle Channel to use as a basis for adjusting the particle preview color, using the Scale Color By option. If you export the Velocity particle channel when emitting Drag particles, you could then set the Scale Color By option to Speed, so that the faster the particles move, the whiter they appear in the preview. You can find more info on Particle Channels from the Particle Channel Ranges page. |
| Section | |||||||||||||||||||||
|---|---|---|---|---|---|---|---|---|---|---|---|---|---|---|---|---|---|---|---|---|---|
|

...
|
Voxel Preview
...
| UI Text Box | ||
|---|---|---|
| ||
The Slice preview displays only a single slice of voxels which can be convenient for debugging and fine-tuning a simulation. |
| Section | |||||||||||||||
|---|---|---|---|---|---|---|---|---|---|---|---|---|---|---|---|
|

...
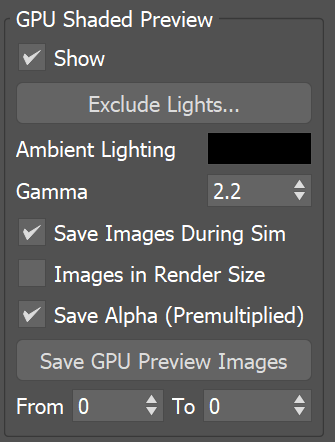
GPU Preview
| UI Text Box | ||
|---|---|---|
| ||
The Phoenix GPU Preview shows a detailed Viewport Preview for Fire/Smoke simulations, by shading the Simulator directly inside the viewport, using the current Volumetric Options. The preview works in real time, so you can use it to quickly preview how changing volumetric options and curves affects the look of the simulation. You can analyze their effect on the simulation’s appearance and make further iterations, without having to render. The GPU Preview can also be used as an extremely basic renderer, since it can automatically save out images during simulation. This can be a useful and fast way to do a previsualization of your sequence, and review your simulation in motion. |
| UI Text Box | ||
|---|---|---|
| ||
Note that the GPU Preview is not a replacement for rendering. In order to display in real time, the preview ignores Displacement, as well as any volumetric texture mapping of the Fire or Smoke. There are also some limitations as to how it displays volumes when geometries intersect the sim, or are inside the grid. Finally, all lights are treated as directional, so using dome lights, area lights or global illumination would produce different render results than the GPU Preview. If you need to iterate on the final look of the simulation with complex lighting setups, you should use V-Ray GPU IPR, or another interactive rendering solution. |
...
| title | GPU Preview as 3ds Max Extended Viewport |
|---|
...
| size | medium |
|---|---|
| type | tip |
Here is how the GPU Preview looks next to the voxel preview of a Phoenix Simulator:
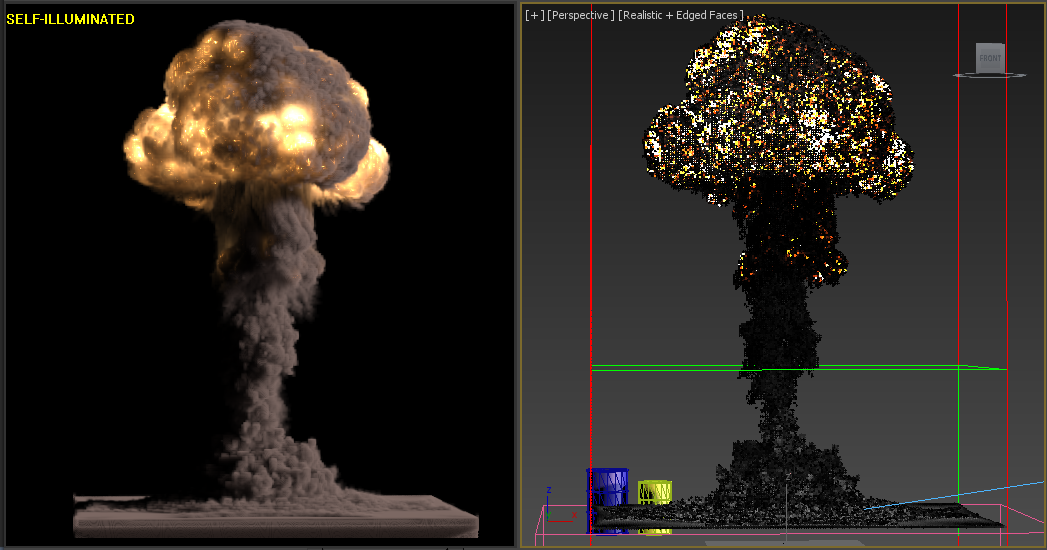
In 3ds Max 2015 and later, the real-time GPU preview of fire and smoke can be directly shown inside the viewport next to all other objects by just turning on the Enable In Viewport option.
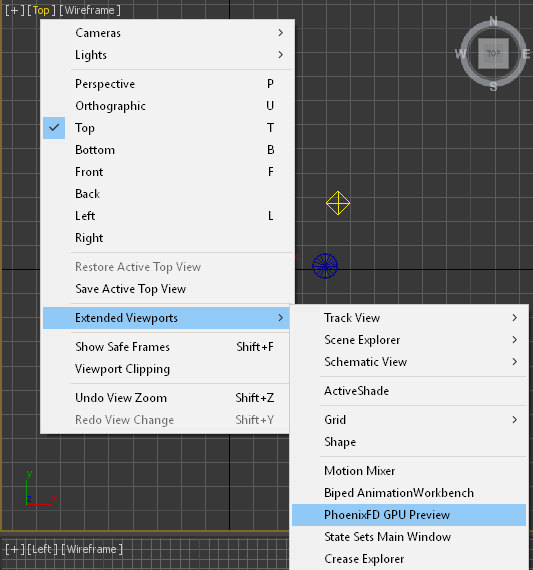
Alternatively, GPU preview can also be enabled in an extended viewport. The Phoenix FD GPU Preview extended viewport shows only the selected Simulator node and uses the parameters of the selected viewport. To enable it, right-click the viewport type and select Extended Viewports > Phoenix FD GPU Preview:
Voxel Preview displays the Grid Channel content of each cell. Phoenix can only preview the channels present in the cache file for the current frame. All enabled channels are drawn if their content is between the corresponding thresholds. To see the list of available channels and their ranges for an input sim cache, go to the Cache File Content section of the Simulation rollout. You can also find more info on the Grid Channel Ranges page. |
| UI Text Box | ||
|---|---|---|
| ||
Note that you can also specify the Voxel Preview value range for any Grid Channel, if you disable the Auto Range option. For example, you could enable only Smoke, and specify the range to be between 0.7 and 1.0, so that you can see where the smoke is getting thicker. Grid Smoke Channel values that are below 0.7, or above 1.0, would not appear in the preview at all. |
| Section | |||||||||||||||||||||||||
|---|---|---|---|---|---|---|---|---|---|---|---|---|---|---|---|---|---|---|---|---|---|---|---|---|---|
|
Bake Streamlines
...
| Section | |||||||||||||||
|---|---|---|---|---|---|---|---|---|---|---|---|---|---|---|---|
|
Slice Preview
...
| UI Text Box | ||
|---|---|---|
| ||
The Slice preview displays only a single slice of voxels which can be convenient for debugging and fine-tuning a simulation. |
| Section | |||||||||||||||
|---|---|---|---|---|---|---|---|---|---|---|---|---|---|---|---|
|
...
| Section | ||||||||||||||||||||||||||||||||||||||||||||||||||||||||||||||||||||||||||||||||||||||||||||
|---|---|---|---|---|---|---|---|---|---|---|---|---|---|---|---|---|---|---|---|---|---|---|---|---|---|---|---|---|---|---|---|---|---|---|---|---|---|---|---|---|---|---|---|---|---|---|---|---|---|---|---|---|---|---|---|---|---|---|---|---|---|---|---|---|---|---|---|---|---|---|---|---|---|---|---|---|---|---|---|---|---|---|---|---|---|---|---|---|---|---|---|---|
|

| UI Text Box | ||||||||||||||||
|---|---|---|---|---|---|---|---|---|---|---|---|---|---|---|---|---|
| ||||||||||||||||
|