![]()
Page History
This page describes how to import a the new V-Ray proxy into Maya that was previously exportedProxy in Maya.
Overview
...
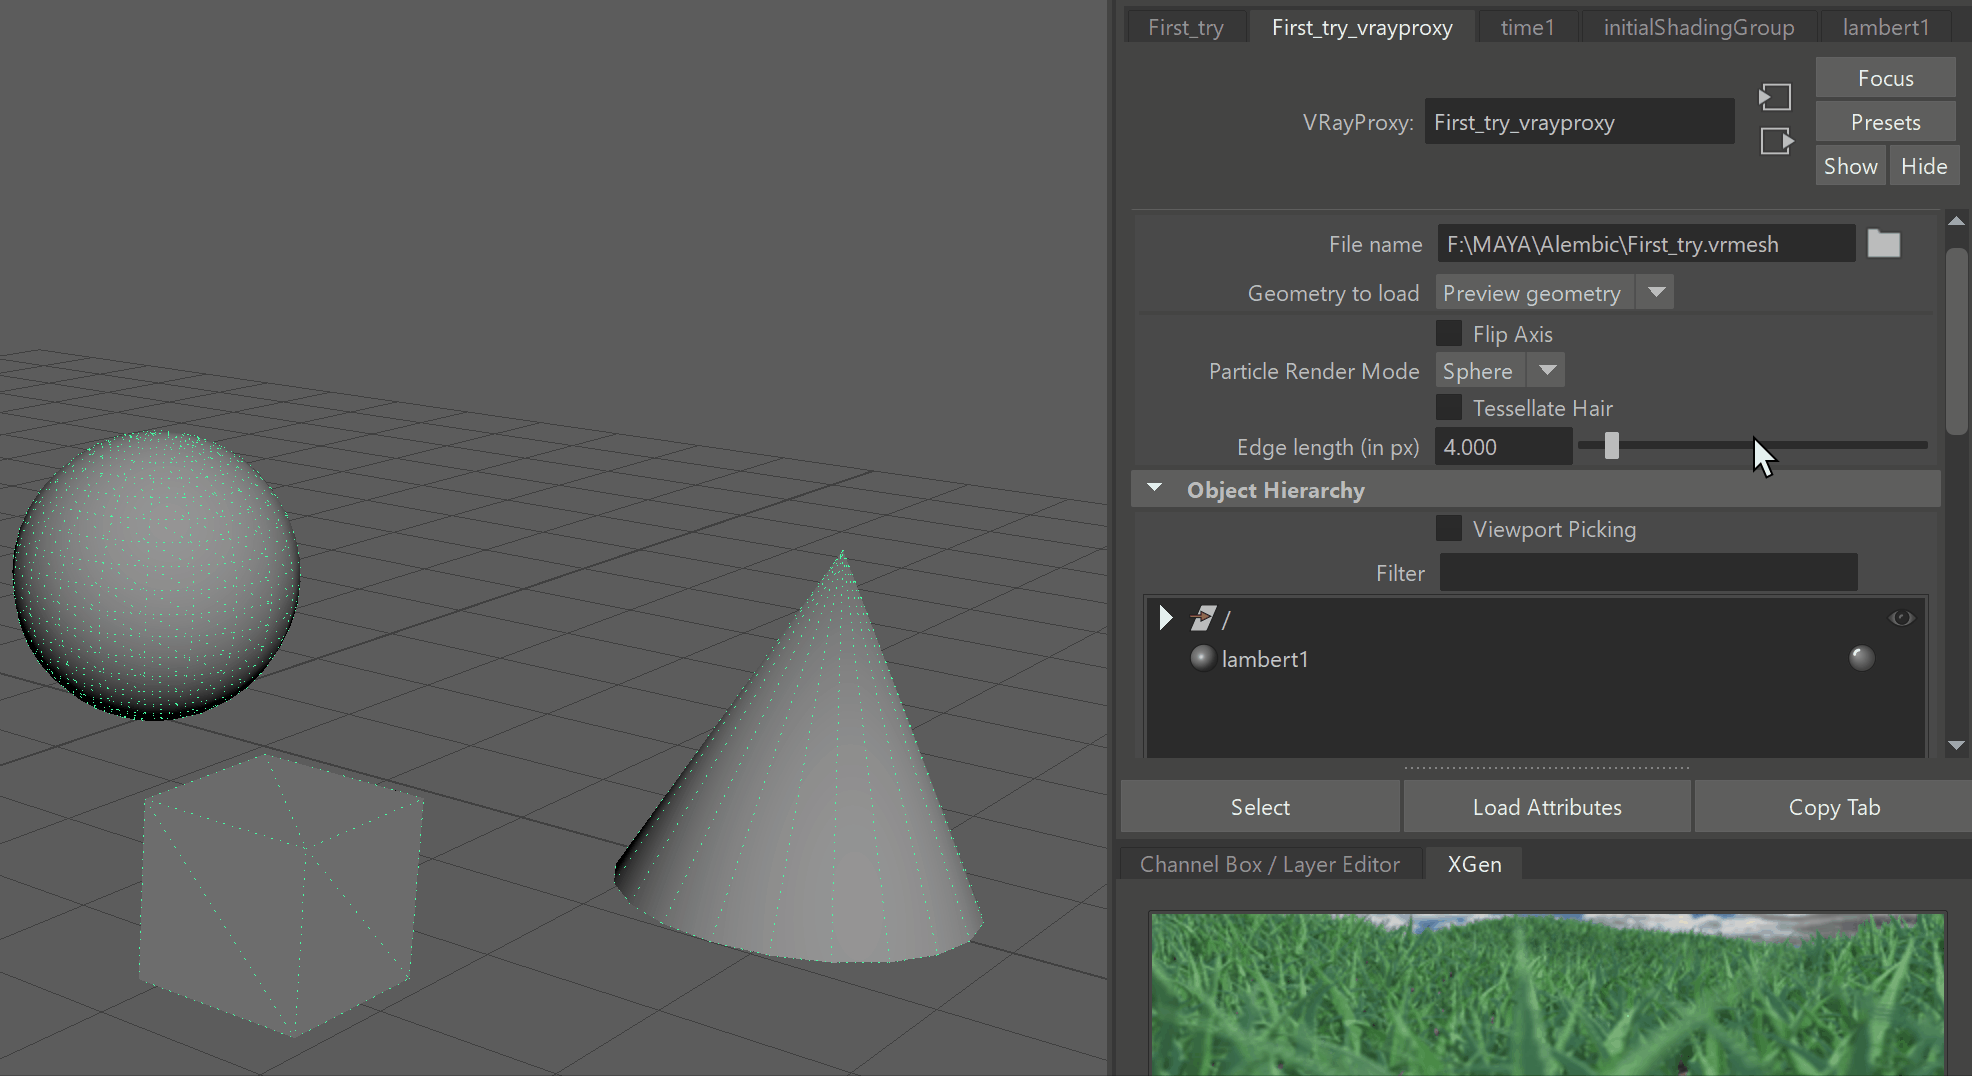
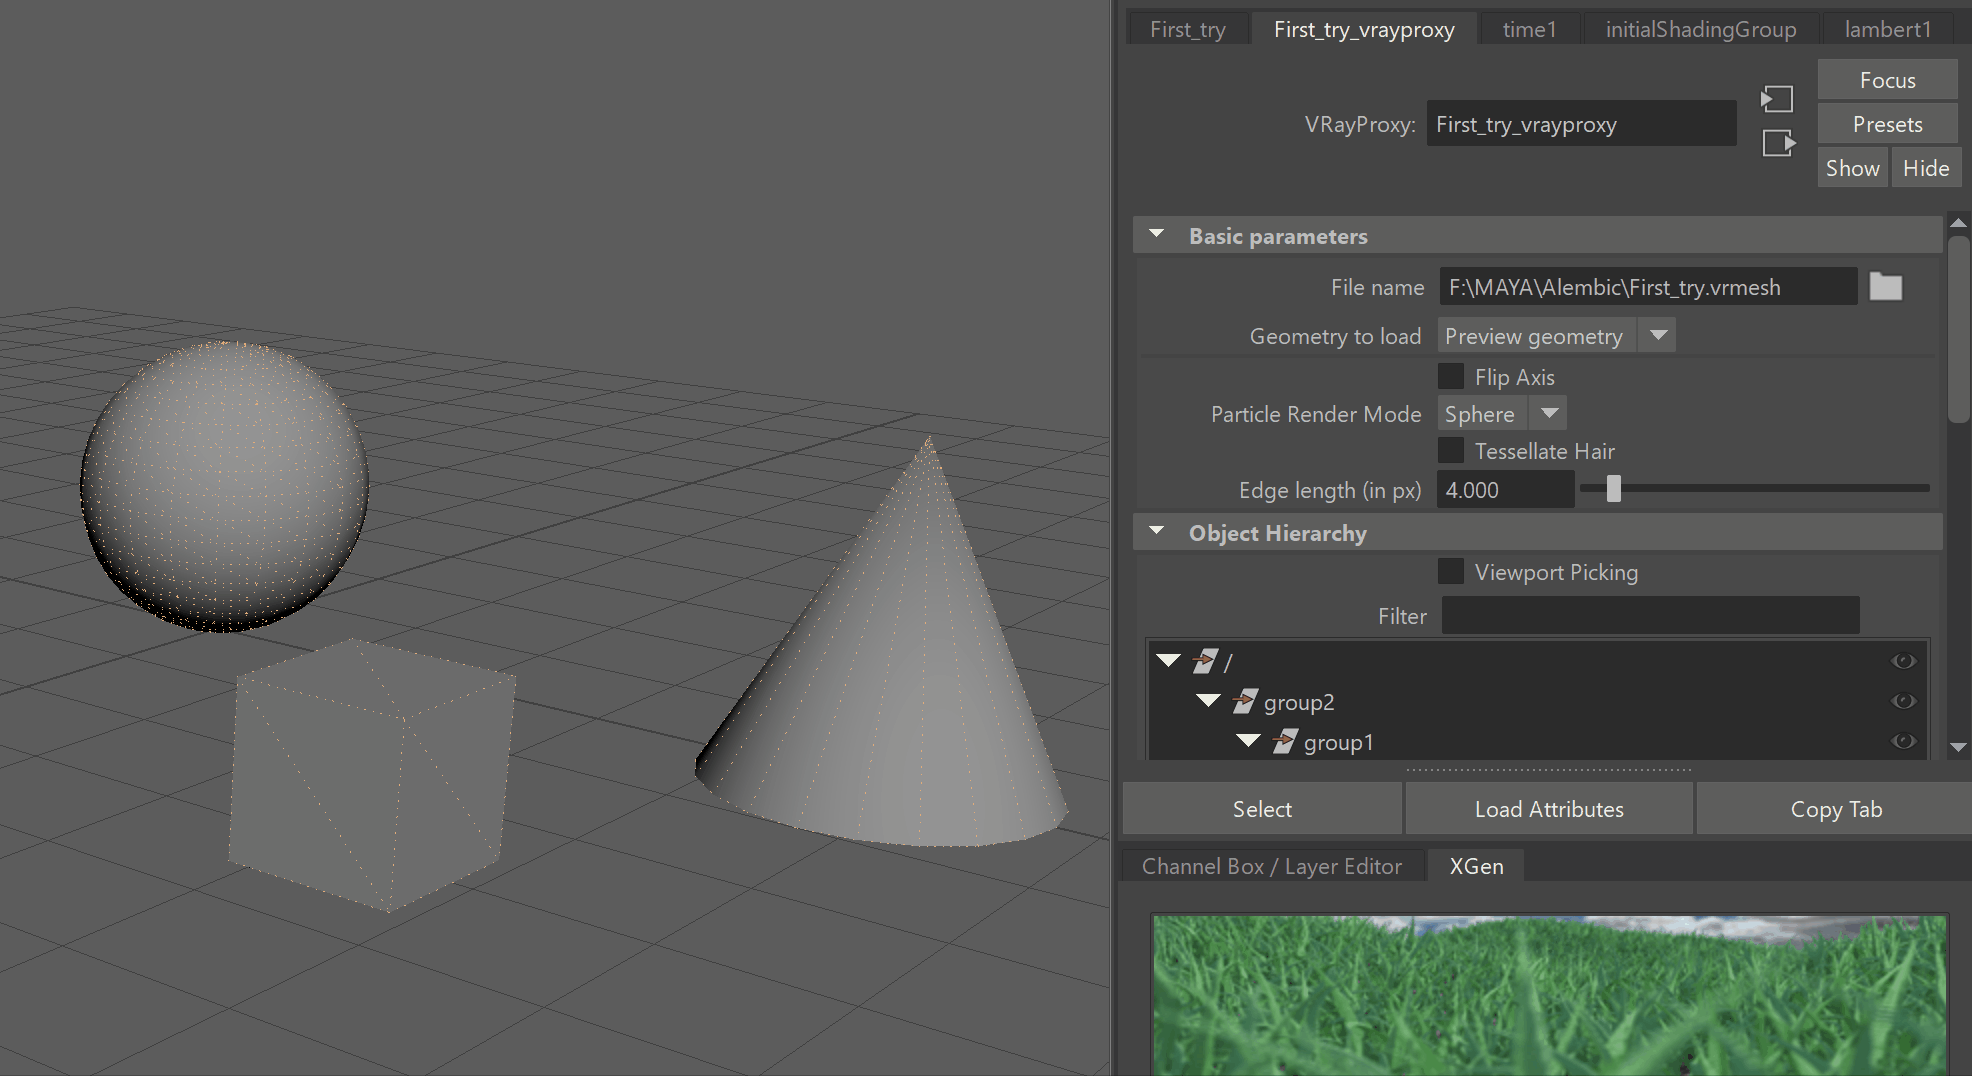
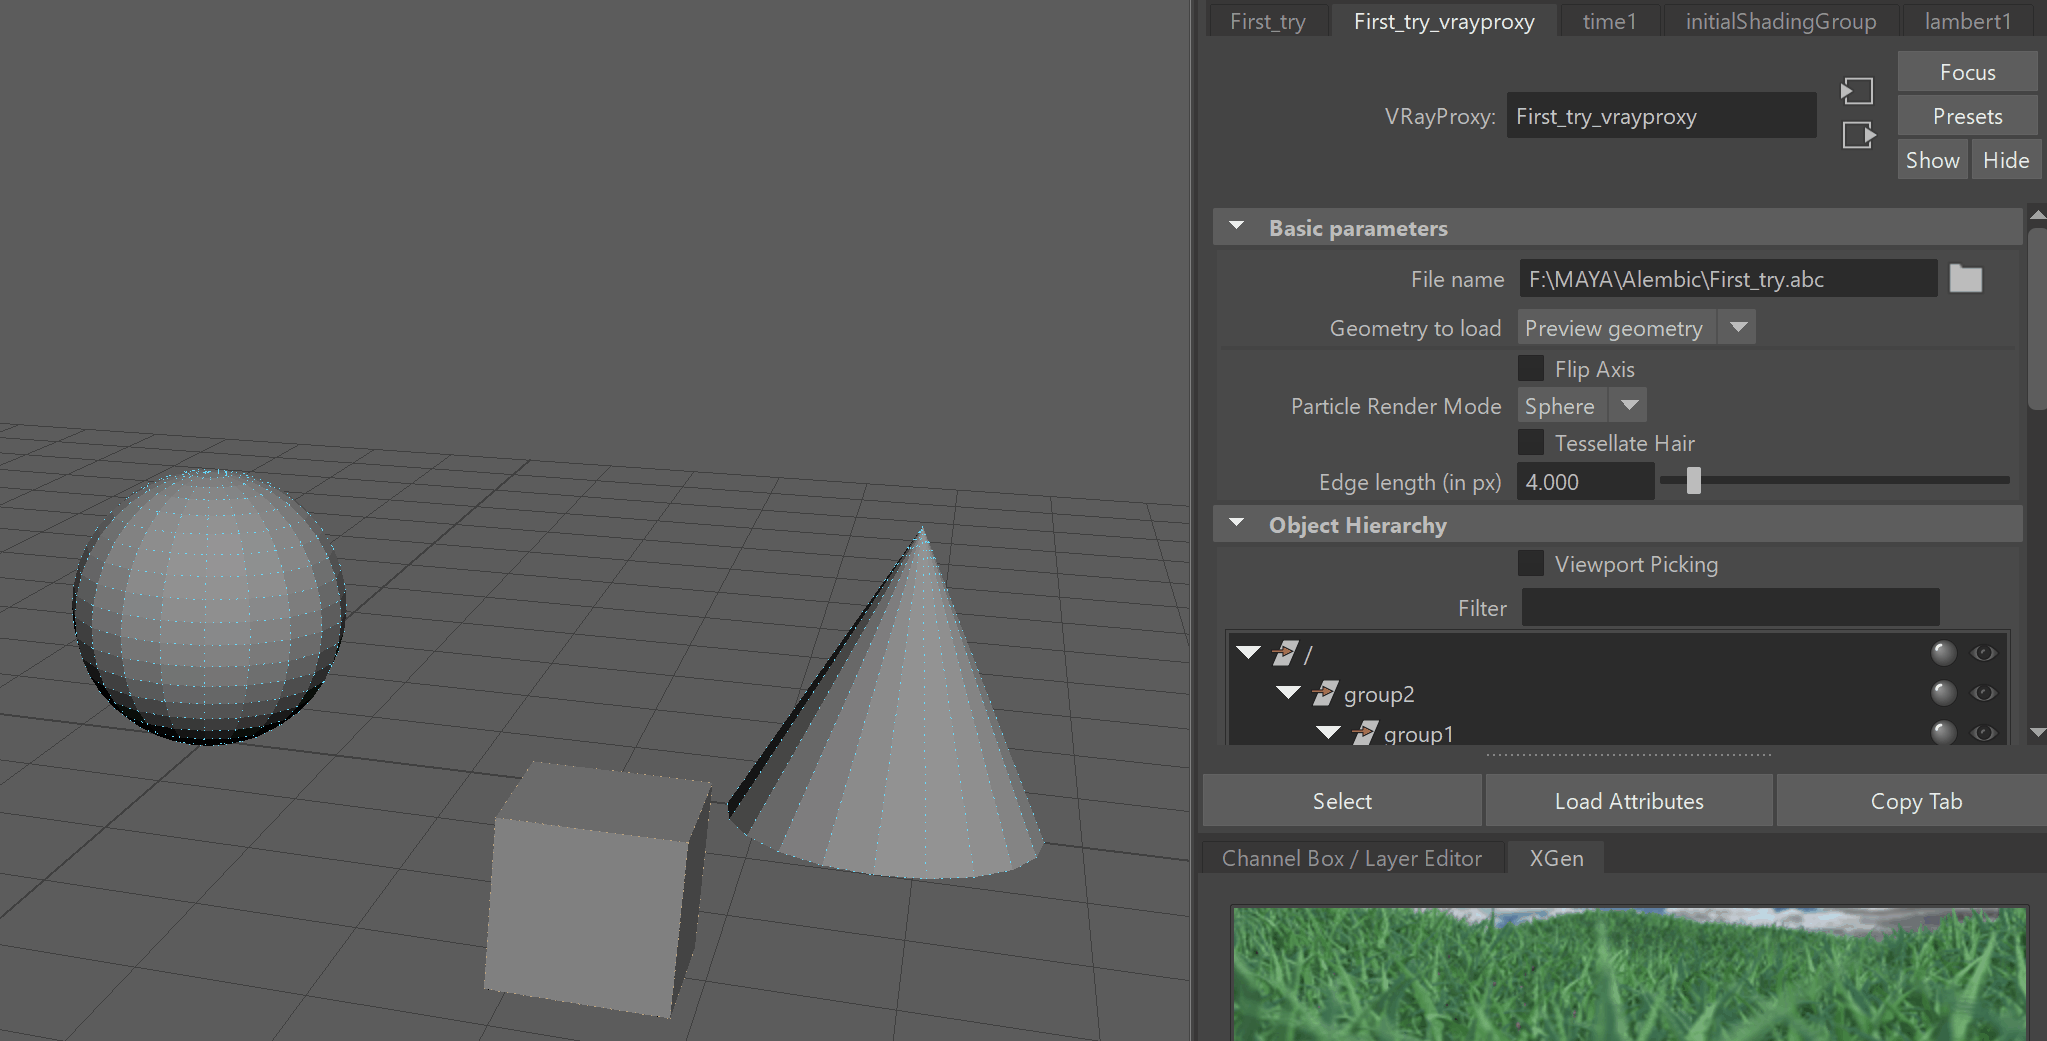
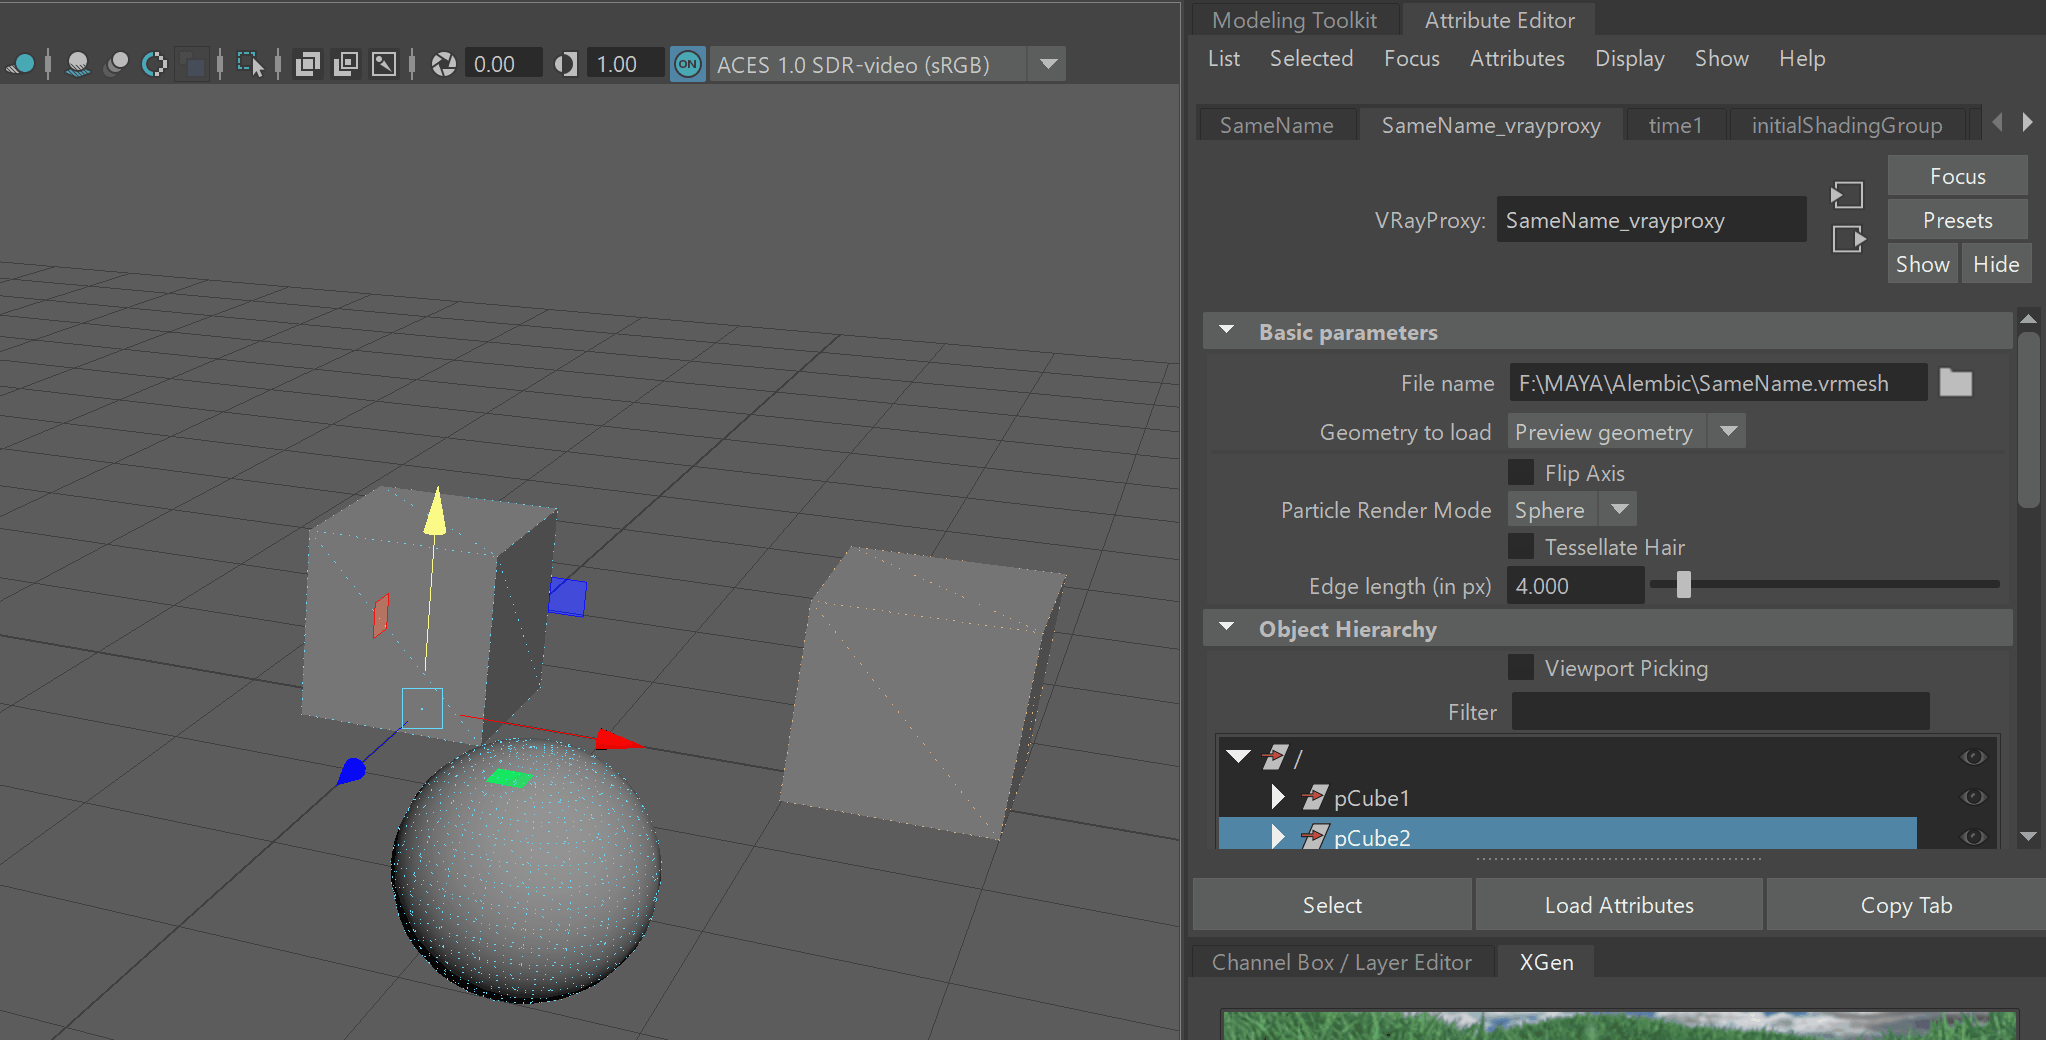
The proxy import process creates a VRayMesh node which imports VRayProxy loads geometry from a file on disk . The node can load V-Ray proxy (.vrmesh) and Alembic (.abc) files. After the V-Ray proxy is imported, its parameters appear in the Attribute Editor.
To see how to import a V-Ray Proxy using the "vrayCreateProxy" command, please refer to Scripting and Programming page.
Add some info about the difference between old and new Proxy node here.
UI Paths
| Section | ||||||||||||||||||||
|---|---|---|---|---|---|---|---|---|---|---|---|---|---|---|---|---|---|---|---|---|
|
| UI Text Box | ||
|---|---|---|
| ||
A VRayProxy object can also be created by dragging and dropping a .vrmesh or .abc file directly in your active viewport. |
Import V-Ray Proxy
This dialog sets basic import parameters and creates the VRayProxy node.
| Section | |||||||||||||||||||||||||||||||||||
|---|---|---|---|---|---|---|---|---|---|---|---|---|---|---|---|---|---|---|---|---|---|---|---|---|---|---|---|---|---|---|---|---|---|---|---|
|
at render time only. The geometry is not present in the scene, and does not use up any resources, except for the viewport preview. This allows rendering scenes with many millions of faces, more than Maya itself can handle.
The V-Ray Proxy in Maya is a VRayProxy node that loads the geometry from a file on disk. The node loads alembic ( .abc ) and V-Ray Proxy ( .vrmesh ) files. Any mesh can be exported to an .abc or .vrmesh file from Maya and then loaded as a proxy.
Meshes are exported to a special .vrmesh file format. This file contains all geometric information for a mesh such as vertices and face topology as well as texture channels, face material IDs, smoothing groups, and normals. In short, everything that is needed to render the mesh is included in the file. In addition, the mesh is preprocessed and subdivided into chunks for easier access. The file also contains a simplified version of the mesh used for preview purposes in the viewports. More information about the .vrmesh file format is available in the V-Ray SDK documentation that comes with the V-Ray for Maya installation.
| UI Text Box | ||
|---|---|---|
| ||
This page describes working with the new and improved VRayProxy node in V-Ray 5 that's simpler, faster and offers new and powerful features. Scenes using the old V-Ray Proxy can be easily converted to the new VRayProxy with the built-in converter found in the V-Ray menu > Tools > Convert to New V-Ray Proxy Node. |
After loading the file, the V-Ray Proxy attributes are accessible in the Attribute Editor.
To load files with V-Ray Proxy, see the Import V-Ray Proxy page.
To export meshes to V-Ray Proxy, see the Export Mesh to V-Ray Proxy page.
For more information on how to work with the V-Ray Proxy, see the V-Ray Proxy courseware page.
Basic Parameters
...
| Section | |||||||||||||||
|---|---|---|---|---|---|---|---|---|---|---|---|---|---|---|---|
| |||||||||||||||
| Section | |||||||||||||||
|
Basic Parameters
...
| width | 62% |
|---|
...
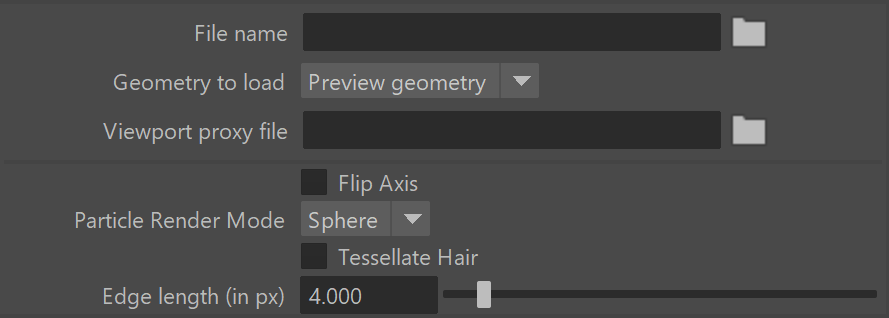
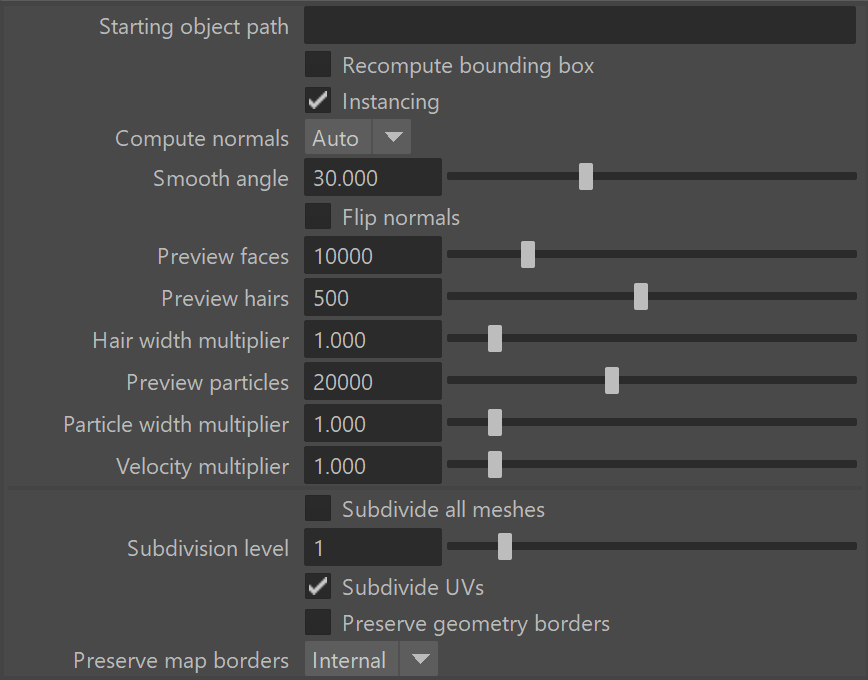
Geometry to load – Select the viewport preview mode from the drop down menu. This does not affect the final render. This parameter is Keyable and can be used as a driven key as Geom Type in the Channel Box.
Bounding box – The mesh is represented as a box scaled to fit the object in viewport.
Preview Geometry – The mesh is represented as a low poly proxy preview as defined in the .vrmesh file.
Full Geometry –
None –
Flip Axis – When enabled, this option switches the axis being used by the proxy as the vertical axis between Y and Z. It allows the user to align the vertical axis of the proxy with the vertical axis in the scene in cases where the proxy was not exported from Maya or when loading Alembic files.
Particle Render Mode – Controls how the particles in the proxy are rendered in the viewports. The available options are Point and Sphere.
Tessellate Hair – When enabled, tessellates hair strands for files containing hair.
Edge length (in pix) – Specifies hair edge length in pixels for smoothing hair strands.
|
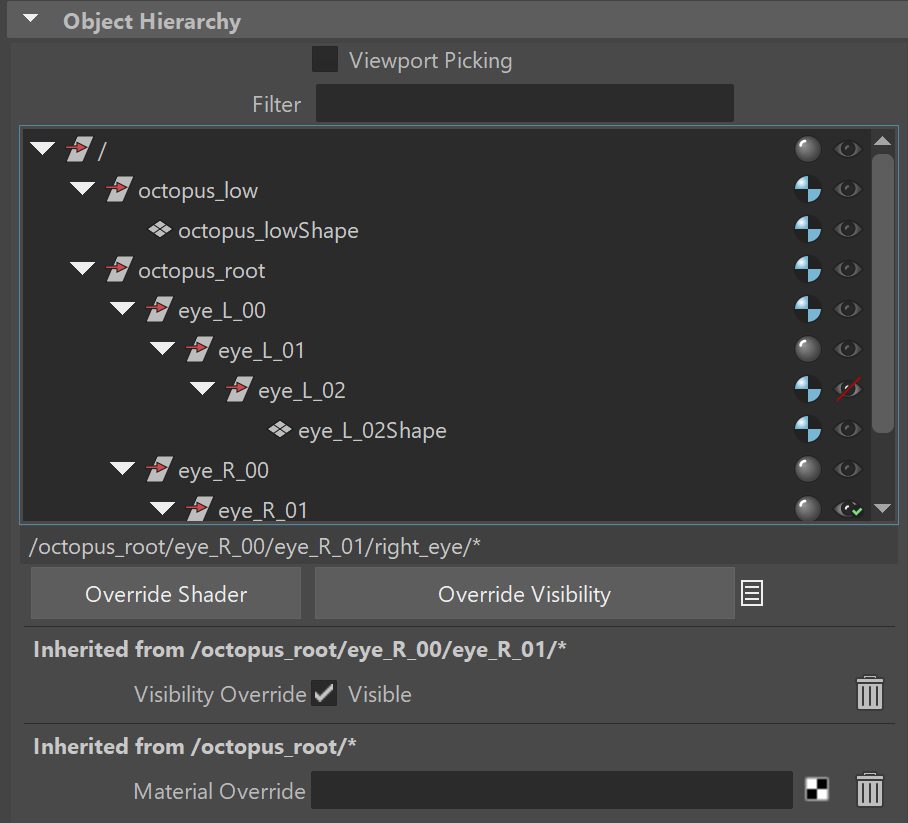
Object Hierarchy
...
| Section | |||||||||||||||||||||||||
|---|---|---|---|---|---|---|---|---|---|---|---|---|---|---|---|---|---|---|---|---|---|---|---|---|---|
|

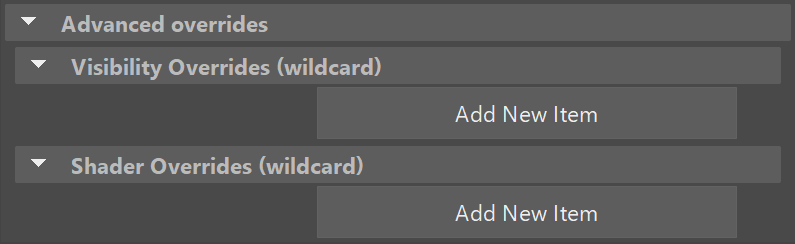
Advanced Overrides
...
| Section |
|---|
| Column | ||
|---|---|---|
| ||
|
| Column | ||
|---|---|---|
| ||
|

Alembic Layers
| Section | |||||||||||||||
|---|---|---|---|---|---|---|---|---|---|---|---|---|---|---|---|
|

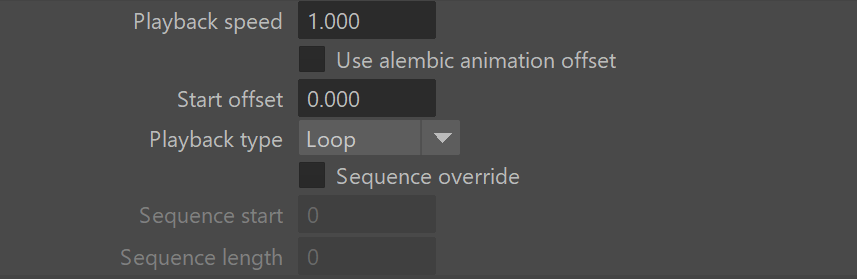
Animation Parameters
| Section | |||||||||||||||
|---|---|---|---|---|---|---|---|---|---|---|---|---|---|---|---|
|
Object Hierarchy
| Section | |||||||||||||||||||
|---|---|---|---|---|---|---|---|---|---|---|---|---|---|---|---|---|---|---|---|
| |||||||||||||||||||
Column |
|

...
| Anchor | ||||
|---|---|---|---|---|
|
...
Example: Applying Visibility Overrides
...
| Section | |||||||||||||||
|---|---|---|---|---|---|---|---|---|---|---|---|---|---|---|---|
|

|
| Anchor | ||||
|---|---|---|---|---|
|
...
Example: Applying Shader Overrides
...
| Section | |||||||||||||||
|---|---|---|---|---|---|---|---|---|---|---|---|---|---|---|---|
|
Point Cloud
| Section | |||||||||||||||
|---|---|---|---|---|---|---|---|---|---|---|---|---|---|---|---|
|

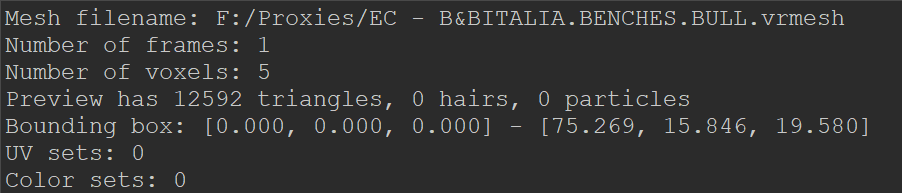
VRayMesh file info
| Section | |||||||||||||||
|---|---|---|---|---|---|---|---|---|---|---|---|---|---|---|---|
|

Notes
|
| Section | |||||||||||||||
|---|---|---|---|---|---|---|---|---|---|---|---|---|---|---|---|
|
| Anchor | ||||
|---|---|---|---|---|
|
...
Example: Applying an Override to Objects with Similar Names
| Section | |||||||||||||||
|---|---|---|---|---|---|---|---|---|---|---|---|---|---|---|---|
|
Animation Parameters
...
| Section | |||||||||||||||
|---|---|---|---|---|---|---|---|---|---|---|---|---|---|---|---|
|
Alembic Layers
...
| Section | |||||||||||||||
|---|---|---|---|---|---|---|---|---|---|---|---|---|---|---|---|
|
Alembic proxy parameters
...
| Section | |||||||||||||||
|---|---|---|---|---|---|---|---|---|---|---|---|---|---|---|---|
|
Assigning Random Colors per Alembic Particle
...
These example workflows show how to assign random colors to alembic particles.
| Section | |||||||||||||||
|---|---|---|---|---|---|---|---|---|---|---|---|---|---|---|---|
|
Point Cloud
...
| Section | |||||||||||||||
|---|---|---|---|---|---|---|---|---|---|---|---|---|---|---|---|
|
VRayMesh file info
...
| Section | |||||||||||||||
|---|---|---|---|---|---|---|---|---|---|---|---|---|---|---|---|
|
Material Assignment Overrides
...
| Section | |||||||||||||||
|---|---|---|---|---|---|---|---|---|---|---|---|---|---|---|---|
|

| Code Block | ||||
|---|---|---|---|---|
| ||||
<materialAssignmentRules>
	<patternRule>
		<pattern>/pCube*</pattern>
		<material>VRayMtl1@material</material>
	</patternRule>
</materialAssignmentRules> |
The sample XML assigns the VRayMtl material to all alembic objects matching the pattern pCube* , i.e. all objects whose name starts with pCube .
| UI Text Box | ||
|---|---|---|
| ||
The new alembic proxies are imported with full path names by default, so the pattern <pattern>pCube*</pattern> won't work for them, but <pattern>/pCube*</pattern> will. If you want to use the new proxy with your old XML file unchanged, import the alembic files with the Use full path names option disabled (this can be done via scripting but then you'll loose the Object Hierarchy), or try using the Convert To New V-Ray Proxy Node tool (it keeps the old short path names as well as the linked rules file, but again you loose the Object Hierarchy). Otherwise, the material assignment override rules will need to be adjusted to match the full path names pattern. |
| Code Block | ||||
|---|---|---|---|---|
| ||||
 <materialAssignmentRules>
	<patternRule>
		<pattern>VRayMtl1</pattern>
		<material>VRayMtl1@material</material>
	</patternRule>
</materialAssignmentRules> |
The sample XML assigns the VRayMtl1 material to all vrmesh objects matching VRayMtl1 pattern, i.e. all objects whose material name is VRayMtl1.
| Code Block | ||||
|---|---|---|---|---|
| ||||
from vray.utils import *

appendSceneContent("C:/mtlAssignments/materials.vrscene") |
For this feature to work, you need to specify the path to the . vrscene containing the materials (procedural textures or paths to bitmaps). This only works with post-translate python script. The following example script specifies the path to the . vrscene file and should be copied into Render Settings > Common > MEL / Python callbacks > Post translate python script.
| Code Block | ||||
|---|---|---|---|---|
| ||||
<materialAssignmentRules>
	<patternRule>
		<pattern>/pCube*</pattern>
		<sceneMaterial>VRayMtl1@material</sceneMaterial>
	</patternRule>
</materialAssignmentRules> |
The sample XML assigns the VRayMtl material to all alembic objects matching the pattern pCube* , i.e. all objects whose name starts with pCube. It uses the new sceneMaterial tag.
| UI Text Box | ||
|---|---|---|
| ||
The material assignment overrides is still an experimental feature and can change at any point! |
Example: Instancing V-Ray proxy with MASH
| Section | ||||||||||||||||||||
|---|---|---|---|---|---|---|---|---|---|---|---|---|---|---|---|---|---|---|---|---|
|
Notes
...
| Fancy Bullets | ||||||||||||
|---|---|---|---|---|---|---|---|---|---|---|---|---|
| ||||||||||||
| ||||||||||||
| Fancy Bullets | ||||||||||||
| ||||||||||||
| V-Ray 5.0 for Maya 2018 and above supports instancing of .vrmesh files via the Maya Instancers found in FX menu set > nParticles > Instancer. |