![]()
Page History
This page provides a detailed QuickStart guide to rendering with V-Ray in NUKENuke.
Page Contents
Table of Contents style circle
...
In this QuickStart tutorial we are going to look at extending the NUKE Nuke Script that we have already created in the previous tutorials. We will be adding a few more Render Elements, exploring the VRayExtraTex node, increasing samples and render quality as well as making sure that we render out all the channels we have created with VRayRenderElements. We’ll also look at how to rebuild a comp in its most basic form and manipulate the channels after we have already rendered out the NUKE Nuke Script.
To follow this tutorial, you will need to have the V-Ray for NUKE Nuke plugin installed. This tutorial is a companion to go along with the QuickStart video posted on our YouTube channel.
...
You will be starting with the NUKE Nuke script you created in the last QuickStart tutorial on lighting, so open up that NUKE Nuke script. Let’s clean this NUKE Nuke script up a bit by deleting all the lights except VRayLightDome and VRayLightRect2. In the 3D view, move VrayLightRect2 closer to the geometry so you have a clearer view of what it is contributing to the scene. Finally, make this light invisible by enabling the Invisible checkbox.
...
Press the Tab key, type in the name VRayBackground, and add this node to the NUKE Nuke script just beside the VRayRenderer node. Connect the VRayBackground node to the VRayRenderer node’s bg input.
...
Select the VRayLightDome node in the NUKE Nuke script and set it to be invisible using the Invisible checkbox. If you connect the yellow Constant node to the bg input of the VRayBackground node, you will see the yellow color as the background of the render. The lighting itself is coming from the VRayLightDome and VRayLightRect2 nodes and not from the yellow Constant node.
...
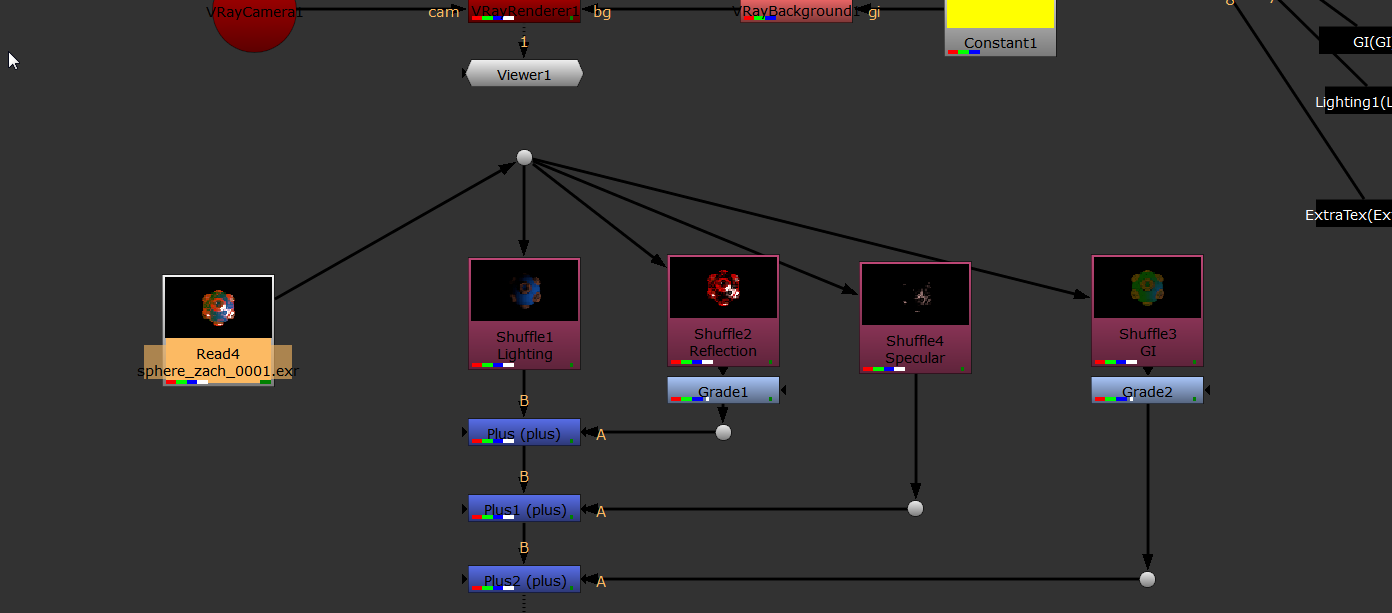
The layout of the Shuffle nodes n the NUKE Nuke script at this stage
To reduce the amount of reflection contribution, place a Grade node below the Reflection Shuffle node. Change the multiply value of the Grade node to 0.045. You will see the effects of these changes in the rendering.
...
The ability to render out the scene is obviously very important. Create a Write node at the point in the NUKE Nuke script that you wish to render out the scene, in this case straight after the VRayRenderer node. It is vital that you set the channels parameter in the properties for the write node to all. If you don’t do so, you will render out only as RGB and not include any of the extra channels that we have set up in the render.
...
In this tutorial series we have covered everything from geometry nodes to materials, material blends, bump maps, wrappers, applying materials to specific geometry, lighting, rendering, the use of render elements, shuffling and compositing. This tutorial series shows a complete end-to-end solution for image-based compositing usingV-Ray for NUKENuke.
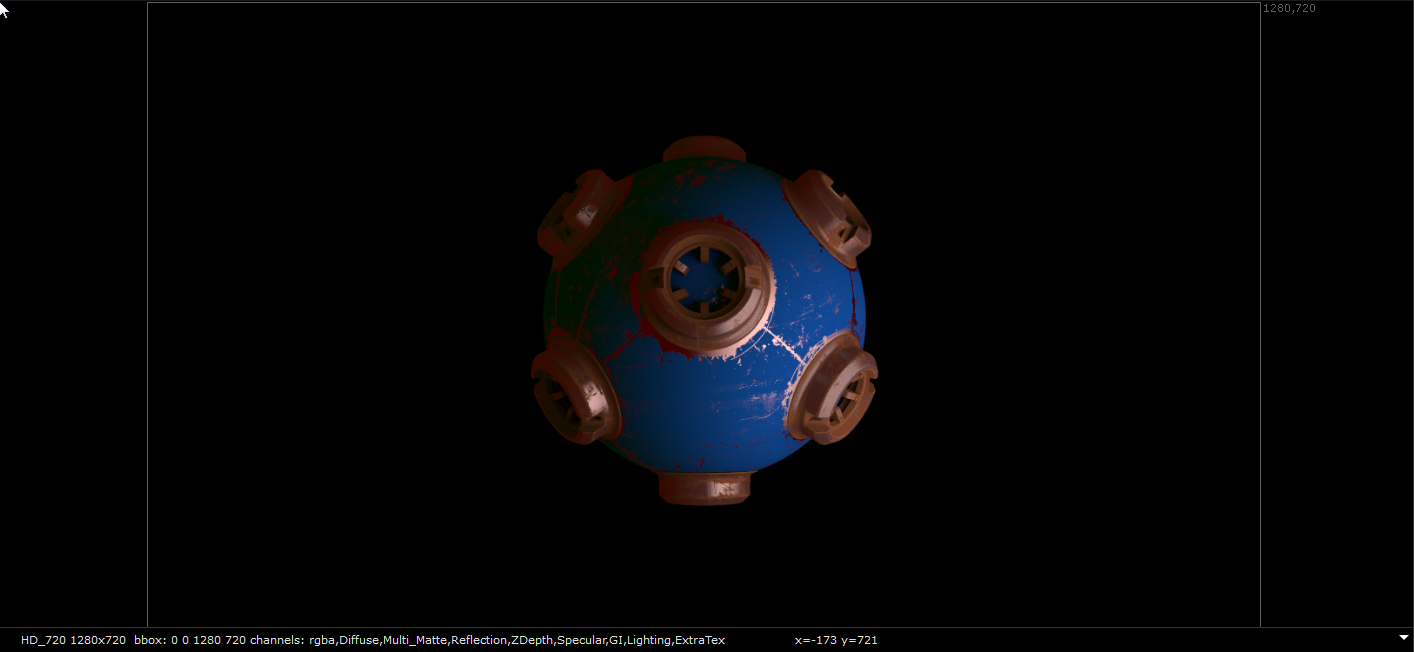
The final comp