This page provides a detailed QuickStart guide to rendering with V-Ray in Nuke.
Overview
In this QuickStart tutorial we are going to look at extending the Nuke Script that we have already created in the previous tutorials. We will be adding a few more Render Elements, exploring the VRayExtraTex node, increasing samples and render quality as well as making sure that we render out all the channels we have created with VRayRenderElements. We’ll also look at how to rebuild a comp in its most basic form and manipulate the channels after we have already rendered out the Nuke Script.
To follow this tutorial, you will need to have the V-Ray for Nuke plugin installed. This tutorial is a companion to go along with the QuickStart video posted on our YouTube channel.
Tutorial Assets
To download the files used in this tutorial, please click on the button below.

Due to licensing issues, the Road_A.hdr file used in the tutorial video is not included in the downloadable assets. Instead, please use one of the provided HDR images in its place.
Tutorial Steps
1) The Starting scene
You will be starting with the Nuke script you created in the last QuickStart tutorial on lighting, so open up that Nuke script. Let’s clean this Nuke script up a bit by deleting all the lights except VRayLightDome and VRayLightRect2. In the 3D view, move VrayLightRect2 closer to the geometry so you have a clearer view of what it is contributing to the scene. Finally, make this light invisible by enabling the Invisible checkbox.
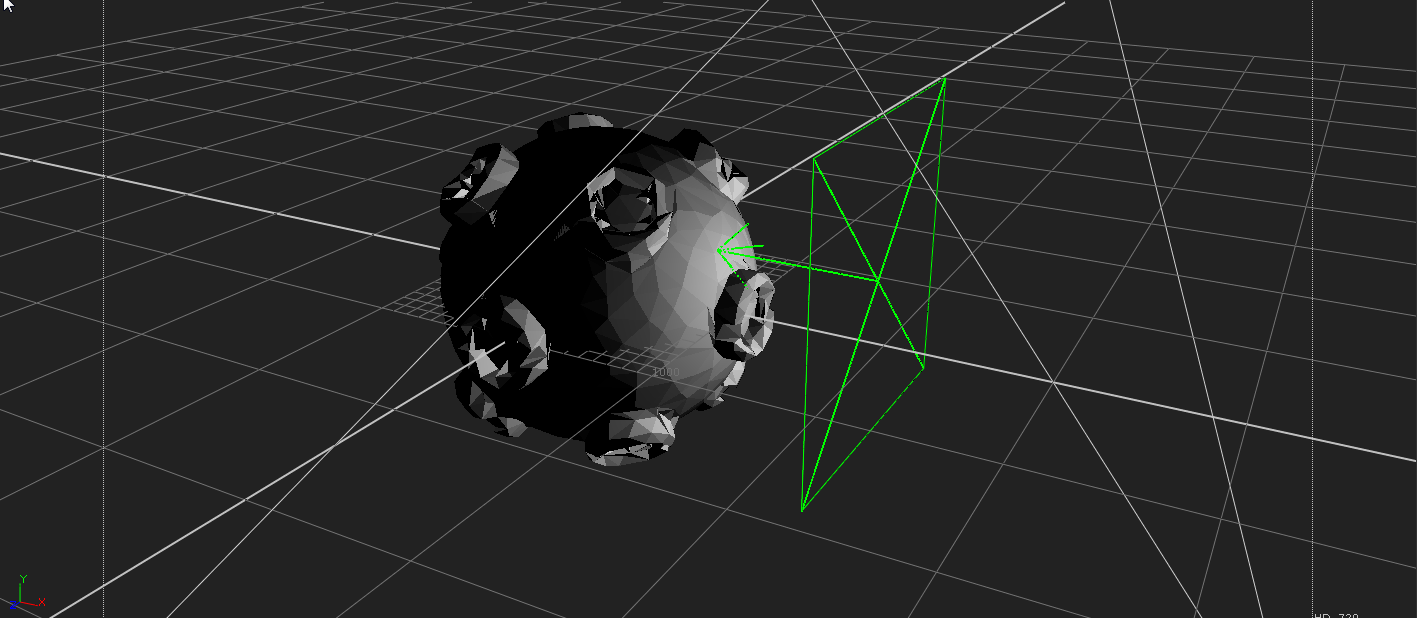
Position of VRayLightRect2 in 3D view
2) VRayBackground Node
In the last tutorial, you created a set of V-Ray render elements that consisted of Multi Matte, Diffuse, Specular, Reflection and ZDepth. We also discussed the use of the VRayMaterialWrapper to assign material properties that the material ID would come through in the Multi Matte render element.
Now you’re going to add a really useful node called the V-Ray Background Node. With this node, a connected texture or constant can affect the Background, Global Illumination, Reflection or Refraction across the entire scene.
Press the Tab key, type in the name VRayBackground, and add this node to the Nuke script just beside the VRayRenderer node. Connect the VRayBackground node to the VRayRenderer node’s bg input.
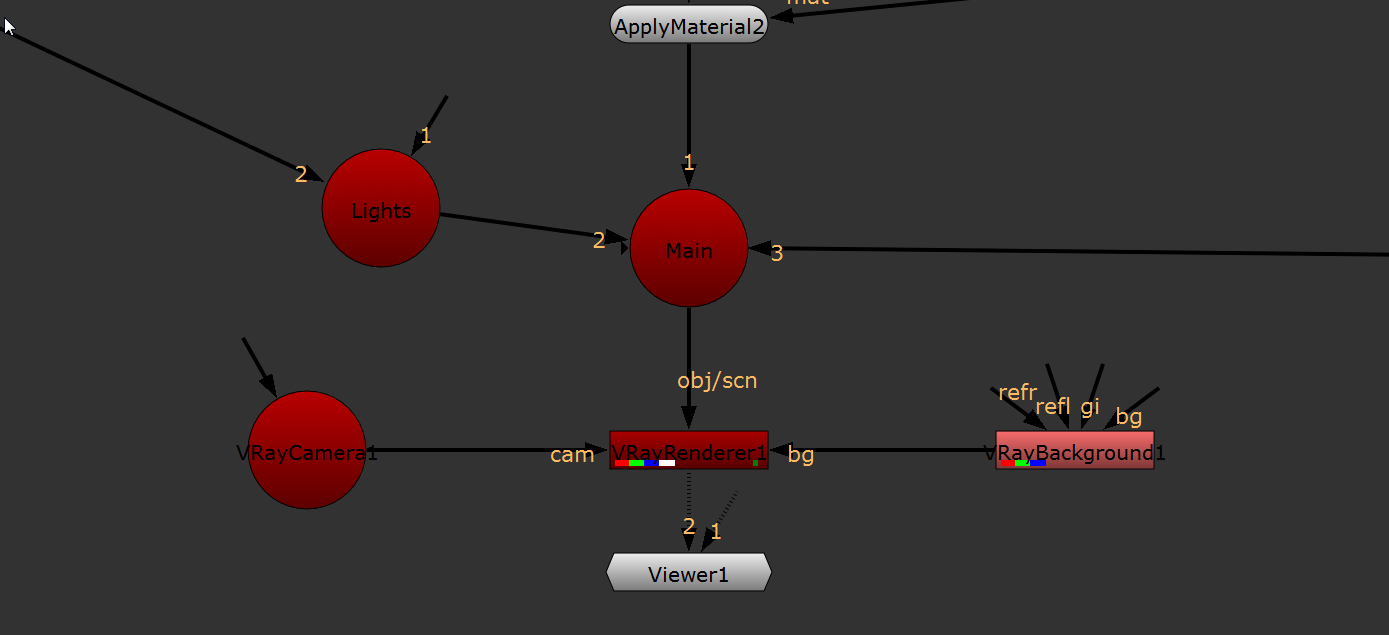
Connection between VRayBackground and VRayRenderer nodes
Add a Constant node into the scene and make it yellow by setting its red, green, and blue colors to 1, 1, and 0 respectively.

Setting a yellow Constant node
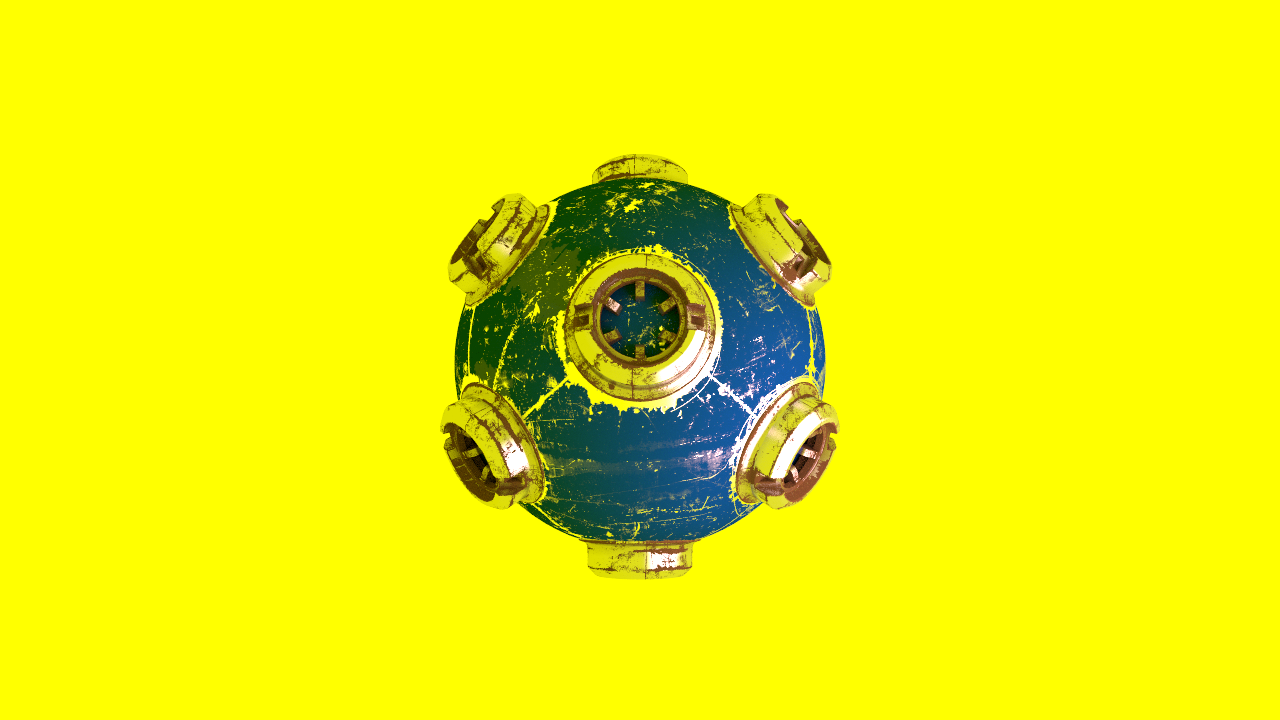
Select the VRayLightDome node in the Nuke script and set it to be invisible using the Invisible checkbox. If you connect the yellow Constant node to the bg input of the VRayBackground node, you will see the yellow color as the background of the render. The lighting itself is coming from the VRayLightDome and VRayLightRect2 nodes and not from the yellow Constant node.

The Yellow constant node connected to the VRayBackground node’s bg input
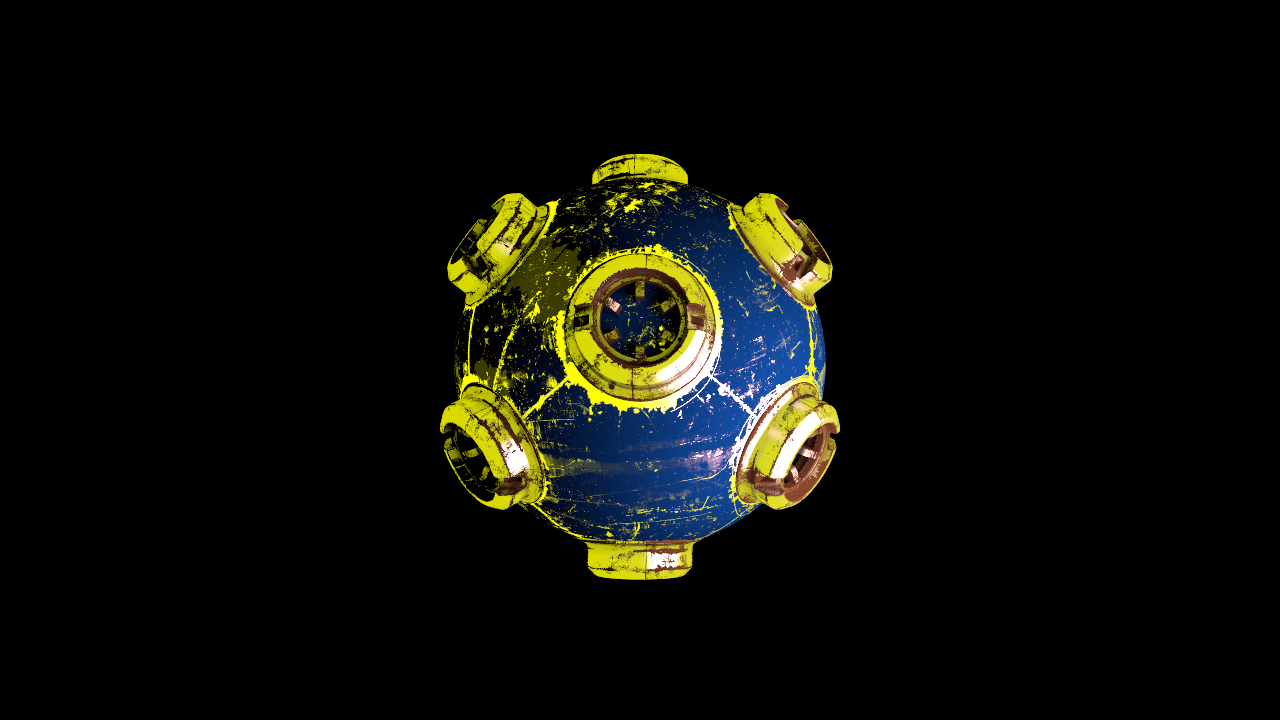
If you want the yellow color to light the scene, simply disconnect the VRayLightDome. You will notice that the yellow Constant node connected to the VRayBackground node is lighting the scene with a constant yellow illumination and behaving like a VRay Ambient light across the entire scene.
The Yellow constant node contributing to the scene lighting when the VRayLightDome is disconnected
To change this so that the Yellow Constant is only acting across the entire scene as the Reflection, disconnect the yellow Constant node from bg input and connect it to the Reflection input instead. You will see the yellow reflecting in the glossy materials, but it isn’t visible in the background of the rendering or to the lighting of the scene.
Yellow Constant node connected to Reflection input of VRayBackground node
Now let’s see how it can contribute to Global Illumination across the scene. Disconnect the Constant node from the Reflection input and connect it to the GI input instead. If you don’t see any effect when you make this change, select the VRayRenderer node and make sure that the Global Illumination checkbox is enabled. You should now see the yellow color affecting the render, bouncing in the areas not lit by the VRayLightRect2 node.
Yellow Constant node connected to the GI input of the VRayBackground node
Create a second Constant node and set its color to red in the color channel by giving it red, green, and blue values of 1, 0, and 0 respectively. Connect this into the Reflection input of the VRayBackground node, and you should now see this contributing to the reflection of the entire scene in the render.
At the moment we have the yellow color affecting the global illumination and the red constant affecting the reflection. If we now connect the bg input of the VRayBackground node to the HDR we are using in the VRayLightDome, you will now see this HDR image in the background of the render.
Red constant connected to reflection input , yellow connected to GI input, HDR connected to the bg input of VRayBackground node
In this way you can do some very useful and interesting things using the VRayBackground node by changing the inputs of the different inputs that affect the bg, reflection, refraction and GI.
3) Manipulating the channels
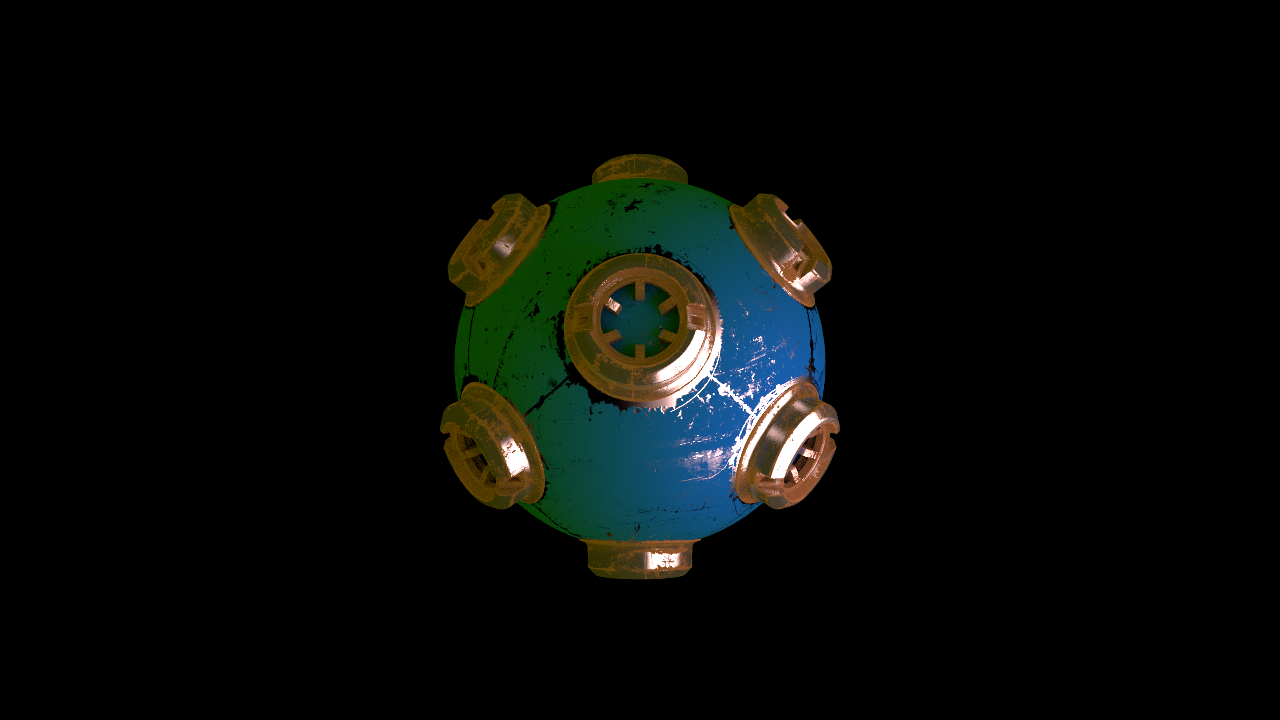
For now let’s remove the HDR in the background of the render by disconnecting its texture from the VRayBackground node. Add a VRayRenderElement and connect this to the VRayRenderElements scene node. Set the VRayRenderElement you have just created to a Render Element type of Lighting. Duplicate this VRayRenderElelement node and set its Render Element type to Global Illumination. Connect this also to the VRayRenderElements scene node. You should now see the Global Illumination and Lighting VRayRenderElements appear in the viewer.
After the VRayBackground node create a Shuffle node and change the in 1 drop down to Lighting in its properties. Under the Node tab change the Label field to [value in]. This allows you to copy and paste this and have a nice lighting label there. Enable the postage stamp checkbox and you should now see an image on the node itself. This image allows you to see what layer it is and what it looks like.
Duplicate this node and change the in 1 dropdown box to Reflection. Duplicate it again and change the in 1 dropdown box to Specular. Then duplicate this one final time and change the in 1 dropdown box to GI. Ensure that all these Shuffle nodes are connected as shown in the next image.
4) Merging the Shuffle nodes
To keep this example simple, you are going to merge these using a Plus node. Create a Plus node and connect its B input to the Lighting Shuffle node and its A input to the Reflection Shuffle node. Below this create another Plus node and connect its A input to the Specular Shuffle node. Create one final Plus node below this, and connect the A input of that one to the GI Shuffle node. If you view this last Plus node you should get exactly the same look as you did in the render. If it does not look exactly the same, then recheck things as it means you have missed something. This is a good time to reorganize the scene and tidy things up so that they don’t get too messy.
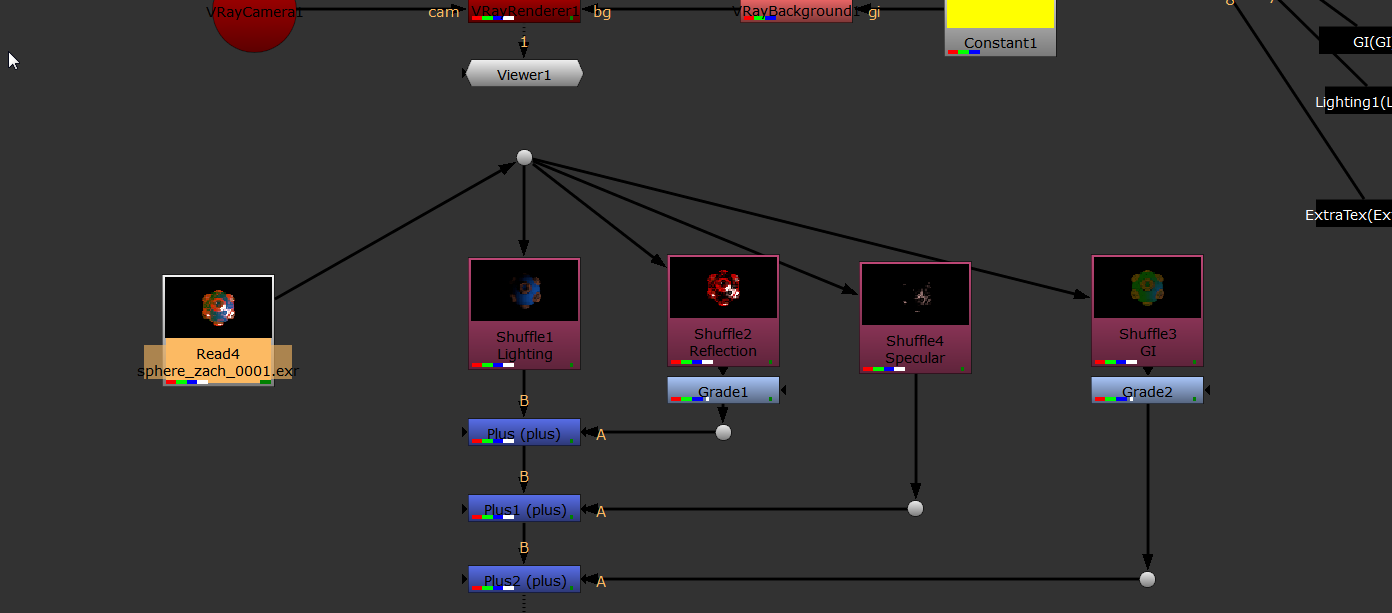
The layout of the Shuffle nodes n the Nuke script at this stage
To reduce the amount of reflection contribution, place a Grade node below the Reflection Shuffle node. Change the multiply value of the Grade node to 0.045. You will see the effects of these changes in the rendering.
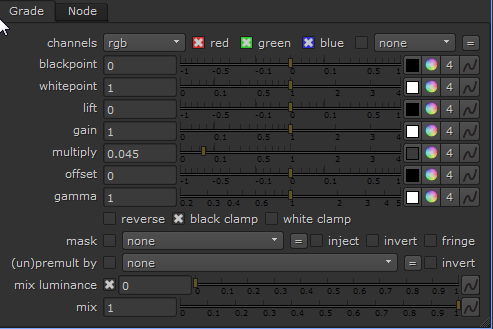
Parameters of Grade node under Reflection pass
Add another Grade node, this time below the GI Shuffle node. Set its mulitply value to 0.1 so it is only contributing a small amount.

The parameters of the Grade node under the GI pass
The number of channels that you break out and the complexity of the rebuild depend upon the complexity of the scene and what you’re used to getting from the lighting department.
5) VrayExtraText node
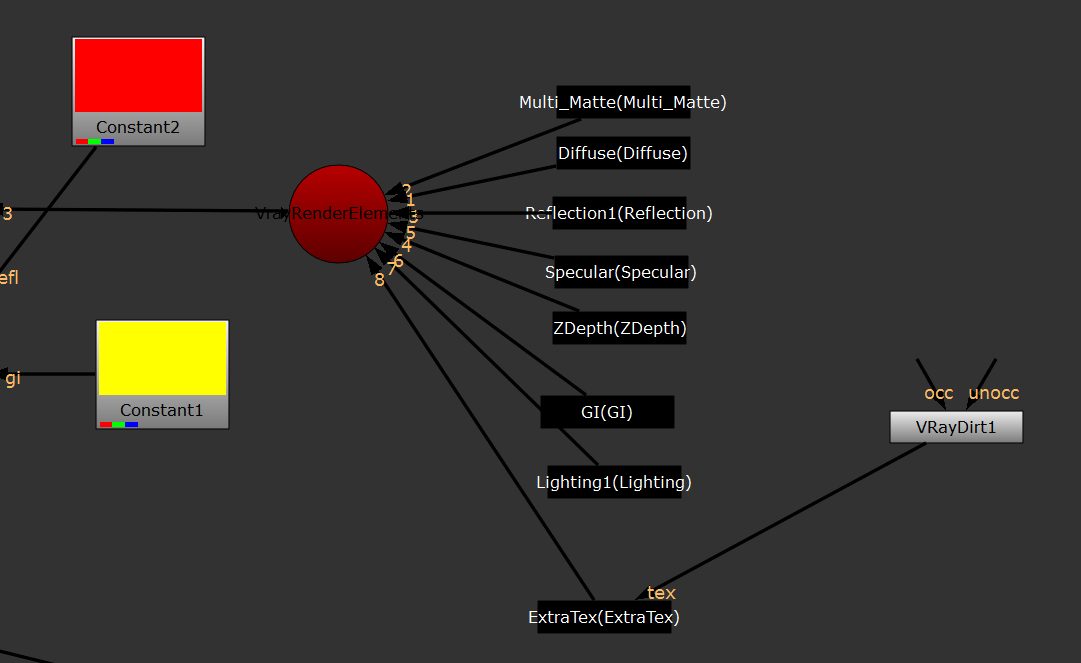
The connection between the ExtraTex VRayRenderElement and the VRayDirt node
Create a VRayRenderElement node and change its Render Element to Extratex , and connect this to the VRayRenderElements scene node. You will notice that this node now has an extra input named tex that we can use to connect to a texture. If you view this pass in the render at this stage it will turn out black as we have not connected any texture to it.
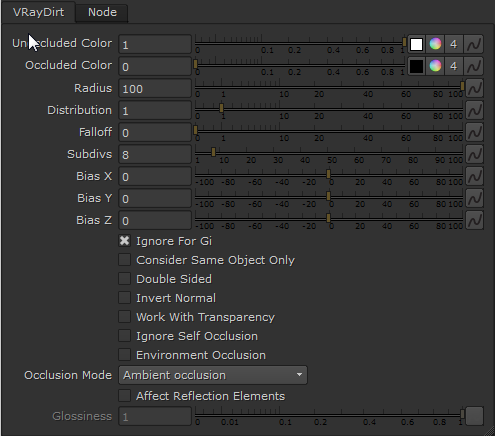
The parameters of the VRayDirt node
Create a VRayDirt node and connect this to the tex input. In the VRayDirt node, change the Radius parameter to 100. You should now see the VRayDirt active in the VRayExtraTex pass in the viewer. This pass is not affecting the RGBA beauty in any way, but is available to you as a matte to manipulate later on.

ExtraTex VRayRenderElement , VRayDirt as tex input
6) VRayFresnel node
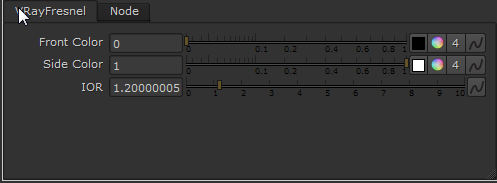
VRayFresnel parameters
Many compositors commonly use a Fresnel pass. The VRayExtraTex node can be used to help you to produce one of these as well. Disconnect the VRayDirt node from the VRayExtraTex node, and create a VRayFresnel node and connect this in its place. In the VRayFresnel node, we’ll invert the colors so we can see them more easily by swapping the values for Front Color and Side Color. The Front Color should now have a value of 0, and the Side Color should now have a value of 1. This pass can give you a nice way to control falloff separately. By changing the IOR value you can control the reflection of the VRayFresnel node. In this case, let’s set it to a value of 1.2.
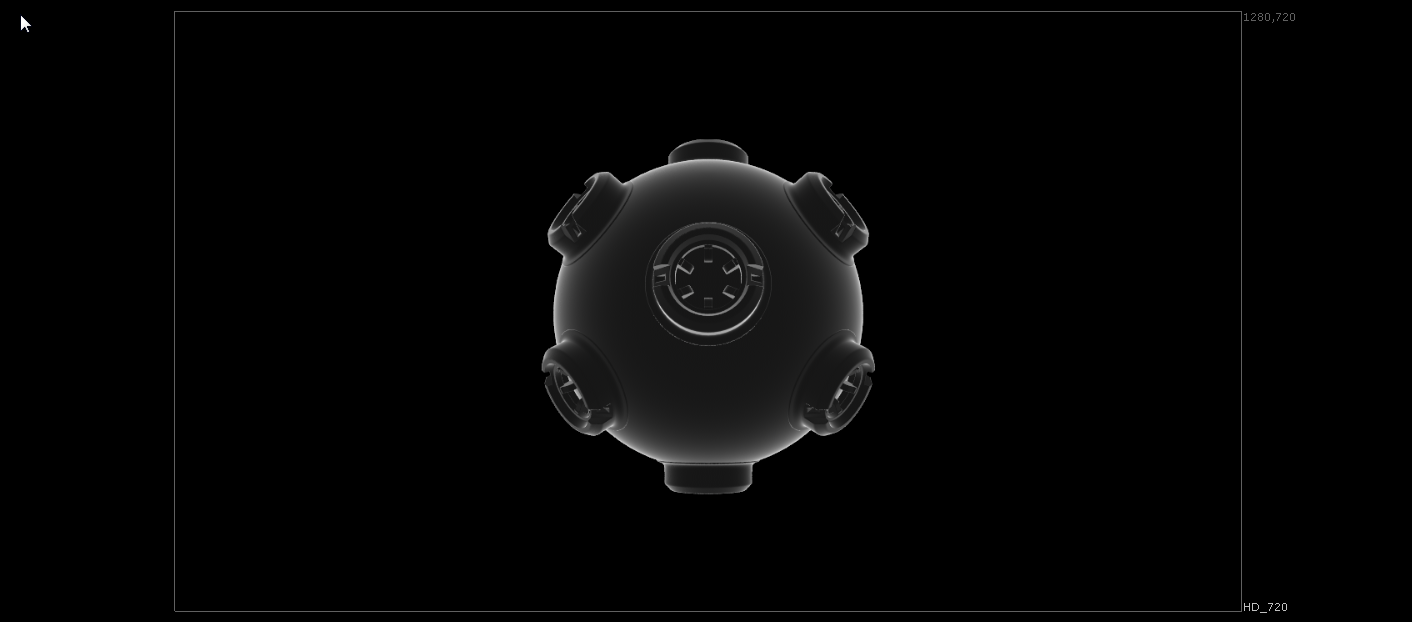
ExtraTex VRayRenderElement showing the result of using VRayFresnel as tex input
This is just the start of things you can do using the VRayExtraTex node.
7) Rendering out the scene
The ability to render out the scene is obviously very important. Create a Write node at the point in the Nuke script that you wish to render out the scene, in this case straight after the VRayRenderer node. It is vital that you set the channels parameter in the properties for the write node to all. If you don’t do so, you will render out only as RGB and not include any of the extra channels that we have set up in the render.
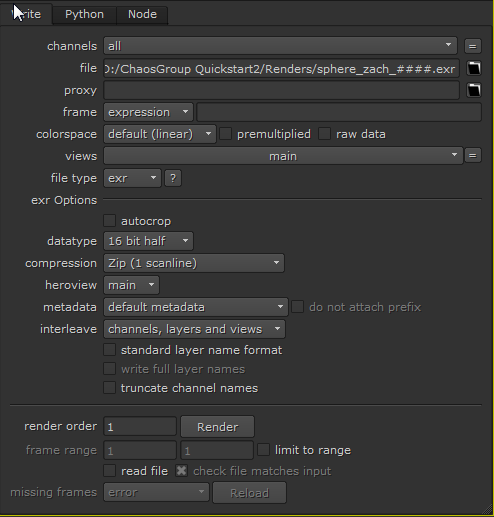
Parameters for the Write node
Set the file location to the folder to which you wish to render out the frames. Ensure it is set to a file type of OpenEXR as this retains the different passes that we can then shuffle out as needed later on. When naming for more than one frame make sure you use a naming convention of [filename]_####.exr. This ensures that each frame is rendered out as a sequentially numbered file sequence. When you click the Render button, make sure you set it to render the correct number of frames required for the sequence.
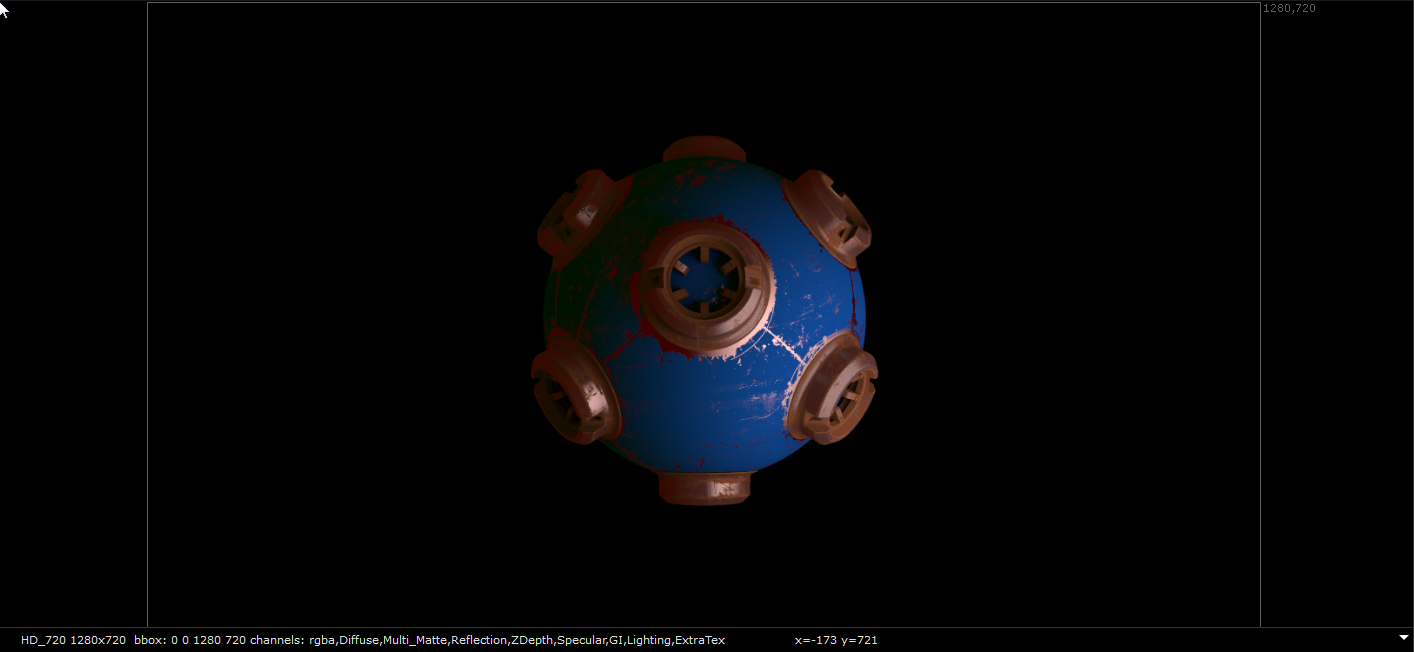
Once the see once the sequence has rendered, if you bring it back in using a Read node and view it, you will see that all the passes you set up are present. You can also connect this to the channel shuffle setup we used before instead of the connection to the VRayRenderer node and use them in the same way. This is especially useful for heavy scenes where it would be counterproductive to composite directly from the VRayRenderer if only purely from a time and resources point of view.
Once you are happy with the initial render and you are getting the results you need, you can then go back into the properties for the VRayRenderer and enable the Antialiasing checkbox, and increase the render quality by adjusting the values in the Antialiasing section.
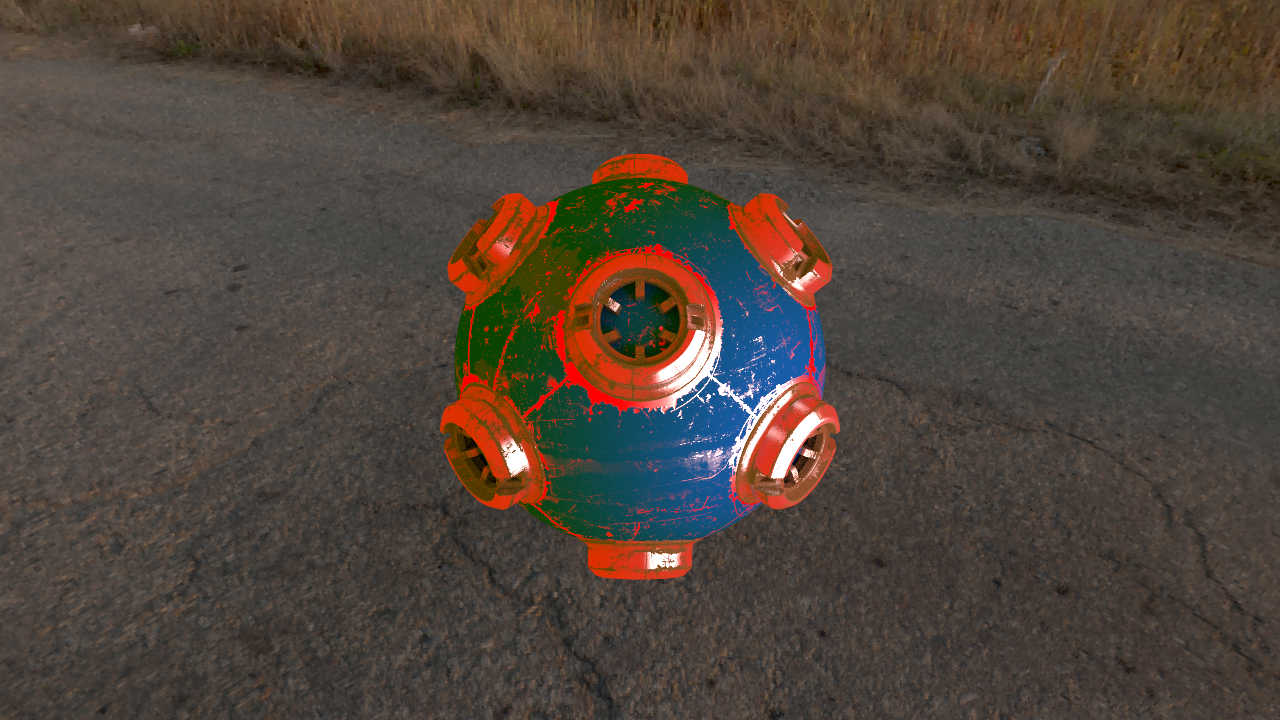
In this tutorial series we have covered everything from geometry nodes to materials, material blends, bump maps, wrappers, applying materials to specific geometry, lighting, rendering, the use of render elements, shuffling and compositing. This tutorial series shows a complete end-to-end solution for image-based compositing using V-Ray for Nuke.
The final comp