Versions Compared

Key

  • This line was added.
  • This line was removed.
  • Formatting was changed.

This page provides a step-by-step guide for understanding solid and non-solid bodies in Chaos Phoenix FD for 3ds Max.

Overview

...

UI Text Box
typeinfo

This is an Entry Level tutorial which requires no previous knowledge of Phoenix FD. A basic understanding of 3ds Max would be helpful but is not a prerequisite for being able to follow along.

Section
Column
width40%

The instructions on this page covers the basic workflows for using Solid and Non-Solid bodies in Phoenix FD for 3ds Max. By the end of this tutorial, you will be able to use Solid and Non-Solid bodies to control interactions and customize simulations.

To follow the described steps, you will need the Phoenix FDChaos Phoenix for 3ds Max plugin installed. If you notice a major difference between the results shown here and the behavior of your setup, please send an email to support@chaosgroup.com.

This tutorial is a companion to go along with the QuickStart video posted on our YouTube channel.


The Download button below provides you with an archive containing the start and end scenes.


UI Button
sizelarge
icondownload
titleDownload Project Files
urlhttps://drive.google.com/uc?export=download&id=1irSchn96jSqIfHxYSOdzaaReOhqUvOoT
 

Column
width60%
HTML
<iframe width="720" height="480" src="https://www.youtube.com/embed/B25eoDqUkn8" frameborder="0" allow="autoplay; encrypted-media" allowfullscreen></iframe>
UI Text Box
typeinfo

The video is created using Phoenix FD 3.0, but the text version of the tutorial is updated and uses Phoenix FD 4.30 Official. In any case of doubt you may refer to the text.

...

Section
Column
width50%

Scale is crucial for the behavior of any simulation. The real-world size of the Simulator in units is important for the simulation dynamics. Large-scale simulations appear to move more slowly, while mid-to-small scale simulations have lots of vigorous movement. When you create your Simulator, you must check the Grid rollout where the real-world extents of the Simulator are shown. If the size of the Simulator in the scene cannot be changed, you can cheat the solver into working as if the scale is larger or smaller by changing the Scene Scale option in the Grid rollout.

The Phoenix FD solver is not affected by how you choose to view the Display Unit Scale - it is just a matter of convenience.


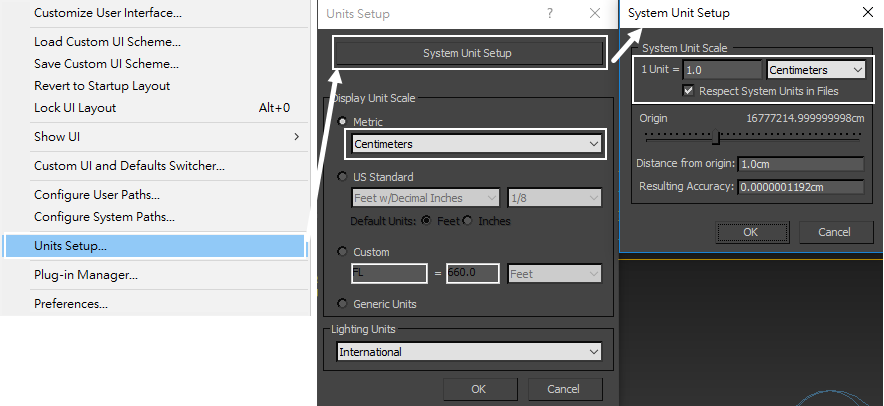
Go to Customize → Units Setup and set Display Unit Scale to Metric Centimeters.

Also, set the System Units such that 1 Unit equals 1 Centimeter.

Column
width50%

...

Section
Column
width40%

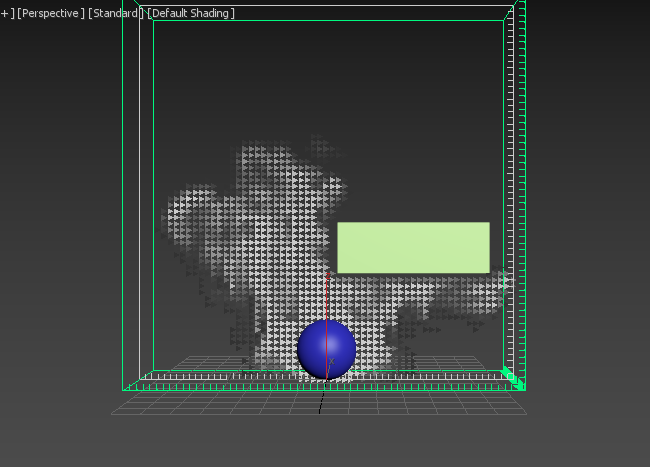
We can clearly see that the Smoke collides with the box, and goes around it. And we didn’t need to do anything to make that happen. That’s because, by default, meshes are treated by Phoenix FD as Solid Objects, which means the object becomes an obstacle to the fluid's motion.

Column
width60%

...

Section
Column
width40%

Next, create a Phoenix FD Ocean.

Select the spaceship and choose the Setup an Ocean preset from the Phoenix FD Toolbar.

Column
width60%


...


Section
Column
width40%

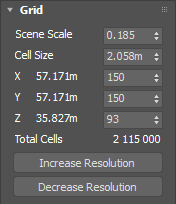
Select the Simulator and navigate to the Grid rollout.

Make the simulation grid a bit smaller with an X/Y/Z Size of 150150, 93.

Column
width60%

...