This page provides a step-by-step guide for understanding solid and non-solid bodies in Chaos Phoenix for 3ds Max.
Overview
This is an Entry Level tutorial which requires no previous knowledge of Phoenix. A basic understanding of 3ds Max would be helpful but is not a prerequisite for being able to follow along.
This tutorial is created using Phoenix 4.30 Official Release and V-Ray 5, Hotfix 2 Official Release for 3ds Max 2018. You can download official Phoenix and V-Ray from https://download.chaos.com. If you notice a major difference between the results shown here and the behavior of your setup, please reach us using the Support Form.
The instructions on this page covers the basic workflows for using Solid and Non-Solid bodies in Phoenix for 3ds Max. By the end of this tutorial, you will be able to use Solid and Non-Solid bodies to control interactions and customize simulations.
This tutorial is a companion to go along with the QuickStart video posted on our YouTube channel.
The Download button below provides you with an archive containing the start and end scenes.
The video is created using Phoenix 3.0, but the text version of the tutorial is updated and uses Phoenix 4.30 Official. In any case of doubt you may refer to the text.
System Units Setup
Scale is crucial for the behavior of any simulation. The real-world size of the Simulator in units is important for the simulation dynamics. Large-scale simulations appear to move more slowly, while mid-to-small scale simulations have lots of vigorous movement. When you create your Simulator, you must check the Grid rollout where the real-world extents of the Simulator are shown. If the size of the Simulator in the scene cannot be changed, you can cheat the solver into working as if the scale is larger or smaller by changing the Scene Scale option in the Grid rollout.
The Phoenix solver is not affected by how you choose to view the Display Unit Scale - it is just a matter of convenience.
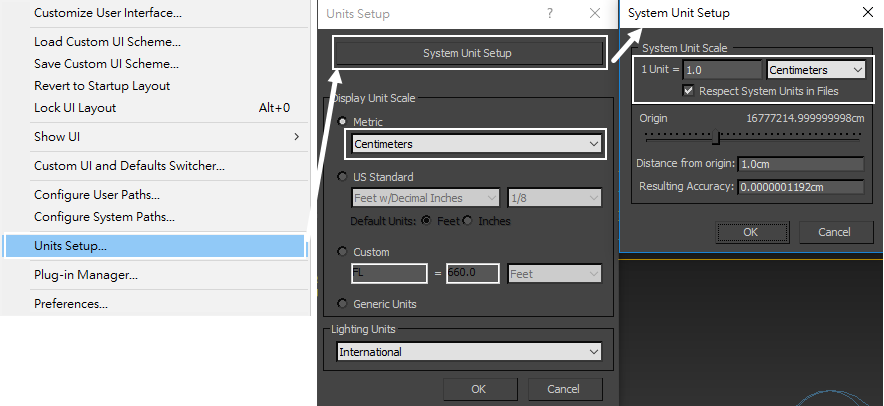
Go to Customize → Units Setup and set Display Unit Scale to Metric Centimeters.
Also, set the System Units such that 1 Unit equals 1 Centimeter.
Scene Setup
First, we will start with a simple scene, and then apply the same concepts to a practical setting: a spaceship crashing into an ocean.
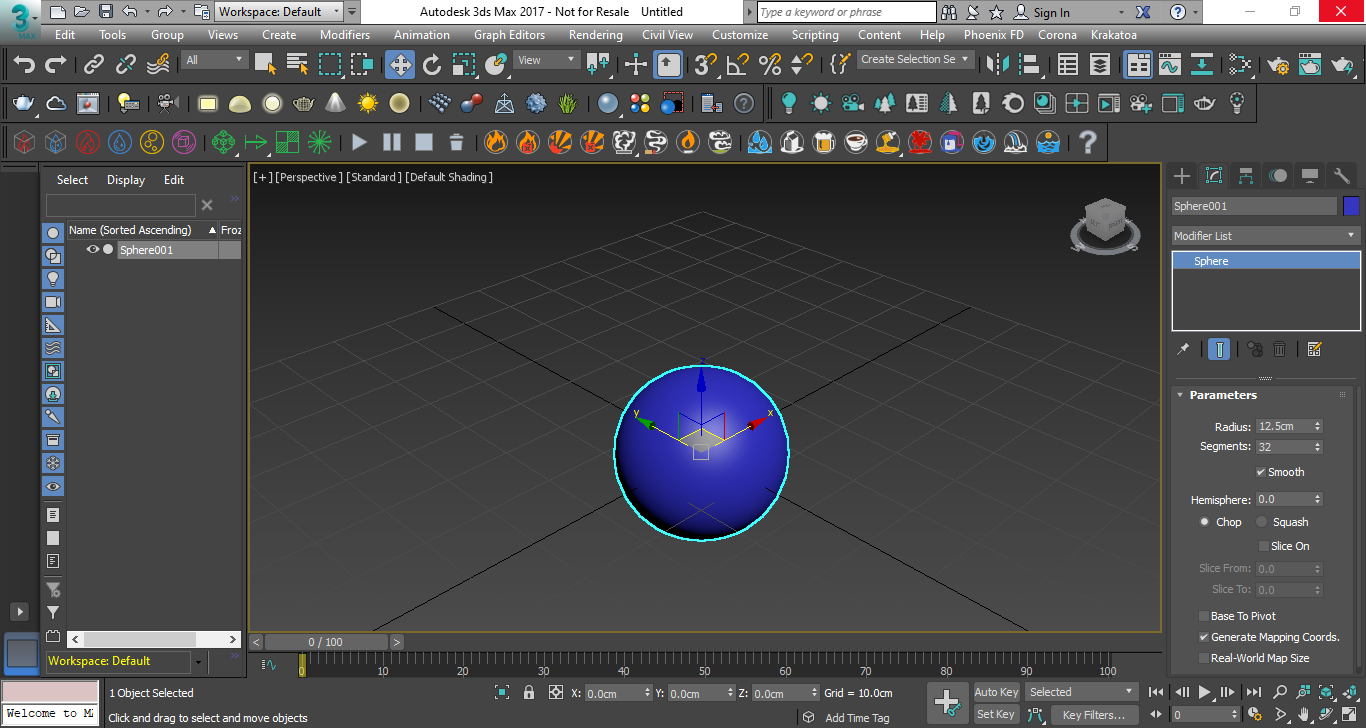
Create a Sphere with a Radius of 12.5cm. The exact size is not crucial.
With the sphere still selected, click on the Large-scale Smoke sim Preset button from the Phoenix Toolbar.

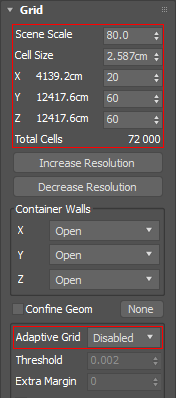
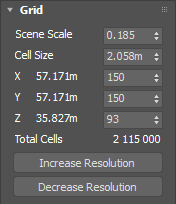
Select the Simulator. In the Modify Panel under the Grid rollout are located the parameters to control the resolution of the volume grid, which greatly affects the look and performance of the simulation.
Currently, there are about 300,000 Total Cells. To save on simulation time during the iteration process, click Decrease Resolution six times until the Total Cells are around 5,000.
For more information regarding simulation resolution, please refer to the Basic Liquids QuickStart page.

Disable the Adaptive Grid and set the X/Y/Z size of the Simulator to 20, 60, 60. This way the simulation is fairly flat and at a very low resolution that will resolve quickly.
Maximize the viewport for a better view of the Simulator.
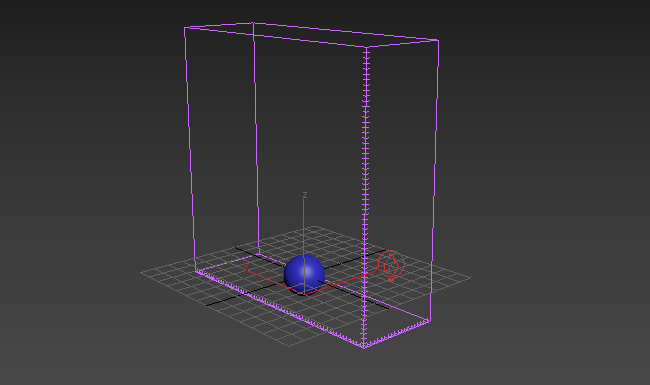
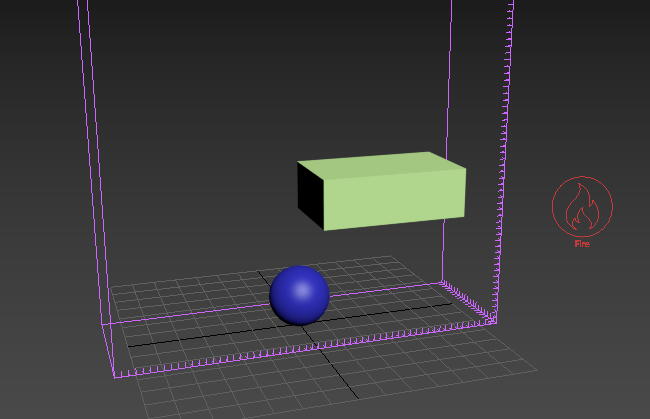
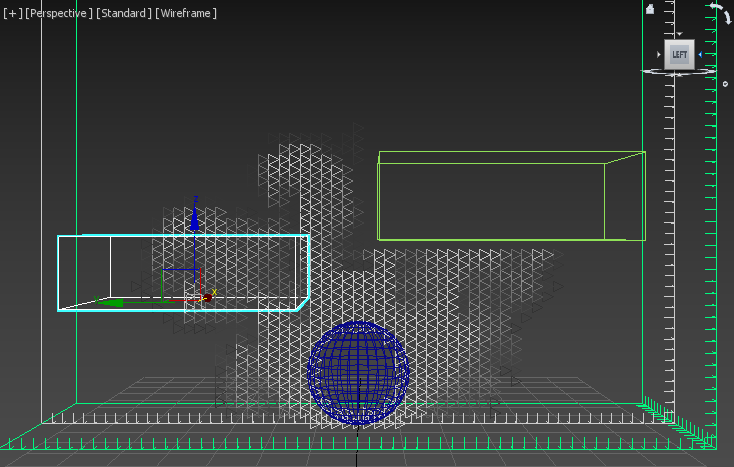
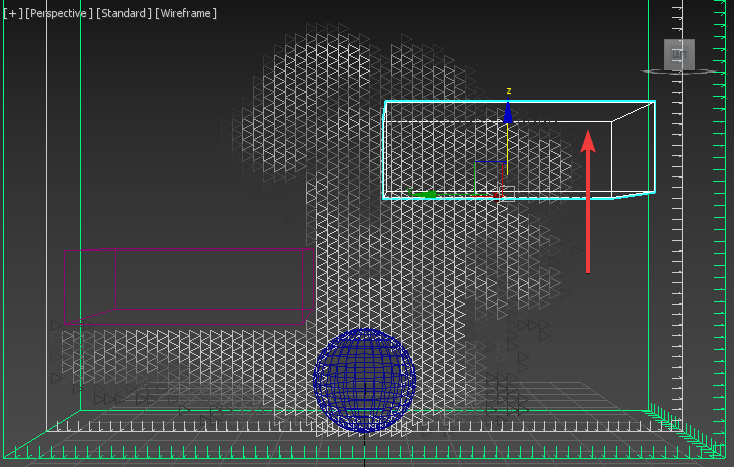
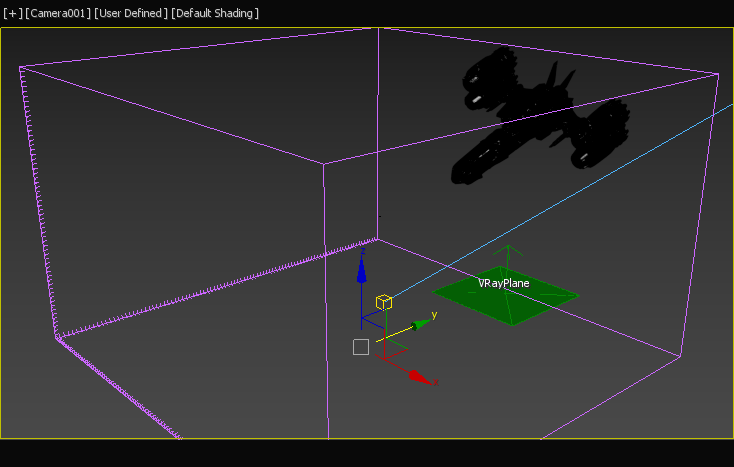
Create a Box and place it above the sphere, slightly off to the right side as shown in the picture.
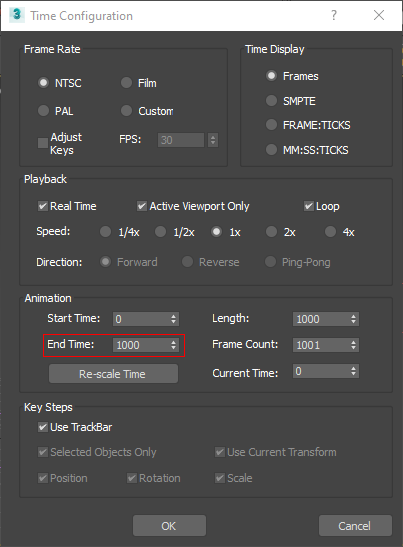
Open the Time Configuration dialog and change the End Time to 1000 so we have more frames to play with.
![]()
Now press the Start Simulation button in the Toolbar. Let the simulation run while you continue with the next few steps.
![]()
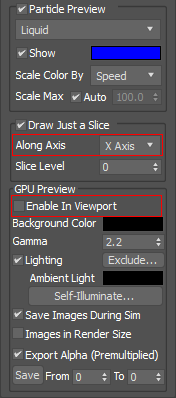
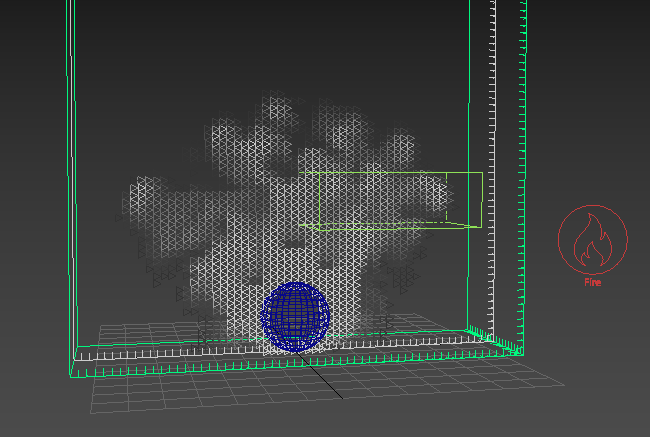
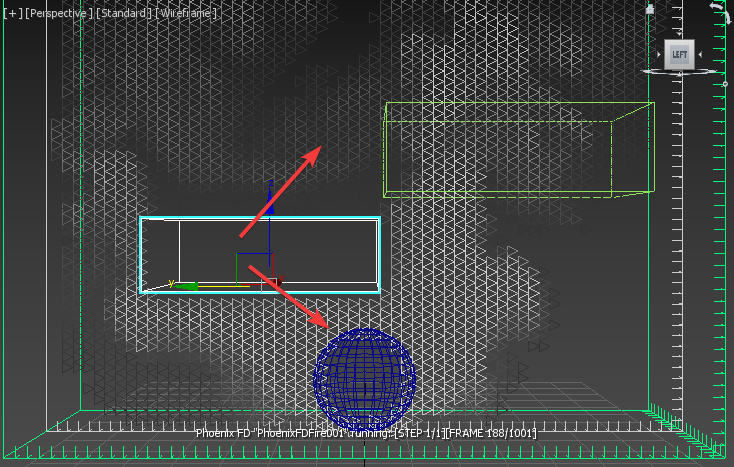
In order to better see how the Smoke interacts with the simulation, go to the Preview rollout and under GPU Preview disable Enable In Viewport.
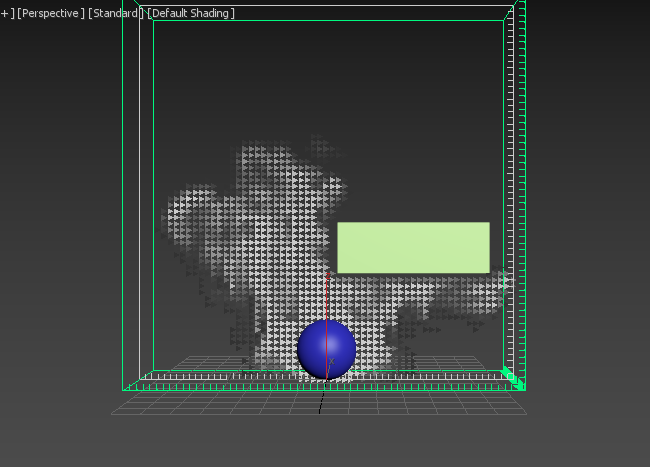
Then, enable Draw Just a Slice with the Axis set to X as shown on the picture.
We can clearly see that the Smoke collides with the box, and goes around it. And we didn’t need to do anything to make that happen. That’s because, by default, meshes are treated by Phoenix as Solid Objects, which means the object becomes an obstacle to the fluid's motion.
Make sure that any mesh you want to use in this manner is closed. Don’t use planes or flat sheets of geometry.
If you need to use flat geometry, you can use 3ds Max's Shell modifier to make that geometry into a closed volume to use in the simulation.
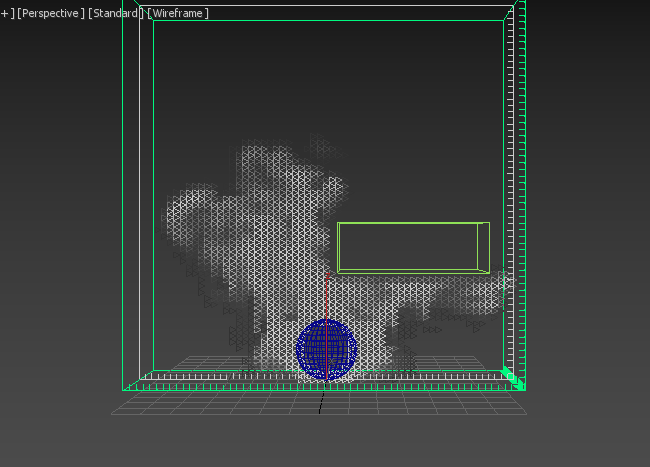
In the upper left-hand corner of the viewport, change the mode to Wireframe Override for better visibility.
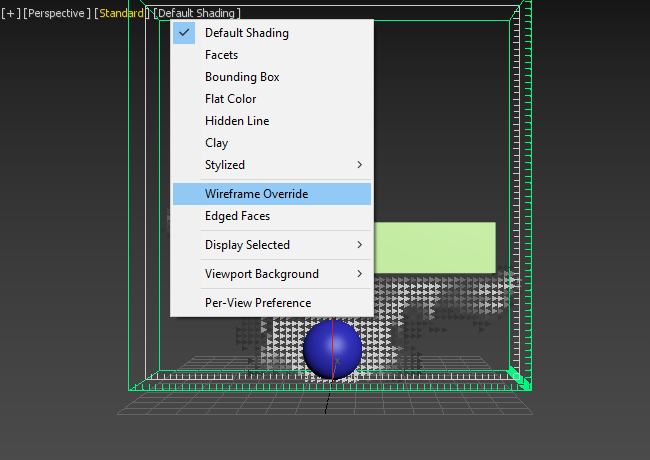
As you can see the inside of the object is empty, and the Smoke goes around the volume.
Now, select the object and right-click on it, and select the Chaos Phoenix Properties.
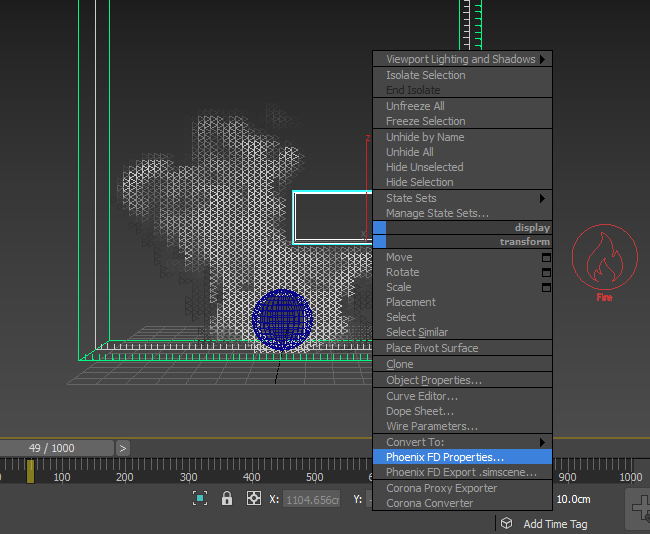
A checkbox for Solid Object parameter is enabled by default. Turn it Off and click OK.
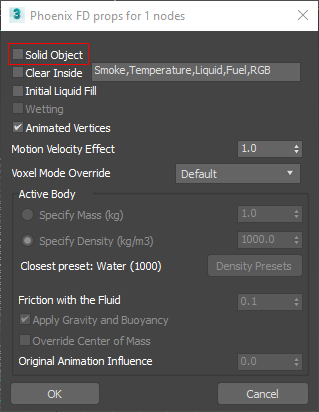
The Smoke passes right through the box. This box is a Non-Solid, which means the box is a part of the simulation, but won’t interact with it.
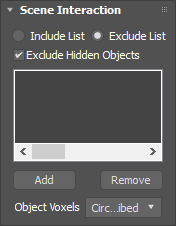
There is another way to make objects not interact with the simulation. With the Simulator selected, go to the Scene Interaction rollout.
You can manage objects that do or don’t interact with the simulation in the rollout shown in the picture.
There is a difference between having a Non-Solid Object, like we have right now, and excluding an object from the interaction.
A Non-Solid Object, such as the one in the scene, can still be used with Forces (e.g. as an attractor for the Body Force) and also as an Emitter by Source objects. It can also be used as a Render Cutter, or a Birth (or ignition) Volume, and so on.
On the other hand, objects excluded through the Scene Interaction rollout will not interact at all with the simulation.
Now we’ll make the Smoke inside the Non-Solid box disappear.
Right-Click the box and open the Phoenix Properties. Enable the Clear Inside option, which lists the different channels of the simulation that are affected. You can edit this list to control what kind of particle channels are cleared inside the Non-Solid.
![]()
Click OK and you can see that the Smoke inside the box is gone.
![]()
The difference between the Solid Object that we had before, and this Non-Solid with Clear Inside, is that the fluid moves around Solids but passes right through the Non-Solids. This way you can use Non-Solids with Clear Inside to erase Smoke, Temperature, Liquid, or different particles from certain areas of the Simulator without effecting the fluid's behavior.
While the simulation continues, create another Box in the scene that is a similar size to the first one. Move it up, inside the container in the path of the Smoke, and it traps some of the Smoke inside it, as in the image.
When creating or moving a Solid Object inside a Fire/Smoke simulation container, it can trap fluid channels inside itself. Note that this behavior does not apply to a Liquid Simulator.
Move this box around some more and you can see that some of the Smoke trapped inside the volume earlier is still stuck inside, and it may capture more.
Again, that’s because by default, all objects are treated as Solid Objects, so the Smoke can’t escape once inside.
Right-click on that second box, choose Phoenix Properties. Turn on Clear Inside and press OK.
![]()
The Smoke is gone from inside that box.
![]()
Finally, select the first box and disable the Clear Inside, so the Smoke goes right through it.
![]()
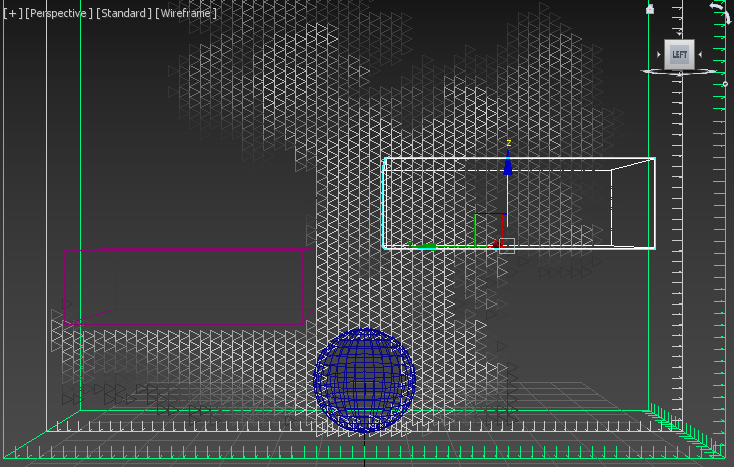
The box on the left is a Solid Object and the box on the right is a Non-Solid Object. Moving the Non-Solid box inside the Simulator changes nothing - it does not change the behavior of the simulation.
But if you move the Solid Object box, it effects the Smoke simulation. If you move it around, the Smoke gets pushed to the side.
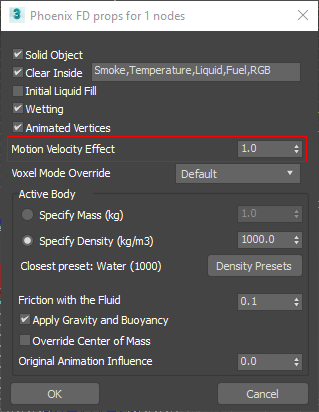
You can control how strongly a moving Solid effects the simulation from its Phoenix Properties using the Motion Velocity Effect parameter.
We will take a look at this in our next example.
Example Scene
Let’s apply these same concepts as we crash a spaceship into a body of water. We will use Solids, see how the Motion Velocity Effect works, and add Foam and Splashes in our simulation.
Open the provided scene file PhoenixFD_QS03A_SolidsNonSolids_start.max.
The scene contains a spaceship crashing into the ocean.
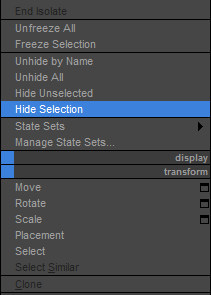
The ocean geometry plane is just for preview purposes. Select the plane, right click to open the Quad Menu, and select Hide Selection.
Next, create a Phoenix Ocean.
Select the spaceship and choose the Setup an Ocean preset from the Phoenix Toolbar.
![]()
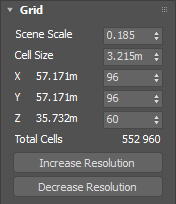
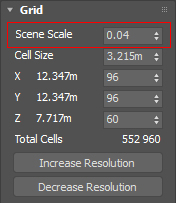
Select the Simulator and navigate to the Grid rollout.
Make the simulation grid a bit smaller with an X/Y/Z Size of 150, 150, 93.
Click the Decrease Resolution button twice to have faster feedback.
The Total Cells will decrease to around 500,000.
Reposition the Simulator around the spaceship's path, moving it closer to the camera in Y, and a little lower in Z to give the spaceship more space to splash down.
The Ocean preset assumes that the geometry in the simulation is a large sea vessel, but the spaceship is much smaller than this.
So in the Grid rollout, decrease the Scene Scale to 0.04.
Now Start the simulation. Let it run, then Stop the simulation around frame 70 or so.
Switch to Perspective view and scrub the timeline to see the result.
When the spaceship crashes, it makes a pretty small splash - not quite the magnitude for a dramatic effect.
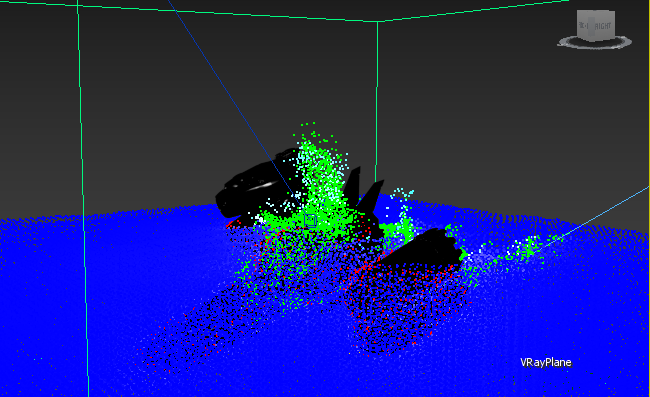
In this case, it's not desirable to change the existing animation of the spaceship, so the only way to get a bigger splash is to adjust the simulation to react as if it produces a massive splash.
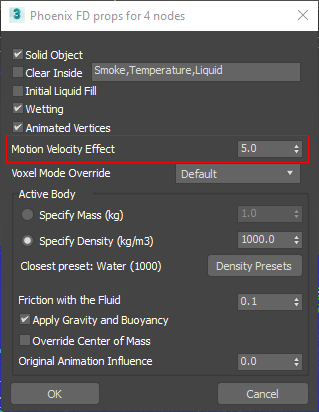
Select the ship and right-click for the Quad Menu and select Phoenix Properties.
The Motion Velocity Effect parameter will make the simulation act as if the speed of the ship is multiplied. Enter a value of 5. This means that the ship will affect the splash as if it were moving five times faster than its animation. Then click OK.
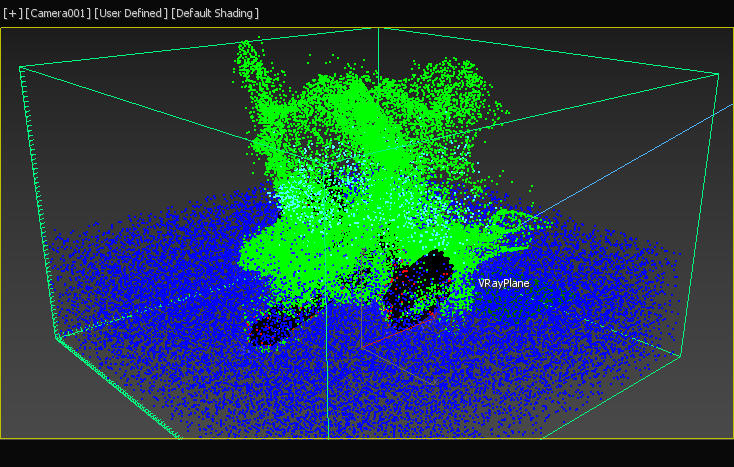
Start the simulation. Notice that the ship creates much bigger and more dramatic splash.
Stop the simulation around frame 50 and scrub the animation to study the new splash.
You may have some particles that are leaving the Simulator.
Let’s say we don’t need these Splash and Foam particles that go outside the Simulator. We can even speed up the simulation time by deleting them once they leave the grid.
Go into the Create Panel and create a Box object. Make the box taller than the Simulator and place it against the side of the grid where the particles are escaping. Position it so it overlaps into the Simulator grid, making sure to have full coverage of the side. Note that the particle deletion only occurs where the box and Simulator overlap. The box cannot kill these particles once they leave the simulation grid.
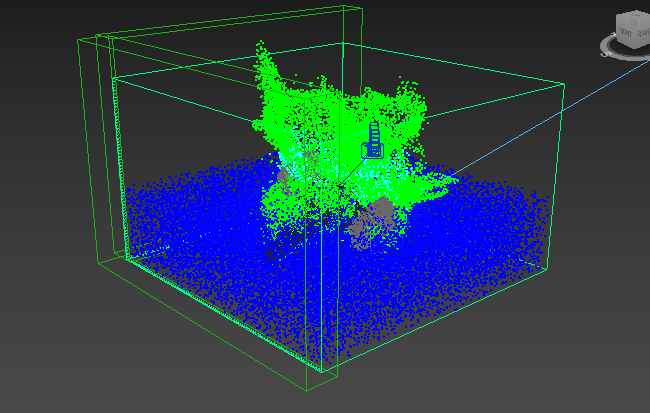
The plan is to delete only the Foam and Splashes particles while leaving the Liquid particles unaffected.
Right-click on the Box, and choose Phoenix Properties. Uncheck Solid Object, so the box won’t affect the simulation.
Turn on Clear Inside and then type in Foam, Splashes to clear only those types of particles from the simulation. Then press OK.
Start the simulation again and notice that the particles that were going out are killed when they come into contact with the box.
![]()
Switch to the Camera view and see how the splash looks when it is going to render it out.
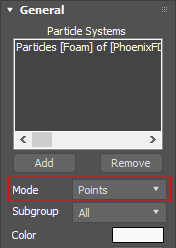
First, a few rendering tips. Open the Scene Explorer and select the first PHXFoam object.
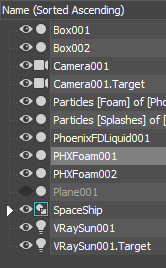
From the Modify Panel change the Mode parameter to Points.
Repeat this for the second PHXFoam object as well. This speeds up rendering quite a bit.
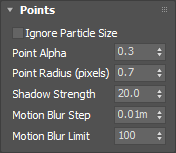
In the Points rollout change the Point Alpha to 0.3, the Shadow Strength to 20, and the Point Radius to 0.7.
Again, do this for both the foam objects and close the Scene Explorer.
This makes the particles more opaque in the render, making them look nicer.
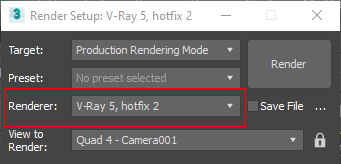
To prepare your scene for rendering a simulation make sure V-Ray is set as your Renderer in the Render Setup window.
Open Render Settings and render out the view. Pretty quickly you will see the ocean, the splash, and a giant box! Stop the render.
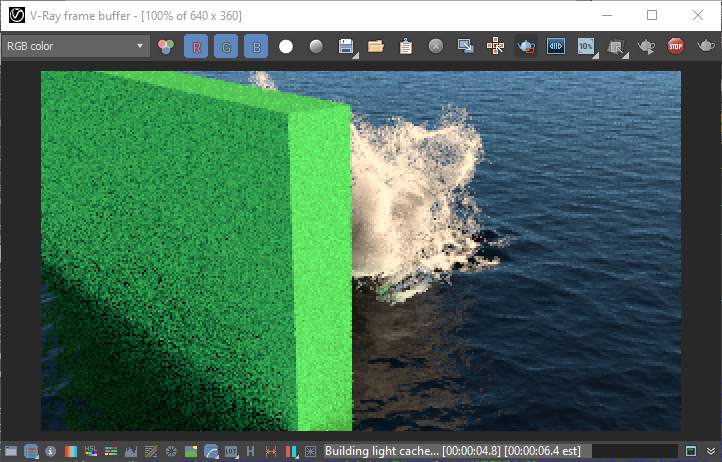
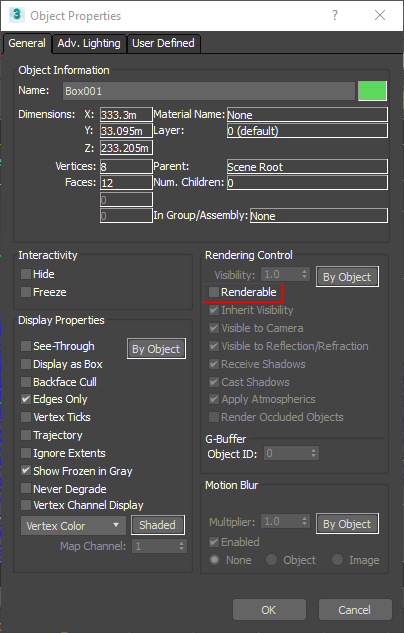
Right click on the Box and choose Object Properties. Disable Renderable for the box and now we can render the scene properly.
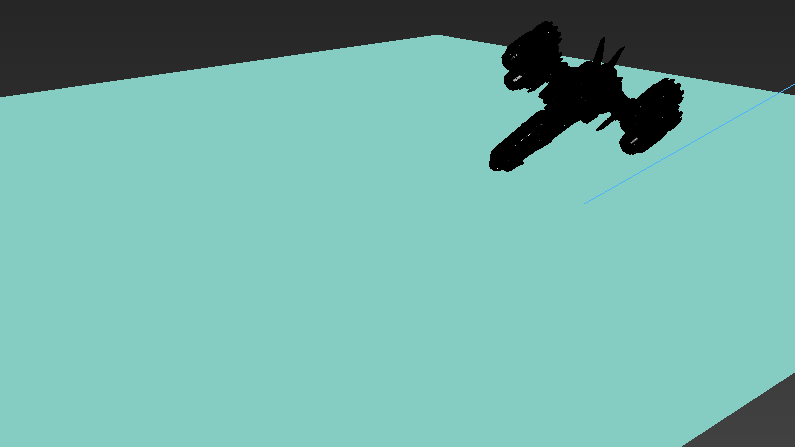
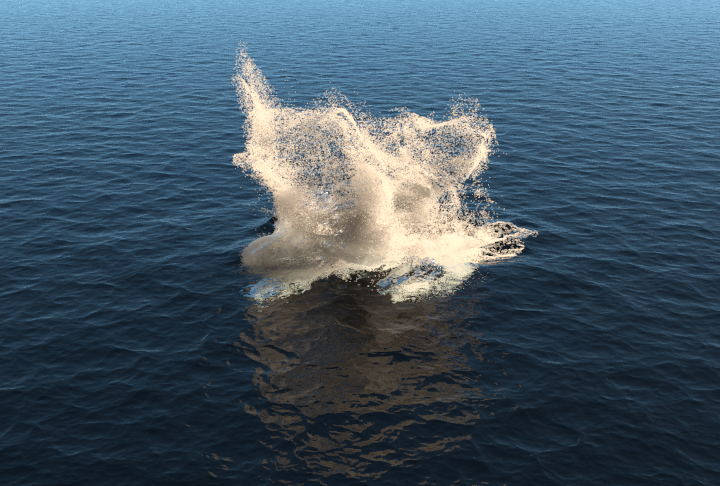
Here is the final render of frame 40.
And the rendered sequence.
If you want you could increase the Motion Velocity value even more to achieve more dramatic splash.
In the following example the Motion Velocity Effect is set to 25.0.