This page provides information about the Tri-Planar texture in V-Ray for Revit.
Overview
The Tri-Planar texture allows quick assignment of bitmap and other 2D textures on objects that don't have suitable UV coordinates. The texture works by projecting one or more textures along the object-space axes depending on the surface normals of the shaded object.
The texture works both for colors and bump maps.
Any texture can be replaced via the Replace With New Texture (![]() ) button, which activates when you select the texture to be replaced. If the texture is an instance, all copies are changed as well.
) button, which activates when you select the texture to be replaced. If the texture is an instance, all copies are changed as well.

Parameters
Mode – Specifies whether to use the same texture on all axis, or separate textures for each axis. For more information, please see the Texture mode example below.
One Texture – Projects the same texture along each local axis.
X/Y/Z Texture – Uses a different texture along each axis.
Texture X – The base texture, or the texture for the X axis if the texture mode is set to different textures. When a texture is selected, it overrides the color as long as the texture checkbox is enabled.
Texture Y – The texture for the Y axis. When a texture is selected, it overrides the color as long as the texture checkbox is enabled.
Texture Z – The texture for the Z axis. When a texture is selected, it overrides the color as long as the texture checkbox is enabled.
Size – Controls the size of the projected texture.
Blend – Controls the amount of blending at the plane seams. Lower values produce sharper transitions between projections. For more information, please see the Blend example below.
Texture Transforms
Projection Space – Specifies the 3D space where the texture projection takes place:
World Space – Uses world coordinates.
Object Space – Uses each object's local coordinates.
Offset X/Y/Z – Specifies the offset from the reference frame center (object or reference node).
Rotation X/Y/Z – Specifies the texture rotations for the three axis, in degrees, in texture space. For more information, please see the Texture Rotation example below.
Randomization
Mode – Specifies what to use to randomize the offset/rotation: For more information, please see the Randomizations example below.
By face ID – Computes the seed based on the face material ID of the mesh.
By render ID – Computes the seed based on the render ID of the objects.
Texture Offset – Randomizes the texture offset in texture space.
Texture Rotation – Randomizes the texture rotation from one object to another in texture space.
Axis – Randomly permutes the projection axes.
Frame Rotation – Random frame rotation (in object or reference space).

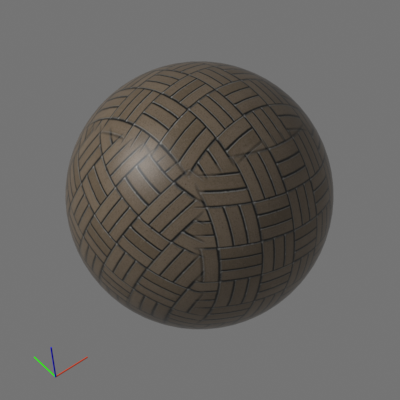
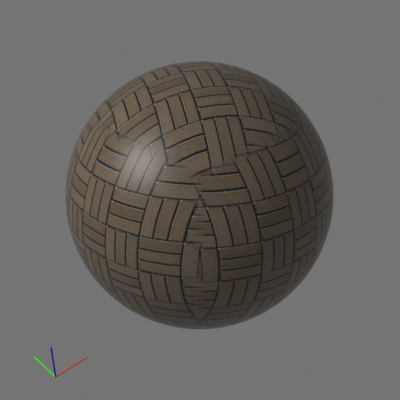
Example: Texture mode
This example shows the difference in the Texture modes - the first image displays the ball with texture applied in One Texture mode, while the second one shows the X/Y/Z Textures application on the ball.


Example: Blend

Blend is 0.0

Blend is 0.1

Blend is 0.3
Example: Texture Rotation

Texture Rotation is 0, 0, 0
Texture Rotation is 30, 0, 0

Texture Rotation is 0, 30, 0
Texture Rotation is 0, 0, 30
Example: Randomizations
This example shows the effect of the different randomization options; the random mode is set to By render ID.

no randomizations

Random texture offset is enabled

Random texture rotation is enabled

Random axis is enabled

Random Frame Rotation is enabled
Multipliers
Mode – Specifies the multiplication mode of the colors.
Multiply – The color used for blending is black.
Blend Amount– The color used for blending is the one specified in the color slot.
Texture X – Blends between a color and a texture, if specified.
Texture Y – Blends between a color and a texture, if specified.
Texture Z – Blends between a color and a texture, if specified.
