This page provides a tutorial on using XGen Archive Primitives with V-Ray for Maya.
Overview
These tutorials explain how to use instanced, animated objects (archives) with XGen and V-Ray for Maya.
Before starting these tutorials, it is recommended that you review the XGen General page.
Part I: Export an Archive
To export geometry with materials as an XGen archive, the scene has to be saved on disk.
Select the geometry that you want to export.
Ensure that the name has no colons. For example, a mesh named Torso:torso1Shape will not export properly as an archive using XGen. Deleting the colon will fix the problem. Transforms should also not contain any colons.
Ensure that the AbcExport maya plugin is loaded before exporting archives - XGen uses it.
Choose Export Selection as Archive(s) from the File menu. For older versions of Maya, this can be found under XGen or Generate menus.
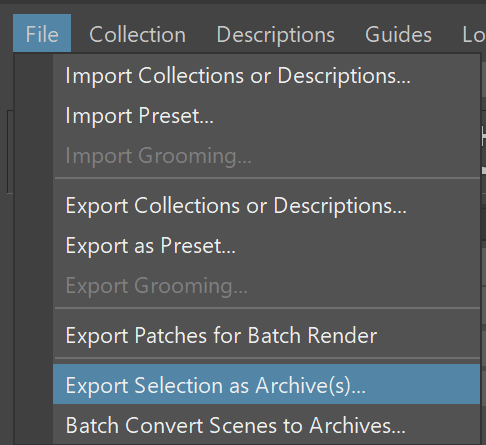
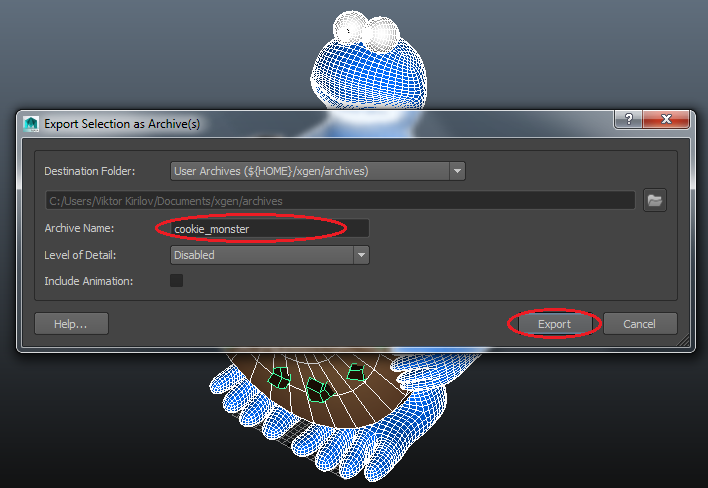
In the dialog that opens, give the archive a name and export it.
To download the scene created with these steps, please click the button below.
When an XGen archive export fails (no .xarc file is generated), find the <archive_name>.log file in the output directory of the export and check for errors.
Part II: Create a Simple Scene
In this step, we will create a simple scene for the XGen Archive primitives.
Set Up a Plane
Create a plane.
Assign a description with archives randomly across the surface.
Set the density to 0.5.
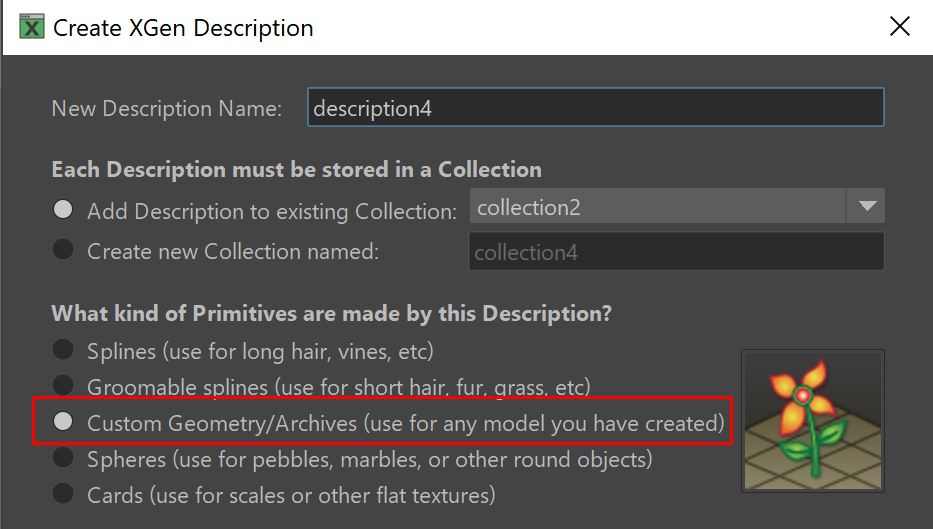
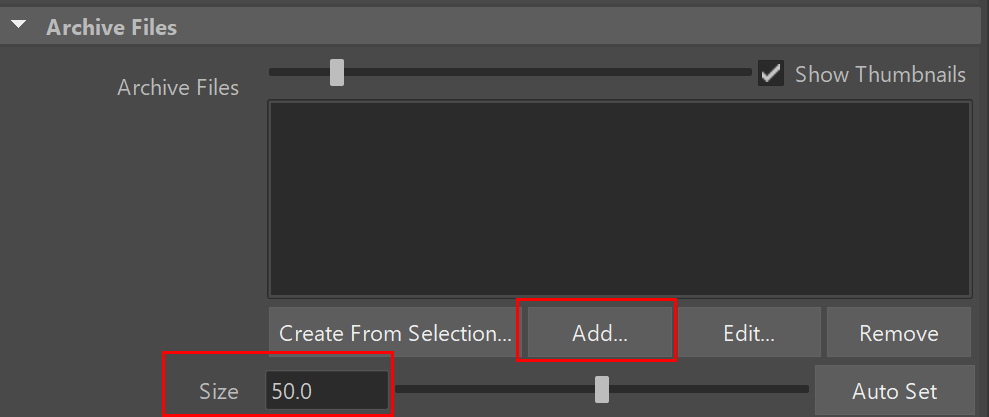
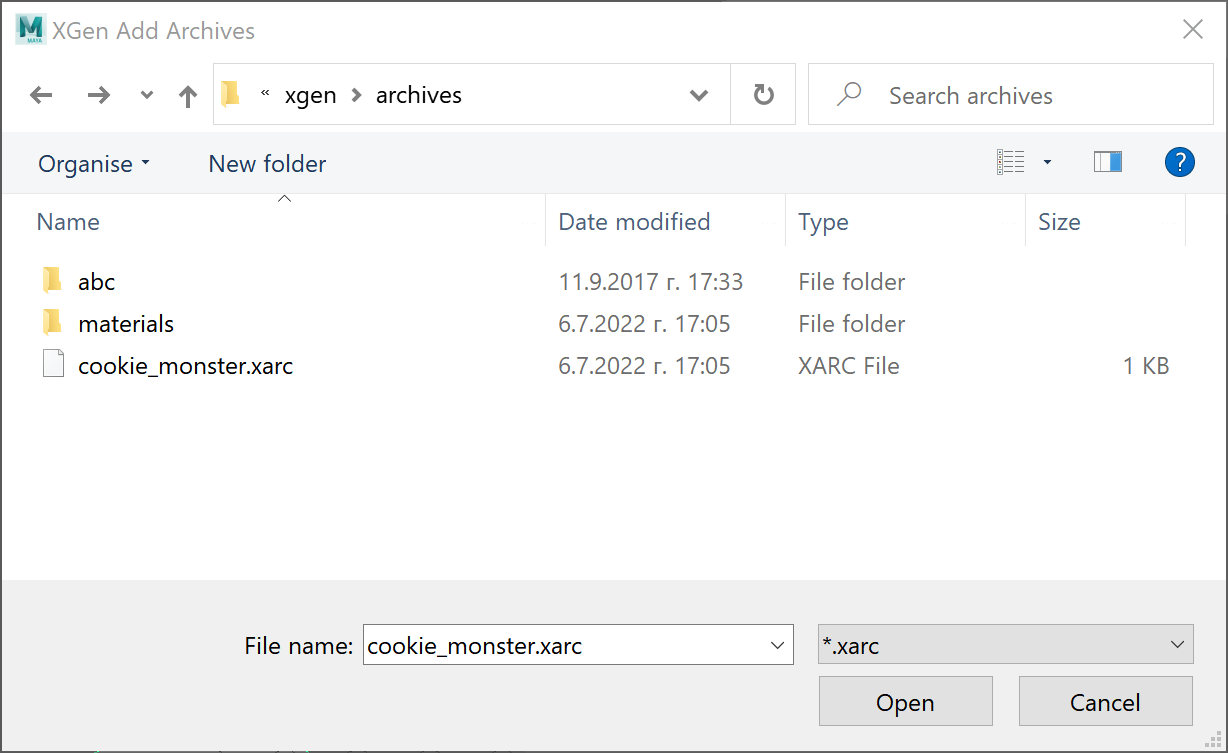
Set up the Archive Primitives
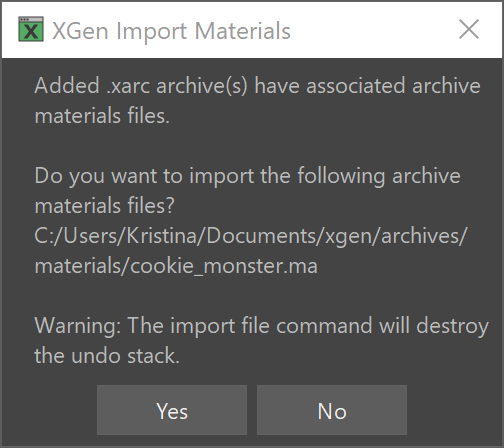
Save the scene after the materials have been imported.
Give the twist attribute the following expression:
rand(-180, 180)
Set Up the Render
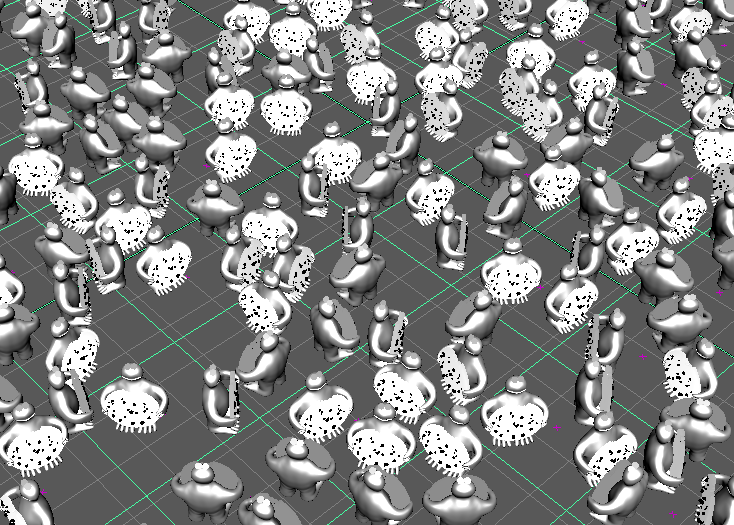
You should see something like this in the viewport:
Add a VRay Dome Light to the scene and render.
The result should be like this:
Part III: Adding Multiple Archives
More than one archive can be instanced in the same XGen description. Here is an example with a second archive.
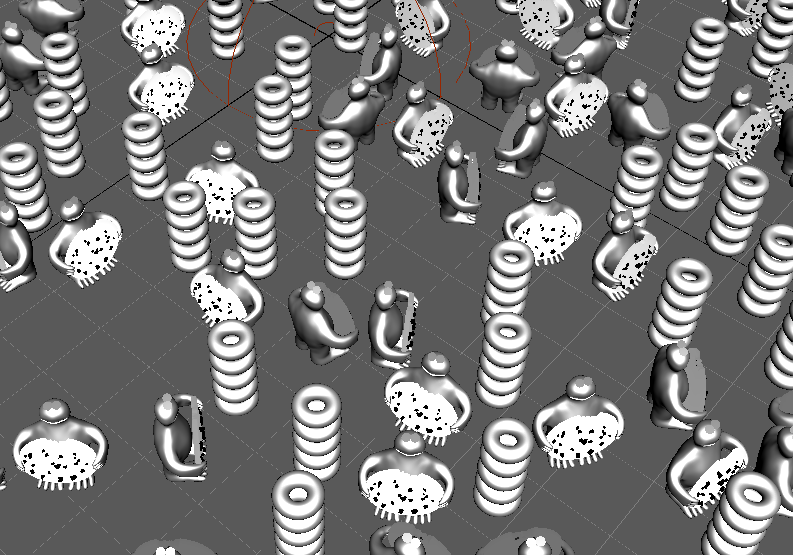
And let's see how this looks in the viewport.

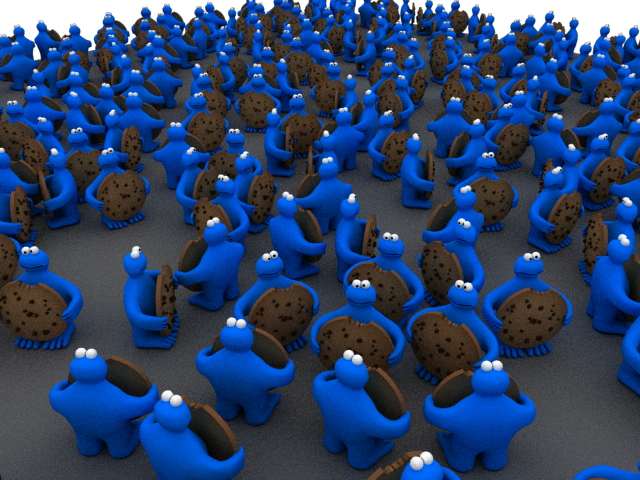
And when rendered it should look like this.
To download the scene created with these steps, please click the button below.
Part IV: Per Patch/Description Materials
A material can be assigned to a patch/description and all archive instances can be forced to use that material.
Select the description from the Outliner and right click in the viewport > Assign New Material.
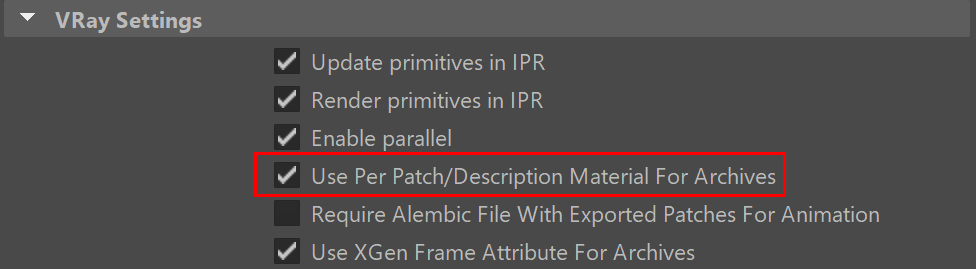
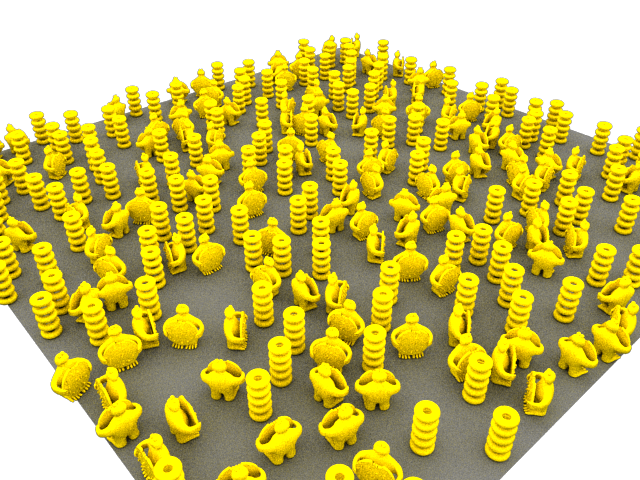
To make everything yellow we can assign a VRayMtl to the description and tick the Use Per Patch/Description Material For Archives option from the VRay settings in the Preview/Output tab:
There may not be a change in the viewport, but when rendered it should look like this:
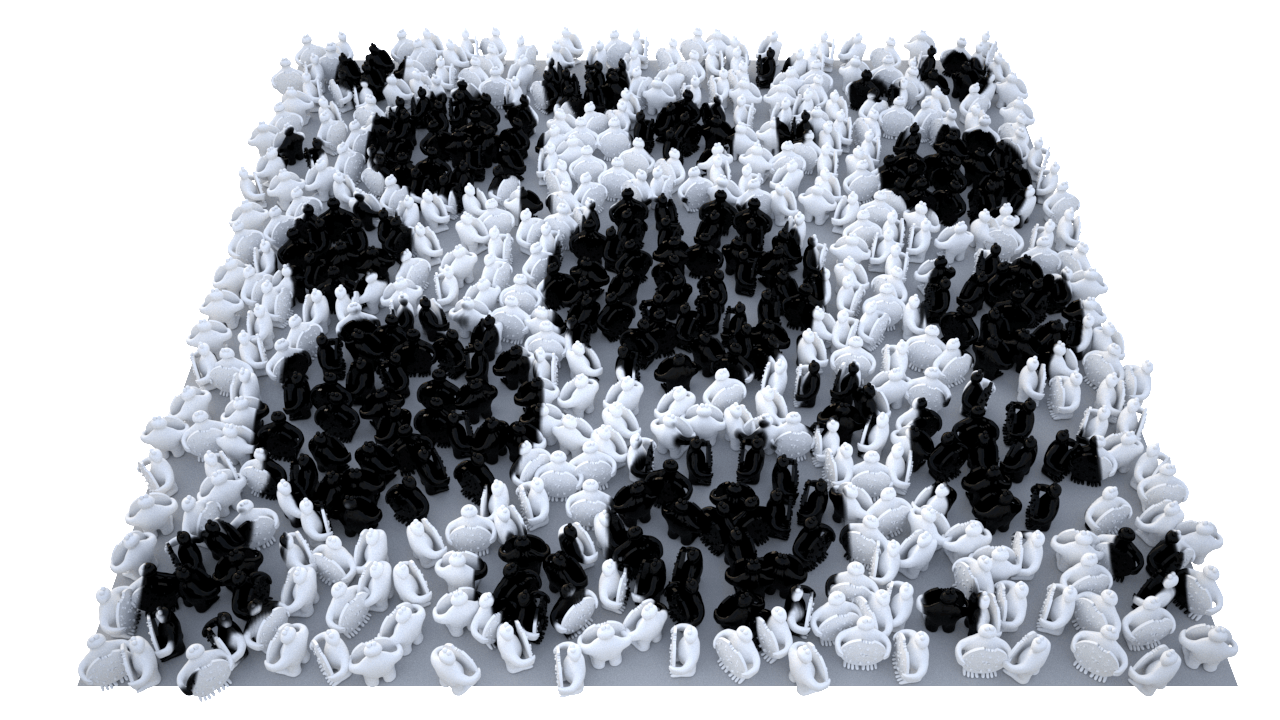
- Projected textures can be used too! Here is an example with a projected file texture instead of the yellow diffuse color:
Part V: Shading Archive Instances Uniquely
Archive instances can be shaded uniquely through the use of Custom Shader Parameters. Unlike XGen Hair there are no specified/hardcoded names for such parameters - colors and floats with any name can be used with VRay User Color and VRay User Scalar and can be plugged to anything.
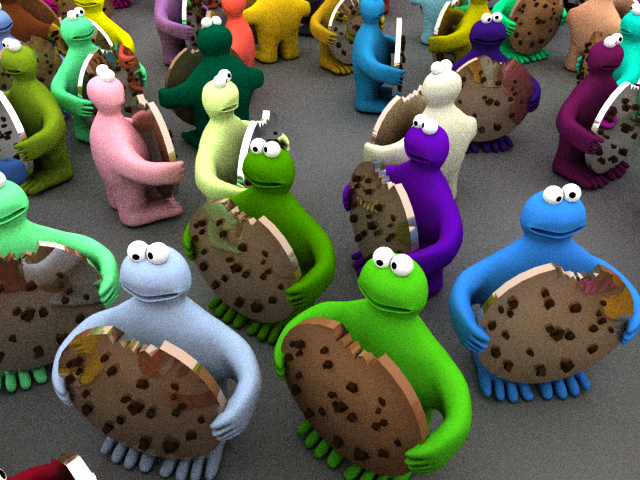
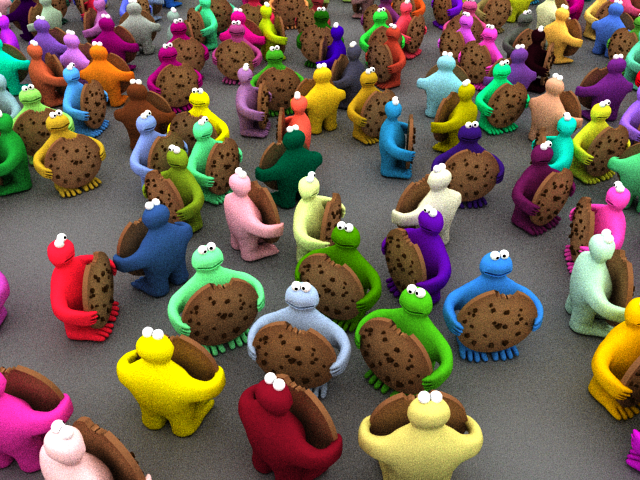
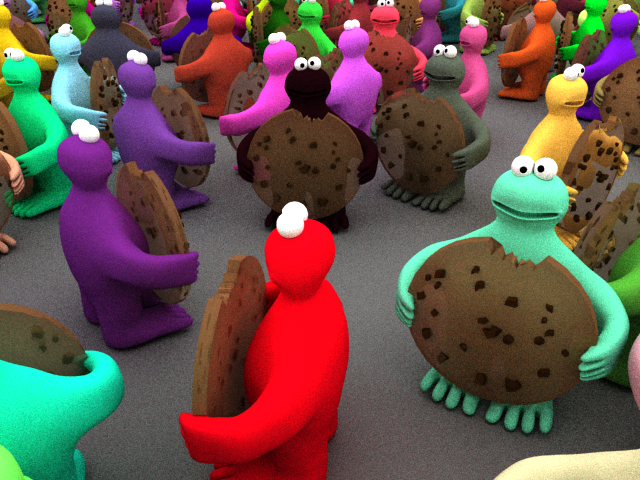
Here we will get rid of the tori archive and make each cookie monster body with a unique random color.
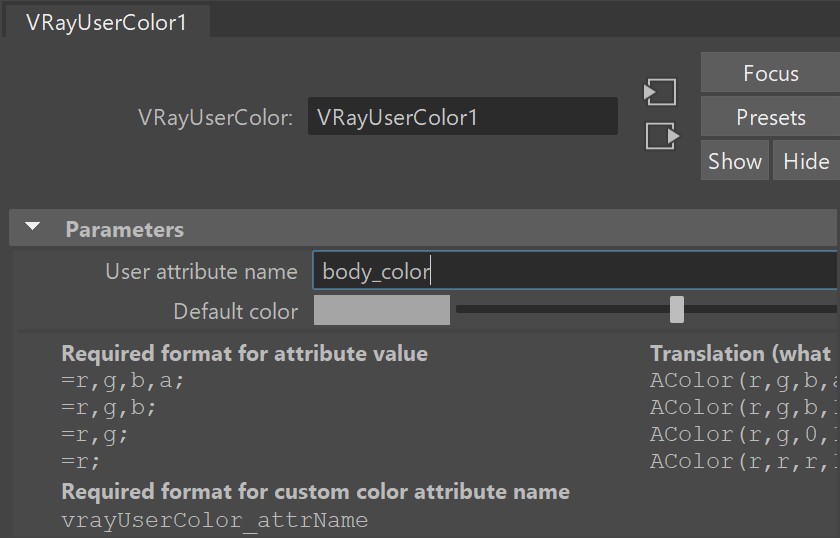
Add a V-Ray User Color Map
Disable the Use Per Patch/Description Material For Archives option from the VRay settings in the Preview/Output tab.
Since the materials for the archive have been imported we can select the cookie_monster:body_blue material and attach a VRay User Color to the Diffuse Color.
Give User attribute name "body_color" as a value (or whatever name you like - It should just match the name of the parameter we will add later).
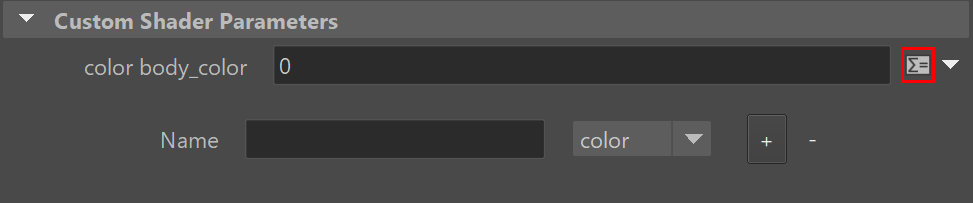
Add a Custom Shader Parameter
Add body_color as type color like so.

Randomize the Color with an Expression
Go to the expression editor for the new attribute.
Set the following expression:
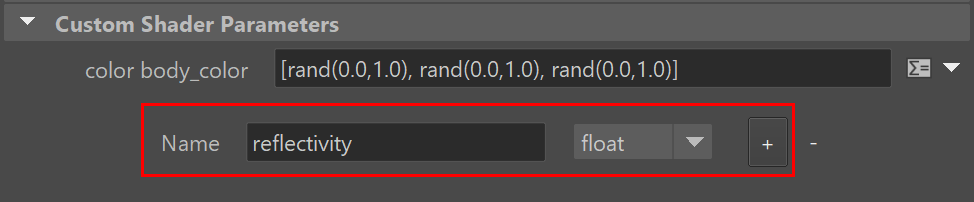
[rand(0,1), rand(0,1),rand(0,1)]
And when rendered it should look like this:
You can also set this expression to the Primitive Color attribute of the Preview Settings in the Preview/Output tab to get some sort of visual feedback in the viewport.
Add a V-Ray User Scalar Map
To render each cookie with a random amount of reflectivity we can create a VRay User Scalar and plug it to the Amount of the reflection of cookie_monster:BrownMtl.
Set the Reflection Color to white so that the Amount dictates the reflectivity.
Set the User attribute name of the VRay User Scalar to something like "reflectivity".
Randomize the Reflectivity
Add a custom shader parameter of type float.
Set the expression of the new parameter to the following:
rand(0,1)
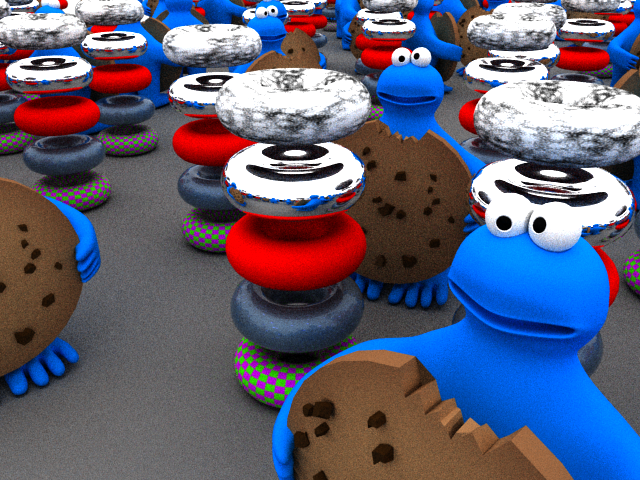
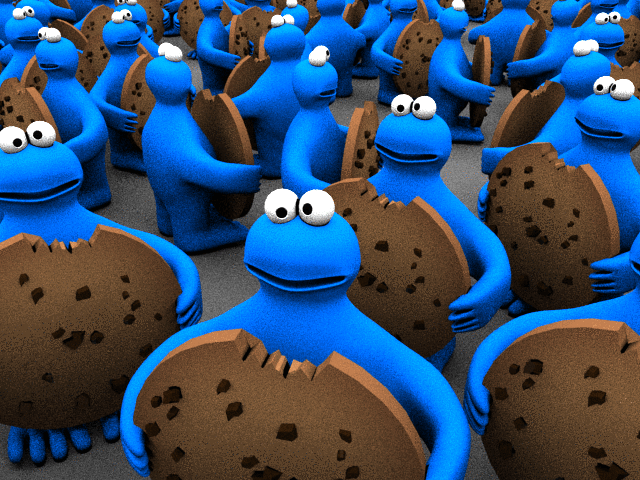
And when rendered it should look like this (with every cookie having different reflectivity):
Additional Options
- A texture map could be also used to drive the Custom Shader Parameters like explained in the XGen General page
Here is another render with randomized refraction for the cookies instead of reflectivity
Part VI: Animated Archives
XGen can export an archive with animation within it from the export menu as shown below:
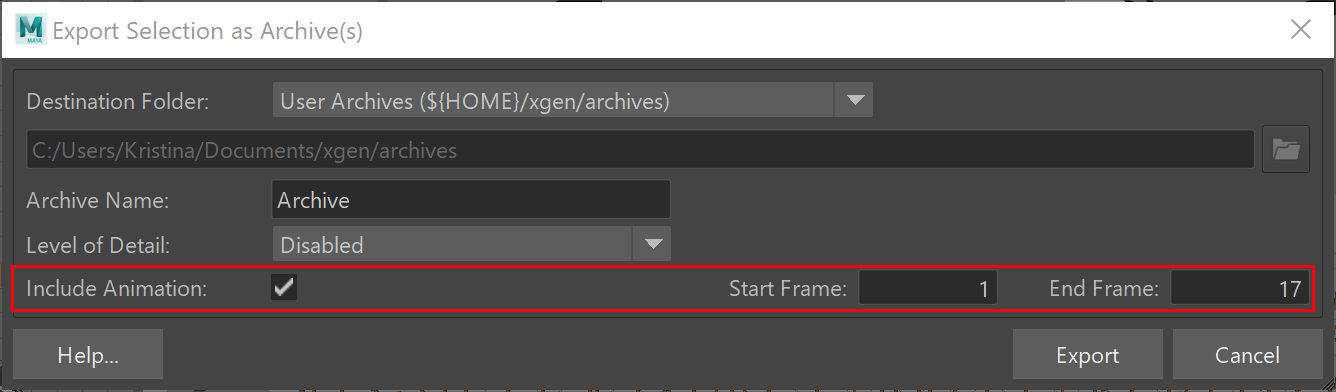
As an example here is the cookie monster with its eyes animated for 26 frames:
The whole archive instances can be animated uniquely as well - for more information refer to the XGen Animation and Motion Blur page.
The animation in the archive does not contain samples for non-integer times! If rendering with motion blur and more than 2 geometry samples for the scene the animated archives will have only 2 geometry samples.
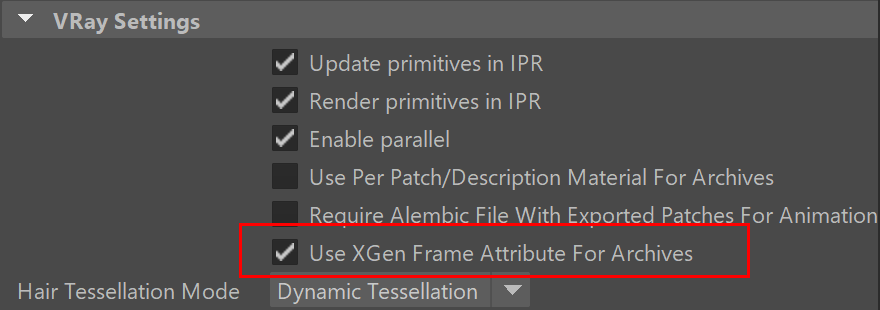
Part VII: Frame Attribute Per Archive
You will also need to enable the Use XGen Frame Attribute Per Archive option from the Preview/Output tab of the XGen window.
Notes
- Everything that can be done for XGen hair (animation, motion blur, batch mode, scene modifications, XGen attributes, IPR) can also be applied to XGen archives
- If an archive is exported with a material from the "initialShadingGroup", then it will not be imported by xgen into the scene when importing the archive.