This page provides information on the User Attributes set that can be added to meshes.
Overview
Allows the user to specify their own attributes, which can then be accessed with the User-defined Color Map (VRayUserColor) and User-defined Scalar Map (VRayUserScalar) textures to provide per-object values for shading attributes. They can also be used in the file name of File nodes to resolve the bitmap file name on a per-object basis. Several attributes can be specified in the string, separated with a semicolon ';' character. User attributes can also be specified on transform nodes. The final string of user attributes for a given object is a concatenation of the user attributes specified on the shape of the object and the user attributes specified on its parent nodes along the DAG path. This allows to conveniently add attributes to a large part of the DAG hierarchy.
Starting with V-Ray 5.0, when user attributes are used at the beginning of a file path, V-Ray treats the path as absolute. For example, if a file node loads a texture from <userAttribute>/texture.png, the path is treated as absolute and the Maya project path is no longer prepended. To mimic the old behavior, use the fake user attribute <PROJECT_PATH> that forces the path to be interpreted as relative. For example, if you have an old scene with an Image name = <filename>.jpg where 'filename' is not a full absolute path but just the jpg name, you can add the fake attribute in front: Image name = <PROJECT_PATH>/<filename>.jpg and it will be loaded correctly.
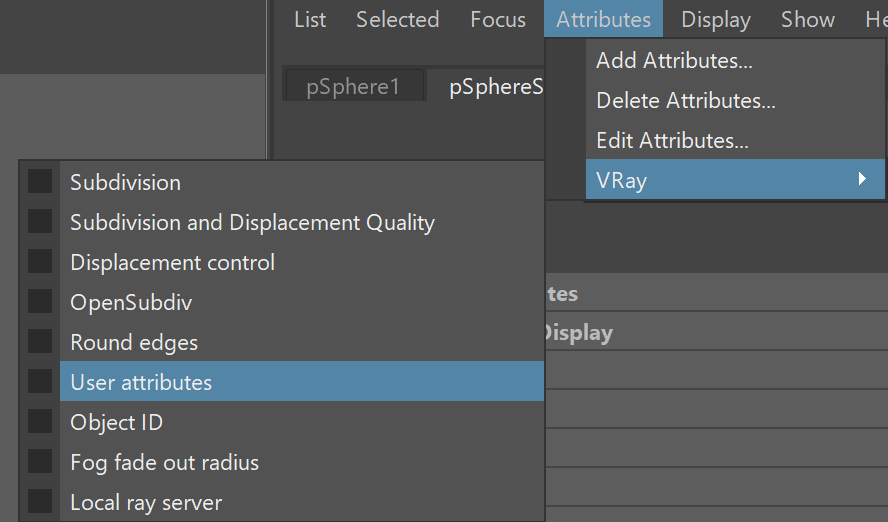
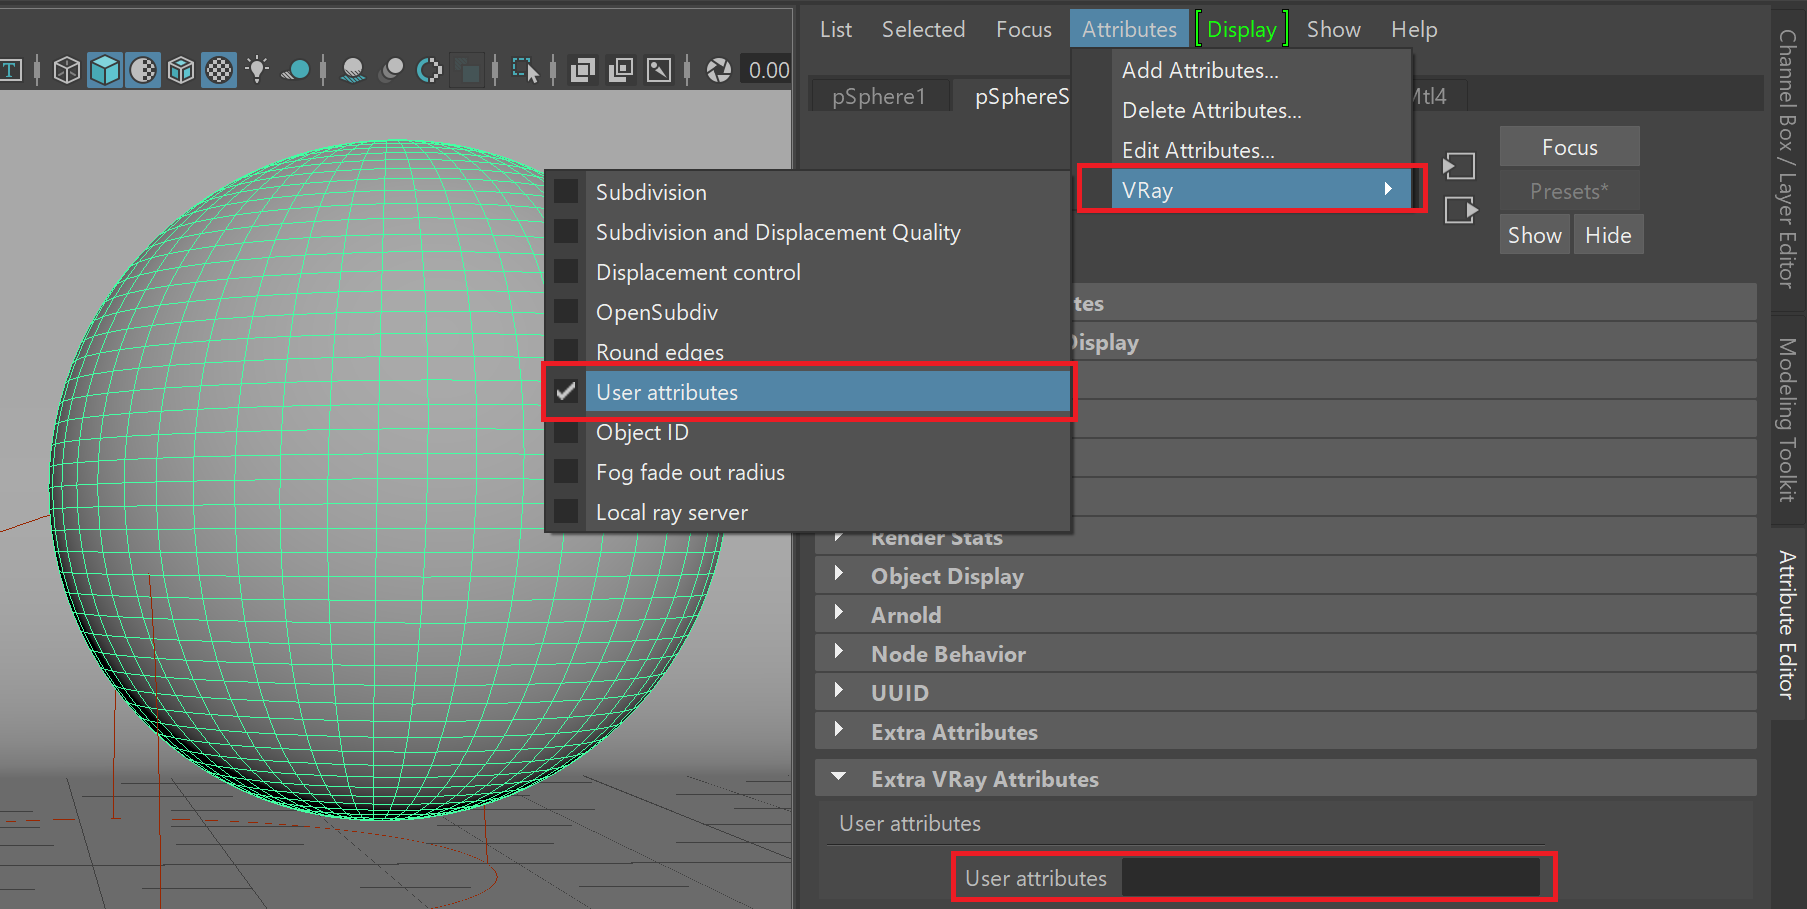
UI Path: ||Select mesh|| > Attribute Editor > Attributes menu > VRay > User Attributes
User Attributes
User attributes – A list of attributes separated by semicolons that are assigned to the mesh.

Animated User Attributes
If you need to animate the value of a user attribute, you can create a custom dynamic attribute attached to the shape or transform of an object, and animate that. The dynamic attribute must be named vrayUserColor_attrName or vrayUserScalar_attrName or vrayUserString_attrName depending on the attribute type. You can then use the tag <attrName> in textures like VRayUserColor and VRayUserScalar as well as the file name of a File node.
Example: Scalar User Attributes
In this example, the VRayMtl Reflection Glossiness parameter is controlled with a VRayUserScalar texture. The VRayMtl is applied to all objects, and the VRayUserScalar texture reads a user attribute from each object and passes the value to the material. In this way, the Reflection Glossiness parameter is controlled on the object level with a shared material.
Custom user attributes are assigned to the objects from Attributes > VRay > User attributes. Select each object and assign user attributes to it.
Set an attribute name and assign different values for each object, using the <attribute_name>=<value> syntax.
Note that to pass per-object values for the same attribute, the attribute name needs to be the same on each object.
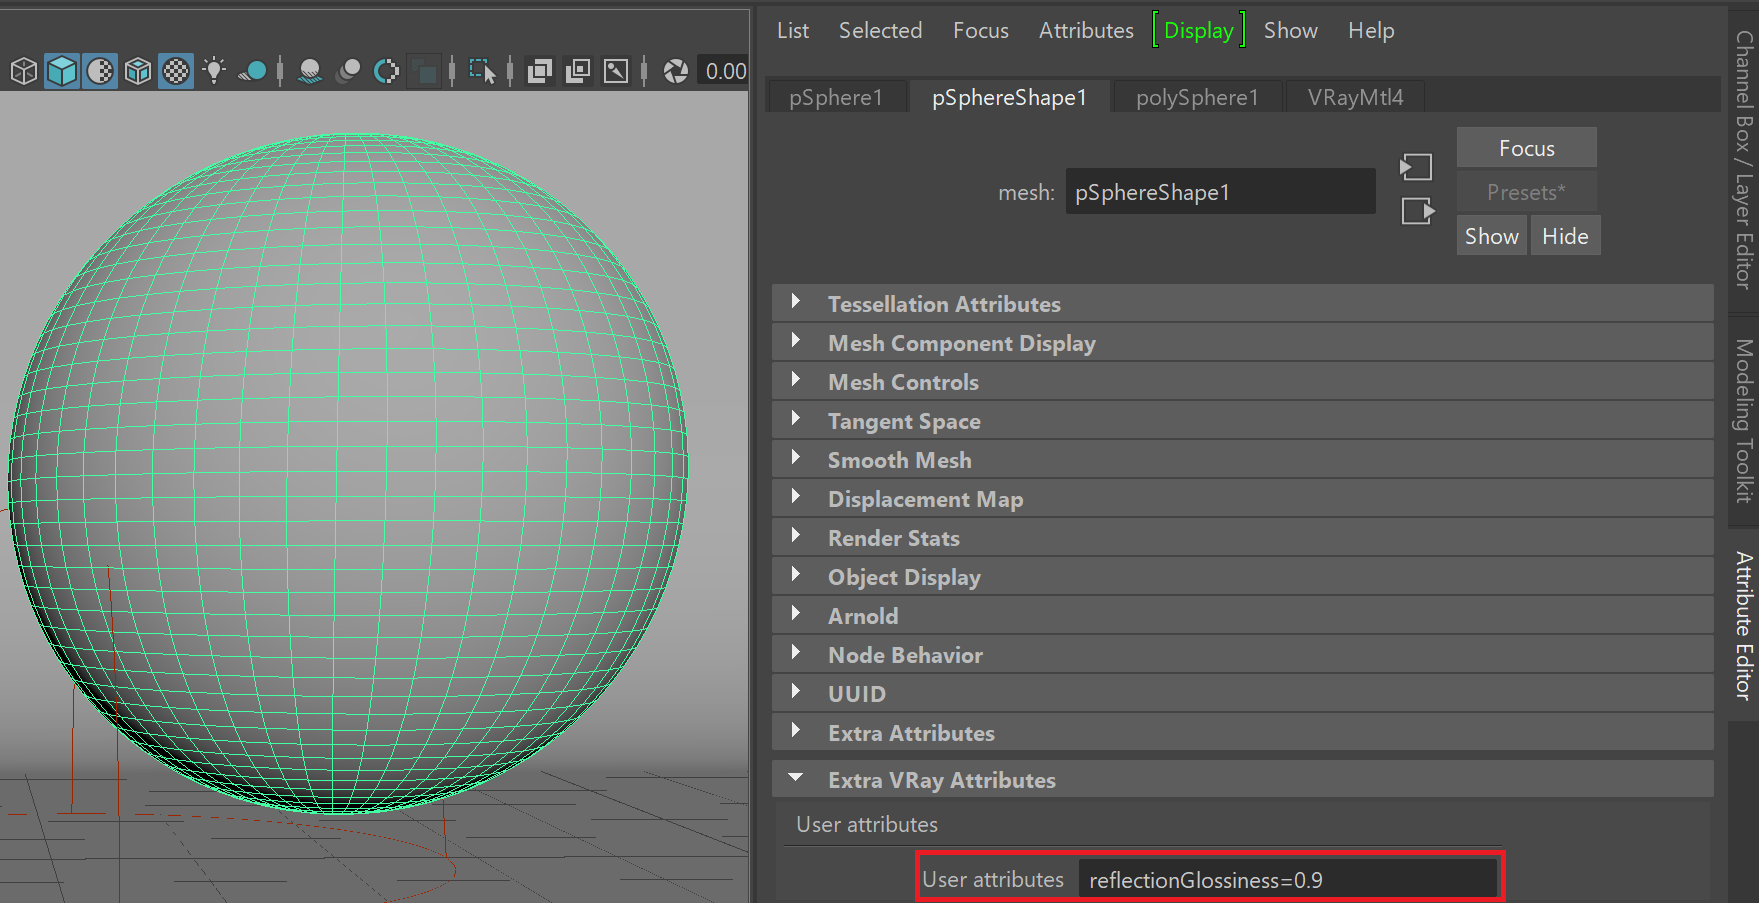
Set a value for the user attribute for the first object
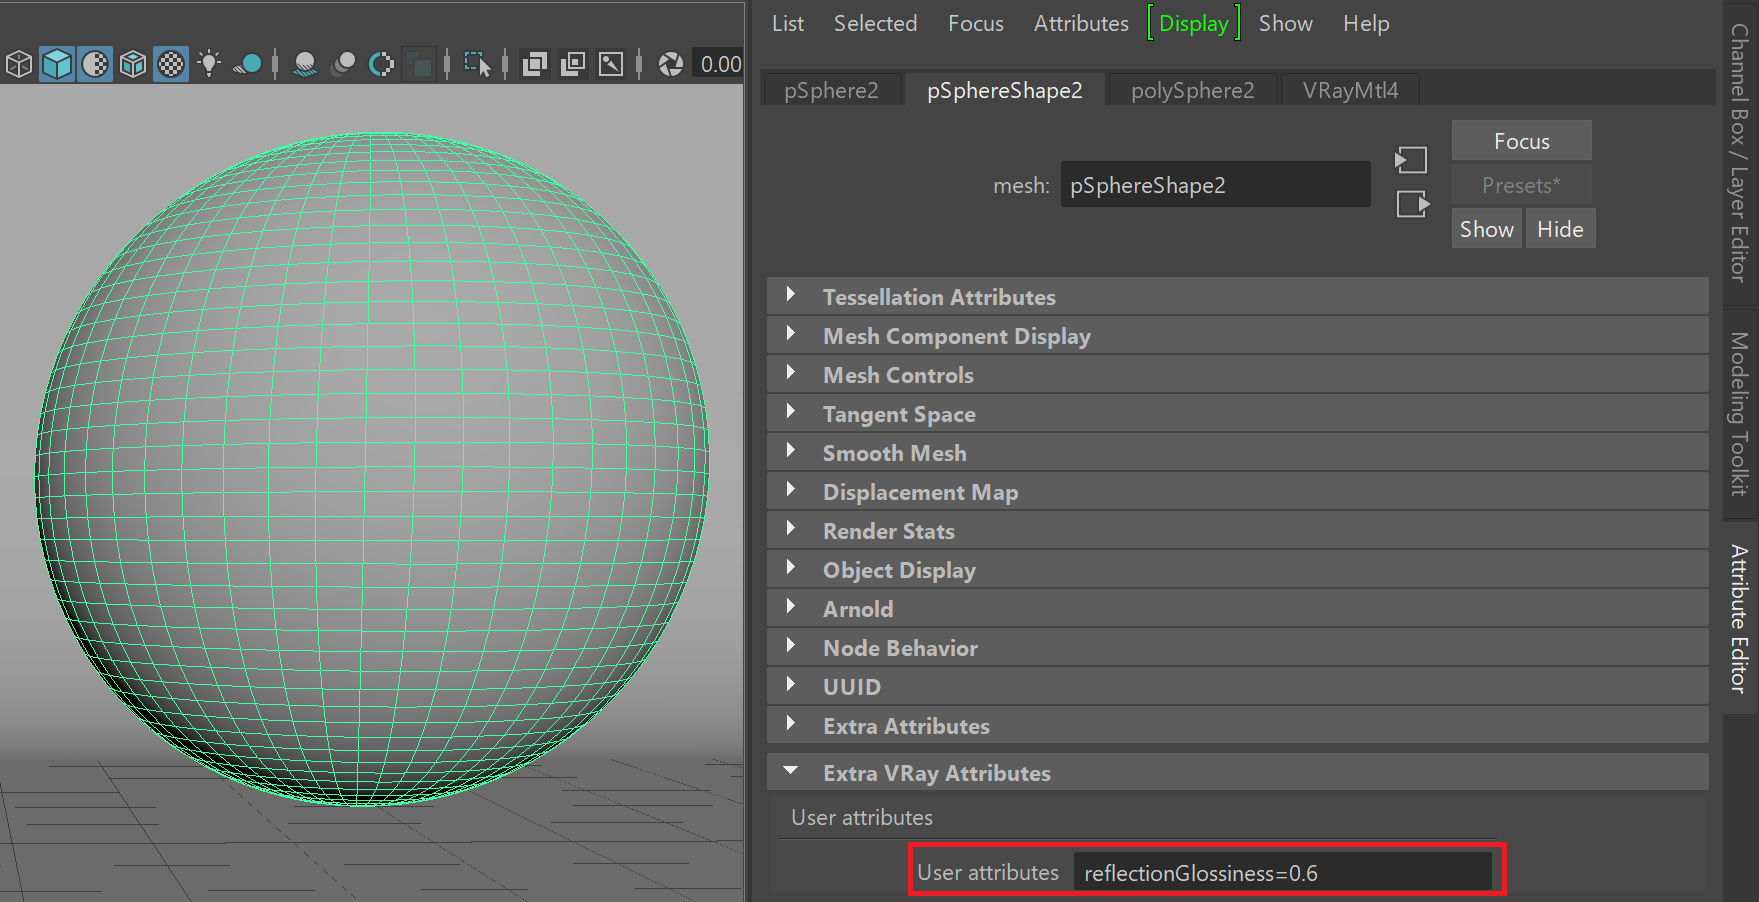
Set a value for the user attribute for the second object
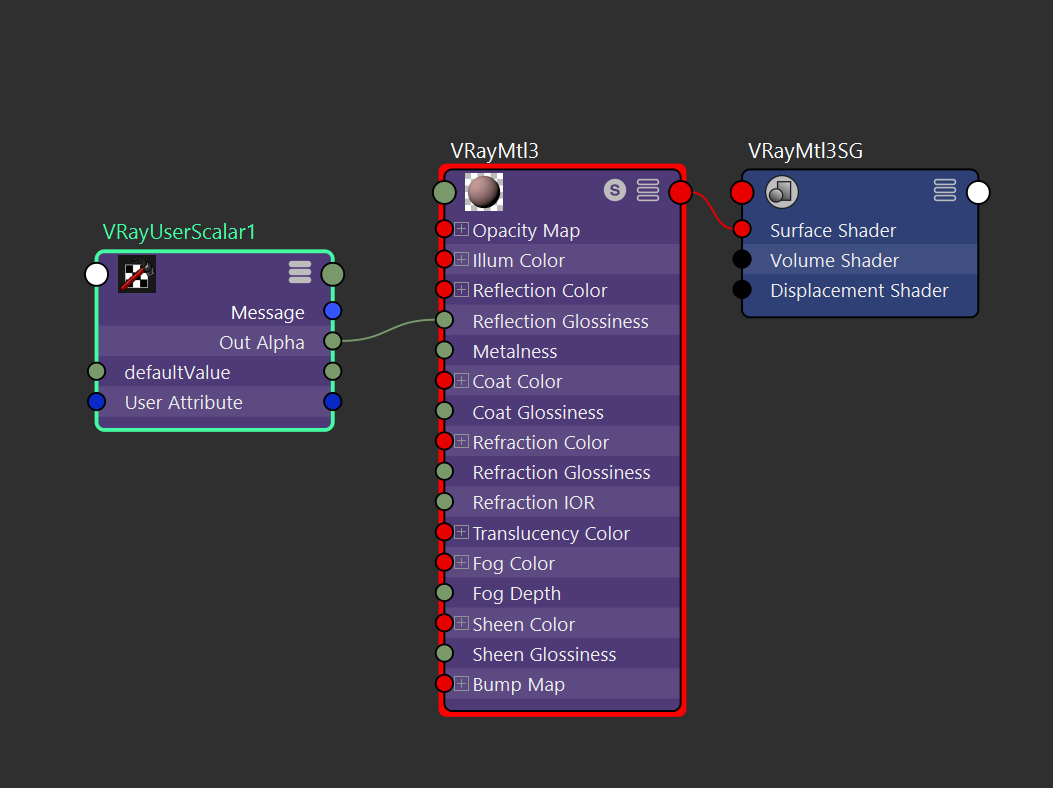
Assign the same VRayMtl to both objects. Connect the VRayUserScalar's Out Alpha to the VRayMtl's Reflection Glossiness input.
The name of the attribute can be anything. In this example, reflectionGlossiness was chosen as the attribute name for simplicity.
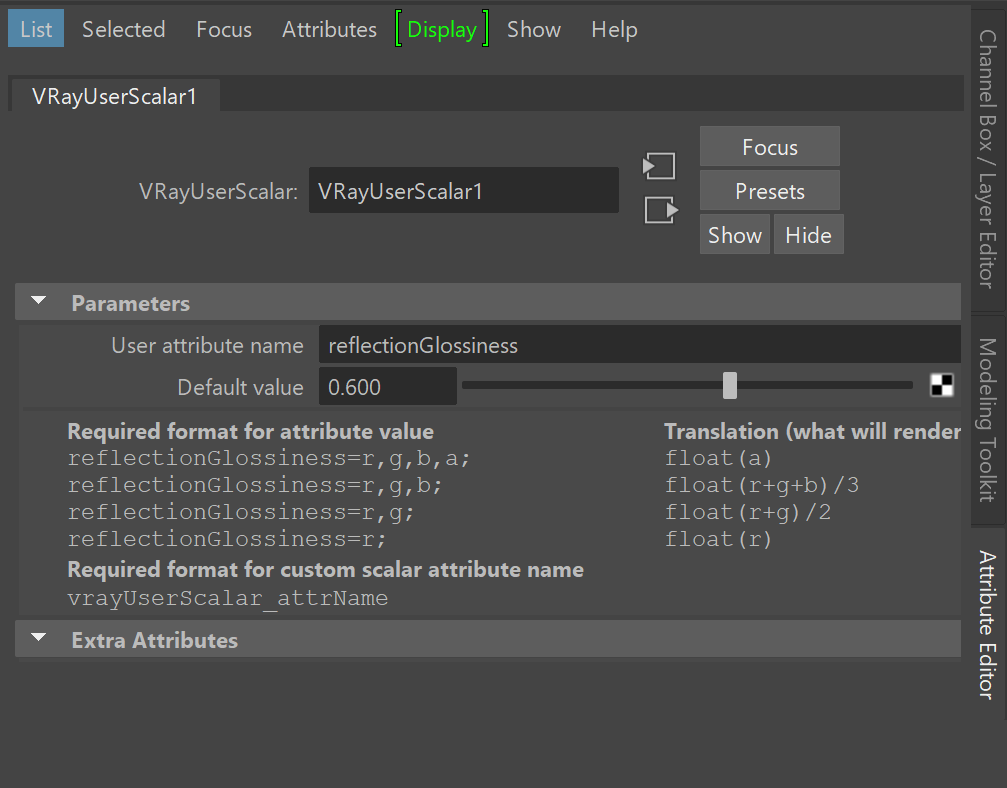
The final step is linking the VRayUserScalar texture to the custom attribute. Enter the name of the attribute in the User attribute name parameter.
The VRayUserScalar texture will pass the attribute value from each object to the material.
Example: Animating a Scalar User Attribute
In this example, the VRayUserScalar texture reads an animated custom scalar attribute and passes it to the VRayMtl Reflection Glossiness parameter.
Note that the example shows the setup for a single object, but this setup is useful when multiple objects have different animated scalar values and all objects share the same material.
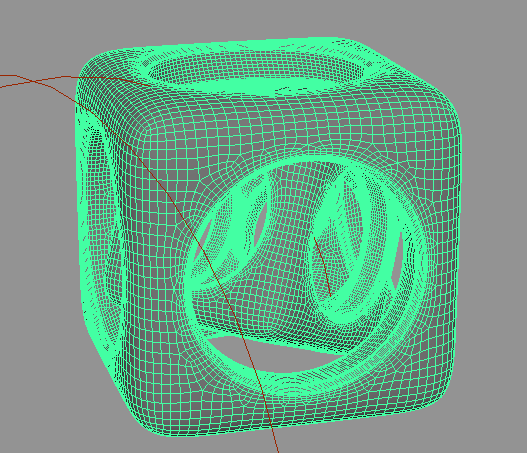
First, create a new custom dynamic attribute on the object. In this case, the attribute is created on a Cube's transform node.
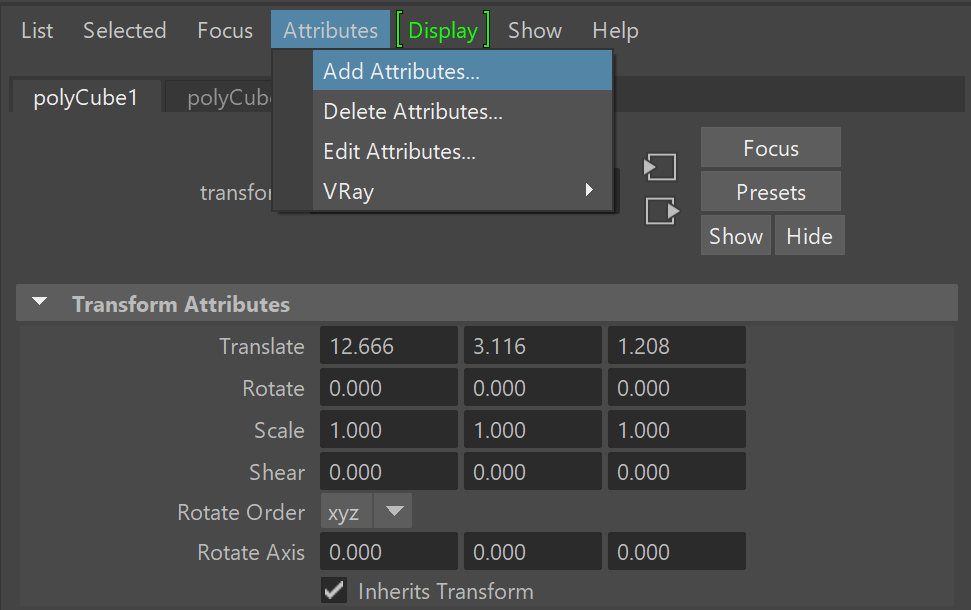
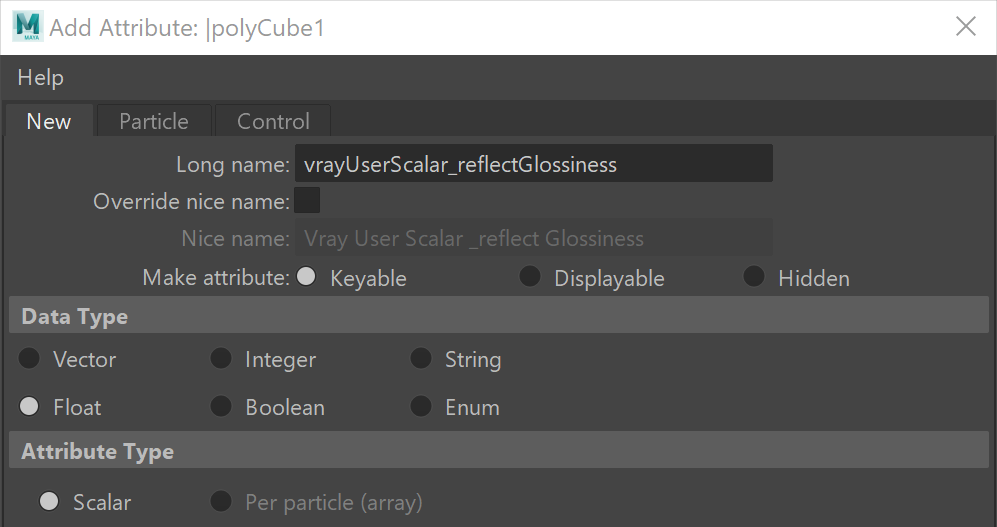
With the object selected, open the Add Attribute window from Attributes > Add Attributes... in the Attribute Editor.
The attribute Long name must begin with vrayUserScalar_ in order to be read by VRayUserScalar later.
To create an animatable scalar attribute, make the attribute Keyable, then set the Data Type to Float and the Attribute Type to Scalar.
After clicking Ok or Add, the new attribute is available in the Channel Box and the Attribute Editor. To animate the value at different frames, move the timeline, enter a value for the desired frame and right click the value field to select Key Selected.
For this example, the attribute is keyed with a value of 0.6 on frame 1 and a value of 10 on frame 10.
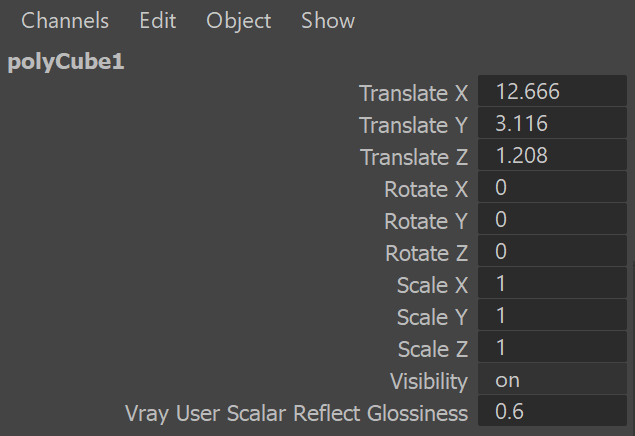
New user attribute with the value keyed
The attribute value can also be edited from the Extra Attributes rollout in the Attribute Editor.

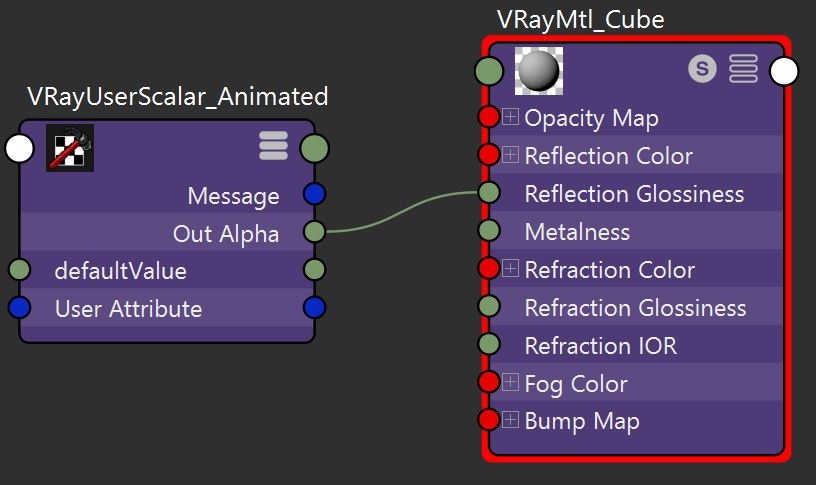
Next, set up the shader so that the VRayMtl's Reflection Glossiness is driven by VRayUserScalar's Out Alpha. The VRayMtl is then assigned to the Cube object.
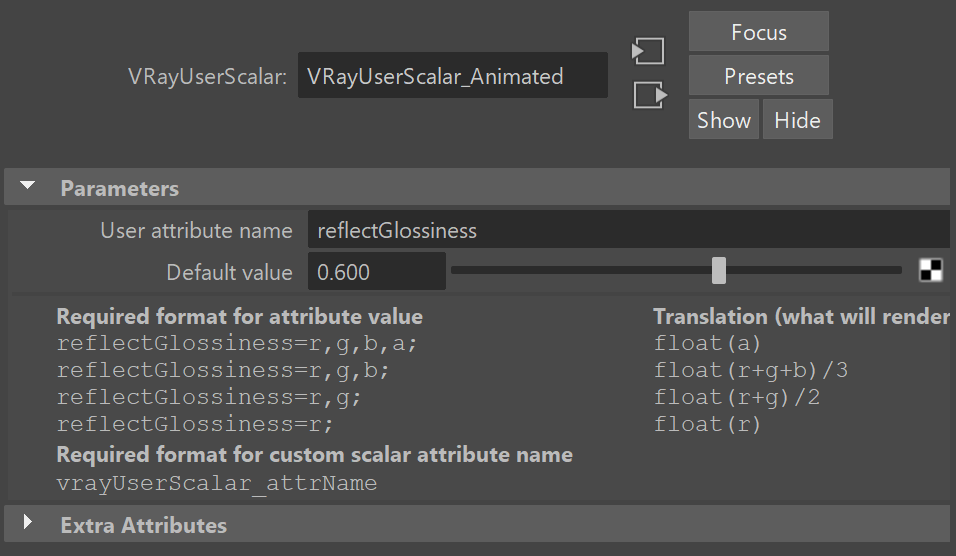
The final step is linking the VRayUserScalar texture with the custom attribute. Enter the name of the attribute without the vrayUserScalar_ prefix in the VRayUserScalar User attribute name parameter.
The final rendered results show the Reflection Glossiness value animated between frames 1 and 10.
This example uses a single object, but the setup is useful when multiple objects have different animated scalar values.
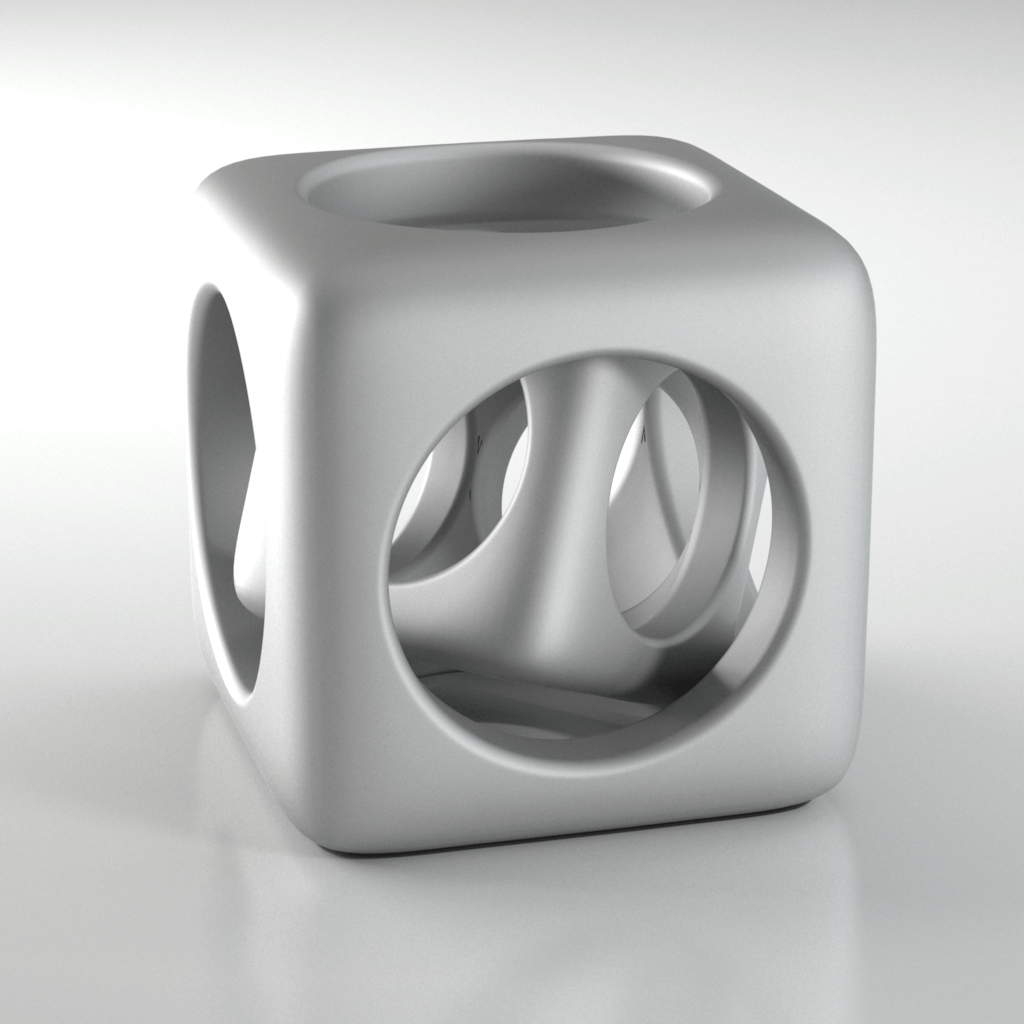 Frame: 1
Reflection Glossiness: 0.6

Frame: 2
Reflection Glossiness: 0.826
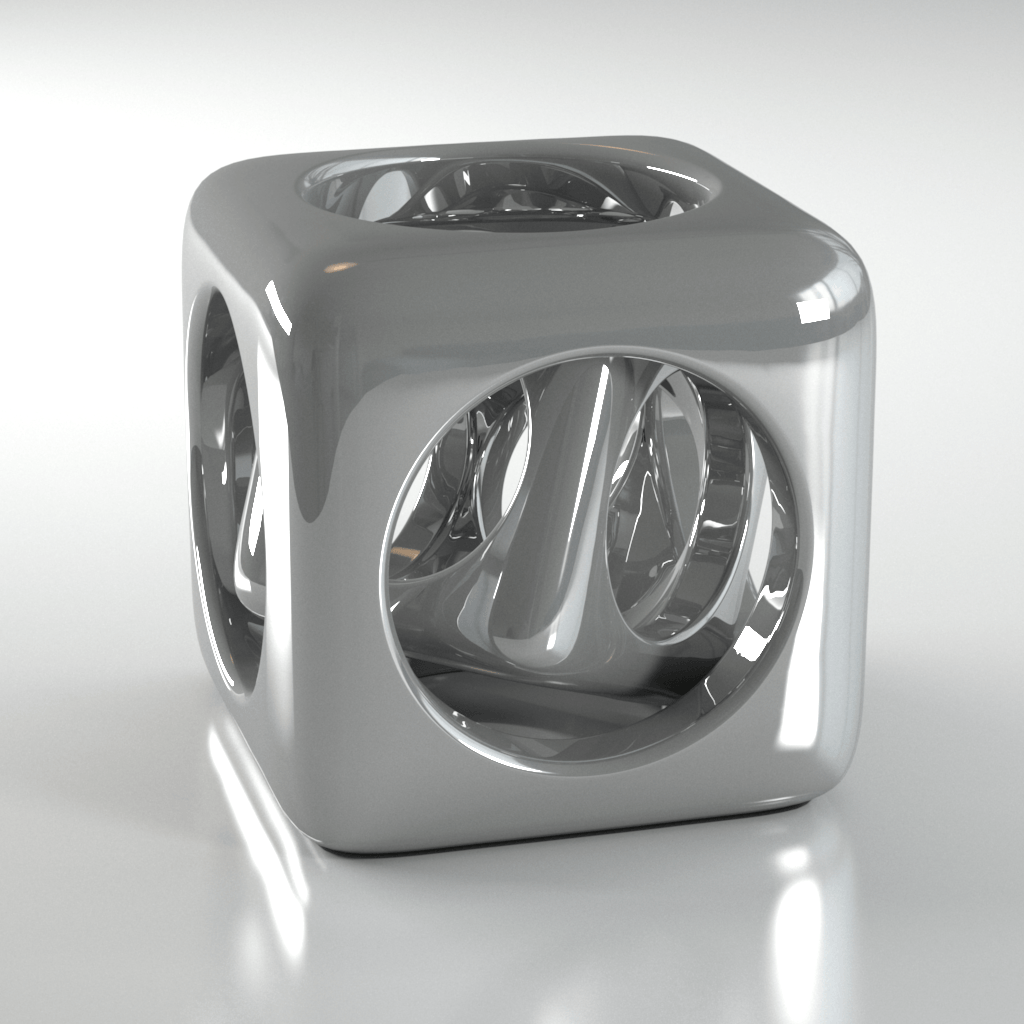
Frame: 10
Reflection Glossiness: 10.0