This page provides information about the V-Ray Lister.
Overview
The V-Ray Lister provides an easy and quick way to manage the settings of all cameras and lights in a scene through one window.
The V-Ray Lister has two tabs: Lights and Cameras. They replace the old V-Ray Lights Lister and V-Ray Camera Lister, available in earlier V-Ray versions.
The Lights tab offers a handy way to modify many common attributes of all lights in the scene, both V-Ray lights and standard 3ds Max lights.
The Cameras tab allows you to modify the settings of multiple cameras (V-Ray and standard 3ds Max cameras), as well as to copy and paste settings from one camera to another.
UI Path:
||V-Ray menu|| > V-Ray Lister
||V-Ray Toolbar|| > V-Ray Lister icon

General Settings
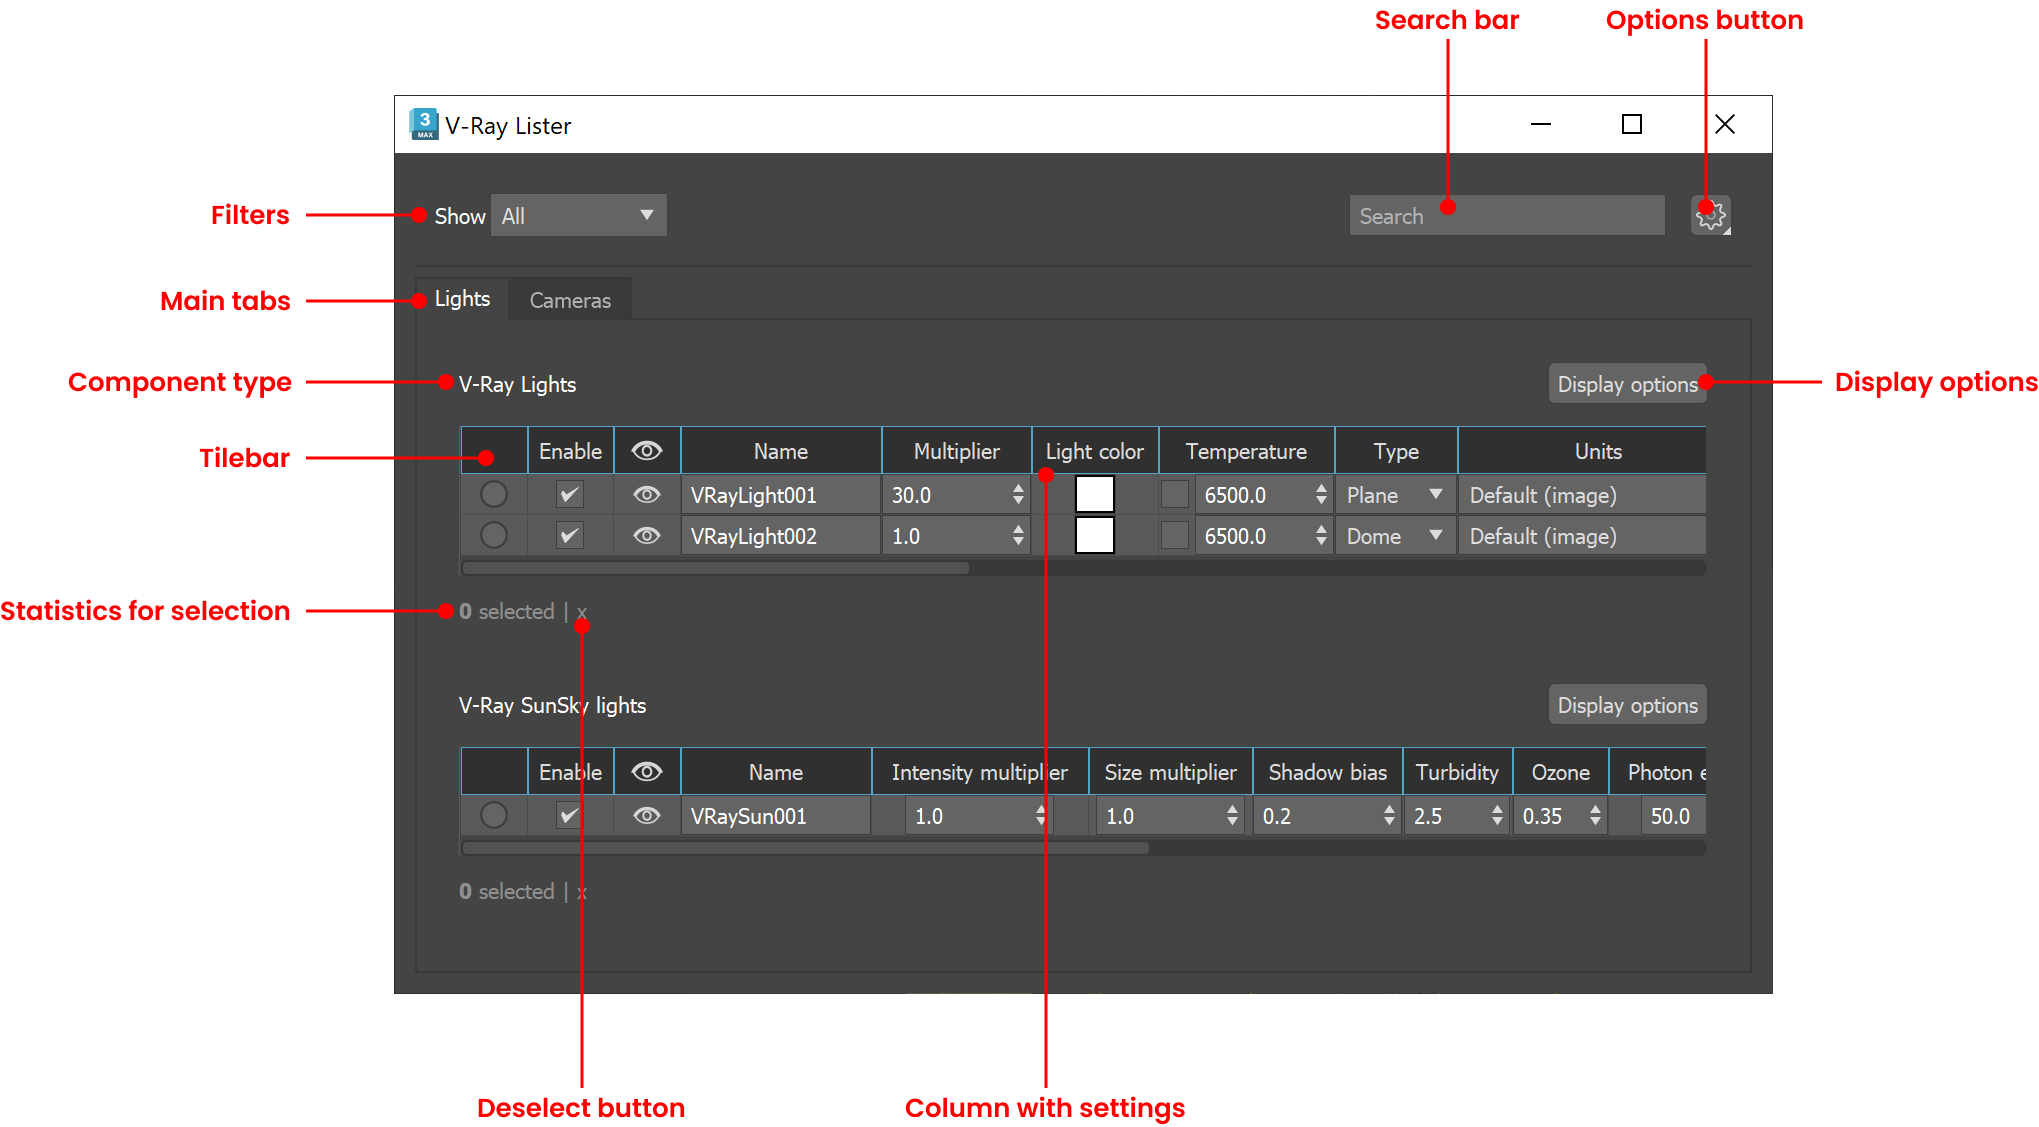
Here are the main components of the Lister. They are available for all tabs:
Filters – Filters the objects by Groups, Layers, and Selection sets.
Search bar – Searches for an object. You need to enter at least 3 symbols in the field. If a filter is applied, it searches only from the stack with the filtered objects.
Options – Offers options for loading, saving and resetting layouts.
Load Layout – Opens the Choose settings file to load window and loads a .vrlst layout file. See the Default and Custom Layouts section for more information.
Save Layout – Opens the Choose saved file destination window and saves the current settings as a layout preset in a .vrlst format.
Reset Layout – Resets the layout to its default state.
Display options – Opens the Display options dialog where you can add or remove shown parameters.
Note that some of the additional columns contain settings that should not be modified as the modifications would have no effect. However, V-Ray provides access to them and you can check their default values.
Titlebar – All cells except for the first 4 cells can be rearranged. The first 4 cells are always going to stay in the same order. The Name cell is stretchable, while the rest of the cells are not.
Statistics for selection – Shows the number of selected objects.
Deselect – Deselects all objects.
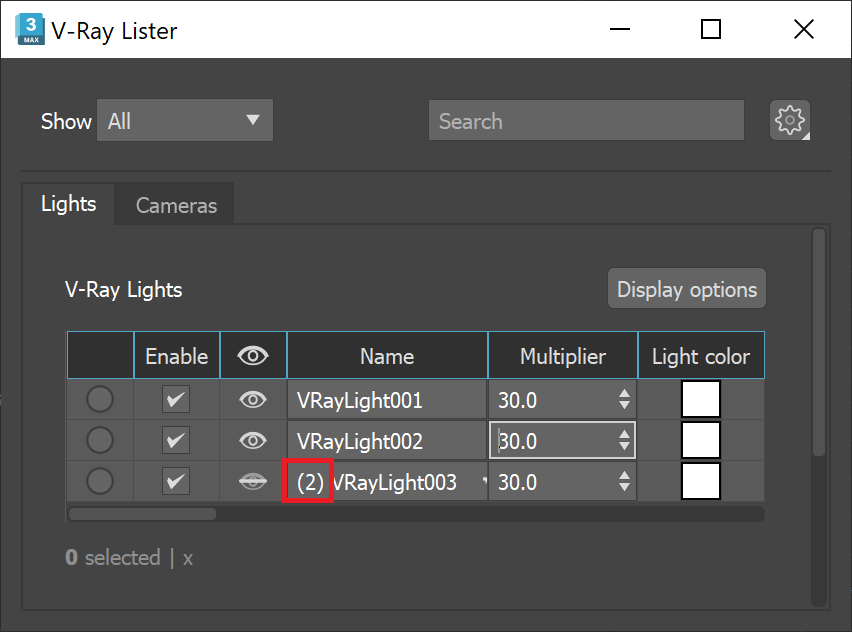
The number of instanced lights or cameras is marked in brackets in front of the object’s name.
Note that the Lights and Cameras tabs can be rearranged by dragging them.
Click on the image to enlarge it.
Selection
The following options are available for all tabs:
![]() – Indicates an unselected light or camera.
– Indicates an unselected light or camera.
![]() – Indicates a selected light or camera.
– Indicates a selected light or camera.
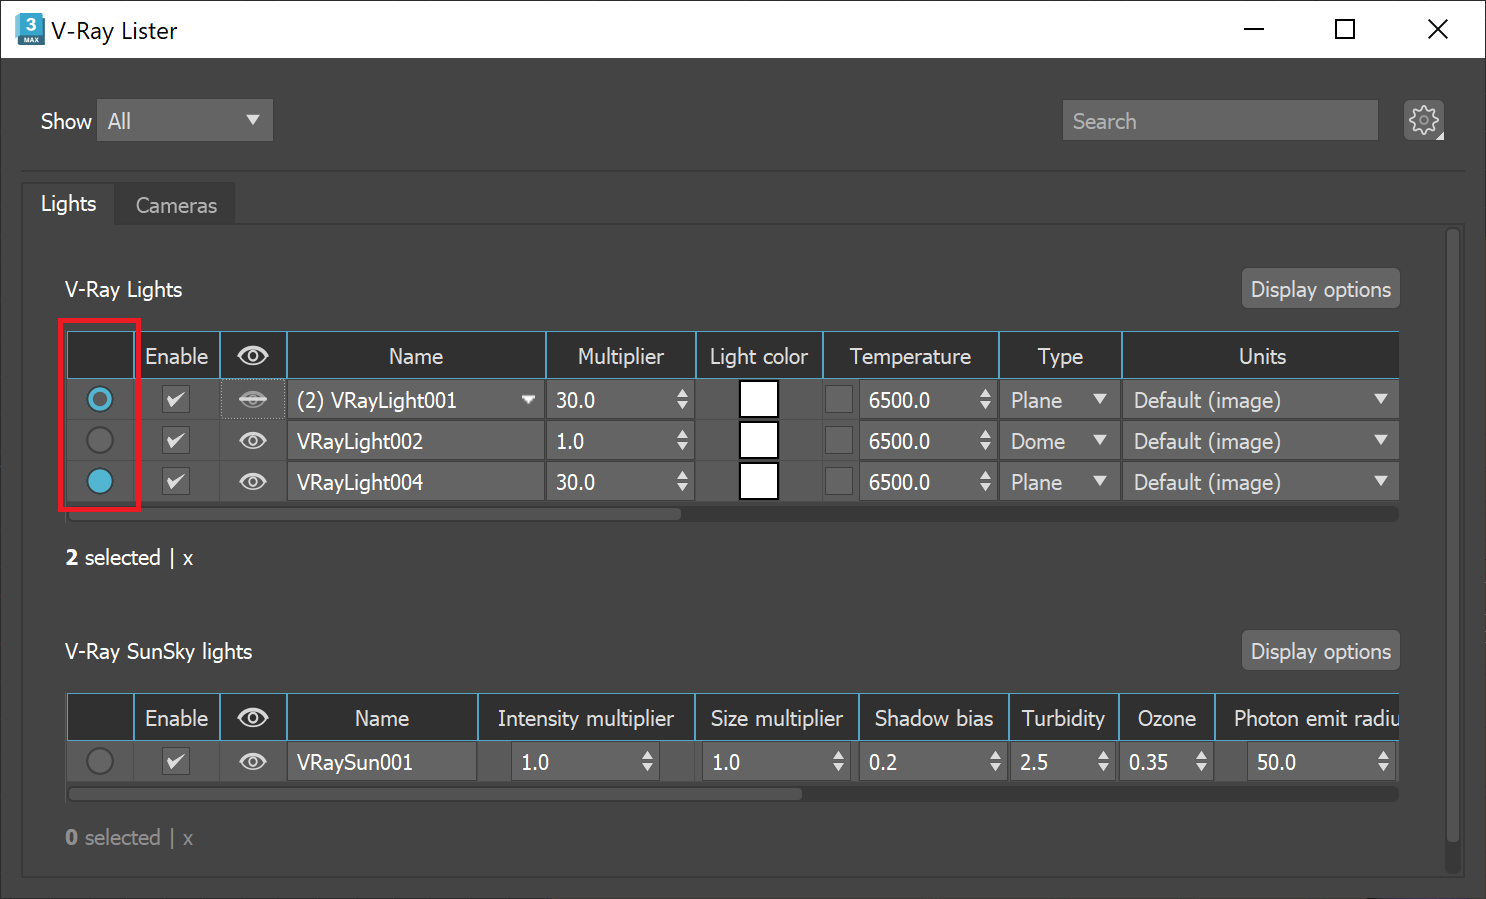
![]() – Indicates a combination of selected and unselected lights/cameras under the same row of instances. If all instances are selected, the circle becomes fully blue, and the opposite - if all instanced lights/cameras are deselected, the circle becomes gray.
– Indicates a combination of selected and unselected lights/cameras under the same row of instances. If all instances are selected, the circle becomes fully blue, and the opposite - if all instanced lights/cameras are deselected, the circle becomes gray.
Press Ctrl and click the Selection (![]() ) icon of a to make a multiple selection.
) icon of a to make a multiple selection.
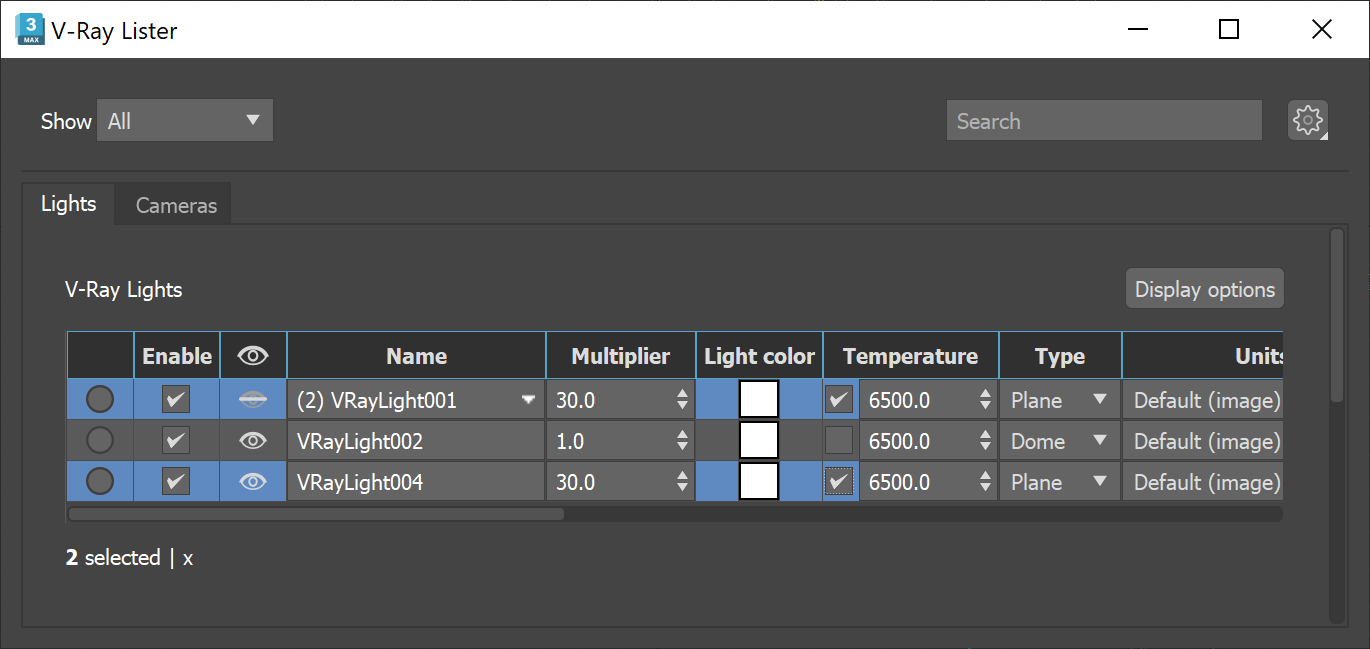
Press Ctrl while clicking on multiple rows without selecting any of the settings, then change a setting and the change will be propagated to all selected lights/cameras.
Click on the image to enlarge it.
Click on the image to enlarge it.
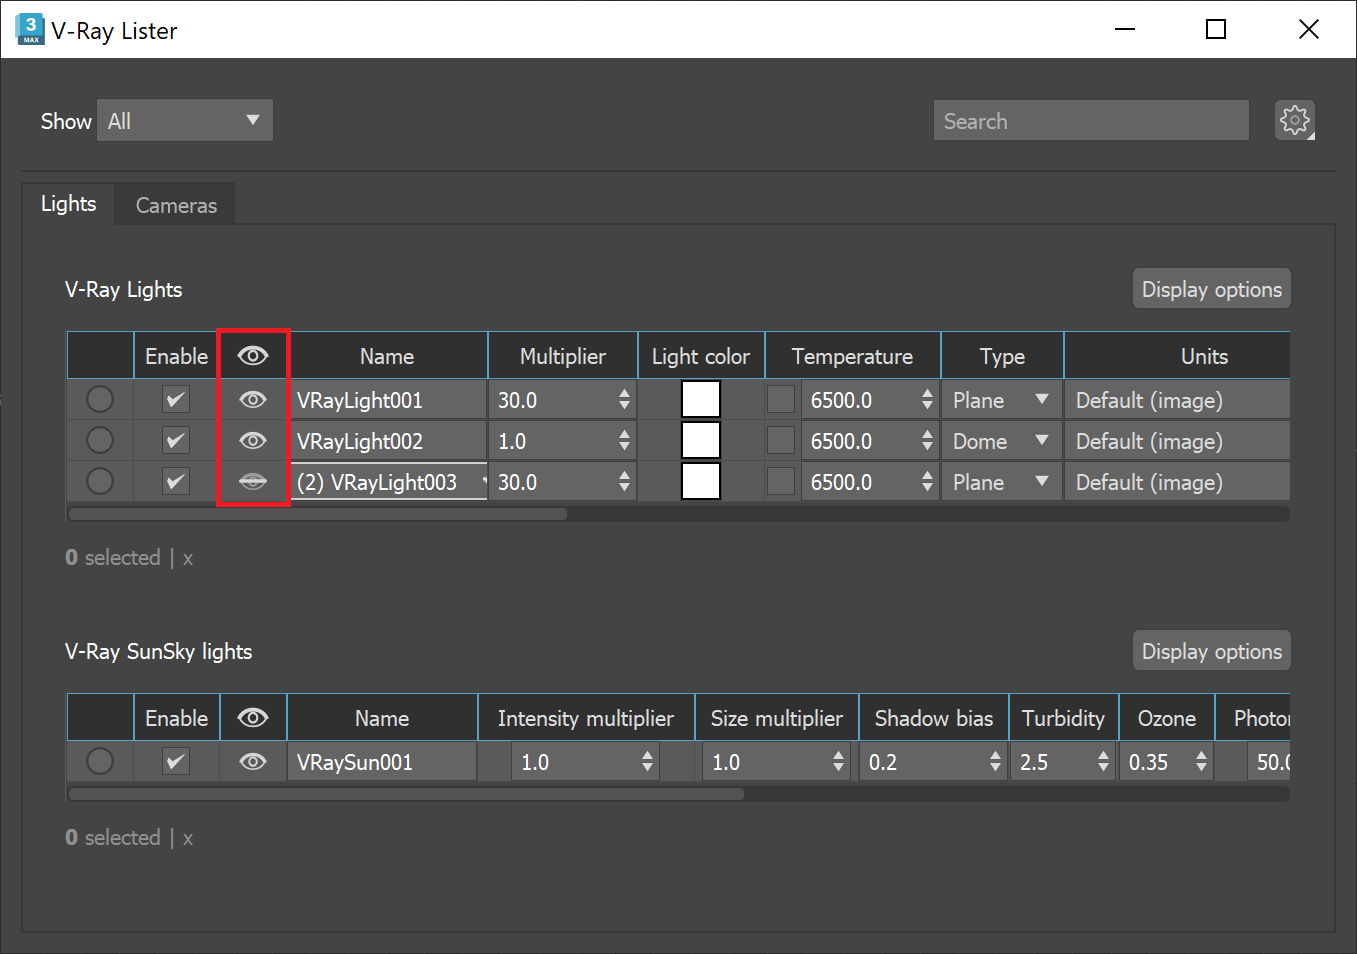
Visibility
The following options are available for all tabs:
![]() – Indicates that the light or camera is visible.
– Indicates that the light or camera is visible.
![]() – Indicates that the light or camera is invisible.
– Indicates that the light or camera is invisible.
![]() – Indicates a combination of visible and invisible lights/cameras under the same row of instances.
– Indicates a combination of visible and invisible lights/cameras under the same row of instances.
Press Ctrl and click the Visibility (![]() ) icon of an object to make a multiple selection.
) icon of an object to make a multiple selection.
Click on the image to enlarge it.
Default and Custom Layouts
The VRayLister layout can be customized by reordering the columns and tabs, switching the order of the main Lights and Camera tabs, choosing what parameters to display per light or camera type through the Display options, as well as by tweaking filters, size, position, search. These changes can be saved to a .vrlst layout preset file and then loaded.
A default layout is stored in the vraylisteruser.vrlst file, which is located in: C:\Users\%user%\AppData\Local\Autodesk\3dsMax\20## - 64bit\ENU\en-US\plugcfg where ## stands for the version of 3ds Max used.
Every time you open a new scene, the .vrlst file in the ENU folder is loaded automatically.
When closing the VRayLister, the default layout file gets overwritten and any new changes are considered as part of the new default.
To save a layout preset, go to Options button > Save layout and specify the name and location of the file. The saved file serves as a backup file of the layout. You can save as many layouts as you want.
To load another layout preset, go to Options button > Load layout.
Once the VRayLister is closed, the newly loaded layout will override the current one in the vraylisteruser.vrlst file.
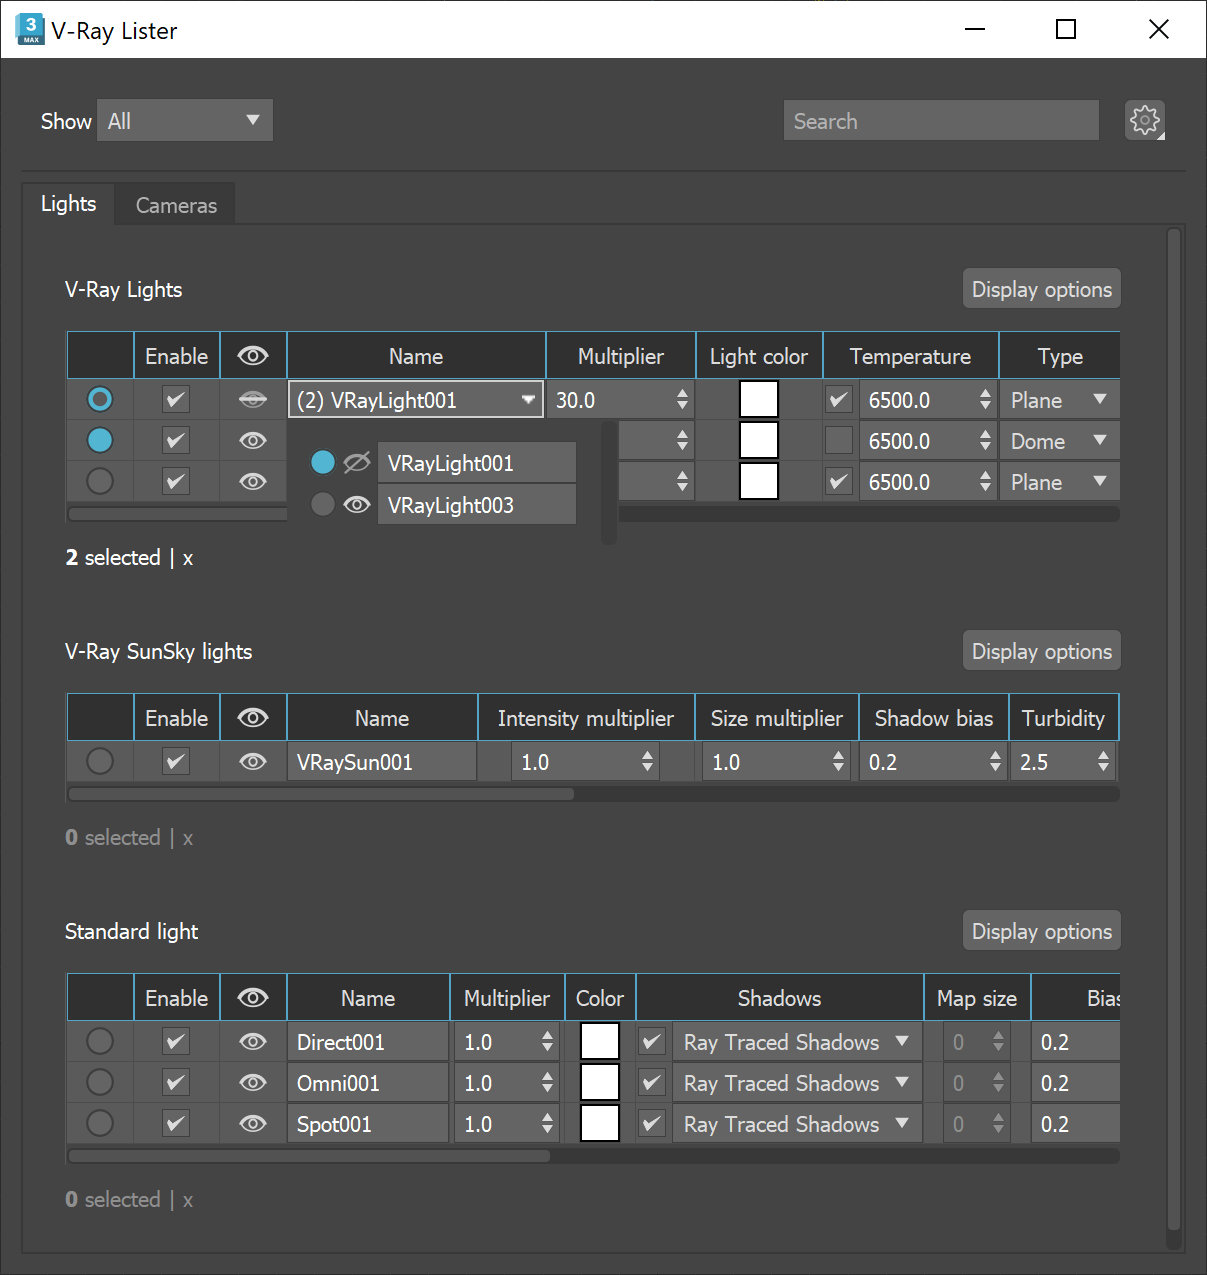
Lights Tab
The Lights tab controls common parameters for all lights in the scene.
Lights can be enabled or disabled from the Enable checkbox.
In the Light tab, instanced lights appear as a single entry with a dropdown. Editing any parameters for the entry affects all instances. The dropdown can be used to select a specific instance in the viewport.
For more information on the parameters displayed for V-Ray lights in the Lister, see the respective page for the specific light type.
Click on the image to enlarge it.
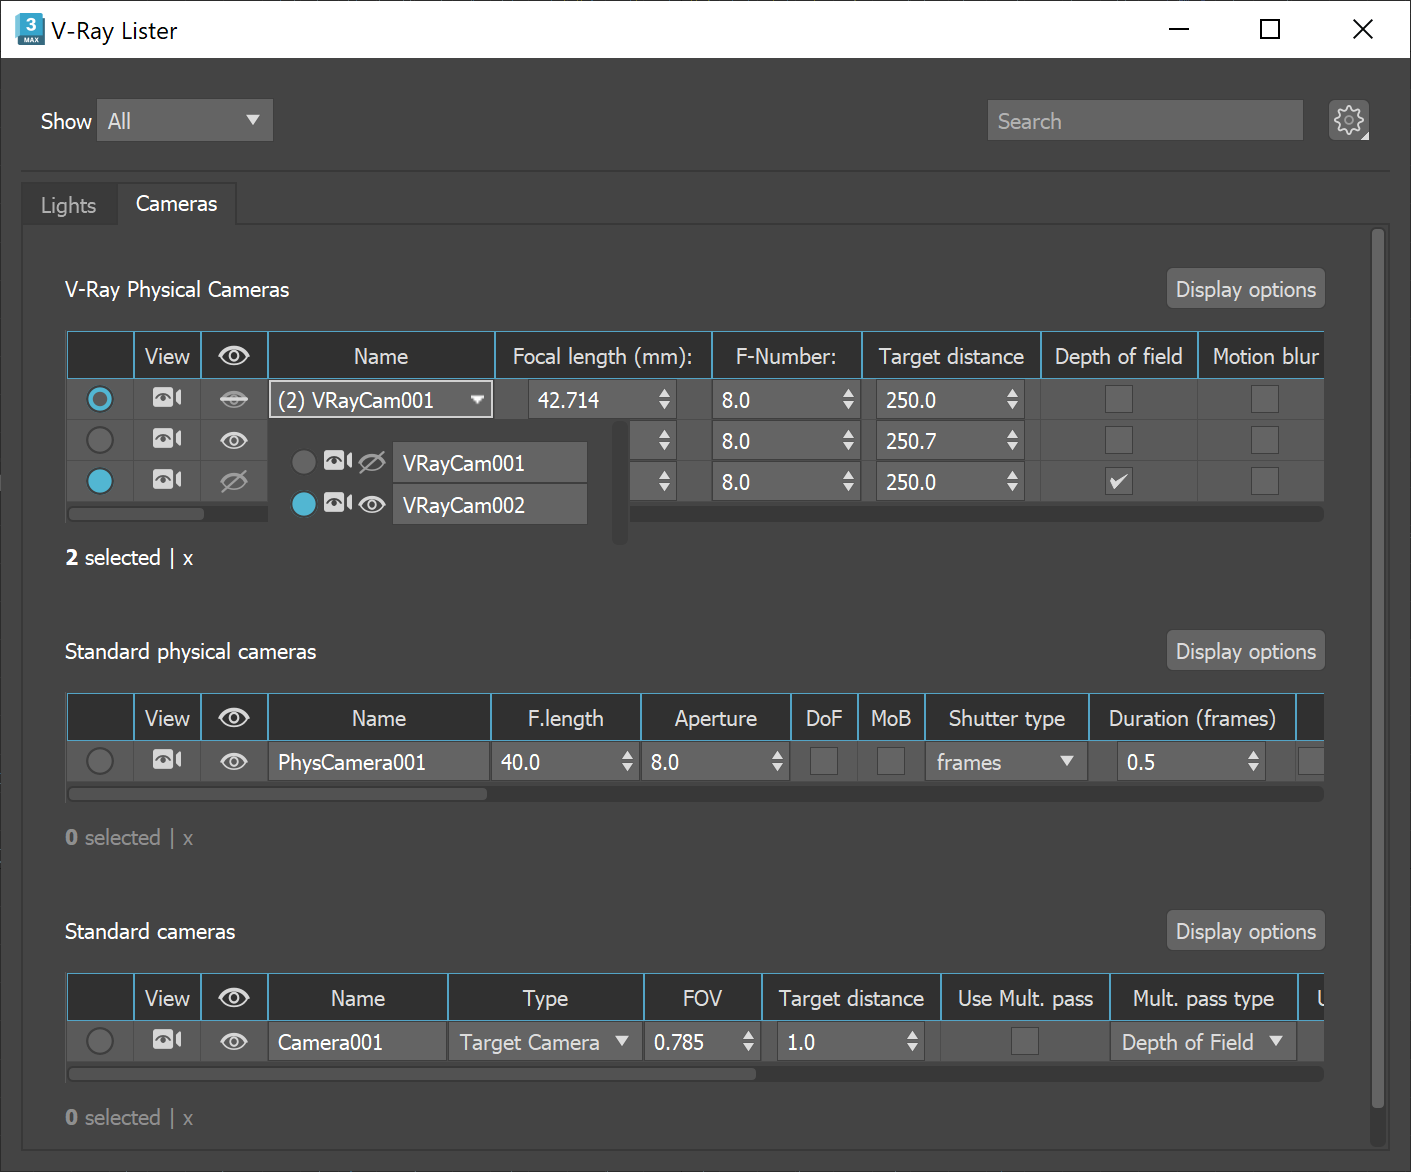
Cameras Tab
The Cameras tab controls common parameters for all cameras in the scene.
The Look through (![]() ) icon sets the active viewport to look through the specified camera.
) icon sets the active viewport to look through the specified camera.
For more information on the parameters displayed for V-Ray Physical Camera in the Lister, see the VRayPhysicalCamera page.
Note that changes done to the parameters in the Camera tab cannot be undone from the Edit > Undo menu.
Click on the image to enlarge it.