This page provides information on the Global Illumination rollout.
Overview
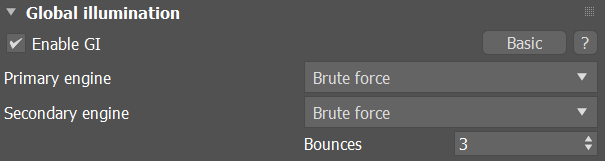
The Global Illumination rollout appears under the GI tab. It controls various settings related to GI and specifies the Primary engine and Secondary engine.
For additional information on the different GI engines and how they compare with each other, see the Indirect Illumination page.
UI Path: ||Render Setup window|| > GI tab > Global illumination rollout (Renderer set to V-Ray)

Basic Parameters
The following parameters are visible from the Global illumination rollout when set to the Basic Render UI Mode.
Enable GI – Turns indirect illumination on and off.
Primary engine – Specifies the method to be used for primary diffuse bounces.
Irradiance map – Causes V-Ray to use an irradiance map for primary diffuse bounces. For more information, see the Irradiance Map Settings page.
Brute force – Causes V-Ray to use direct computation for primary diffuse bounces. For more information, see the Brute Force section.
Light cache – Sets light cache as the primary GI engine. For more information, see the Light Cache Settings page.
Irradiance Map GI engine is deprecated. It doesn't support some of the new V-Ray features and will be soon removed as an option.
Secondary engine – Determines how V-Ray calculates secondary diffuse bounces.
None – No secondary bounces are computed. Use this option to produce skylit images without indirect color bleeding.
Brute force – Causes V-Ray to use direct computation for secondary diffuse bounces. For more information, see the Brute force section.
Light cache – Sets light cache as the secondary GI engine. For more information, see the Light Cache Settings page.

Brute Force
The Brute force method for computing global illumination recomputes the GI values for every single shaded point separately and independently from other points. This method is very accurate, especially if you have many small details in the scene.
Bounces - Controls the number of diffuse light bounces. Since V-Ray 3.0, a higher number of bounces can be computed efficiently without slowing the render down significantly. This option is only available when Brute Force is set for both primary and secondary engine.
To speed up Brute force GI, you can use a faster method like the Light Cache for approximating secondary GI bounces, while using the brute force method for the primary bounces.
For more information on how the Brute force GI calculations work, please see the Brute Force GI reference page.
You can speed up the Brute Force calculations by distributing them among several machines with the help of Distributed Rendering (DR).
Example: Light Bounces
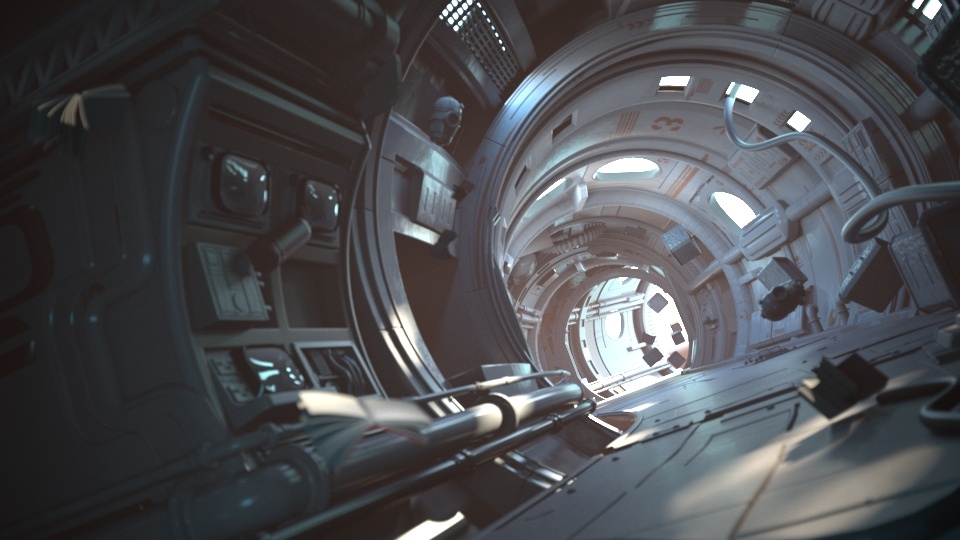
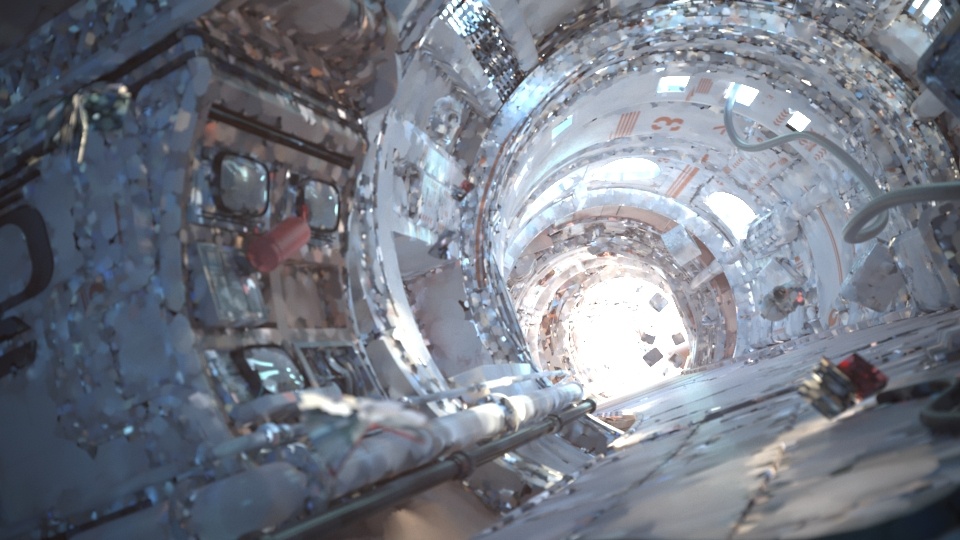
These examples show the effect of the different primary and secondary engines. Note that by default Brute Force has 3 light bounces and Light Cache works with 100 light bounces. All the examples are set to their default values.
GI is disabled

GI is set to Brute Force/None

GI is set to Brute Force/Brute Force

GI is set to Brute Force/Light Cache

GI is set to Light Cache/None

GI is set to Light Cache/Light Cache
GI is set to Light Cache/Brute Force
Advanced Parameters
The following parameters are added to the list of visible settings available from the Global illumination rollout when set to the Advanced Render UI Mode.
GI caustics represent light that has gone through one diffuse, and one or several specular reflections (or refractions). GI caustics can be generated by skylight, or self-illuminated objects, for example. However, caustics caused by direct lights cannot be simulated in this way. You must use the separate Caustics section to control direct light caustics. Note that GI caustics are usually hard to sample and may introduce noise in the GI solution.
Reflective GI caustics – Allows indirect light to be reflected from specular objects (mirrors etc.). Note that this is not the same as Caustics, which represent direct light going through specular surfaces.
Refractive GI caustics – Allows indirect lighting to pass through transparent objects (glass etc.). Note that this is not the same as Caustics, which represent direct light going through transparent objects. You need refractive GI caustics to get skylight through windows, for example.
Saturation – Controls the saturation of the GI; a value of 0.0 means that all color is removed from the GI solution and is in shades of gray only. The default value of 1.0 means the GI solution remains unmodified. Values above 1.0 boost the colors in the GI solution.
Contrast – Works together with Contrast base to boost the contrast of the GI solution. When Contrast is 0.0, the GI solution becomes completely uniform with the value defined by Contrast base. A value of 1.0 means the solution remains unmodified. Values higher than 1.0 boost the contrast.
Contrast base – Determines the base for the contrast boost. It defines the GI values that remain unchanged during the contrast calculations.
Amb. occlusion – Enables or disables ambient occlusion. The multiplier controls the amount of ambient occlusion. A value of 0.0 produces no ambient occlusion, while higher values make the ambient occlusion effect more prominent.
Radius – The ambient occlusion radius.
Subdivs – Determines the number of samples used for calculating ambient occlusion. Lower values render faster, but might introduce noise.

Example: GI Caustics

This example shows GI caustics generated by a self-illuminated object.
Example: Ambient Occlusion
This example demonstrates the effect of the global ambient occlusion options.
The first image is rendered without Ambient occlusion, with Brute force GI engine for primary bounces, and the Light Cache as a secondary engine. The second image is rendered with Light Cache as a primary GI engine and Ambient occlusion is enabled. The render times include the time for calculating the light cache. Note how Ambient occlusion can produce a feeling of a more detailed image, even though the result is not entirely correct.


Notes
- V-Ray does not have a separate skylight system. The skylight effect can be achieved by setting the background color or environment map in the 3ds Max environment dialogue, or in V-Ray's own Environment rollout.