
This page provides information about the Denoiser Render Channel.
Overview
The V-Ray Denoiser takes an existing render and applies a denoising operation to it after the image is completely rendered out via normal means. The denoising operation detects areas where noise is present and smooths them out. Images can also be denoised using the Standalone Denoise Tool included with the installation of V-Ray for Blender.
Because the V-Ray Denoiser operates on other render elements (like Color ) rather than being part of the rendering process itself, the denoising operation does not require re-rendering of the scene.
The V-Ray Denoiser has three preset options for its settings: Default, Mild, and Strong. Parameters can also be adjusted directly by using the Custom preset.


Using the Denoiser
When rendering, the V-Ray Denoiser automatically adds a few render elements in the V-Ray frame buffer which are required by the denoising algorithm. Some of them are standard render elements like Diffuse and Reflection Filter. A few special render elements are also generated:
- The noiseLevel render element is the amount of noise for each pixel in greyscale values, as estimated by the V-Ray image sampler.
- The defocusAmount render element is non-black only when depth of field and motion blur are enabled, and contains the estimated pixel blurring in screen space.
- The VRayDenoiser render element, when generated, contains the final image that results from noise removal. Whether this render element is generated depends on the Mode selection.
UI Path
||Node Editor|| > Add > Render Channels > Color Channel > Denoiser
Node
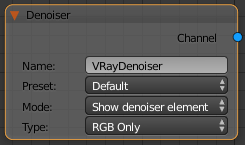
Name – The name of the render channel.
Preset – Offers presets to automatically set Strength and Radius values. For more information, see the Denoising Presets example below.
Default – Applies mid-level denoising.
Mild – Applies a more subtle level of denoising than the Default preset.
Strong – Applies a stronger level of denoising than the Default preset.
Custom – Allows the Strength and Radius parameters to be set to custom values.
Mode – Specifies how the results of VRayDenoiser will be saved.
Only generate render elements – Do not calculate a denoised result.
Hide denoiser element – Replace the RGB channel with the deniosed result.
Show denoiser element – Generate a separate channel with the denoised result.
Type – Specifies whether to denoise only the RGB color channel, or other render elements as well.
All Channles – Denoise render elements separately.
RGB Only – One-pass denoising on RGB channel only.
Parameters
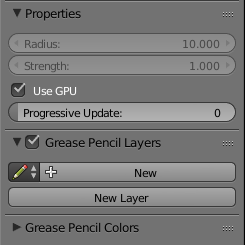
Radius – Specifies the area around each pixel to be denoised. A smaller radius affects a smaller range of pixels, while a larger radius affects a larger range, which increases the noise removal. This value is automatically set by preset selection, but can be changed when Preset is set to Custom.
Strength – Determines the strength of the denoising operation. This value is automatically set by preset selection, but can be changed when Preset is set to Custom.
Use GPU – When checked, enables the usage of GPU version if OpenCL support is found.
Progressive Update – Frequency of update during progressive rendering. A value of 0 means the scene is not updated. A value of 100 means the scene is updated as often as possible.
Grease Pencil Layers – When enabled, shows grease pencil for this view.
New – Adds a new Grease Pencil data-block.
New Layer – Adds a new Grease Pencil layer for the active Grease Pencil data-block.
Suggested Render Settings
While the denoiser can be quite effective at removing noise, it is not perfect. Very noisy images can lead to artifacts and loss of image detail. For most scenes, use the Progressive image sampler with the Noise threshold parameter set to 0.05 or lower. Additionally, the denoiser works best when the noise levels across the image are similar (when the noiseLevel channel is as close to uniform gray as possible), so using very low sampling is not recommended.
When rendering animations, disabling the Animated noise pattern option in the DMC sampler rollout generally improves the results.
Using the Standalone Denoise Tool on the rendered frames can additionally improve the quality of the animation.
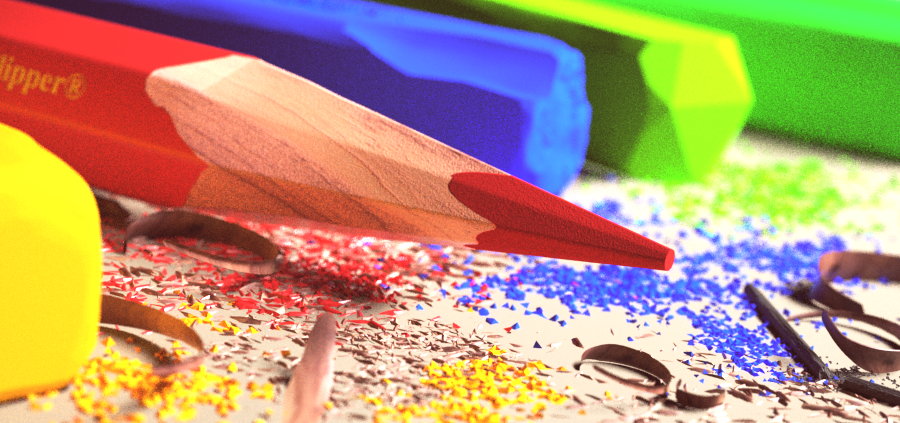
Example: Denoising Presets
The example below illustrates how the Default V-Ray denoiser works after more samples are made with the Progressive image sampler. When the samples are too few, there's not enough information for the denoising to produce a smooth result.
Sampling pass 1

Sampling pass 2

Sampling pass 4

Sampling pass 8

Sampling pass 16

Sampling pass 32

Sampling pass 64

The original vs. the denoised image after 64 passes.
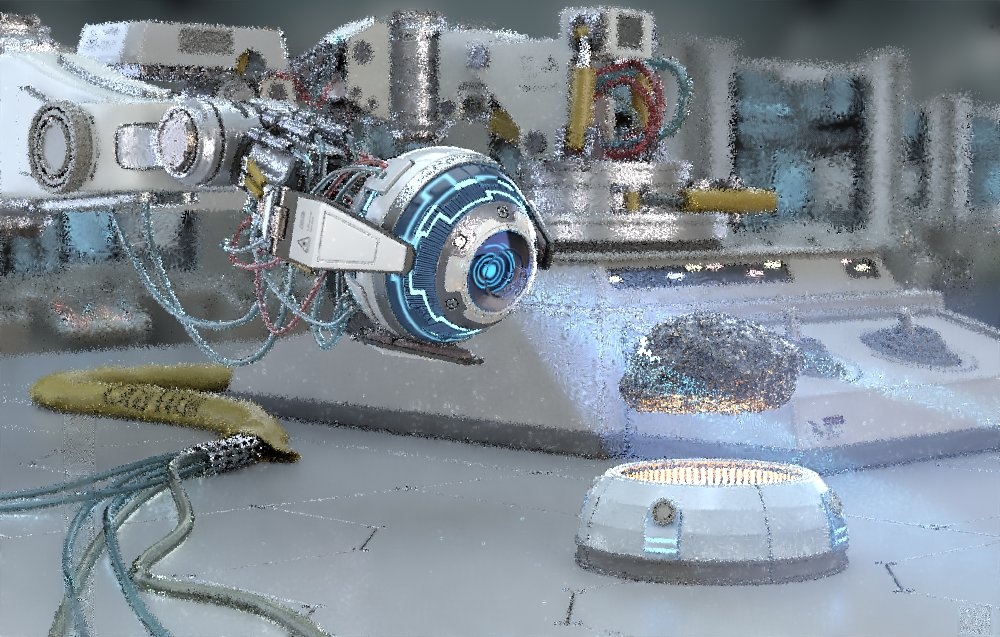
Example: noiseLevel Render Element
The noiseLevel Render Element shows where areas of noise have been detected in the scene. White areas have the most noise, black areas have no noise, and gray areas have varying levels of noise.
RGB Color Render Element prior to denoising
noiseLevel Render Element

Denoised RGB Color Render Element
Denoising Animations
When denoising animations, it is recommended to use the Standalone Denoiser Tool. Unlike the denoiser integrated in the UI, the standalone tool can do frame blending for animations, which reduces flickering. The integrated denoiser only works on the rendered frame and does not take the next and previous frame(s) into account, like the standalone tool does.
To denoise an image sequence with vdenoise run the following command:
vdenoise -inputFile="path\to\sequence_????.ext
where the question mark (?) replaces the digits in the sequence's file names.
For example, if the images in the sequence are named anim_0001.exr, anim_0002.exr, etc. and are located in the folder c:\renderoutput, the full command will be:
vdenoise -inputFile="c:\renderoutput\anim_????.exr
When that command is run, the sequence is read and for each frame, the specified number of adjacent frames are also considered. A new output image is then written for each frame.
Recommended settings:
- Мode set to only generate render elements.
- Render output set to vrimg or multichannel exr.