This page provides general information about the Mesh sub-section of the Rendering rollout of Chaos Phoenix.
Overview
The options for this rollout are accessible when the Render Mode is set to Mesh, Ocean Mesh, or Cap Mesh.
UI Path: ||Select PhoenixFDSim|| > Attribute Editor > Rendering rollout > Mesh rollout
Parameters
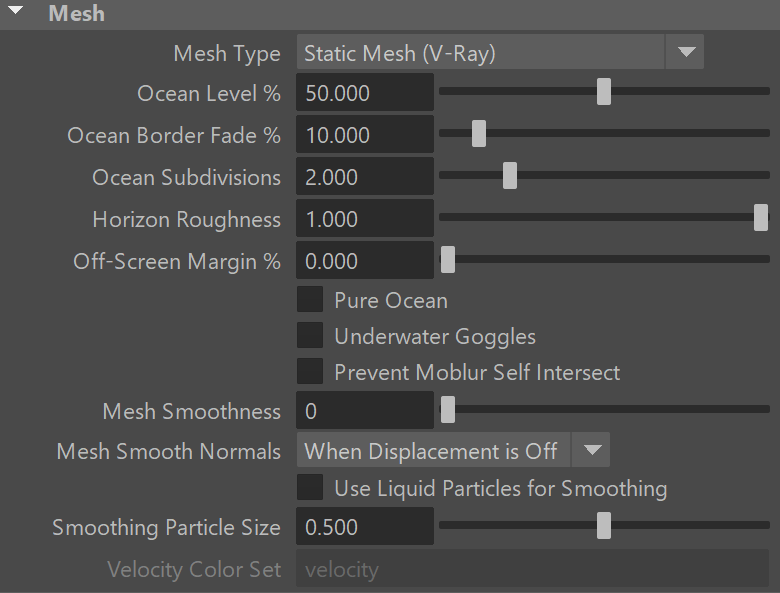
Mesh Type | rendMeshType – Specifies the type of mesh to render.
Static Mesh (V-Ray) - this mode will generate a V-Ray Static mesh type at render time. Static geometry is generated at the beginning of the rendering and remains in memory until the frame is rendered. This can speed up the rendering but will increase the memory usage.
Dynamic Mesh (V-Ray) - this mode will generate a V-Ray Dynamic mesh type at render time. Dynamic geometry is generated 'on the fly' which can potentially save memory. Not recommended when Render Mode is set to Ocean Mesh.
Maya Mesh (not suitable for Ocean) - this mode will generate a standard Maya mesh that can be rendered with renderers other than V-Ray. When you enable Show Mesh from the Preview rollout, this mesh is also available in the viewport for processing as any other Maya geometry. This way it can be exported to Alembic for example, from Maya's Cache → Alembic Cache menu. If the Render Mode is Ocean Mesh or Cap Mesh, the generated mesh will have low detail because the Phoenix ocean mesh is deliberately low-res in the viewport preview for performance reasons. In Maya Mesh mode, you can use the Velocity Color Set field to control the name of the color set with vertex velocities that will be needed for rendering the mesh with motion blur. The vertex velocity is in Units/Second.
Switching to Maya Mesh mode will create a new TexUVW UV set, if you have enabled the TexUVW channel in the Output rollout before running your simulation. In order to use the new UV set you need to select the Maya Mesh and link the TexUVW UV set from the Maya Relationship editor. Switching away from the Maya Mesh mode will reset the UV sets, so if later you decide to switch back to Maya Mesh mode you will need to relink the UV set again.
Ocean Level % | rendOcean – Used with the Ocean Mesh and Cap Mesh rendering modes. Specifies the water level as a percentage of the total grid height.
- Ocean Level is a rendering setting which is closely related to the Initial Fill Up simulation setting in the Dynamics rollout.
- Both should initially be set to equal values, and the Ocean Level should be adjusted after the simulation is done, if needed. This has to be done manually because the liquid surface might bounce up or down in the first few seconds until it settles.
- Depending on a variety of factors, the resulting surface might be a little below or a little above the Initial Fill Up value, and this cannot be automatically predicted.
- The Ocean Level should remain constant and should not be animated for the duration of the render sequence, otherwise the horizon would start moving up and down.
Ocean Border Fade % | rendOceanTransitionZone - The width of a zone inside the Simulator Grid where the mesh surface level would smoothly transition into the displaced waves outside the Simulator. The value is a % of the Simulator width. Increase the value if you need a smoother transition. This option can be especially useful for merging tall waves created by a Wave Force inside the Simulator, with tall displaced waves outside the Simulator.
Ocean Subdivisions | rendMeshSubdiv – Used with the Ocean Mesh and Cap Mesh rendering modes. When generating the far areas of the surface, this determines how many vertices will be generated for each pixel of the image. Like with V-Ray subdivisions, the square of the parameter value is used. For example, if you increase the subdivisions twice, the vertices count will grow four times. For more information, see the Ocean Subdivisions example below.
Increasing the Ocean Subdivisions may dramatically increase the amount of consumed RAM.
Horizon Roughness | rendOceanHorizRough – Controls the roughness of the distant ocean surface near the horizon. Adds more detail to the waves, which is especially helpful when using a highly reflective material for the ocean surface. Increasing this value can potentially produce visible noise when rendering an animation. To counter this effect, increase the Ocean Subdivisions parameter.
Off-Screen Margin % | rendOceanExtraMargin – The ocean is generated only in the camera view, which can lead to problems when using camera motion blur, using reflections, or when the ocean casts shadows on objects underwater. This option allows you to extend the ocean further from the borders of the camera view in order to solve such issues. The value is a percentage of the image size.
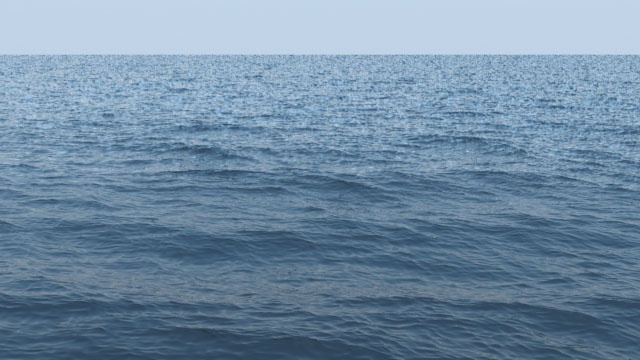
Pure Ocean | rendPureOcean – Creates a flat ocean surface up to the Ocean Level height. It does not need loaded caches and if there are any, it ignores their content, so no simulation details will show. Thus changing frames and generating the ocean surface is very quick. This allows you to preview the behavior of the Phoenix Ocean Texture when Displacement is enabled or if you want to set up your texture for the Wave force. The option is available for both preview and rendering in Ocean Mesh or Cap Mesh modes. During preview, it requires the Show Mesh option to be enabled in the Liquid Preview rollout.
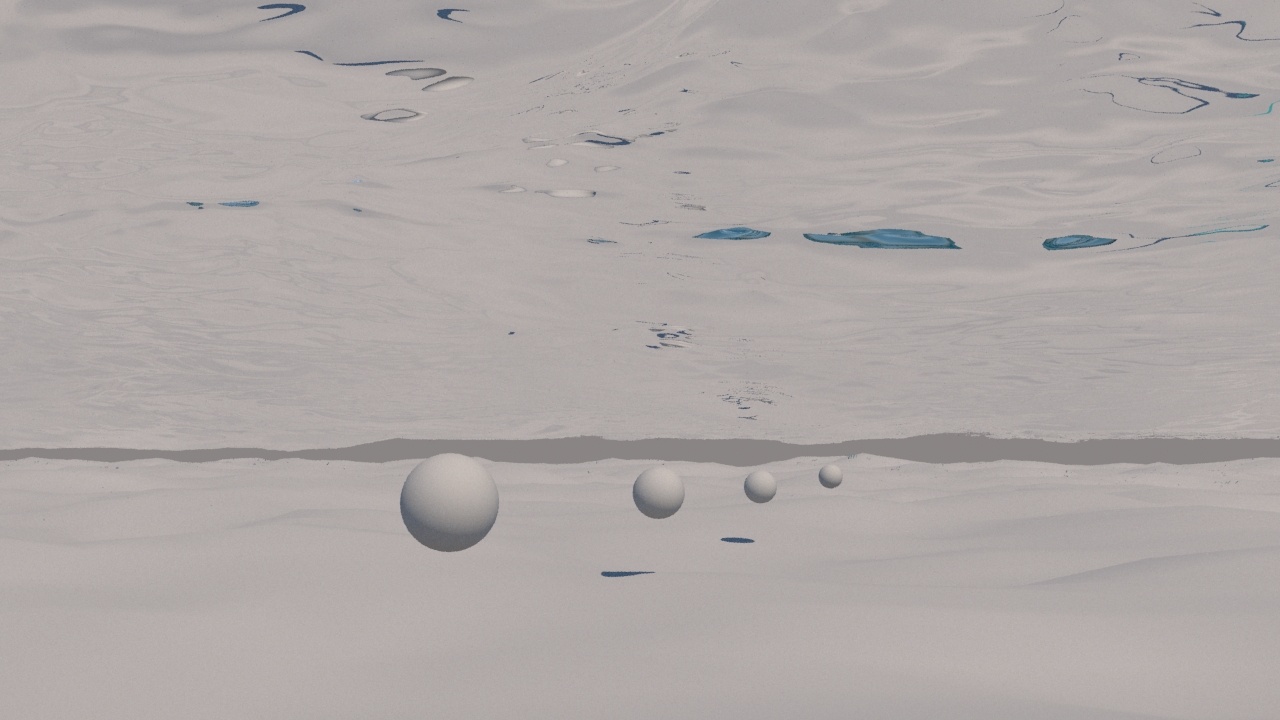
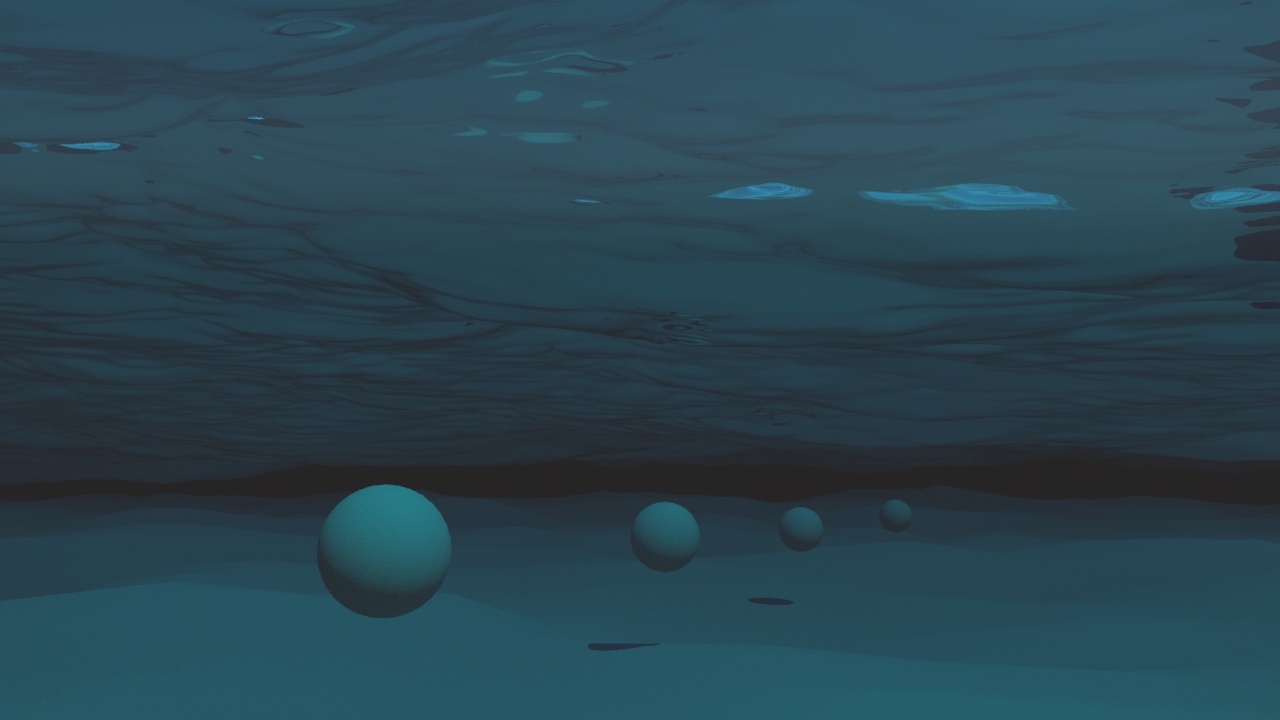
Underwater Goggles | rendUwGoggles – This option is designed to be used when the camera is placed under the water in Ocean Mesh or Cap Mesh mode. When enabled, a surface gets automatically added in front of the camera, using the same material that is assigned to the Simulator, and this way mimics the effect of real life underwater goggles. This way the ocean volume receives the Fog color from the material assigned to the Simulator, and the field of view shrinks when the index of refraction of the material is above 1. For more information, see the Underwater Goggles example below.
Prevent Self Intersection | rendMbSelfIsect – In all Mesh modes, some motion blurred vertices might penetrate the opposite side of the geometry. When enabled, this option prevents such situations. The self-intersection analysis is expensive, so enable this parameter only when an intersection is obvious.
Phoenix meshes are motion blurred in a different way than regular transforming and deforming geometries. When rendering regular meshes with motion blur, the entire mesh is moved along its transformation path back and forward in time, and so each individual vertex of the mesh follows this path. However, for each rendered frame, a new Phoenix mesh must be built from the voxel grid, and so it usually has a different number of vertices than the previous and the next frame. Because of this, individual vertices can not be traced back or forward in time between frames. Instead, motion blur of fluid meshes uses the velocity of vertices which is recorded by the simulation, and moves each vertex back and forward in time along the vertex velocity. This is why the generated liquid mesh does not support frame sub-sampling for motion blur. This may cause a mismatch between the liquid and transforming/deforming objects in your scene that interact with it. The fluid mesh is generated from data at the exact rendered frame and fluid data for the preceding or following frames is not used, unlike regular deforming meshes. As a consequence, the liquid and the objects in your scene would synchronize best if those objects do not use additional geometry samples for motion blur.
Mesh Smoothness | rendSmoothMesh – Specifies the number of smoothing passes. The higher the value, the smoother the result, but the mesh will require more time to calculate. Used when Render Mode is set to Mesh, Ocean Mesh, or Cap Mesh to reduce the roughness of the mesh.
Mesh Smooth Normals | smooth_normals – Smooths the normals of the mesh in order to get an even smoother looking result, even if the mesh is with low resolution. However when the Ocean displacement is used to add fine details the smoothing of normals should not diminish that and can be turned off.
Always – The mesh normals will be smoothed always.
When Displacement is Off – The mesh normals will be smoothed only when the Ocean displacement is off.
Never – The mesh normals will not be smoothed.
Use Liquid Particles for Smoothing | rendSmothUsePrt – Enables particle-based smoothing of the mesh. It requires Liquid particles to be simulated and exported to the cache files. This method overcomes the limitations of the basic smoothing without particles, which can flicker in animation and cause small formations in the mesh to shrink.
Smoothing Particle Size | rendSmoothPrtSz – Used to make the liquid thicker or thinner. Works only when Use Liquid Particles is enabled. This parameter specifies the distance from the mesh surface to the particle centers, in voxels.
Velocity Color Set | rendMayaMeshVelSet – Available only in Maya Mesh mode. You can use this field to control the name of the color set with vertex velocities that will be needed for rendering the mesh with motion blur. For example, VRayProxy in 3ds Max and Maya looks for a color set named 'v' or 'velocity'. Phoenix automatically transfers this name to the standard Maya motion vector color set under Mesh Shape → Mesh Controls → Motion Vector Color Set field, so you'd get motion blur in Maya Mesh mode. In order to export the mesh as Alembic with included Phoenix velocity, make sure to enable Write Color Sets in the Advanced Options of the Alembic Export window. This workflow is covered in the How to export a Phoenix FD cache to Alembic video.
Note that the Phoenix velocity color set keeps the velocity in scene units per second. This way Alembic caches exported from it can be loaded via a V-Ray Proxy in 3ds Max or Maya, and also via the built-in 3ds Max Alembic importer. However, rendering the Maya Mesh directly or importing it via Maya's built-in Alembic importer would read the velocity in units per frame, so you might have to adjust Phoenix's Motion Blur Multiplier in the Rendering rollout prior to rendering or export, in order to reduce the length of the motion blur.
When exporting Alembic caches with vertex velocity using Maya's built-in exporter, make sure that a Phoenix frame exists for the starting frame of the sequence and that it contains velocity. Otherwise the entire exported Alembic cache will not have vertex velocity.
Example: Ocean Subdivisions
Example: Underwater Goggles
Notice how the field of view shrinks when the option is enabled, due to using Refraction IOR = 1.33 in the Simulator's VRayMtl.