This page provides a tutorial on creating a simulation of fruits falling in water.
Overview
This is an Intermediate Level tutorial. Even though no previous knowledge of Phoenix is required to follow along, re-purposing the setup shown here to another shot may require a deeper understanding of the host platform's tools, and some modifications of the simulation settings.
The instructions on this page guide you through the process of setting up a simulation of fruits falling in a water tank. We use a 3ds Max MassFX particle system for the Rigid Body simulation of the fruits, and then we use that RBD simulation as a collider for the Phoenix Liquid.
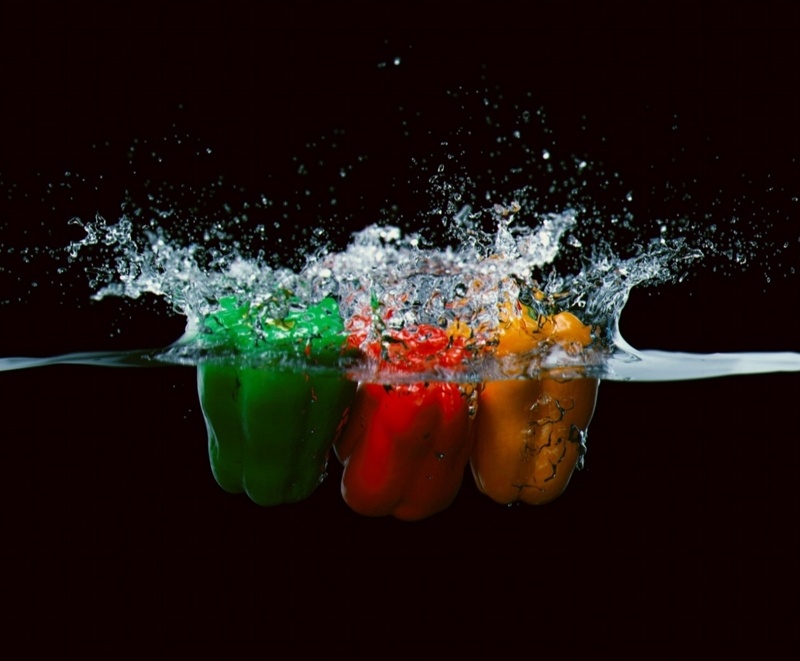
The goal of this tutorial is to explain how to simulate and render a high-speed photography type of shot.
For this tutorial, we are using Phoenix 4.20 Official Release and V-Ray 5, Update 1 Official Release for 3ds Max 2016. You can download official Phoenix and V-Ray from https://download.chaos.com. If you notice a major difference between the results shown here and the behavior of your setup, please reach us using the Support Form.
Units Setup
Scale is crucial for the behavior of any simulation. The real-world size of the Simulator in units is important for the simulation dynamics. Large-scale simulations appear to move more slowly, while mid-to-small scale simulations have lots of vigorous movement. When you create your Simulator, you must check the Grid rollout where the real-world extents of the Simulator are shown. If the size of the Simulator in the scene cannot be changed, you can cheat the solver into working as if the scale is larger or smaller by changing the Scene Scale option in the Grid rollout.
The Phoenix solver is not affected by how you choose to view the Display Unit Scale - it is just a matter of convenience.
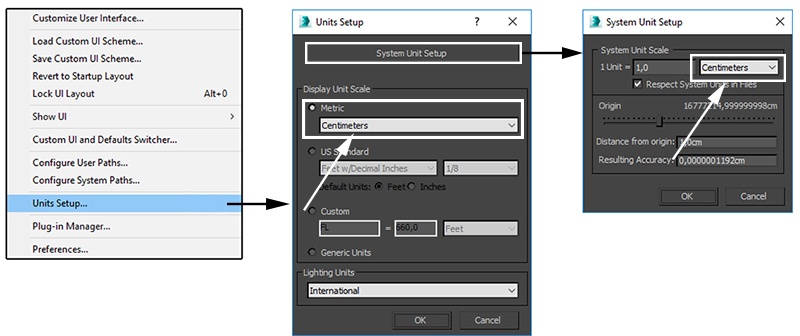
Go to Customize → Units Setup and set Display Unit Scale to Metric Centimeters.
Also, set the System Units such that 1 Unit equals 1 Centimeter.
Rigid Body Simulation
This tutorial is focused on the Phoenix liquid simulation.
For the Rigid Body simulation, you can use the 3ds Max built-in MassFX or any other third-party plug-in.
The diameter of the fruits used for this tutorial is about 15 cm, and they fall into the water from a height of 77cm.
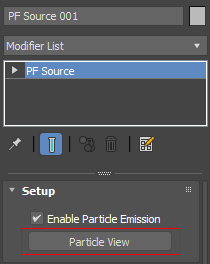
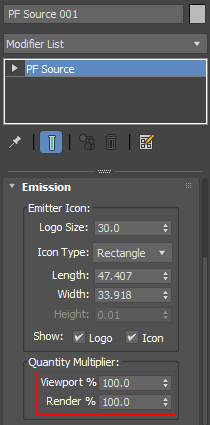
Go to Modify Panel → Particle Systems → and create a new PF Source.
The exact Position of the PF Source icon in the scene is [ X: 0cm, Y: 0cm, Z: 77cm ].
Open the Particle View window.
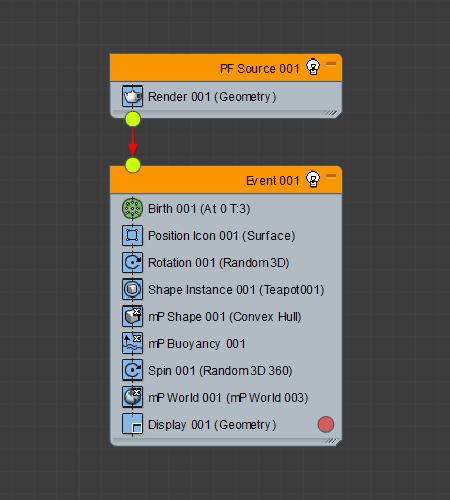
Add a Shape Instance, mP Shape, mP Buoyancy, Spin and mP World Operators to Event 001.
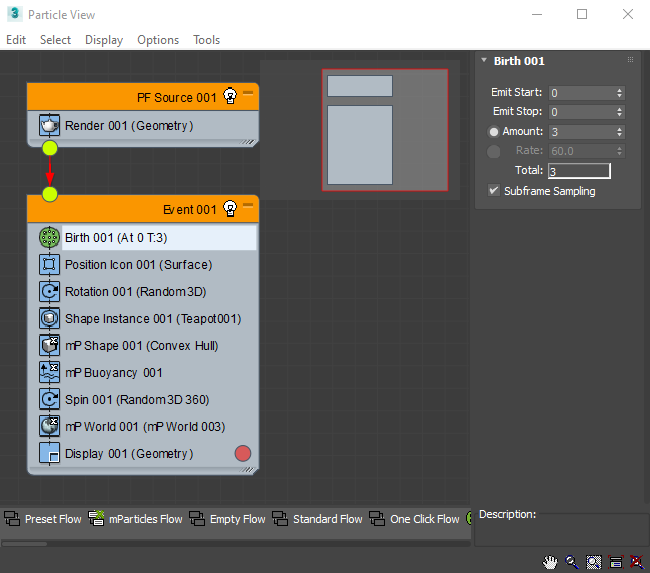
Select the Birth Operator.
Set the Emit Start and Emit Stop to 0.
Set the Amount to 3.
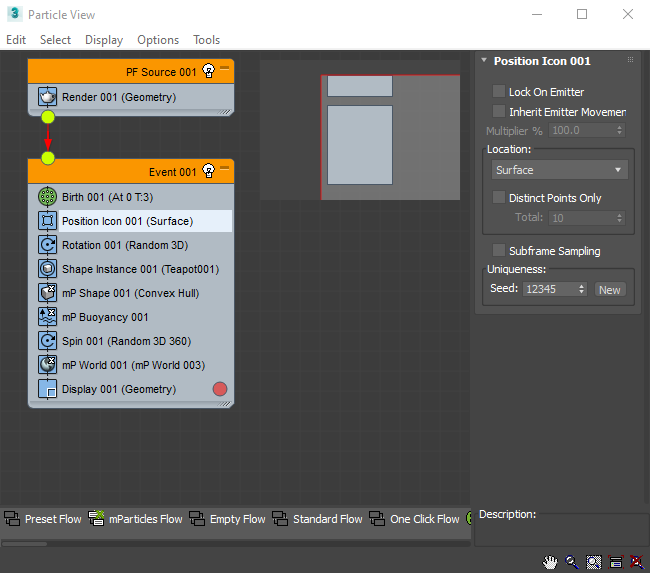
Set the Position Operator to Surface and keep the Rotation and Spin Operators set to default.
Select the fruit model in the scene as the Shape Instance.
Set the Display Operator to Geometry.
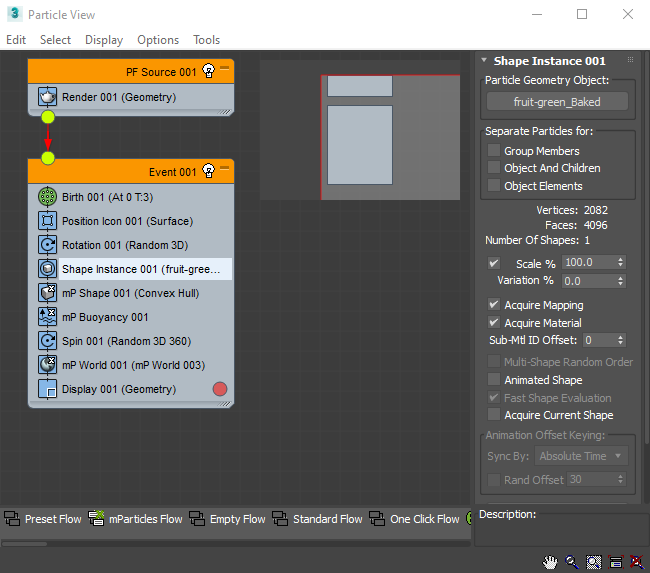
In order to see all particles in the viewport, select the PF Source and set the Viewport % to 100.
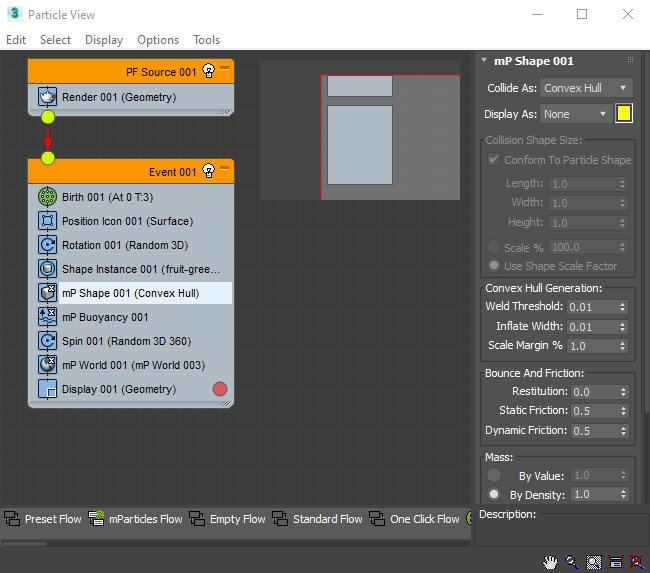
Set mP Shape 001's Collision representation to Convex Hull.
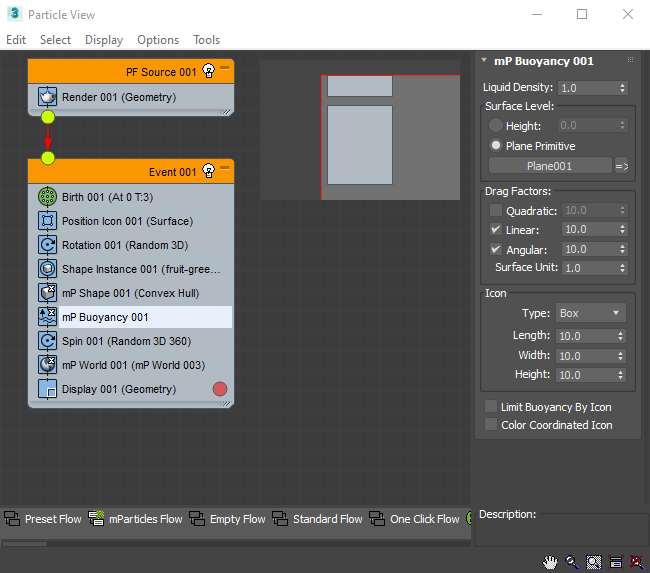
Create a Standard Primitive → Plane.
In the mP Buoyancy Operator, select the Plane geometry as the Plane Primitive.
This plane works as the water surface for simulating buoyancy. Once you are happy with the motion of the falling fruits, you could hide the plane.
Select the mP World Operator and press Create New Driver.

As no ground collision is required, disable Ground Collision Plane in the mp World Operator.
Enable the Apply Gravity option.

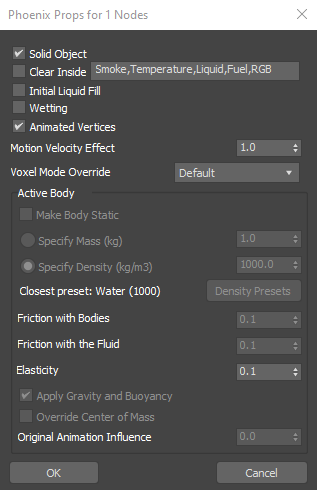
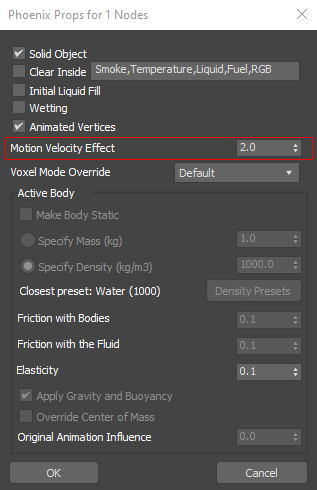
Now, select the PF Source and right-click on it, and select the Chaos Phoenix Properties.
Enable the checkbox for the Solid Object parameter.
Phoenix Liquid Simulation
With the RBD simulation done, we can continue with the second part of the tutorial.
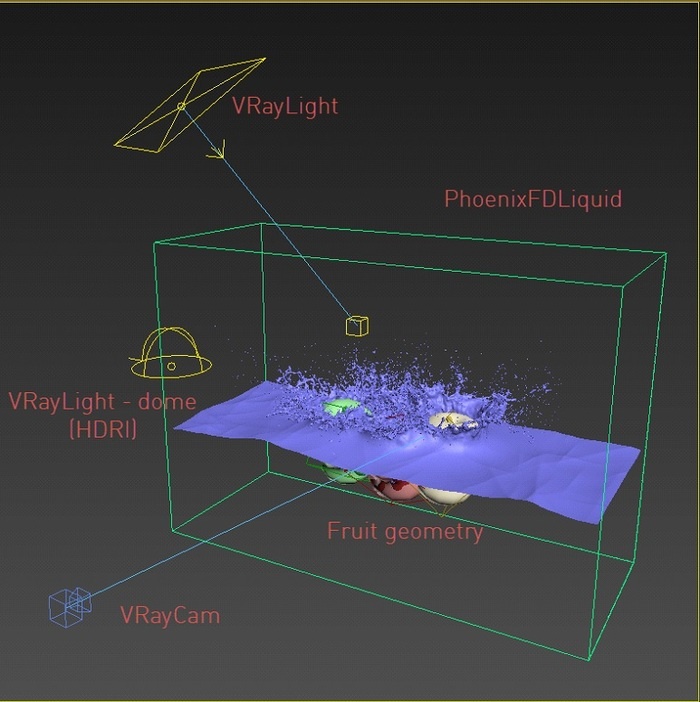
Scene Layout
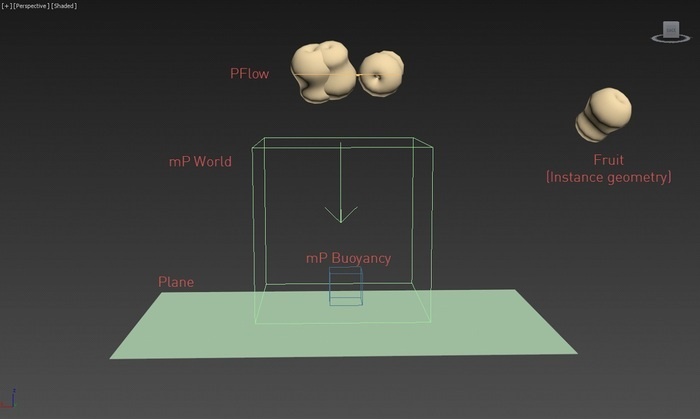
The setup consists of one Phoenix Liquid Simulator, PF Source with three fruits, and two lights: one is a V-Ray Dome Light for ambient lighting, and the other is a V-Ray Area Light used to boost the reflections and refractions in the water tank.
A V-Ray Physical camera is used for rendering.
Scene Setup
Create a Liquid Simulator that encompasses the animated fruits.
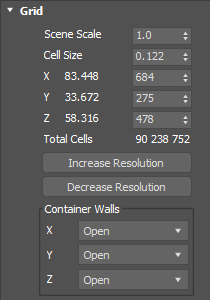
Keep the Container Walls set to Open.
Set the Scene Scale to 10.
Set the Cell Size such that Total Cells is between 500.000 and 2M cells, depending on your machine's performance. Working at a low grid resolution until you've nailed down the general motion of the liquid is a huge time-saver.
The final Cell Size for this example is ~0.12cm.
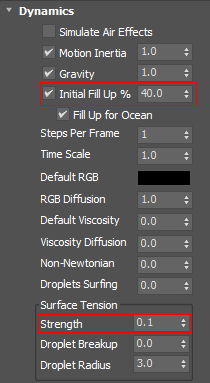
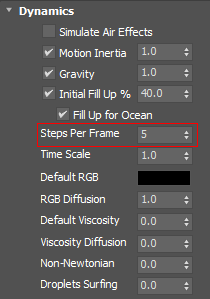
Go to Simulator → Dynamics rollout and set the Initial Fill Up parameter to 40. This will fill 40% of the container with liquid at the start of the simulation.
Set the Surface Tension Strength to 0.1 (real water has a surface tension of ~0.05 - 0.1).
As the water has to be deep enough for the fruits to dive into and not hit the tank's bottom, and there should be sufficient space for splashes at the top, make sure that the simulator size is adequate.
The following examples show the simulation with different Scene Scale values.
 Scene Scale: 1
Scene Scale: 5
Scene Scale: 10
Set the Steps Per Frame to 5.
Higher SPF values will result in a smoother liquid at the cost of increased simulation times. In general, you should try to keep this as low as possible without compromising on the quality of your simulation.
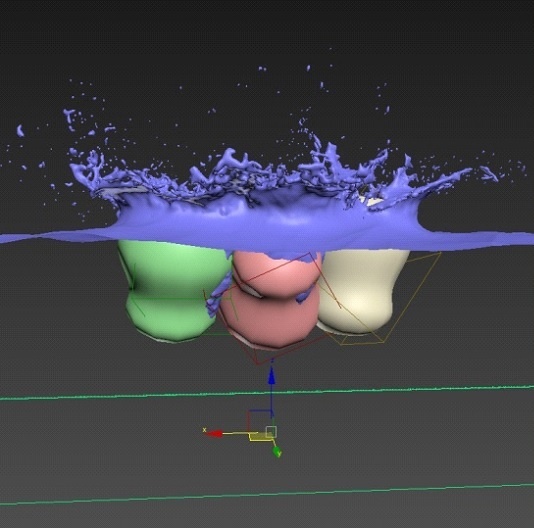
The following examples show the simulation with different SPF values.
 SPF: 1
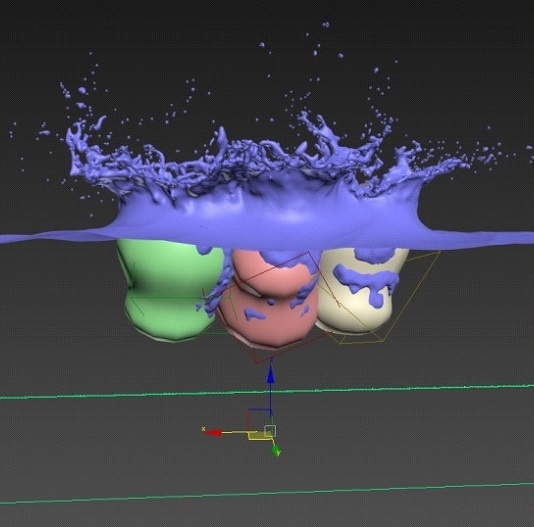
 SPF: 3
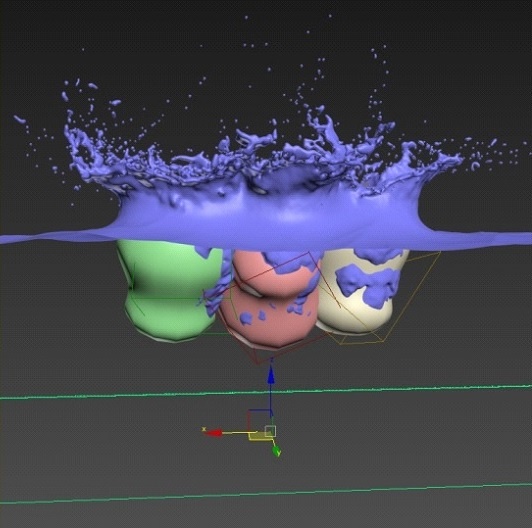
 SPF: 10
To make the splashes more dramatic, increase the Motion Velocity Effect parameter of the PF Source to a value of 2.
As the name implies, Motion Velocity will inject velocities based on the movement of your geometry, which in turn will make the interaction between the simulated fluid and your objects more realistic.
This value is a multiplier for the strength of the effect.
Select the PF Source, and right-click on it, and select the Chaos Phoenix Properties.
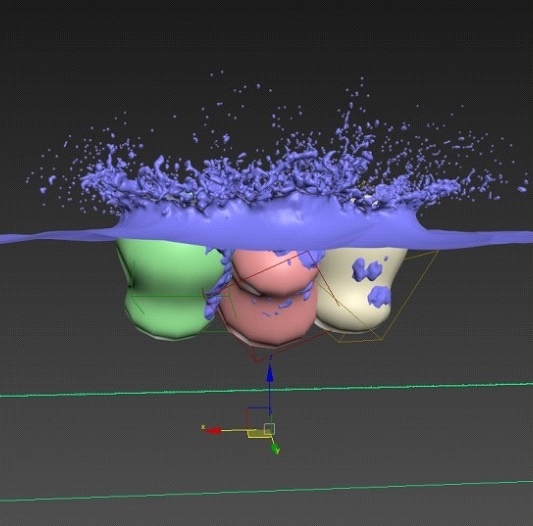
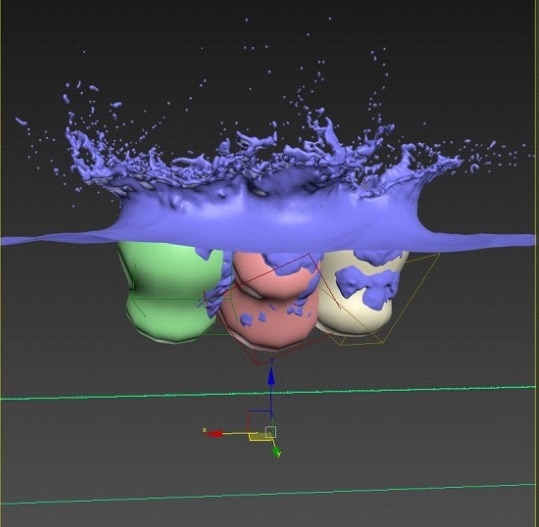
The following examples show the simulation with different Motion Velocity Effect values.
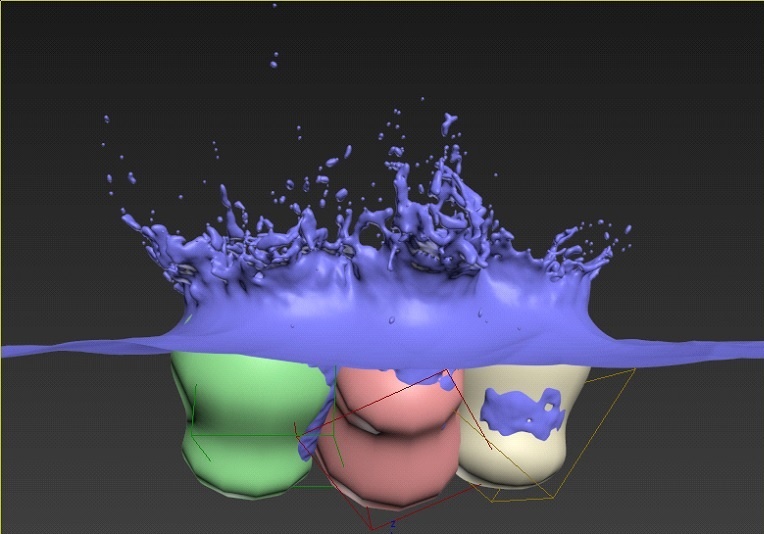 Motion Velocity Effect: 1
Motion Velocity Effect: 2
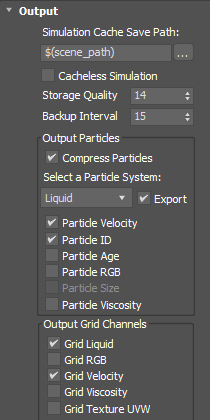
Check if the Grid Velocity Channel is enabled under the Output rollout of the Simulator.
The Grid Velocity Channel is required for rendering the liquid with Motion Blur.
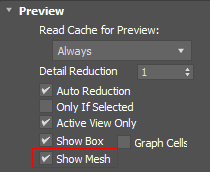
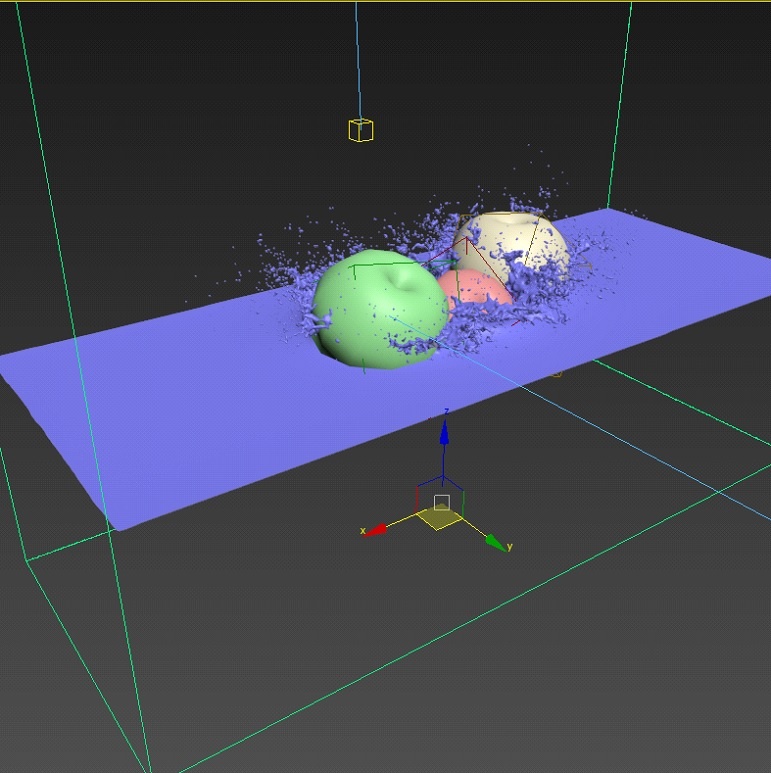
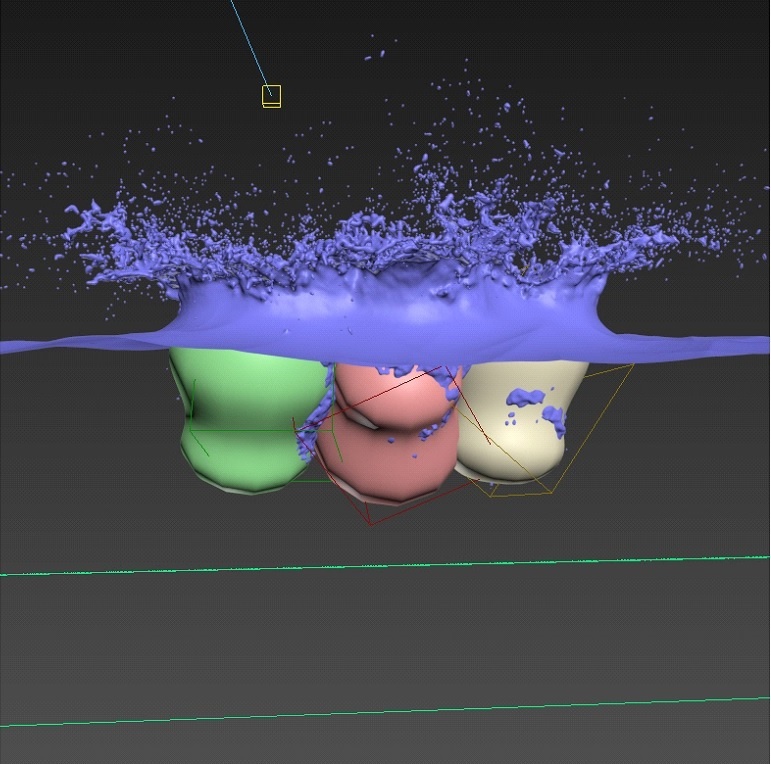
Go to the Preview rollout of the Simulator and enable Show Mesh.
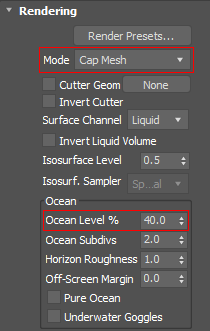
Scroll to the Rendering rollout and change the Mode to Cap Mesh.
Set the Ocean Level % parameter to the same value as the Initial Fill Up % parameter (in the Dynamics tab).
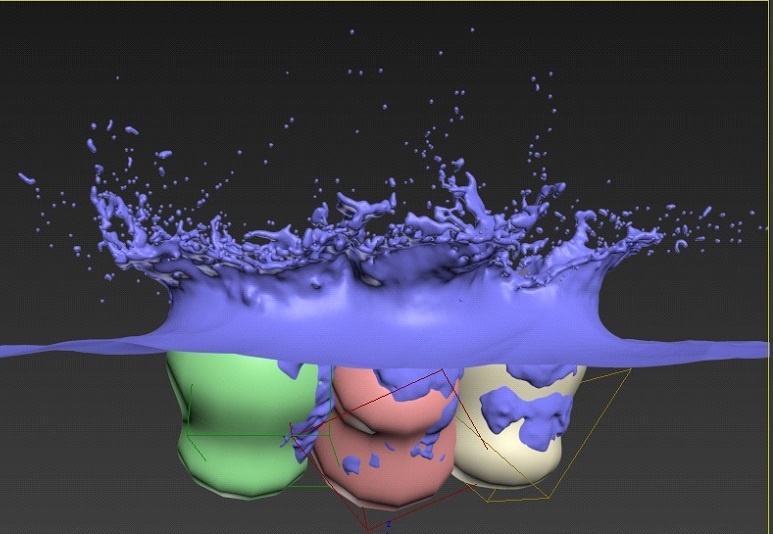
Phoenix's default rendering mode is Mesh - this produces a solid geometry surface. Although it is more realistic, for this example we make an artistic decision to use the Cap Mesh mode instead.
Cap Mesh Mode, on the other hand, won't produce geometry (and thus, reflections and refractions) on the sides of the simulator. Only the upper liquid surface is rendered.
The following examples show the simulation with Mesh and Cap Mesh Modes.

Mesh Mode
Cap Mesh Mode
Enable Displacement and pipe a PhoenixFDOceanTex into the Map slot.
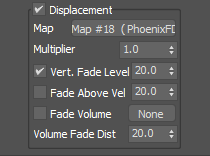
The PhoenixFDOceanTex is a special texture map that can emulate wavy water surfaces. It is easier to control and faster to work with than a pure simulation.
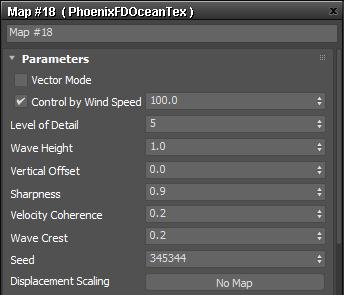
Disable Vector Mode on the PhoenixFDOceanTex.
In this particular example, it may produce artifacts in the rendered image if left enabled.
The following examples show how the Cap Mesh looks with different Displacement values.
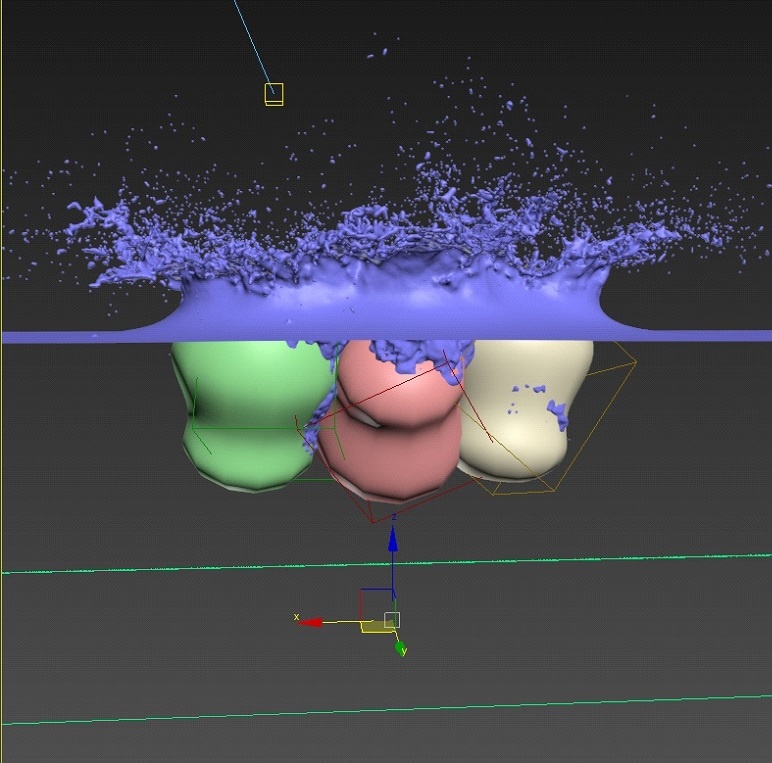
No Displacement
With Displacement
Lighting and Camera Settings
A V-Ray Dome Light is used for ambient lighting.
A V-Ray Area Light placed in the upper left corner of the Simulator is used to boost the reflections and refractions in the water.

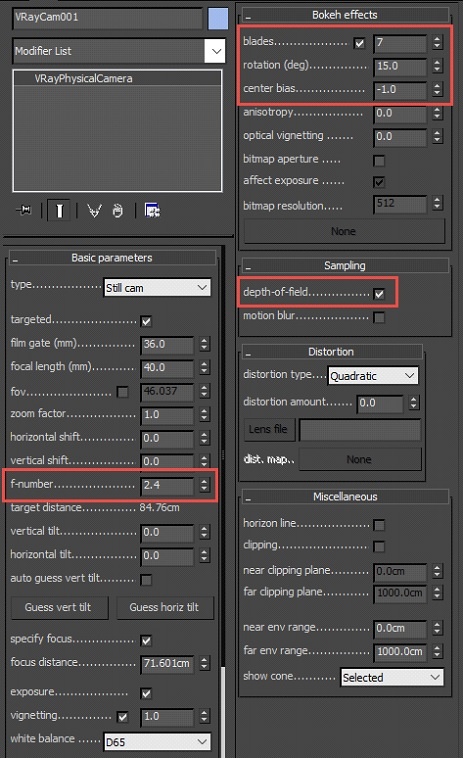
Create a V-Ray Physical Camera.
Enable Depth of Field and set the Bokeh parameters according to your scene requirements.
Materials
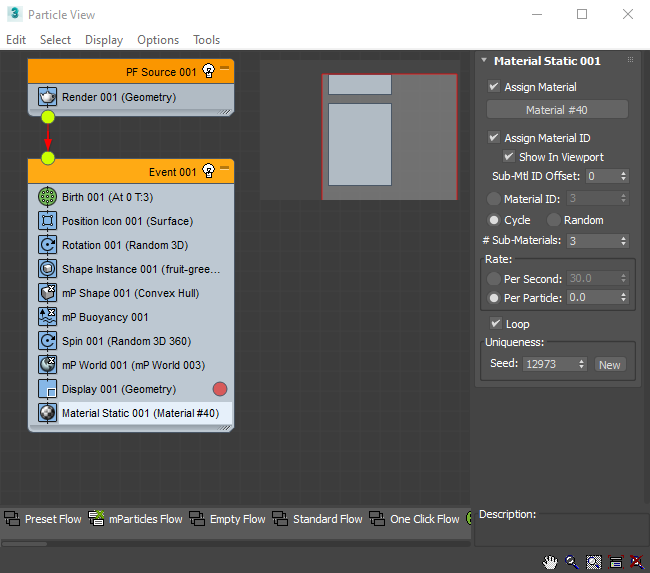
Open the Particle View window.
Insert → Operator → Material Static Operator.
Enable Assign Material ID and Show in Viewport.
Select the Cycle option and set the #Sub-Materials to 3.
Set the Per Particle Rate to 0.
Enable Loop.
In the next step we will create a Multi/Sub-Object Material and will assign it to the Material slot of the Material Static Operator. This material will be used for shading the fruits.
Open the Slate Material Editor.
Create a Multi/Sub-Object Material. Set the Number of Materials to 3.
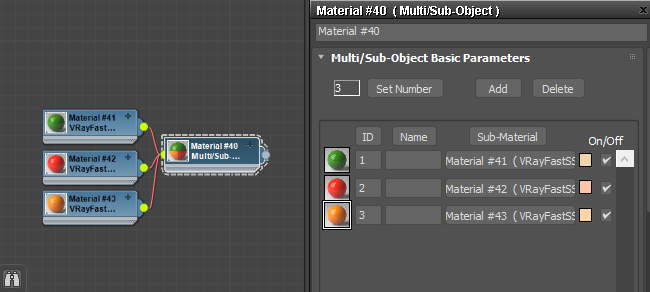
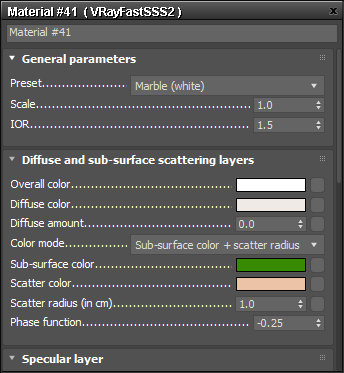
We will use three VRayFastSSS2 materials with the preset set to Marble (white).
For the Green colored fruit, set the Sub Surface Color to RGB (9, 67, 0). Apply the material in the first Sub-Material slot.
For the Red colored fruit, set the Sub Surface Color to RGB (254, 5, 0). Apply the material in the second Sub-Material slot.
For the Orange colored fruit, set the Sub Surface Color to RGB (250, 67, 0). Apply the material in the third Sub-Material slot.
Now, assign the Multi/Sub-Object Material to the Material slot of the Material Static Operator.
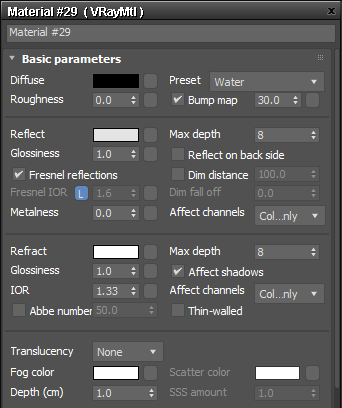
For the water, create V-Ray Standard Material and set the Diffuse to black.
Set Reflection and Refraction to white and the IOR to 1.33.
Another way to create water material is to use the Preset option and set it to Water.
Rendering
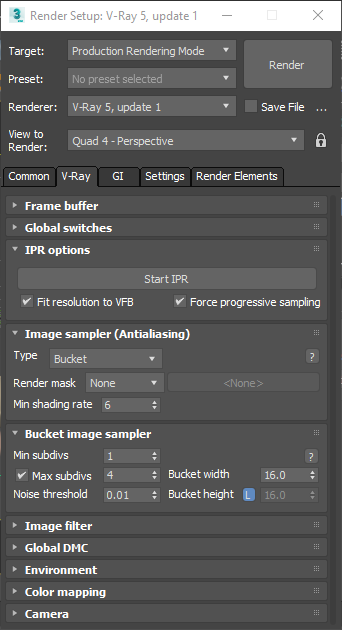
Set the Renderer to V-Ray.
Set the Image Sampler to Bucket and the Max subdivs. to 4.
You can add VRayDenoiser Render Element for your final render to remove the unwanted noise.
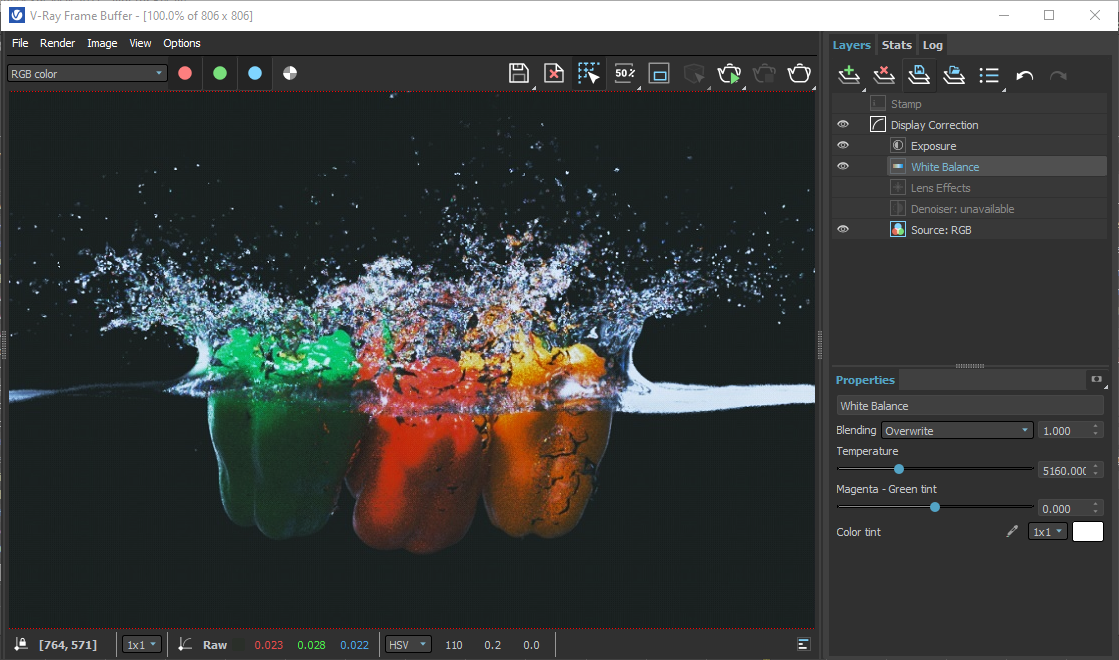
The final image can be adjusted in the V-Ray Frame Buffer.