Introduction
In this chapter we'll talk about Antialiasing in the context of creating various Shading Effects. One thing we need to begin with is what is adaptive sampling generally. We'll continue with the new image sampler and its settings. Then we'll cover briefly what antialising is and the algorithms available in V-Ray. In the end we'll talk about the DMC (Deterministic Monte-Carlo) method.
Adaptive sampling
V-Ray is an adaptive sampling engine. This means that whenever V-Ray needs to compute a value, like the color of a pixel, or the light reflected from a surface, V-Ray will take a varying number of samples for that value, depending on the context. The adaptive algorithm that V-Ray uses is very straightforward: for any effect that requires several samples, V-Ray first computes a small amount of samples, and then, if the variance of the samples is too big, it continues to take more samples until the result is good enough.
The samples that V-Ray needs to compute can be broadly classified as image samples and shading samples. Image samples are those directly related to pixel values that compose the final image, including depth of field and motion blur effects. Shading samples are those taken to compute effects like glossy reflections, global illumination, area lights etc. V-Ray employs adaptive sampling in both of these cases. The picture below shows one possible way that a light or a material may be sampled within a given pixel.

For each value that must be sampled adaptively, there is a certain minimum number of samples that V-Ray always computes, a maximum number of samples, and a noise threshold that controls how many samples between the minimum and the maximum would be actually computed. The minimum number of samples are needed because, like every adaptive algorithm, V-Ray's DMC sampler needs to gather a bit of information about the particular value that is being sampled before it can make any assumptions about it.

For image sampling, the three values - minimum samples, maximum samples and noise threshold - are directly specified by the user. The VRaySampleRate render element can show how many samples were actually performed, as a percentage of the maximum. However, for shading effects like glossy reflections, area lights, GI, it would be too cumbersome to have to specify the three values for each effect separately. To simplify the setup, V-Ray allows the user to specify the maximum number of samples using the various subdivs parameters for lights, materials and so on (although importance sampling may modify this maximum number depending on the expected contribution of the value). The noise threshold is specified globally for all values with the DMC noise threshold. What remains then, is to figure out the number of minimum samples that must be taken for a given value:
- The minimum number of samples may be specified directly with a fixed number. This is not a bad approach, however, it means that increasing the subdivs value for a shading effect might not always lead to improved quality, contrary to what users typically expect.
- The minimum number of samples could be specified as a percentage of the maximum number of samples. This approach ensures that increasing the subdivs value always results in better quality, but if the maximum number of samples are too low to begin with, it may mean that there is not enough information in those samples for the adaptive algorithm to work reliably.
The V-Ray DMC sampler combines both strategies and takes the bigger value to determine the actual minimum number of samples. Those strategies are controlled by the DMC min. samples parameter and the DMC adaptive amount parameter respectively. Once the minimum number of samples are taken, the DMC sampler continues taking more samples either until the noise threshold is reached, or the maximum number of samples are taken.
The new image sampler
In the past V-Ray used to have a few "subdivs" parameters in various Settings plugins. Now it automatically calculates the rest of them from the main "subdivs" parameter in the Antialiasing settings. Increasing it increases the total render time, but produces higher-quality sampling. The setting is located in the SettingsImageSampler plugin.
We generally have four types of image samplers in V-Ray - fixed rate, adaptive, adaptive subdivision and progressive. The fixed one renders the image in buckets. Progressive renders the entire image progressively in passes. Adaptive is actually the same as fixed (used in previous versions of V-Ray), but with two parameters added - max. subdivs and noise threshold. Disabling them results in the same behavior as the fixed one. The type of the sampler is controlled by the type parameter of SettingsImageSampler with the following values:
0 - fixed rate
This will trace camera rays equal to the square of the fixed_subdivs specified for each pixel, regardless of DMC sampler settings. It's useful when a tight control of the AA sampling is needed.
1 - adaptive
This sampler makes a variable number of samples per pixel based on the difference in intensity between the pixel and its neighbors. This is the preferred sampler for images with lots of small details (like fine hair, for example) and/or blurry effects (DOF, motion blur, glossy reflections etc). It also takes up less RAM than the Adaptive subdivision sampler.
The following diagram shows visually the way V-Ray is placing samples when using the Adaptive sampler. The black squares represent the pixels of the image while the dots represent the individual samples. In the first pass, V-Ray always places the minimum number of samples determined by the Min subdivs parameter. Then, the color of samples is compared and more are added where needed in the following passes.

2 - adaptive subdivision
This sampler is deprecated.
3 - progressive
The Progressive sampler is similar to the Adaptive sampler, but instead of rendering the image in buckets, it renders the entire image progressively in passes.
The advantage of this sampler is that you can see an image very quickly, and then let it refine for as long as necessary as additional passes are being computed. This is in contrast to the bucket-based image samplers, where the image is not complete until the final bucket is done.
A disadvantage is that more data needs to be kept in memory, especially when working with render elements. Also, when using distributed rendering, because of the continuous refinement, frequent communication between the client machine and the render servers is required, which may reduce the CPU utilization on the render slaves. This effect can be controlled to some extent using the Ray bundle size and Min shading rate parameters.
Choosing the Best Image Sampler for the Situation
No image sampler is best for all scenes or workflows. Choosing the best image sampler is usually a matter of experimentation, but there are a few guidelines you can follow.
- Setting Image Sampler Type to Bucket is the same as the Adaptive Type in previous versions of V-Ray.
- With the Bucket type, disabling Max. Subdivs will also disable the Noise threshold and will match the Fixed sample behavior in earlier versions of V-Ray.
- Progressive is useful when it is necessary to see overall results quickly (like when placing light, building shaders, or general Look Development work) because it generates the whole image at once and progressively cleans up the noise in it. Additionally, the render can be stopped at any time before resolving completely.
- Progressive is also helpful when a set amount of time to spend per render is needed. This can also be useful when rendering test animations, where the entire sequence must be rendered within a certain time frame.
- Combining the VRayDenoiser with Progressive renders can help with cleaning up render noise. If the Denoiser's Update button is used when manually cancelling a render, the noise levels will be adequate enough to use the denoiser to avoid splotches and/or other unwanted effects. Also note that in 3ds max 2017, there is a Stop button in addition to the Cancel button in the progress window. After clicking Stop, V-Ray will begin denoising the render.
- Using Bucket when running Distributed Renders can be helpful for cutting down on network traffic and reducing the loss of information if work is not completed by one or more DR machines.
Examples: Image Sampler Comparisons
Here are some examples demonstrating the quality vs. speed of the image samplers. All the samplers were set to produce approximately the same image quality. The first example is a normal smooth image (no blurry effects), click the images for a larger view:

Both the adaptive and the adaptive subdivision samplers are substantially faster than the fixed rate sampler.
Here is a more complex example with some fine textures (lots of fine bump mapping) and an area light; this example uses a pre-calculated irradiance map - the render times are for the final rendering only.

In this case, the Adaptive sampler performed best, and the Adaptive subdivision method performed the worst. Why is that? Here is the non-antialiased image, to give an idea of what the image samplers had to deal with.

Some parts of the image are quite "noisy" because of the fine bump map. Lots of image samples were required to smooth this out. Furthermore, each image sample was quite costly to compute - there is an irradiance map and an area light, which (especially the area light) need a lot of computations. With the Fixed and Adaptive samplers, V-Ray knows in advance how many image samples will be taken for a pixel; therefore, it can optimize the computation of some values (the area light for example) so that the final image result is similar, while actually those values are computed with lower accuracy (i.e. tracing fewer shadow rays) for the individual image samples. This cannot be done for the Adaptive subdivision sampler - it does not know in advance how many samples will be computed for a pixel; therefore it needs to maintain a constant (high) accuracy. Constant accuracy is also required in order for the sampler to adapt correctly to the image. This is why, in this example, the Adaptive subdivision sampler performed worse than the other two methods.

Example
One of the functions of image sampling is anti-aliasing, which is the reduction of jagged edges in a rendering. The following example shows the basic difference between an image with anti-aliasing, and one without.
If only one sample is taken for the each of the pixels around the edge of the sphere, the choice of pixel color is limited to the dark gray at the edge of the object, or the (white) background. Using one of these colors (i.e. taking only one sample) makes the image look jagged. This is the equivalent of no anti-aliasing at all.
If two or more samples are taken in each pixel, the colors are averaged, and pixels at the edge of the object end up being a color in between the dark gray of the sphere and the background. These in-between colors make the object appear smoother in the final rendering.

In the image with anti-aliasing, the edges appear smoother than in the image without anti-aliasing.
V-Ray performs anti-aliasing by sampling colors in areas where one color meets another, as with the edges touching the background. The choice of image sampler and the parameter settings determines the effectiveness of anti-aliasing for any particular scene.
Anti-aliasing within a material can also be affected by filters.

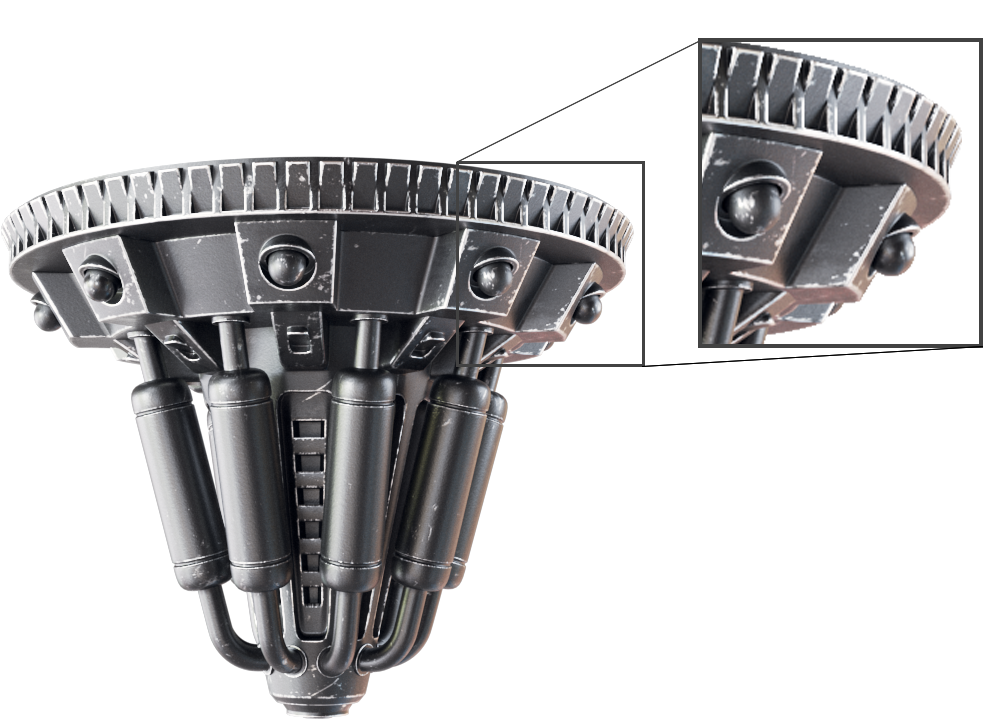
The above picture is rendered using the scenes from the bundle. Make sure to open them and see the commented sections. You can also comment/uncomment different sets of settings for image sampling quality and shading quality.
Parameters
Fixed (bucket) image sampler
- fixed_subdivs - Subdivs value for the fixed sampler
- fixed_per_pixel_filtering - True to enable per-pixel filtering for the fixed sampler
Adaptive (bucket) image sampler
- dmc_minSubdivs - Min. subdivs value for the adaptive DMC image sampler
- dmc_maxSubdivs - Max. subdivs value for the adaptive DMC image sampler
- dmc_threshold - Color threshold for the adaptive DMC image sampler
- dmc_adaptive_method - Switches between legacy and new adaptive sampling
- dmc_per_pixel_filtering - True to enable per-pixel filtering for the adaptive DMC image sampler
Progressive image sampler
- progressive_minSubdivs - Min. subdivs value for the progressive image sampler
- progressive_maxSubdivs - Max. subdivs value for the progressive image sampler
- progressive_threshold - Noise threshold for the progressive image sampler
- progressive_maxTime - Max. render time for the progressive image sampler
- progressive_bundleSize - Bundle size for the progressive image sampler
- progressive_showMask - If true, the AA mask will be rendered
- progressive_progNoiseThreshold - Progressive noise threshold active pixels percent at which the threshold is reduced.
Others
- render_mask_mode - Sets the mode for the render mask. The mode controls which render_mask_* parameter will be used to generate the mask from. Possible values are: 0 - Disable, 1 - Texture, 2 - Objects, 3 - ObjectIDs
- render_mask_texture - Texture used for render mask when render_mask_mode=Texture.This accepts float textures, where a value of <=1e-6, means that V-Ray won't render in this pixel
- render_mask_objects - List of Node/GeomGen plugins which will be used for render mask when render_mask_mode=Objects
- render_mask_object_ids - List of integers object ids, which will be used for render mask when render_mask_mode=ObjectIDs
You can see a good default values for these parameters in
DMC Sampler Overview
Monte Carlo (MC) sampling is a method for evaluating "blurry" values (anitaliasing, depth of field, indirect illumination, area lights, glossy reflections/refractions, translucency, motion blur, etc). V-Ray uses a variant of Monte Carlo sampling called Deterministic Monte Carlo (DMC).
The difference between pure Monte Carlo sampling and Deterministic Monte Carlo is that the first uses pseudo-random numbers which are different for each and every evaluation (and so re-rendering a single image will always produce slightly different results in the noise), while Deterministic Monte Carlo uses a pre-defined set of samples (possibly optimized to reduce the noise), which allows re-rendering an image to always produce the exact same result. By default, the Deterministic Monte Carlo method used by V-Ray is a modification of Schlick sampling, introduced by Christophe Schlick in C. Schlick, "An Adaptive Sampling Technique for Multidimensional Integration by Ray Tracing", in Second Eurographics Workshop on Rendering (Spain), 1991, pp. 48-56.
Instead of having separate sampling methods for each of the blurry values, V-Ray has a single unified framework that determines how many and which exact samples are to be taken for a particular value, depending on the context in which that value is required. This framework is called the DMC sampler.
Parameters for DMC
Another plugin which controls the DMC method itself is the SettingsDMCSampler plugin. It's parameters are:
- time_dependent - If this is true, the sample pattern will vary from frame to frame.
- adaptive_amount - Amount of adaptive sampling; 1.0 means full adaptation; 0.0 means no adaptation.
- adaptive_threshold - Noise threshold that determines when to stop sampling. Lower values reduce noise, but may take longer to render.
- adaptive_min_samples - Minimum amount of samples to take.
- subdivs_mult - A global subdivs multiplier. Handy for reducing overall quality for draft renders.
- path_sampler_type - int
- div_shade_subdivs - Allow VRay to divide the number of samples for lights, materials etc by the number of AA samples in order to achieve roughly the same quality and number of rays when changing AA settings.
- random_seed - If non-zero, a random seed for the DMC sampler.
- use_local_subdivs - true if shading subdivs in materials/lights/GI should be used, and false to determine subdivs automatically.
Effects
Anti-Aliasing for soft shadows
Shadows are calculated by secondary (shadow) rays in our scene. The best way to get V-Ray to shoot more shadow rays is to increase the Min Shading Rate. The AA Quality helps reduce the noise seen in the shadows. For each Primary Ray ( controlled by the AA Quality) V-Ray shoots additional secondary(shadow) rays that is why AA Quality also affects the quality of the shadows. The Threshold value is a big factor in how much noise we are okay with in our renders. In the following example pictures the term "Shading quaility" refers to a preset for Image Sampler’s Min Subdivs, Max Subdivs, and Noise Threshold.

Shading Quality: 3% Min Shading Rate: 2
AA Quality: 1-8 Threshold: 0.005

Shading Quality: 37% Min Shading Rate: 24
AA Quality: 1-8 Threshold: 0.005

Shading Quality: 25%
AA Quality: 1-1 Threshold: 0.05

Shading Quality: 25%
AA Quality: 1-8 Threshold: 0.005
Anti-Aliasing for Reflections
A higher Min Shading Rate will allow more secondary ray calculations for glossy reflections. If a scene has little to no reflections, a lower Min Shading value will keep render times fast. Increasing the Shading Quality (Min Shading Rate) will increase the secondary effects (like blurry reflections). Increasing the AA Quality will increase the Anti-Aliasing on the geometry in the scene.

Min Shading Rate: 2
AA Quality: 1-4 Threshold: 0.02

Min Shading Rate: 16
AA Quality: 1-4 Threshold: 0.02

Shading Quality: 35% Min Shading Rate: 23
AA Quality Min/Max: 1/2 Threshold: 0.05

Shading Quality: 35% Min Shading Rate: 23
AA Quality Min/Max: 1/6 Threshold: 0.01