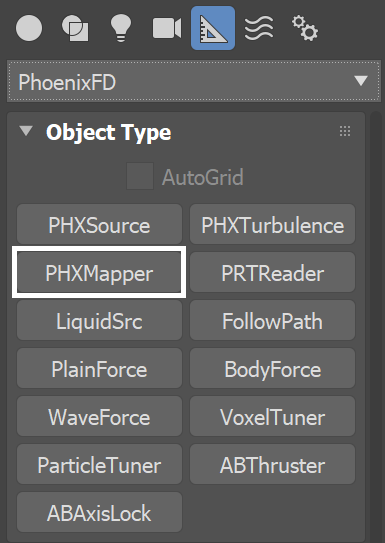
This page provides information on the Mapper component (PHXMapper).
Overview
The Mapper uses textures to affect a channel in the simulation's grid. The chosen grid channel can either be directly set to the texture's values when the simulation starts, or it can gradually approach the texture's values over time. The Buildup Time specifies the time it takes for the channel to reach the full value specified in the texture under the influence of the Mapper.
The Mapper affects all Phoenix simulators in the scene unless they explicitly exclude it.
![]()
Parameters
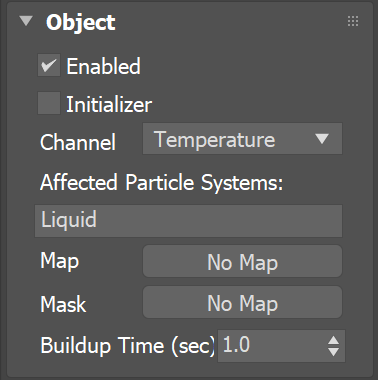
Active | active – Animatable checkbox that turns on and off the effect of the Mapper.
Initializer | init – The Mapper can work in two different modes. When this is checked, the Mapper just sets the initial conditions for the grid and stops affecting the simulation afterwards. Otherwise, while the simulation runs, it gradually or immediately keeps changing the value of the selected grid or particle Channel towards the value in the Map (similarly to a Source in Volume Brush mode).
Channel | channel – Specifies which channel is affected by this helper. It can be one of the following:
Disabled - Disables this node.
Temperature - Maps the voxels of the simulator for the Temperature channel to the texture values. Keep in mind that this channel should be mapped with a texture with a range that is typically [ 300, 2000 ] for Fire/Smoke simulations.
Smoke - Maps the voxels of the simulator for the Smoke channel to the texture values. This channel is typically in the range [ 0, 1 ].
Fuel - Maps the voxels of the simulator for the Fuel channel to the texture values. This channel is typically in the range [ 0, 1 ].
Velocity - Maps the voxels of the simulator for the Velocity channel to the texture values. This channel can take both positive and negative values, and its range is not limited. If your texture produces no result, try using an Output 3ds Max texture to boost the values. Velocity is typically in the range of [ 10, 1000 ].
RGB - Maps the voxels of the simulator for the RGB channel to the texture values. Essentially, this will transfer the texture color to the RGB channel.
Viscosity - Maps the voxels of the simulator for the Viscosity channel. This channel is typically in the range [ 0, 1 ].
You can find out more about Phoenix Grid Channel Ranges here.
Affected Particle Systems | affectpartsys - Allows the Mapper to separately affect the Liquid, Foam, Splash or Mist particles. You can also affect Drag particles in a Fire/Smoke simulation, but note that you cannot change their Velocity channel - they are simply dragged by the fluid. You could affect any Drag particle system by typing Drag in the list, or you can affect specific Drag particle systems by using their exact names.
The Mapper can not create or delete particles - it can only change values in their channels, such as particle Velocity, RGB or Viscosity.
Map | map – Specifies the texture that will copy its values into the Simulator. It should be mapped into Object XYZ (using the Simulator box) or World XYZ. For channels that may require values higher than 1 (such as Velocity or Temperature), you can use a regular 3ds Max Output Map to expand the texture's values. For more information on texture mapping in Phoenix, please check the Texture mapping, moving textures with fire/smoke/liquid, and TexUVW page.
Mask | mask – A mask that specifies the region which will be affected by the Mapper. It allows you to limit the effect of the Mapper only to a certain volume in the Simulator. White values in the texture mean that the region is affected, and black values mean that the region is not affected. Gray values in between mean that the region is affected, but will take longer time to reach the values from the Map.
If the Buildup Time is 0, gray mask values will be treated as white, and the Mapper will act with full strength in such voxels. You could use a V-Ray DistanceTex as a Mask in order to confine the effect of the Mapper to a geometry volume, in order to make it easier to setup the effect visually.
Buildup Time | influence – When Initializer is disabled, this parameter specifies the time it takes (in seconds) for the channel to gradually reach the value specified in the Map. If Buildup Time is 0, the effect is instant and fluid is set to the values from the Map immediately. Time Scale different than 1 will affect the Buildup Time of the Phoenix Mapper. In order to get predictable results you will have to adjust the buildup time using this formula:
Time Scale * Time in frames / Frames per second
How-To's
Following are some example setups you can create using a Mapper.
For a detailed tutorial, please check the RGB Workflows tutorial (Chapter 5: Changing the RGB Color after emission with a Mapper and a V-Ray Distance Texture).
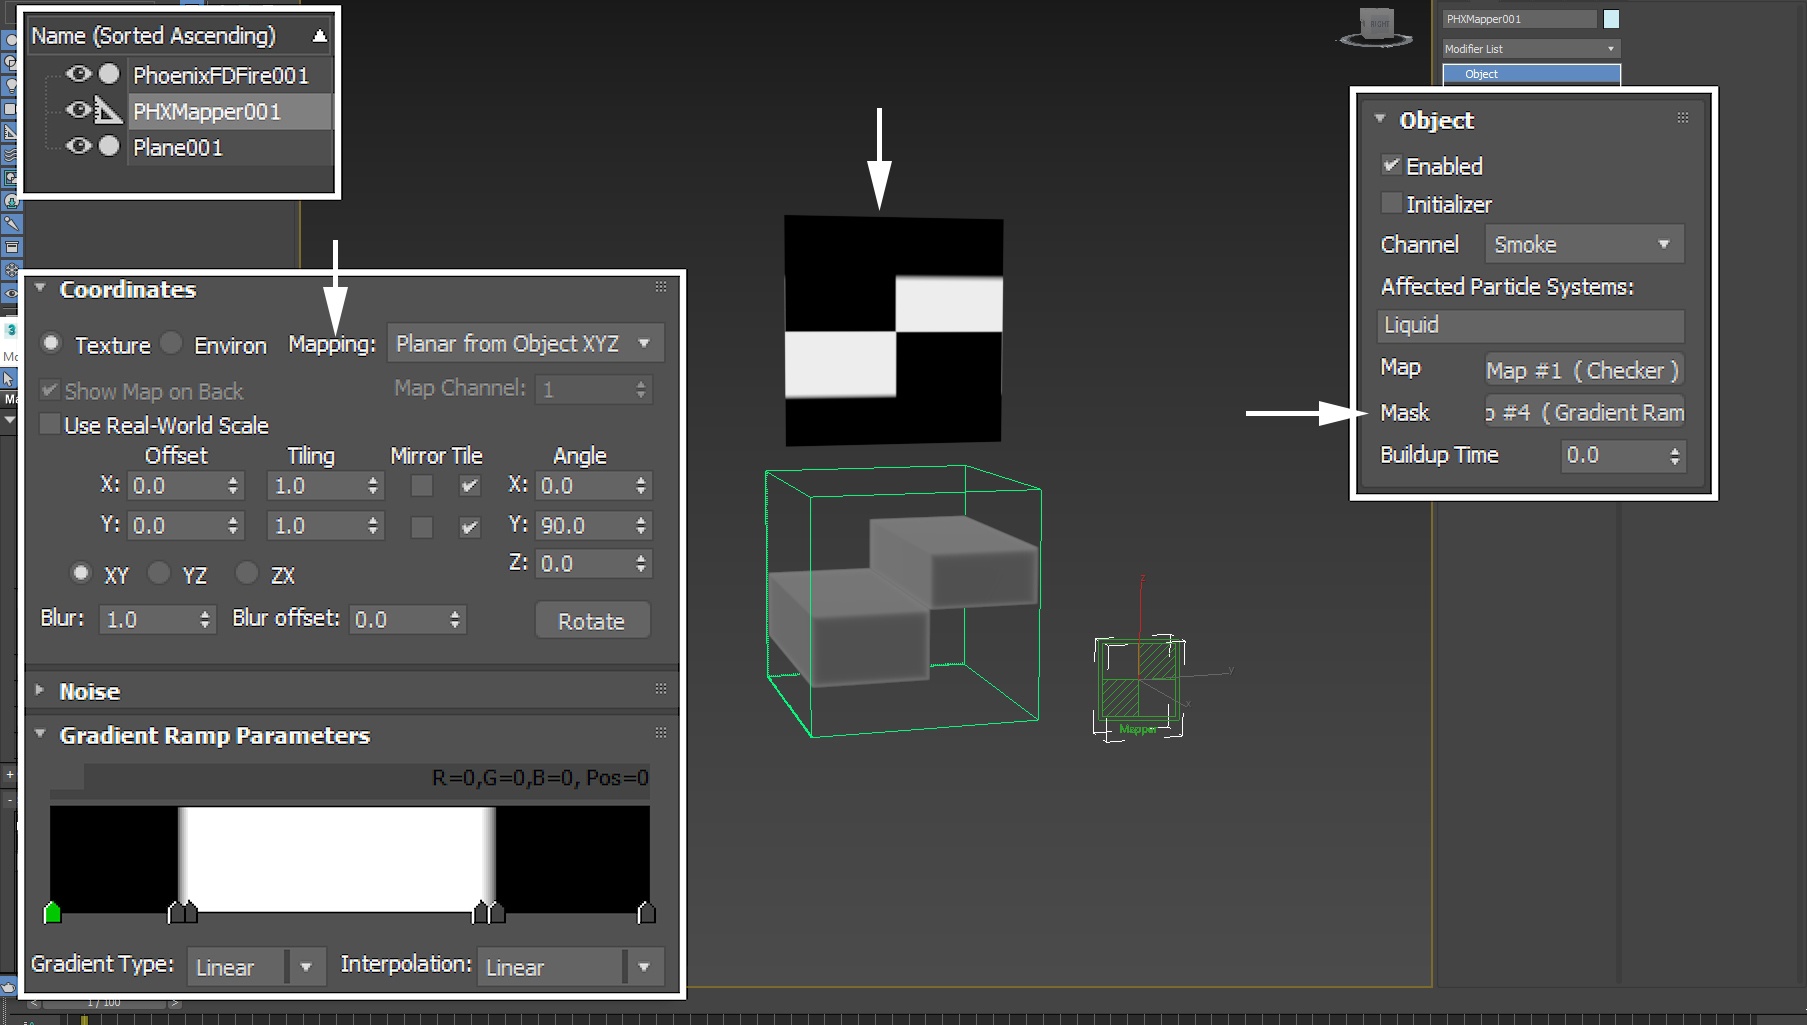
A Checker texture is plugged into the Map parameter of the Mapper. When you Start a simulation, the Mapper will look at this texture to determine what values to apply to the voxels of the Simulator. Note that if this is Liquid Simulator, the FLIP liquid particles will be affected and not just the voxels.
The Mapping parameter for the texture is set to Planar from Object XYZ. The Mapper works in a volume, so the default Explicit Map Channel does not make sense because it affects only the surface of objects, and the Simulator has no UV coordinates to map the Checker to.
Buildup Time is set to 0 so the Mapper will instantly set the voxels of the Phoenix Simulator to the values of the texture for each frame of the simulation.
The Channel option is set to Smoke so the Mapper will set the texture values only for the Smoke Channel. If you want to affect multiple channels simultaneously, you need to set up multiple Mapper nodes.

A Gradient Ramp is used as a Mask for the Mapper. The Mask specifies where the Map values are applied inside the Phoenix Simulator.
The poly plane above the simulator has a Composite Texture applied to it such that the Checker is multiplied by the Gradient Ramp. This is essentially what happens with the Map + Mask parameters of the Mapper.
Imagine this plane projected over the Phoenix Simulator from the front - the white values will set the Smoke Channel to 1, the Black values will set it to 0.
Note that the Mapping for the Gradient Ramp is also set to Planar from Object XYZ for the same reason - because the simulator has no UV coordinates, the texture has to be projected from one of the XY / YZ or ZX planes.
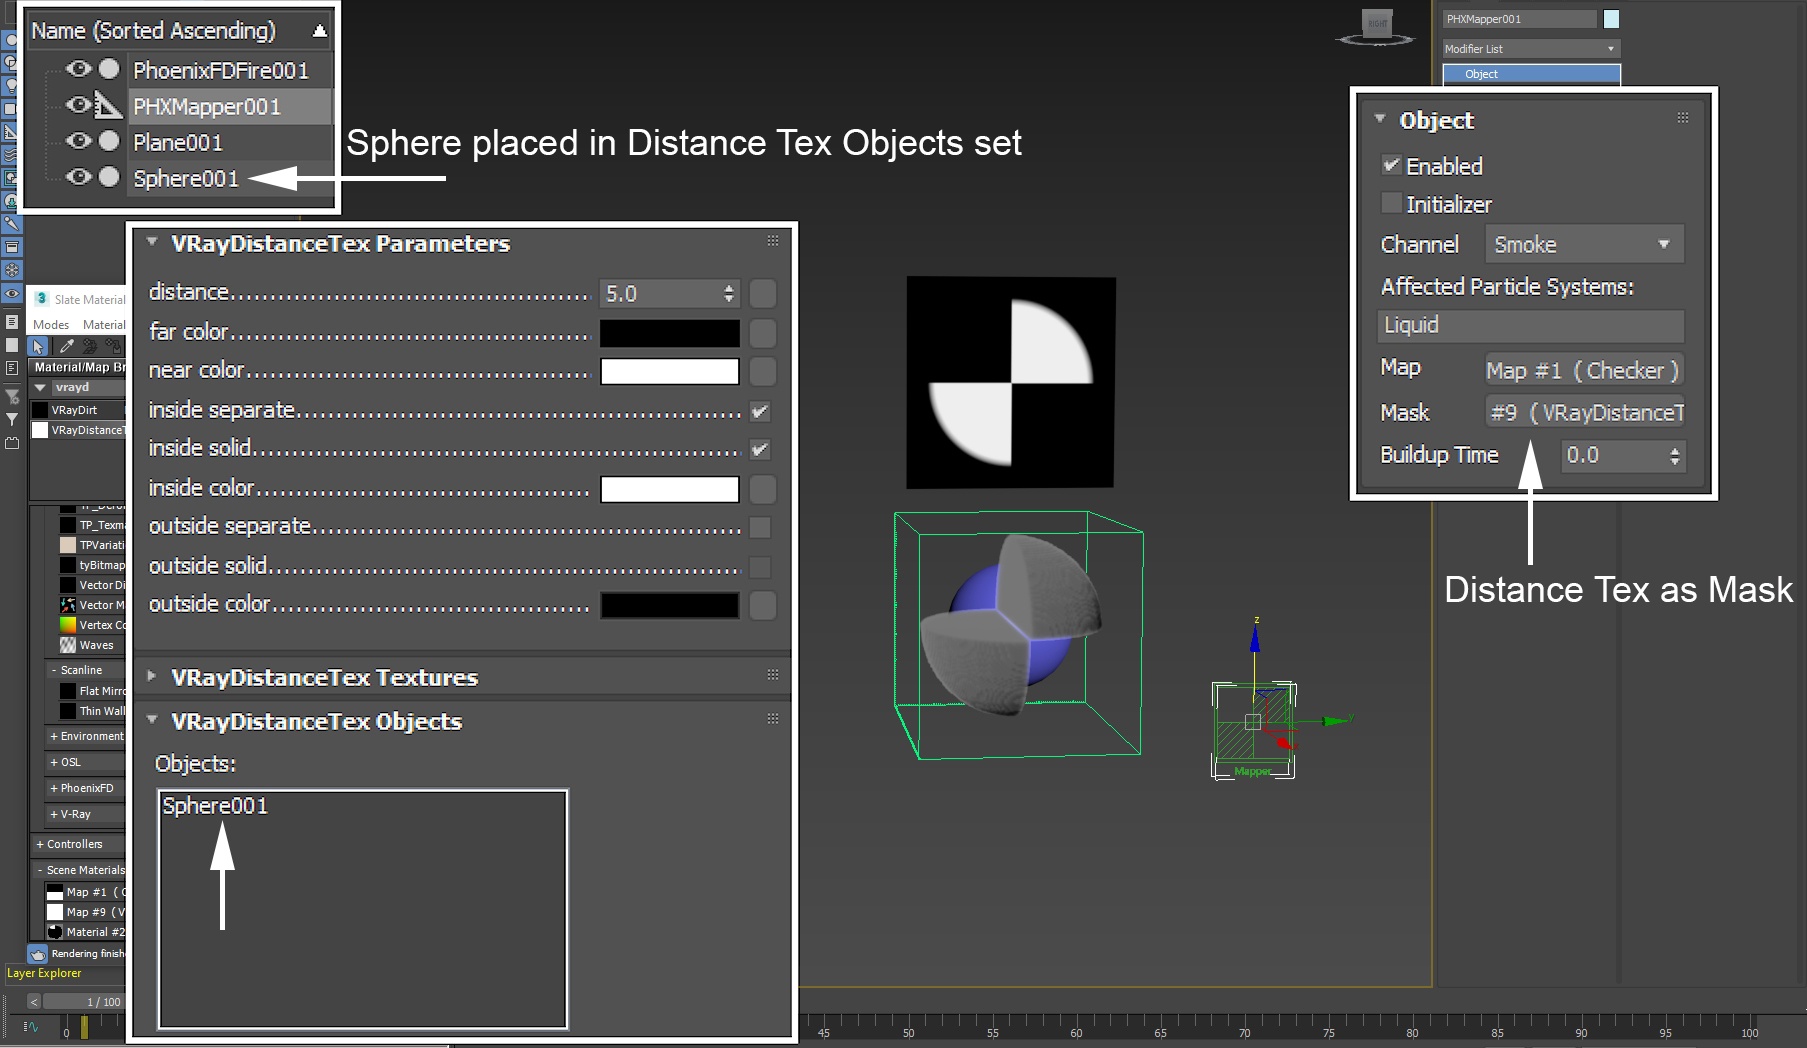
The mask functionality becomes quite useful when you start using a V-Ray Distance Texture.
The Distance Texture takes Input Geometry and returns a black and white texture based on how far the Input Geometry is from the object that the Distance Texture is applied to.
A regular Poly Sphere is created and placed inside the Simulator to be used as Input Geometry for the V-Ray Distance Texture.
The Mapper works directly on each voxel or particle of the Simulator. When the Distance Texture is evaluated, it looks at each voxel or particle and checks 'How far is the Sphere from that voxel'. If the answer (in this case) is 'Greater than 5', then the value returned to the Mapper is equal to the Far Color parameter (black). Thus, the voxels of the Simulator which are farther than 5 units from the Sphere geometry are not affected - the value for the Mask there is black.
You can use the Mapper to affect any grid or particle channel.
The video to the right shows the Mapper affecting the Grid RGB Channel instead of the Smoke density grid channel, and a V-Ray User Color texture with a solid Green color set as the Map parameter for the Mapper.
Once the smoke passes through the volume of the sphere geometry, it inherits the RGB color set by the Mapper for that region of the Simulator.
For this setup to work, a Phoenix Source is created to emit Smoke and RGB (the color is set to Gray). On the Phoenix Simulator → Output rollout, RGB Grid Channel export is Enabled.