![]()
Page History
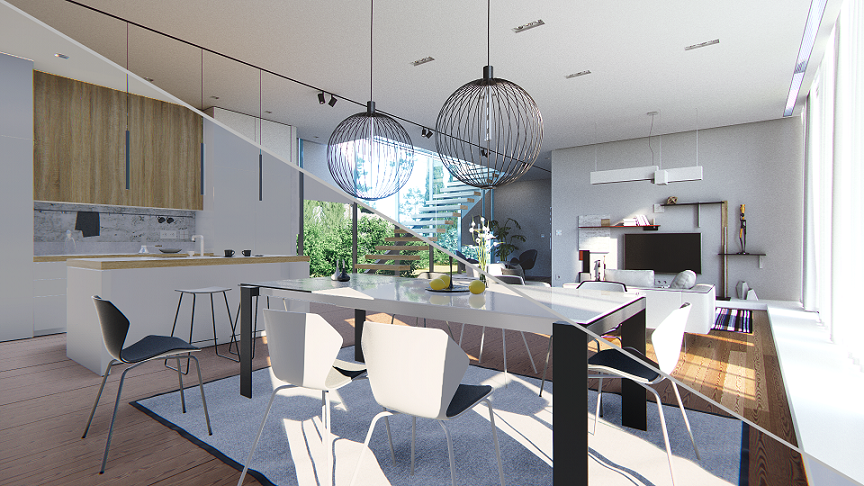
This page provides information about the real-time viewer V-Ray Vision.
Overview
...
| Section | |||||||||||||||||
|---|---|---|---|---|---|---|---|---|---|---|---|---|---|---|---|---|---|
|
UI Paths
...
| Section | |||||||||||||||||
|---|---|---|---|---|---|---|---|---|---|---|---|---|---|---|---|---|---|
|


V-Ray Vision Menu
...
...
| Indicates whether the live link with V-Ray is currently active. Click on the button to open the Live link parameters panel: Sync Camera – Sync vision camera with the host application viewport. | ||||||
| Selects a .vrscene file to be loaded in the viewer. | ||||||
| Shows or hides the information panel and the shortcuts. | ||||||
| Resolution mode. Click on the button to cycle between the following modes: Fit in Window – Matches the window size and aspect. | ||||||
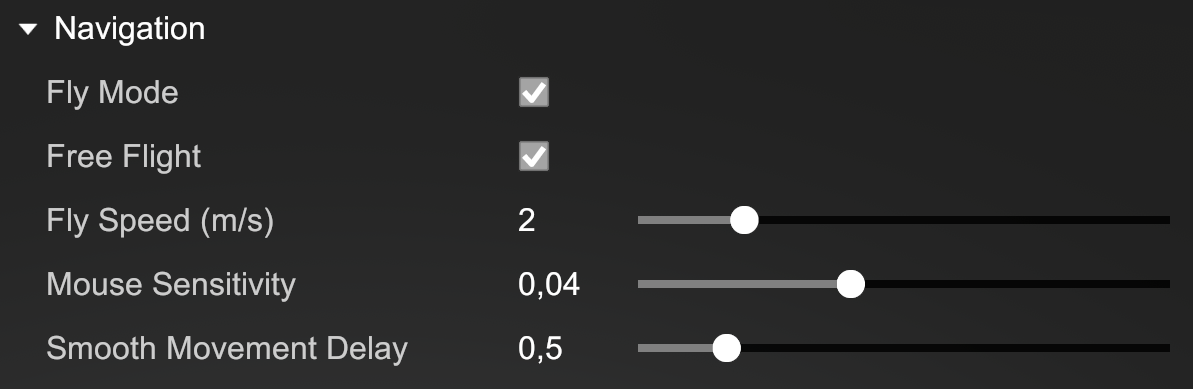
| Camera Navigation Mode. Click on the button to cycle between the following modes:
Orbit mode – enables the camera movement based on orbit, pan, and zoom manipulations. | ||||||
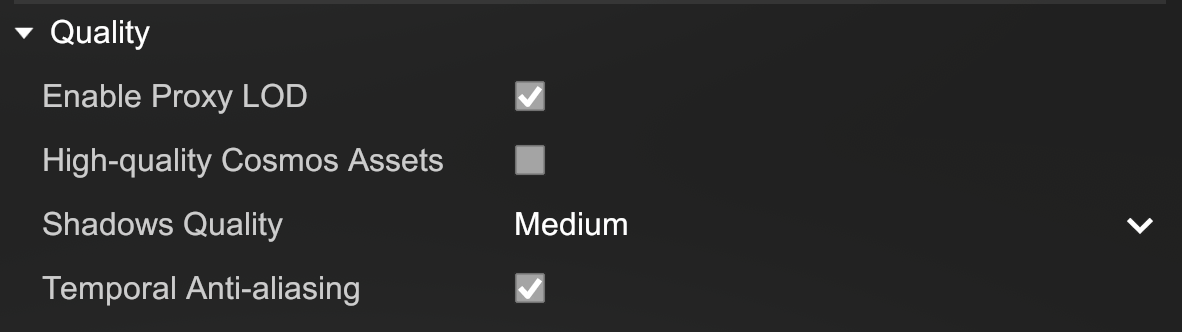
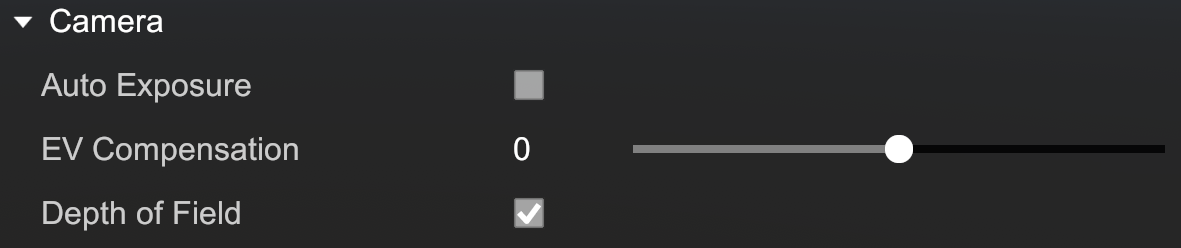
| Enables/disables Auto Exposure.1 | ||||||
| Enables/disables the Measurement Tool. | ||||||
| Opens the Settings panel. | ||||||
| Opens the Color Corrections panel.
| ||||||
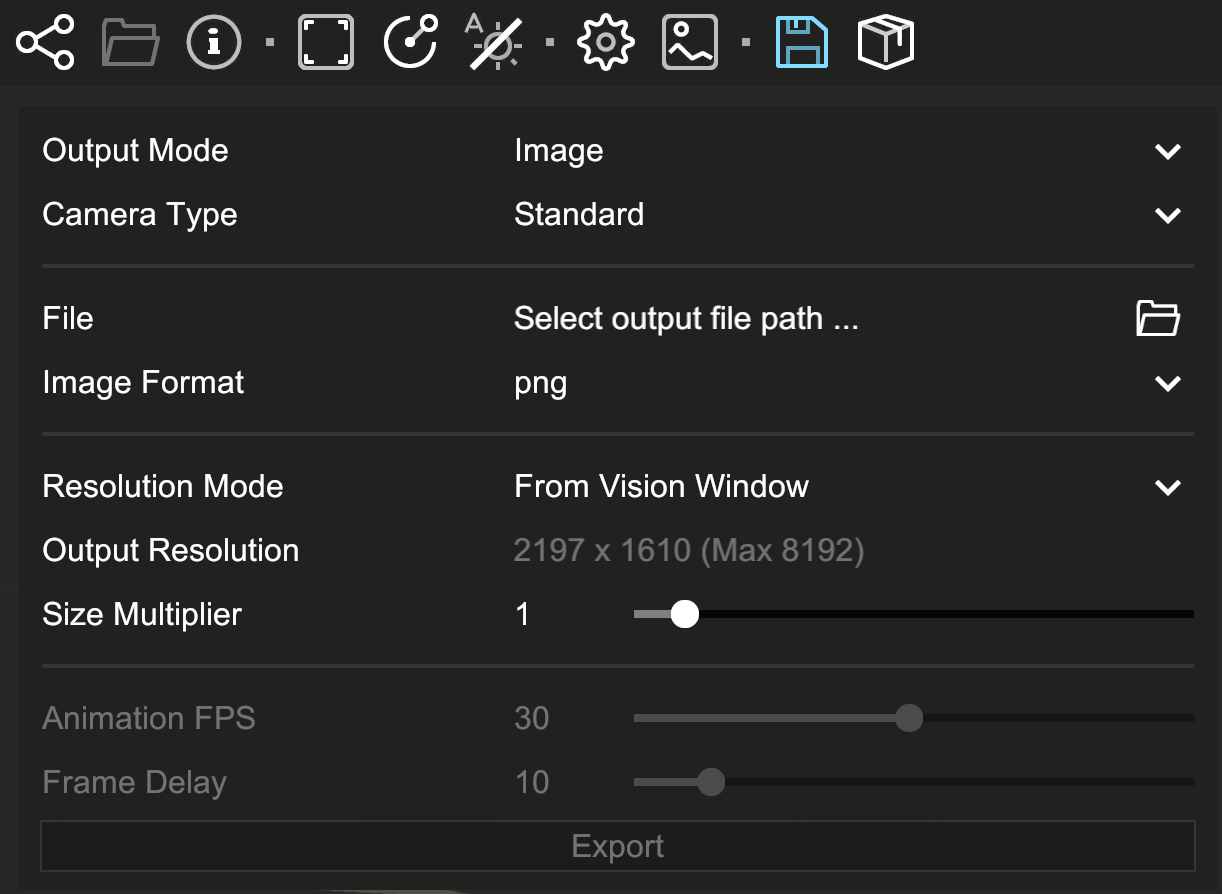
| Opens the Save Options panel. | ||||||
| Enables the Standalone Application Export.2 Packages and exports the project as a standalone application. |


Toolbar Menu Hide Option – An arrow appears upon hovering at the top part of the V-Ray Vision window. This allows for the toolbar to be hidden or expanded.

SettingsAnchor Settings Settings
| Settings | |
| Settings |
...
| Section | ||||||||||||||||
|---|---|---|---|---|---|---|---|---|---|---|---|---|---|---|---|---|
|
Camera
...
| Section | |||||||||||||||||
|---|---|---|---|---|---|---|---|---|---|---|---|---|---|---|---|---|---|
|
Navigation
...
| Section | |||||||||||||||||
|---|---|---|---|---|---|---|---|---|---|---|---|---|---|---|---|---|---|
|
...
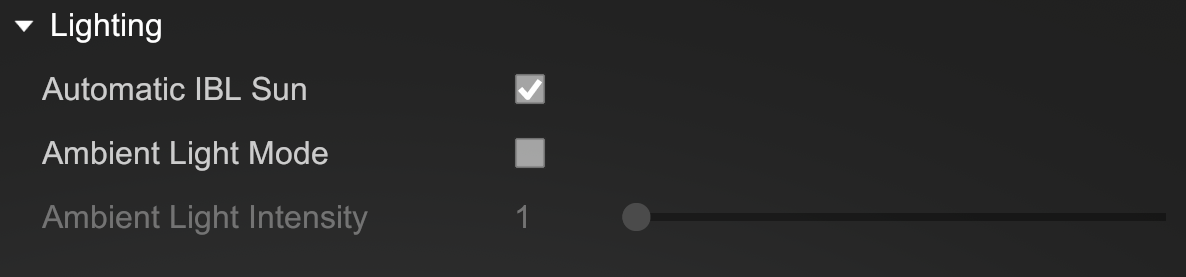
Lighting
...
...
| Section | |||||||||||||||||||||
|---|---|---|---|---|---|---|---|---|---|---|---|---|---|---|---|---|---|---|---|---|---|
|
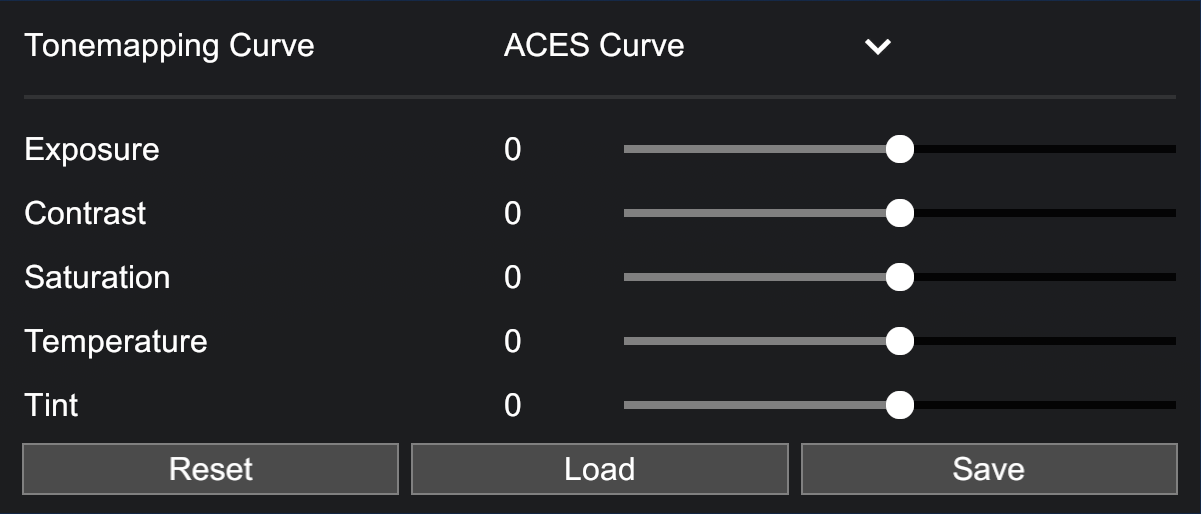
Color Corrections Anchor ColorCorr ColorCorr
| ColorCorr | |
| ColorCorr |
...
| Section | ||||||||||||||||
|---|---|---|---|---|---|---|---|---|---|---|---|---|---|---|---|---|
|
...
| Anchor | ||||
|---|---|---|---|---|
|
...
| Section | ||||||||||||||||||||||
|---|---|---|---|---|---|---|---|---|---|---|---|---|---|---|---|---|---|---|---|---|---|---|
|
...
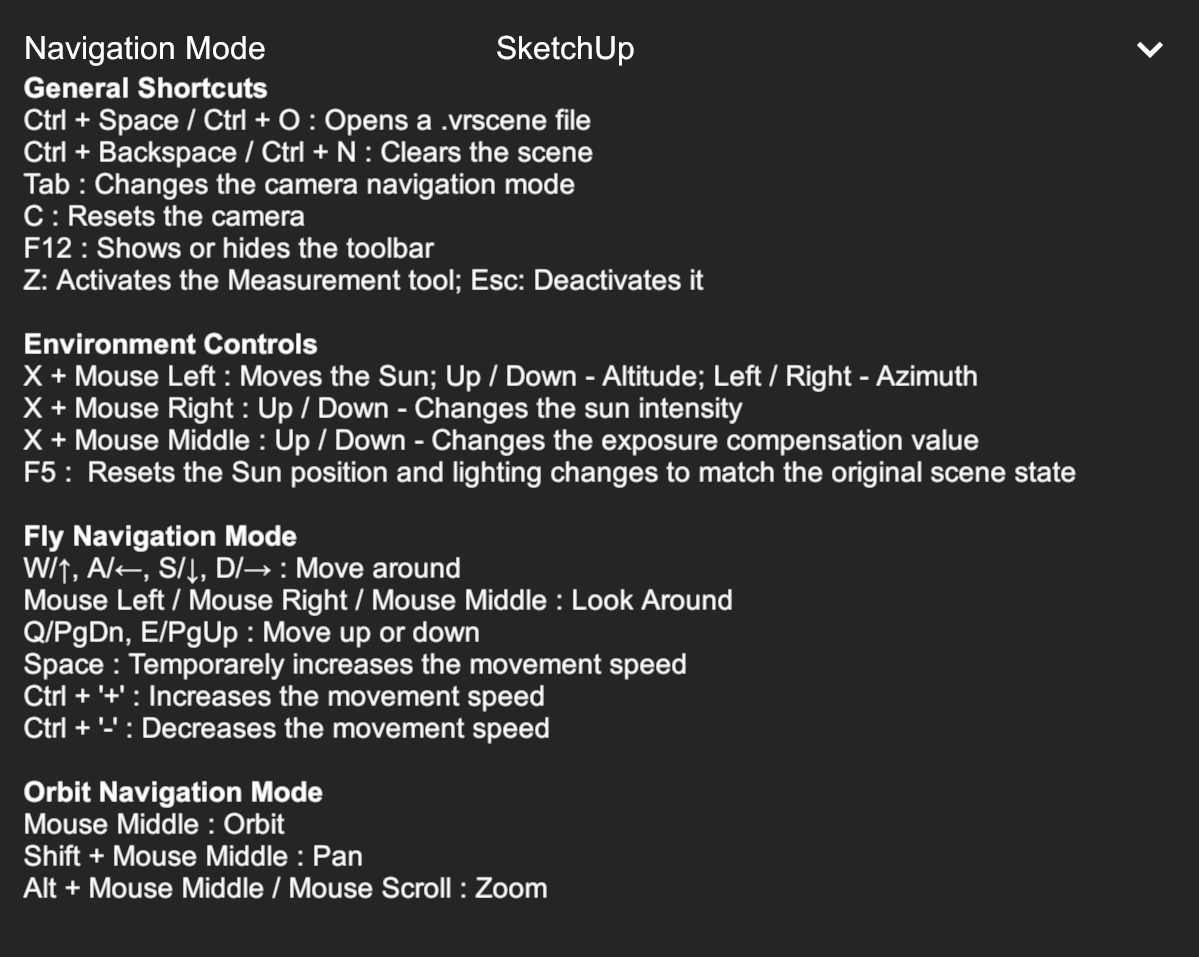
ShortcutsAnchor Shortcuts Shortcuts
| Shortcuts | |
| Shortcuts |
...
| Section | ||||||||||||||||||
|---|---|---|---|---|---|---|---|---|---|---|---|---|---|---|---|---|---|---|
|
| Section | ||||||||||||||||||||||||||||||||||
|---|---|---|---|---|---|---|---|---|---|---|---|---|---|---|---|---|---|---|---|---|---|---|---|---|---|---|---|---|---|---|---|---|---|---|
|
| Section | ||||||||||||||||||||||||||||||||
|---|---|---|---|---|---|---|---|---|---|---|---|---|---|---|---|---|---|---|---|---|---|---|---|---|---|---|---|---|---|---|---|---|
|
...
FAQ
...
Does V-Ray 6 include Vision?
...
• The technology used in Vision (rasterization) is fast but limited in quality and number of effects that can be supported.
• Most of the common material parameters used in V-Ray are supported in Vision. Some are still unsupported and hence you’ll see some differences in the way surfaces appear.
• Vision is also still not capable of evaluating the global illumination in the scene. As a result closed interior spaces would be illuminated incorrectly in most cases. Calculating many light bounces is required for better results.
• Chaos' main goal with Vision is to give a real-time experience keeping a high framerate. Vision is in active development, so the supported features are subject to change.
Footnotes
...
1- Note that when Auto Exposure is enabled, sizeable very dark or light portions of the buffer (e.g. completely black background surrounding a model), might produce an exaggerated exposure value adjustment.
| Anchor | ||||
|---|---|---|---|---|
|
...