The New V-Ray Frame Buffer (VFB 2) is a second-generation V-Ray virtual frame buffer.
The New VFB is much more than a render image holder window, with Light Mix capabilities for modifying the scene lighting after rendering and Layer Compositing for a higher level of post-processing adjustments.
Image preview: Loads render elements channels via a dropdown list; Works with display corrections; Loads various 8bit and 32bit file formats, including V-Ray resumable files; Image comparison between 2 or 4 renders;
Image management: Keeps the rendered image in full 32-bit floating-point format; Can store history of rendered images with their post rendering corrections; Can save corrected output to various image formats;
Image editing and post-processing: Add Color Corrections to rendered image and its elements; Layer Compositing for anything from a simple Back to Beauty workflow or advanced compositing; LightMix adjustment of the scene lighting after rendering the image;
Scene editing: Can modify actual lights values by transferring updated intensity and color from LightMix mode;
Render management: Denoiser control; Region rendering control and test resolution; Allows you to choose the order in which the buckets are rendered.
<iframe width="560" height="315" src="https://www.youtube.com/embed/CwAZGvYngU0" title="Enhance your editing experience with the new VFB features in V-Ray 6 for SketchUp" frameborder="0" allow="accelerometer; autoplay; clipboard-write; encrypted-media; gyroscope; picture-in-picture;" allowfullscreen></iframe>
Image Removed
UI Paths
...
Section
Column
width
11%
Column
width
35%
||V-Ray for SketchUp Toolbar|| > Frame Buffer
SketchUp Menus Ribbon
||Extensions|| > V-Ray > Frame Buffer
Column
width
8%
Column
width
35%
||V-Ray Asset Editor|| > Open V-Ray Frame Buffer
Column
width
11%
...
Section
Column
width
45%
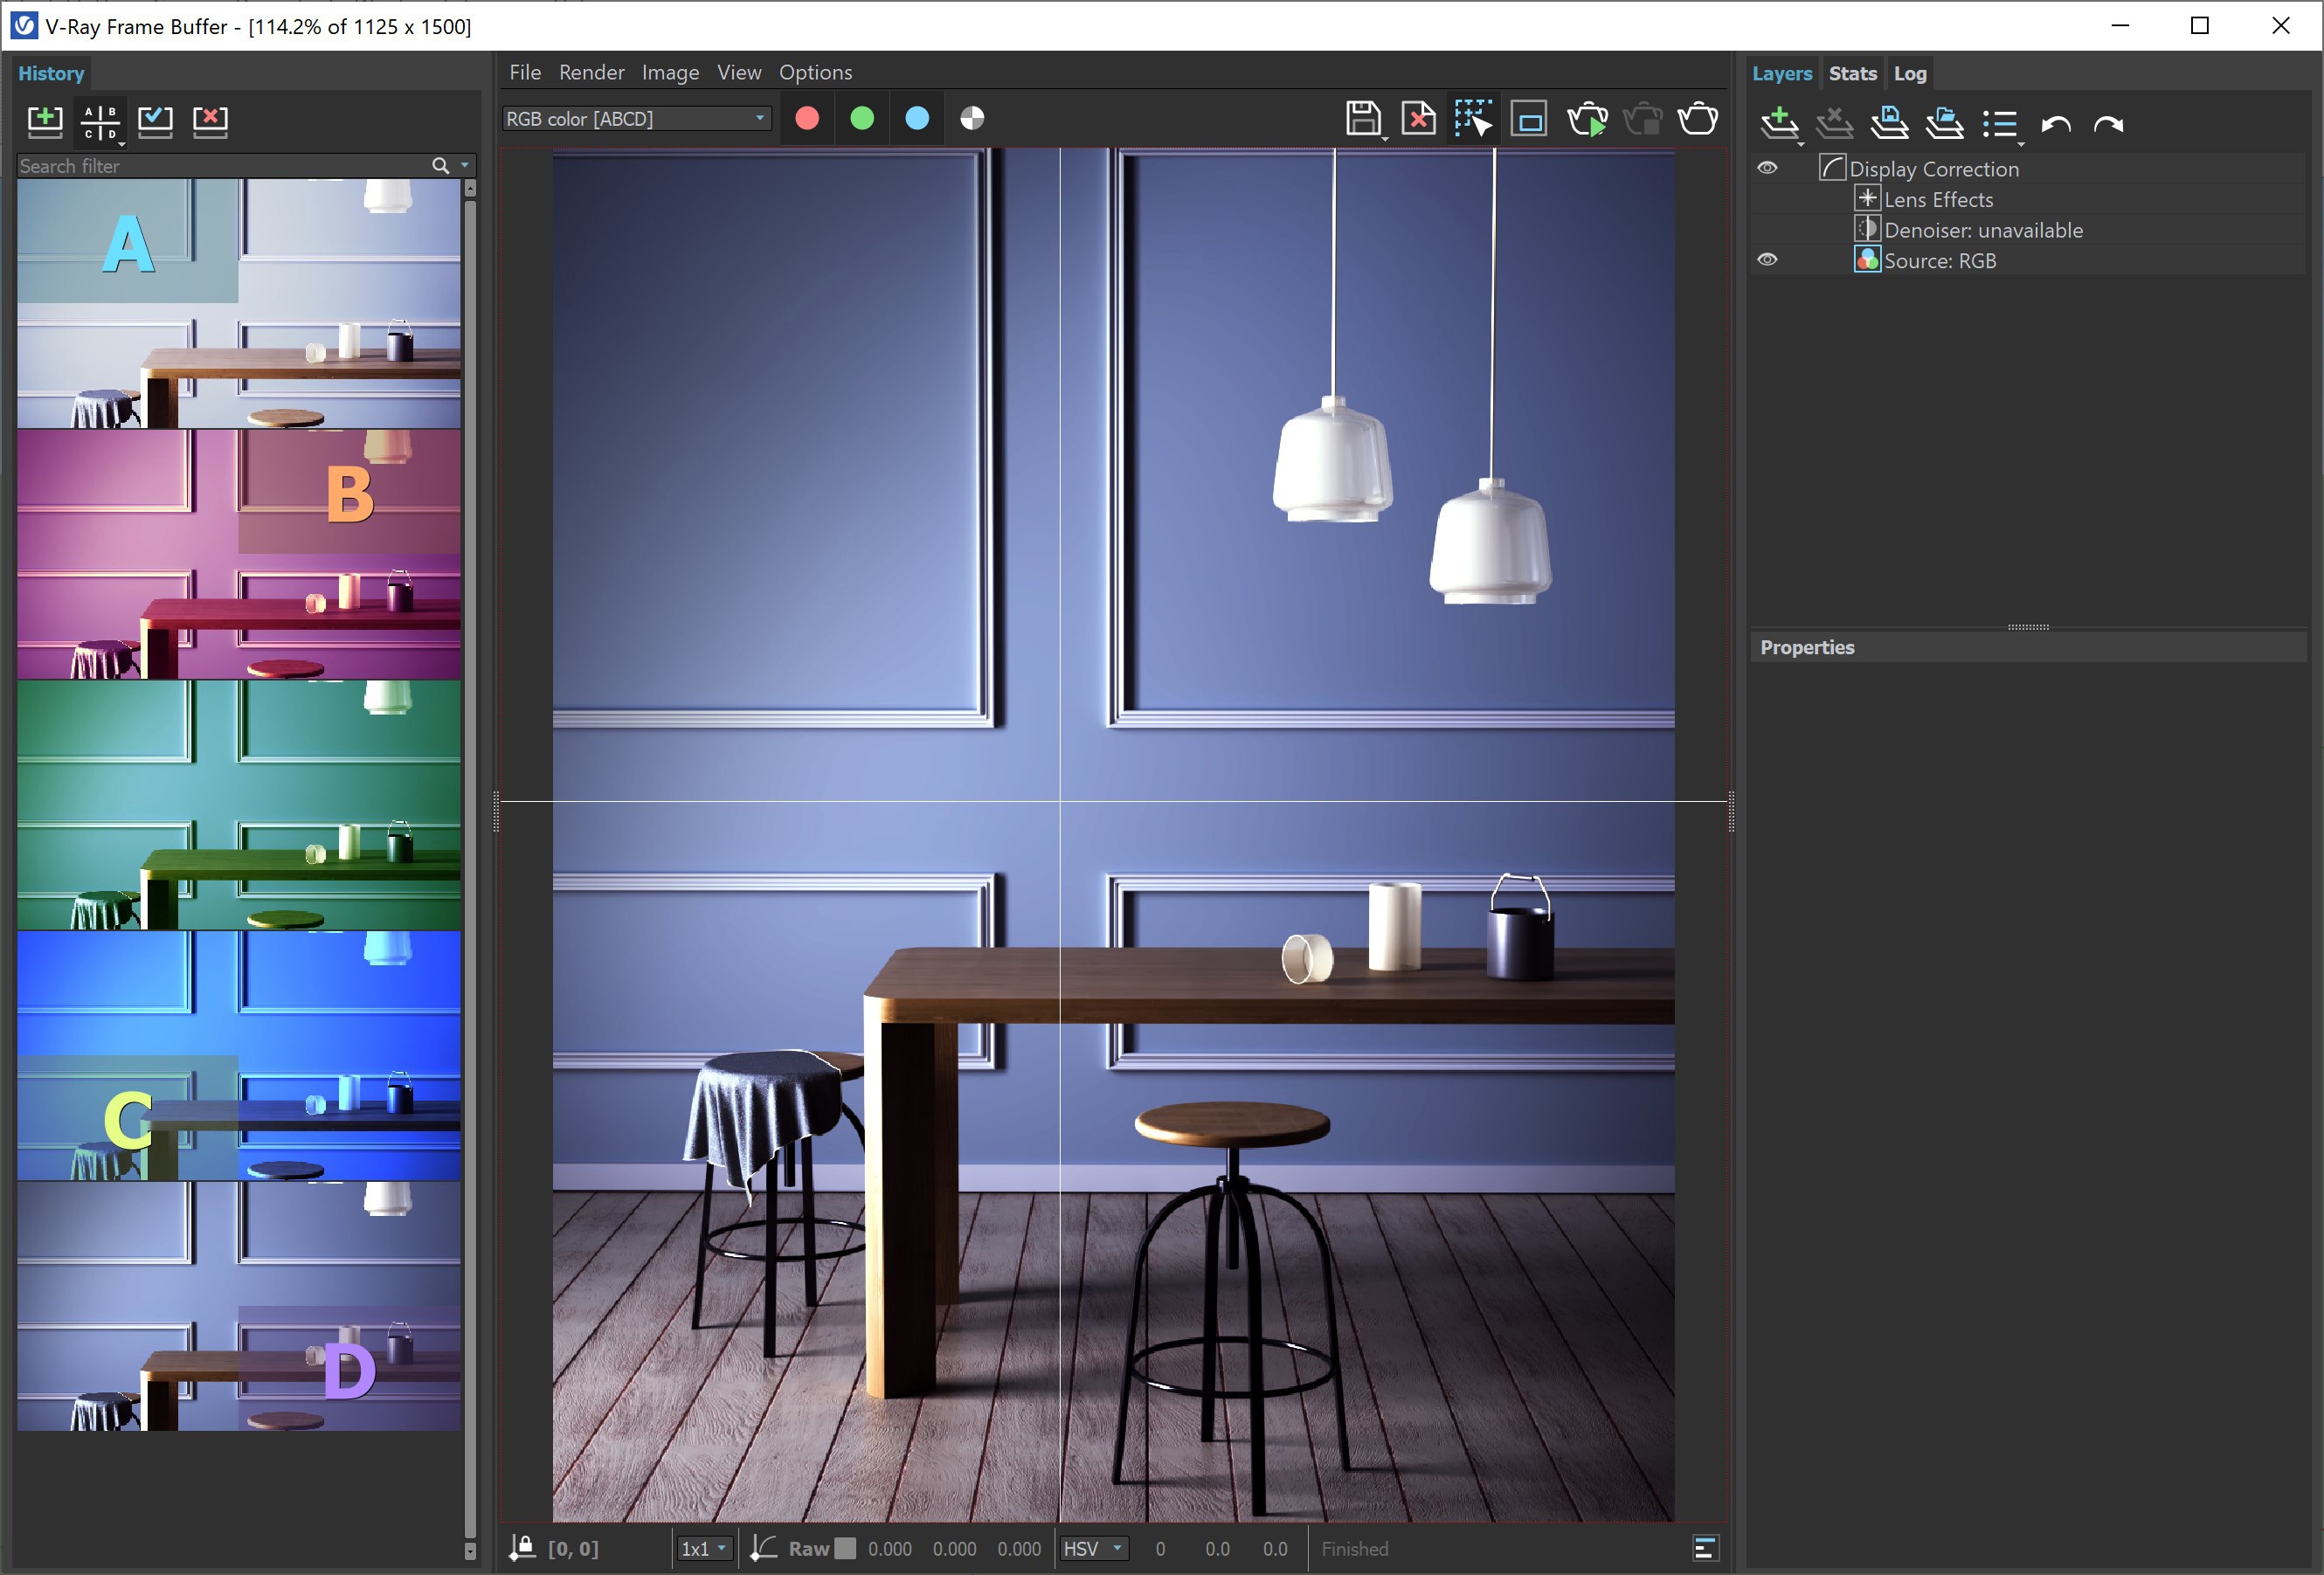
The V-Ray VFB keeps a history of previously rendered images and lists each with a number, thumbnail, and textual details in the Render history panel. Up to four images can be called from the history to be compared in the VFB (as shown below). History files are stored as .vrimg files in a user-specified folder. Render history settings can be configured in the VFB Settings window.
Column
width
5%
Column
width
50%
...
Section
Column
width
45%
Use the button in the button on the left side of the VFB to set up the Historyup.
Column
width
5%
Column
width
50%
...
Section
Column
width
80%
Right-click on the History field to open the History dropdown menu.
Edit note– Allows – Allows you to add a text comment to the image; the comment appears below the image.
Set A – Sets the render as A image for A/B comparison.
Set B – Sets the render as B image for A/B comparison.
Load to VFB – Loads the selected image in the VFB (same as double-clicking on the image).
Delete – Deletes the selected image from history. The image is moved to the system's Recycle Bin and can be restored from there if needed.
Load layers – Loads the layer tree preset of the selected image.
Load V-Ray settings – Loads the V-Ray settings used for the saved render.
Compare V-Ray settings – Opens the Compare V-Ray settings dialogue, where you can compare the render setups of saved renders.
Image Info – Opens a window containing detailed information about the image, including Aperture, FOV, Target Distance, etc.
Open scene – Opens the rendered scene in the viewport. This option works as long as the initial file path of the scene has not changed after the render.
Copy scene path – Copies the full path to the scene.
Upload image(s) to Chaos Cloud Collaboration – Uploads selected images to Chaos Cloud Collaboration.
Reload history – Re-reads the history image list. This may be needed if the history folder is updated outside of SketchUp (f.e. from another SketchUp session).
UI Text Box
type
tip
The keyboard keys from 1 to 9 can be used to quickly load the first 9 images from the history to the VFB.
UI Text Box
type
info
Manually saved .vrimg files can also be added to the History folder, but they need to be saved with all image channels in one .vrimg file to keep the complete image info.
Column
width
5%
Column
width
15%
...
Section
Column
width
70%
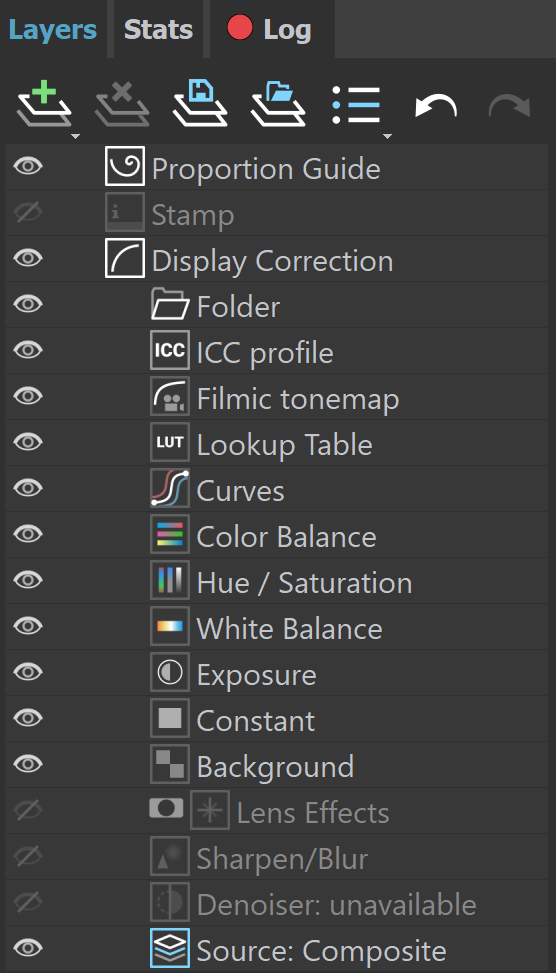
Creates a layer or folder. Multiple layers of the same type can be added.
Folder – Allows grouping multiple layers in folders and folders in sub-folders. ICC Profile – Uses an ICC profile file for color corrections;. Filmic tonemap – Contains different types of mapping curves and gamma corrections. Also allows selection of a color space;. LookupTable – – Allows loading a LUT file for color transformations;. Curves – – Adds a Curves color correction layer;. ColorBalance – – Adds a Color Balance color correction layer;. Hue/Saturation – – Adds a Hue/Saturation color correction layer;. WhiteBalance – – Adds a White Balance color correction layer;. Exposure – – Adds an Exposure color correction layer;. Constant – Adds a solid color that can be used to achieve an effect on another layer (for example to multiply by the constant);. Render Element – Selects a render element (with ability to apply mask on it) from your image that you can use in compositing. This is only available when the Source layer is set to Composite;. Background – – Adds a background color correction layer;. MultiMatte mask element – Mask is based on the MultiMatte Render Element;. Cryptomatte mask element – Mask is based on the Cryptomatte Render Element;. Integer mask element – Mask is used with integer render elements like Render ID, Object ID, and Material ID Render Elements;. Proportion Guide – Allows for a number of composition guides to be overlaid on the image. The available guides are Rule of Thirds, Diagonals, Golden Ratio, Center Cross, and Custom Grid.
Deletes the selected layer(s).
Saves a layer tree preset.
Loads a layer tree preset.
Quick access to custom layer presets. You must set the path to it in the VFB Settings.