![]()
Page History
| Thumbnailspagesettings | ||||||||||||||||||
|---|---|---|---|---|---|---|---|---|---|---|---|---|---|---|---|---|---|---|
|
| HideElements | ||
|---|---|---|
|
| Responsivegridmacro | ||||||||||
|---|---|---|---|---|---|---|---|---|---|---|
|
This page provides information about the menus of Chaos Vantage.
Overview
Chaos Vantage has menus that give you access to a range of functionalities for managing your scene performance and settings.

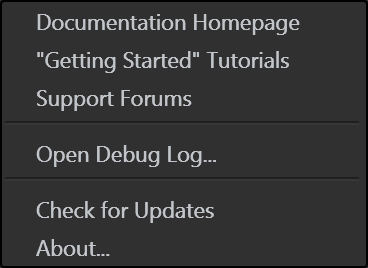
 – When a newer version is available, an "update available" notification appears in the menu bar. Clicking the notification button will open a download link for the new version.
![]() – Toggles the app window to be drawn on top of other windows even when it is not in focus. (Shortcut: Ctrl+Alt+T)
– Toggles the app window to be drawn on top of other windows even when it is not in focus. (Shortcut: Ctrl+Alt+T)
| Div | |||||||||||||||||||||||||||||||||||||||||||||||||||||||||||||||
|---|---|---|---|---|---|---|---|---|---|---|---|---|---|---|---|---|---|---|---|---|---|---|---|---|---|---|---|---|---|---|---|---|---|---|---|---|---|---|---|---|---|---|---|---|---|---|---|---|---|---|---|---|---|---|---|---|---|---|---|---|---|---|---|
| |||||||||||||||||||||||||||||||||||||||||||||||||||||||||||||||
|
Floatingpagetoc
This page provides information about the menus of Chaos Vantage.
Overview
Chaos Vantage has menus that give you access to a range of functionalities for managing your scene performance and settings.
| UI Text Box | ||
|---|---|---|
| ||
You can use the right mouse button click to reset the parameters numeric values to defaults. |
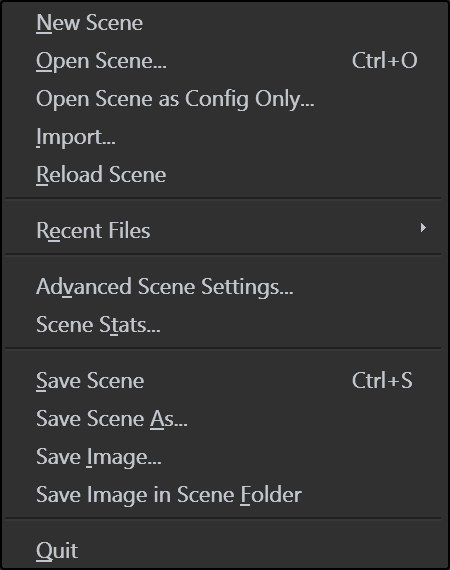
File
| Section | |||||||||||||||
|---|---|---|---|---|---|---|---|---|---|---|---|---|---|---|---|
|
| direction | horizontal |
|---|
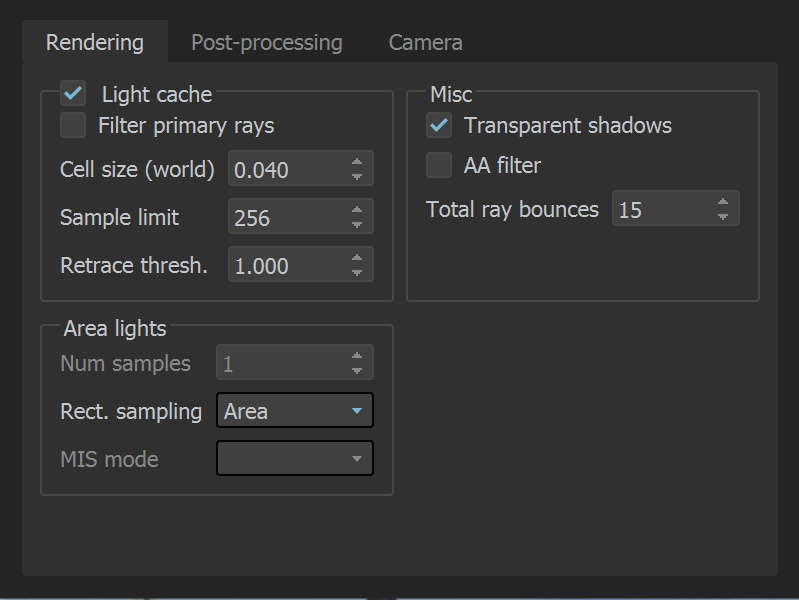
| title | Rendering |
|---|
| width | 60% |
|---|
Light cache – Enables light cache.
Filter primary rays – Enables filtering for primary rays.
Cell size (world) – Specifies the size of a single voxel, in scene units.
Sample limit – Specifies the maximum samples per pixel for refining the image.
Retrace thresh. – Specifies the extent to which GI near corners are retraced instead of being read from the light cache. A value of 0.0 disables retracing.
Misc.
Transparent shadows – Enables materials to cast transparent shadows.
AA filter – Enables the use of Anti-aliasing filter.
Total ray bounces – Specifies a limit for reflection and refraction bounces.
Area lights
Num samples – Specifies the number samples that area lights cast.
Rect. sampling – Specifies the way rectangle lights are sampled.
Area – It is faster for calculations (faster FPS) but clears the image more slowly.
Reprojection – It is slower for calculation (smaller FPS) but clears the image faster. From the very first sample, you can notice that there is far less noise than when using Area.
MIS mode – Selects the Multiple Importance Sampling mode for the lights.
| Column | ||
|---|---|---|
| ||
|
| Column | ||
|---|---|---|
| ||
|
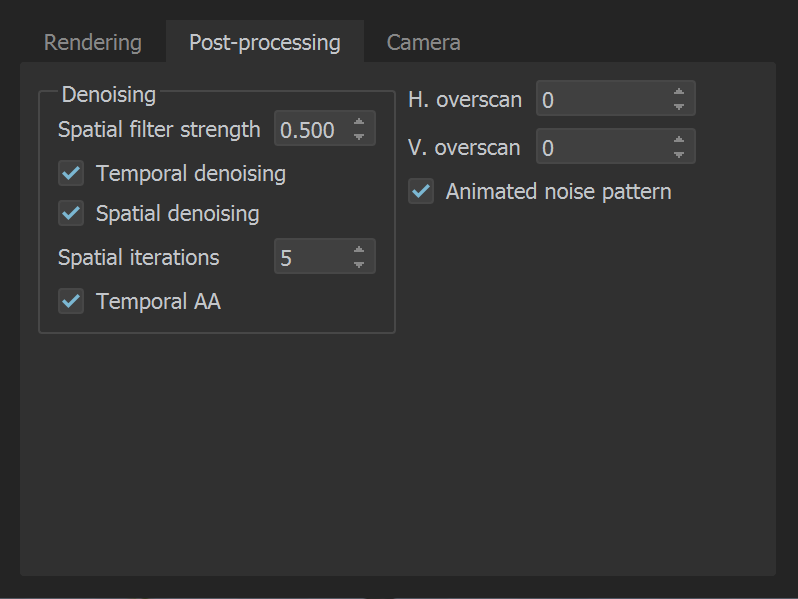
| title | Post-Processing |
|---|
| width | 60% |
|---|
Denoising
Spatial filter strength – Specifies the spacial filter strength.
Temporal denoising – Enables denoising of the previous frames. When disabled, the current frame is denoised on its own.
Spacial denoising – Enables spacial denoising.
Spacial iterations – Controls one of the parameters for quality of denoising. Higher values make denoising more stable.
Temporal AA – Applies time based anti-aliasing
H./V. overscan – Scales the image, so that border pixels can be denoised better.
Animated noise pattern – Enables the generation of random numbers (noise) for each frame.
| Column | ||
|---|---|---|
| ||
|
| Column | ||
|---|---|---|
| ||
|
| title | Camera |
|---|
| width | 60% |
|---|
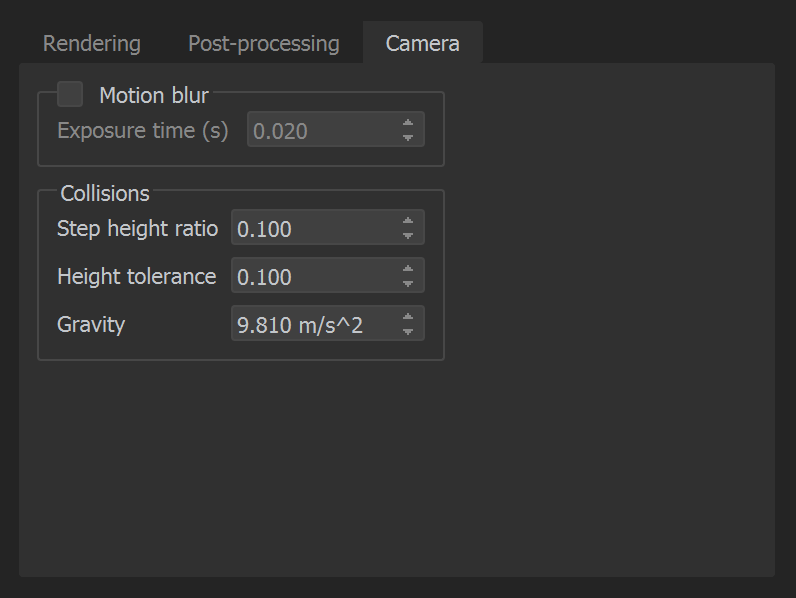
Motion blur – Enables motion blur.
Exposure time(s) – Specifies the amount of time the camera shutter is opened in sec. Small values produce less blurring while big values produce more blur.
Collisions
Step height ratio – Adjusts sensitivity when climbing steps or obstacles. Higher values allow stepping on higher surfaces.
Height tolerance – Specifies the height up to which no collision is detected. For example, if you have small rocks or grass below that value, they are ignored and the camera does not bounce up and down.
Gravity – Specifies the acceleration applied on the camera when collision is enabled.
| Column | ||
|---|---|---|
| ||
|
| Column | ||
|---|---|---|
| ||
|
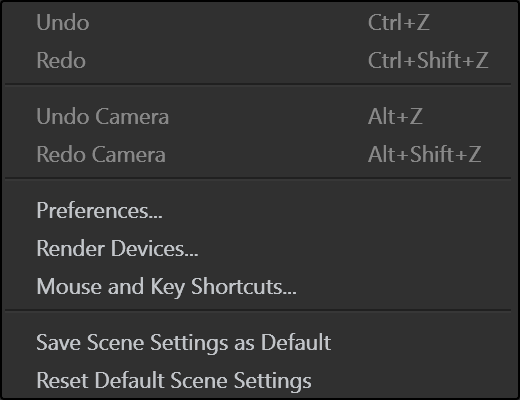
Edit
| Section | |||||||||||||||
|---|---|---|---|---|---|---|---|---|---|---|---|---|---|---|---|
|
| direction | horizontal |
|---|
| title | Files |
|---|
| width | 60% |
|---|
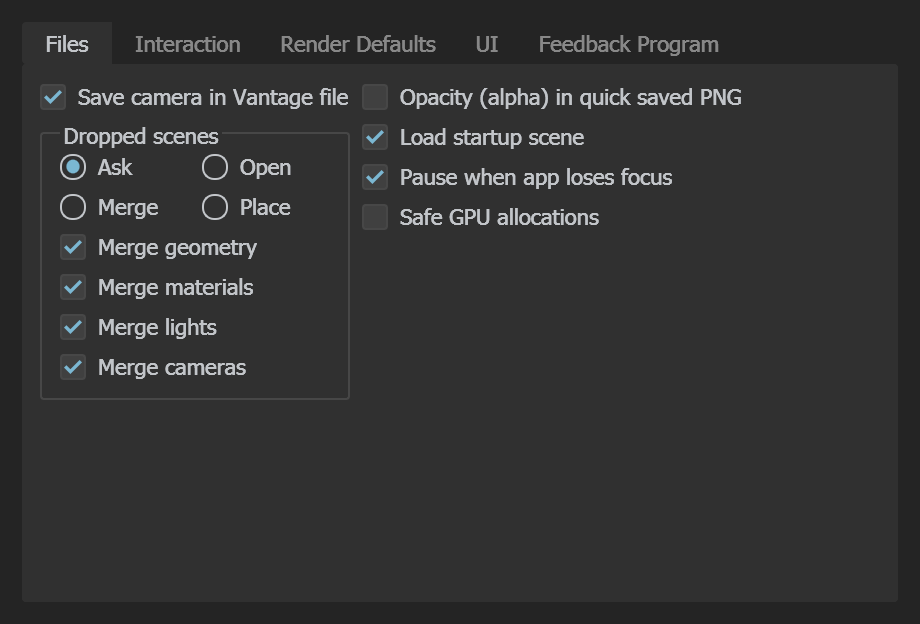
Save camera in Vantage file – Saves the last camera position in viewport in a .vantage file. When disabled, saves the render settings in a .vantage file without saving camera changes.
Compact loaded geometry – Enable to save GPU memory by doing an additional post-processing step on loaded geometries.
Save opacity (alpha) in PNG – When enabled, stores the environment in the alpha channel of the .png file.
Load startup scene – Enable to load the test startup scene provided by Chaos Group.
Pause when app loses focus – Pauses rendering when the app loses focus. This applies to interactive rendering only.
| UI Text Box | ||
|---|---|---|
| ||
The Pause when app loses focus option will be ignored when in Live Link session |
Safe GPU allocation – When enabled Chaos Vantage will try not to use more GPU memory than the available physical memory. This prevents crashes and/or reduces system performance. Disabling this may lead to crashes with heavy scenes.
Dropped scenes
Ask – When a .vrscene is dropped into the viewport, Chaos Vantage asks you whether to open, merge or place the scene.
Open – When a .vrscene is dropped into the viewport, Chaos Vantage opens the scene.
Merge – When a .vrscene is dropped into the viewport, Chaos Vantage merges the scene at origin 0,0,0.
Place – When a .vrscene is dropped into the viewport, Chaos Vantage merges the scene at the position of the red arrow indicator aligned to the normal of the surface.
Merge geometry – When a new .vrscene is dragged and dropped into the viewport, the geometries are merged into the scene.
Merge materials – When a new .vrscene is dragged and dropped into the viewport, the materials are merged into the scene.
Merge lights – When a new .vrscene is dragged and dropped into the viewport, the lights are merged into the scene.
Merge cameras – When a new .vrscene is dragged and dropped into the viewport, the cameras are merged into the scene.
| Column | ||
|---|---|---|
| ||
| Column | ||
|---|---|---|
| ||
|
| title | Interaction |
|---|
| width | 60% |
|---|
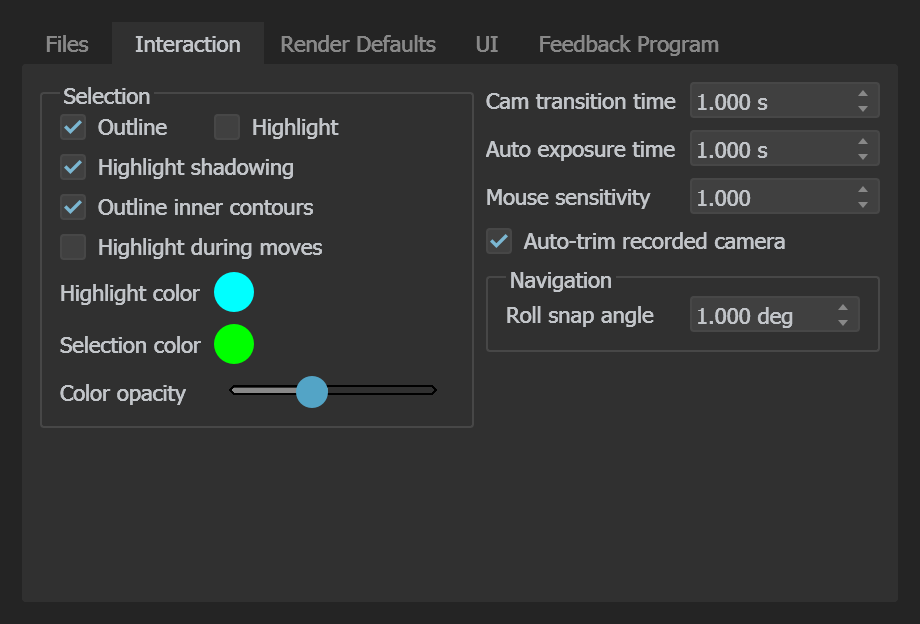
Selection
Outline – Enables outlining of objects in the scene. This means that selected or highlighted objects have a thin line around them with color specified in the Highlight color and Selection color.
Highlight – Enables highlighting of objects in the scene. This means that selected or highlighted objects are filled with a semi-transparent color specified in Highlight color and Selection color.
Highlight shadowing – Enables occlusion of the highlighted/selected objects behind other objects in the scene.
Outline inner contours – Outlines objects when multiple overlapping objects are selected.
Highlight during moves – Enables highlighting of objects during transformations.
Highlight color – Specifies a color for the outline when highlighting an object.
Selection color – Specifies a color for the outline for the selected object.
Color opacity – Controls the opacity of Highlight and Selection colors.
Cam transition time – Specifies the time for transition between saved cameras.
Mouse sensitivity – A multiplier for the mouse sensitivity when using dolly, orbit and camera zoom.
Auto-trim recorded camera – Removes repeated frames without movement from both ends of the recording.
Navigation
Roll snap – When using the roll hotkey(Ctrl+MMB drag), if the roll angle falls below this value, the camera snaps back to horizontal position/0 degrees roll.
| Column | ||
|---|---|---|
| ||
|
| Column | ||
|---|---|---|
| ||
|
| title | Render Defaults |
|---|
| width | 60% |
|---|
Offline
Default width – Specifies a default width for the render in High Quality Snapshot or High Quality Sequence.
Default height – Specifies a default height for the render in High Quality Snapshot or High Quality Sequence.
Default samples – Specifies default samples for the render in High Quality Snapshot or High Quality Sequence.
Default FPS – Specifies default FPS for the render in High Quality Sequence.
Denoiser – When enabled, NVIDIA AI denoiser will be applied to the rendered image.
Reduce denoiser flickering – Enables temporal rendering of the OptiX denoiser. Results and details may be blurry when enabled.
Enable Motion Blur – Enables the rendering of motion blur for the rendered image with the settings set in File > Advance Scene Settings > Camera > Exposure time
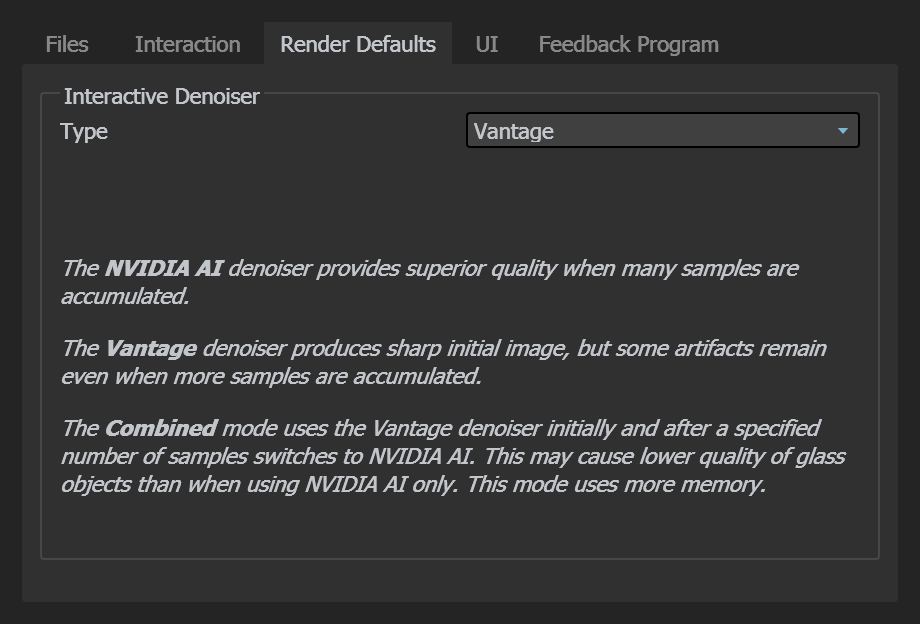
Interactive Denoiser
Type - Sets the type of the denoiser that will be used in the viewport.
NVIDIA AI – Uses NVIDIA AI denoiser that provides superior final quality when many render samples are accumulated over time.
Vantage – Uses the native Vantage denoiser that produces sharp initial image, but some artifacts remain even when more render samples are accumulated.
Combined –Uses the Vantage denoiser initially and then after specified samples in the Switch after parameter switches to NVIDIA OptiX denoiser.
Switch after – Specifies the amount of render samples that need to be accumulated before switching to the NVIDIA OptiX denoiser when the denoiser type is set to Combined.
| UI Text Box | ||
|---|---|---|
| ||
NVIDIA OptiX denoiser requires NVIDIA display driver 466.11 and newer. |
| UI Text Box | ||
|---|---|---|
| ||
Combined denoiser type uses more memory. |
| Column | ||
|---|---|---|
| ||
|
| Column | ||
|---|---|---|
| ||
|
| title | UI |
|---|
| width | 60% |
|---|
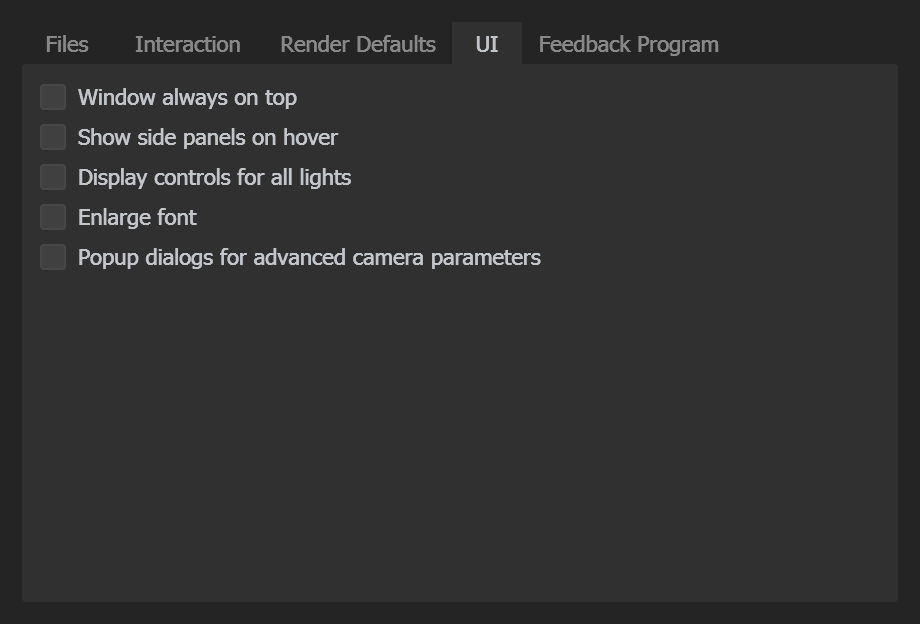
Window always on top – When enabled, the app window will be forced to be drawn on top other windows even when it is not in focus.
Show side panels on hover – When enabled, if the side panels are hidden they show up when the mouse is hovered over them. Otherwise, a click is required.
Display controls for all lights – When enabled, each light is listed in the Lights tab individually. When disabled, lights are grouped in the Lights tab and those with identical parameters are instances.
Enlarge font – When enabled, enlarges the UI font for better readability.
Popup dialogs for advanced camera properties – When enabled, the advanced camera properties are displayed in a separate popup window.
| Column | ||
|---|---|---|
| ||
|
| Column | ||
|---|---|---|
| ||
|
| title | Feedback Program |
|---|
| width | 60% |
|---|
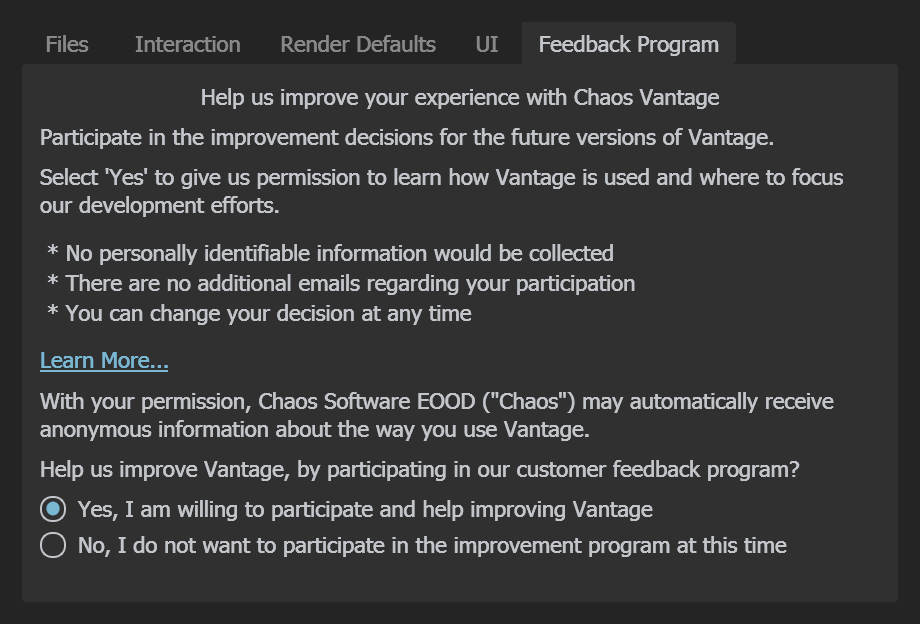
In the Feedback Program tab the participation for customer feedback settings for Chaos Vantage can be changed.
| Column | ||
|---|---|---|
| ||
|
| Column | ||
|---|---|---|
| ||
|
| Section | |||||||||||||||
|---|---|---|---|---|---|---|---|---|---|---|---|---|---|---|---|
|
Select
| Section | |||||||||||||||
|---|---|---|---|---|---|---|---|---|---|---|---|---|---|---|---|
|

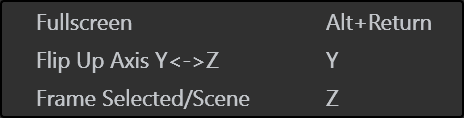
View
| Section | |||||||||||||||
|---|---|---|---|---|---|---|---|---|---|---|---|---|---|---|---|
|
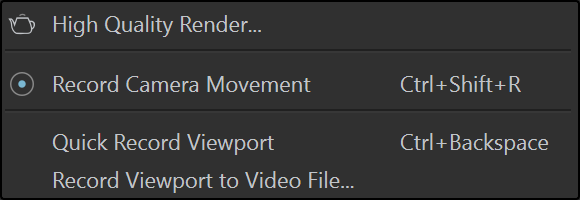
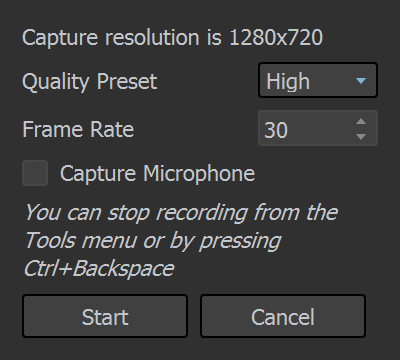
Tools
| Section | |||||||||||||||
|---|---|---|---|---|---|---|---|---|---|---|---|---|---|---|---|
|
| direction | horizontal |
|---|
| Tabs Page | ||||||||||||||||||||||
|---|---|---|---|---|---|---|---|---|---|---|---|---|---|---|---|---|---|---|---|---|---|---|
| ||||||||||||||||||||||
|
| title | Sequence |
|---|
| width | 60% |
|---|
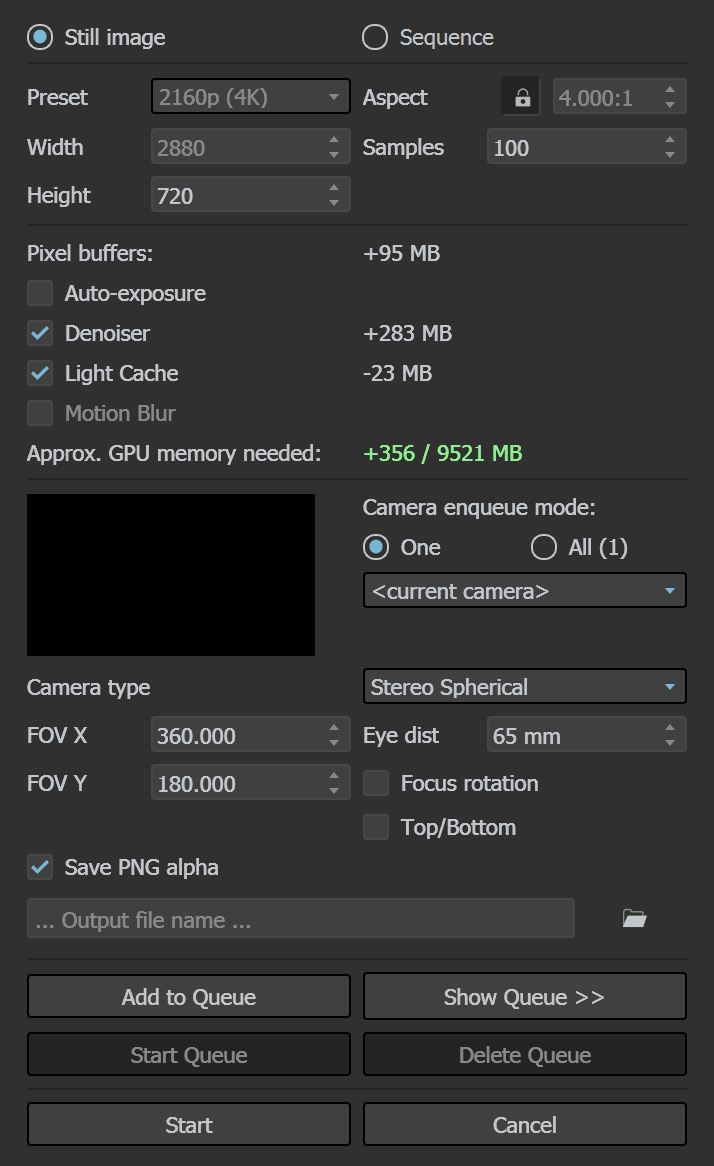
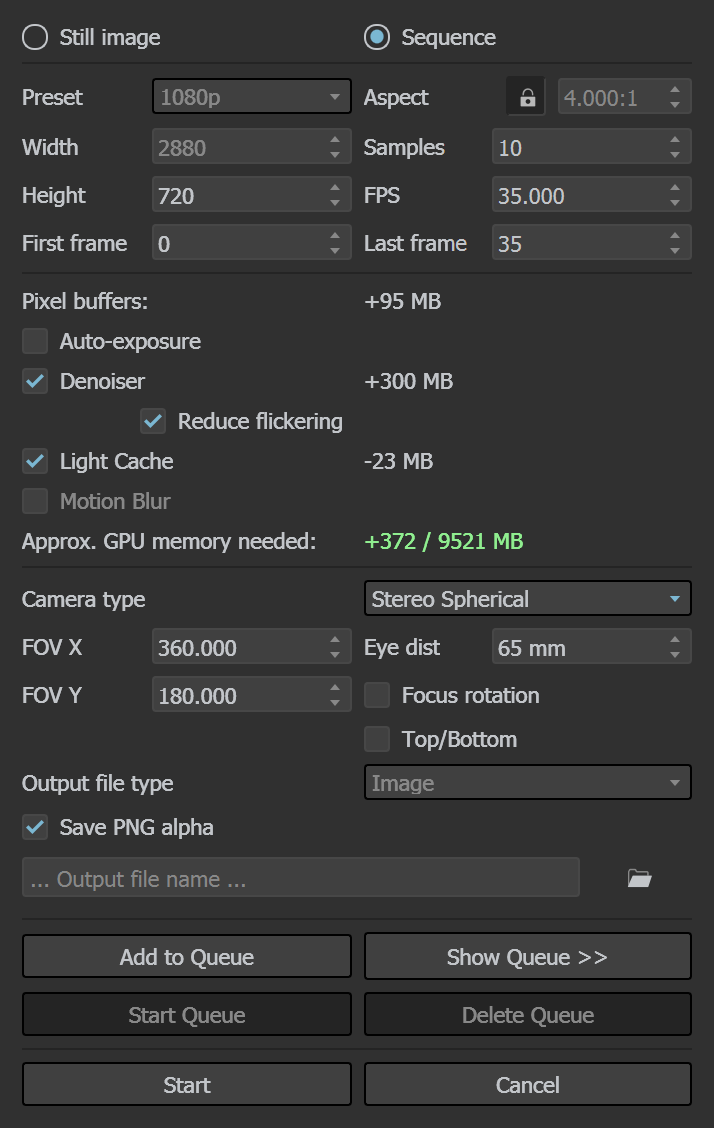
Resolution Preset – Sets the render resolution from 4 predefined resolutions:
720p; 1080p; 1440p; 2160p(4K)
Width – Sets the width of the rendered snapshot in pixels.
Height – Sets the height of the rendered snapshot in pixels.
Samples – Specifies the samples per pixel for refining the image.
FPS – Specifies the frames per second for the animation.
Pixel buffers – The amount of additional memory required for the currently set render resolution.
Denoiser – When enabled NVIDIA AI denoiser will be applied to the rendered image.
Reduce flickering – Enables temporal rendering of the AI denoiser. Results and details may be blurry when enabled. Disabling it may increase image sharpness.
Denoiser Stats – The amount of additional memory required for the denoiser for the currently set render resolution.
Light Cache – Enables Light Cache when rendering.
Light Cache Stats – The amount of additional memory required for light cache for the currently set render resolution.
Motion Blur – Enables the rendering of motion blur for the rendered image with the settings set in File > Advance Scene Settings > Camera > Exposure time.
Approx. GPU memory needed – Displays an approximation of the needed GPU memory for the currently set render resolution and settings.
Camera Type – Specifies the type of the camera to be used when rendering a snapshot.
Perspective – Sets the current scene camera to be used to render the snapshot.
Cube 6x1 – Sets the use of a Box camera with the cube sides arranged in a single row useful in generating cubic VR output.
Stereo Cube 6x1 – Sets the use of a Left/Right stereo Box camera with the cube sides arranged in a single row useful in generating cubic stereo VR output.
Spherical – Sets the use of a spherical camera with independent horizontal (FOV X) and vertical (FOV Y) FOV selection that is useful for generating latlong images for spherical VR use.
Stereo Cube 6x1
Stereo spherical – Sets the use of a spherical Left/Right stereo camera with independent horizontal (FOV X) and vertical (FOV Y) FOV selection and that is useful for generating latlong images for spherical VR use. The stereo strength can be adjusted by modifying the Eye dist parameter.
FOV X – Specifies the horizontal field-of-view angle. Available only when Camera Type is set to Spherical or Stereo spherical.
FOV Y – Specifies the vertical field-of-view angle. Available only when Camera Type is set to Spherical or Stereo spherical.
Eye dist – Specifies the eye distance for which the stereoscopic image is rendered. Available only when Camera Type is set to Stereo Cube 6x1 or Stereo spherical.
Focus rotation – When enabled the left and right views are rotated so that their focus points coincide at the distance specified by the Focus Distance parameter in the Camera tab. When disabled the left and right views directions are parallel.
Output file type – Specifies the file type for the rendered sequence.
Image – Output of the animation will be an imagesequence. In the ''Save Image' window a .png or .exr file format can be specified for the image sequence.Image + MP4 – Output of the animation will be an image sequence and an .mp4 file. In the ''Save Image' window a .png or .exr file format can be specified for the image sequence.
Image + MKV – Output of the animation will be an image sequence and an .mkv file. In the ''Save Image' window a .png or .exr file format can be specified for the image sequence.
MP4 – Output of the animation will be an .mp4 file.
MKV – Output of the animation will be an .mkv file.
Save PNG alpha – When enabled, stores the environment in the alpha channel of the .png file. In the ''Save Image' window a .png file format must be specified.
Save as defaults – Saves the current settings as default values.
| UI Text Box | ||
|---|---|---|
| ||
In the 'Save Image' window a .png or .exr file type must be added after the specified file name e.g Camera01.png or Camera01.exr |
| Column | ||
|---|---|---|
| ||
| Column | ||
|---|---|---|
| ||
|
| Section | |||||||||||||||
|---|---|---|---|---|---|---|---|---|---|---|---|---|---|---|---|
|
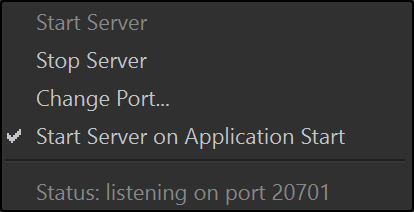
Live Link
| Section | |||||||||||||||
|---|---|---|---|---|---|---|---|---|---|---|---|---|---|---|---|
|
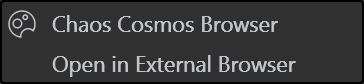
Cosmos
| Section | |||||||||||||||
|---|---|---|---|---|---|---|---|---|---|---|---|---|---|---|---|
|
Help
| Section | |||||||||||||||
|---|---|---|---|---|---|---|---|---|---|---|---|---|---|---|---|
|