![]()
Page History
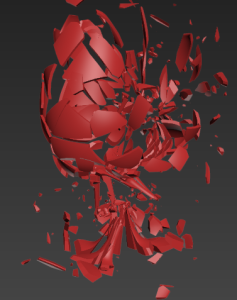
This page provides a tutorial for simulating a liquid for a baked fragmented wine glass.
Overview
| UI Text Box | ||||
|---|---|---|---|---|
| ||||
This is an Entry Level tutorial which requires no previous knowledge of Phoenix FD. A basic understanding of 3ds Max would be helpful but is not a prerequisite for being able to follow along. |
| Section | |||||||||||||||||||||||||||||||||
|---|---|---|---|---|---|---|---|---|---|---|---|---|---|---|---|---|---|---|---|---|---|---|---|---|---|---|---|---|---|---|---|---|---|
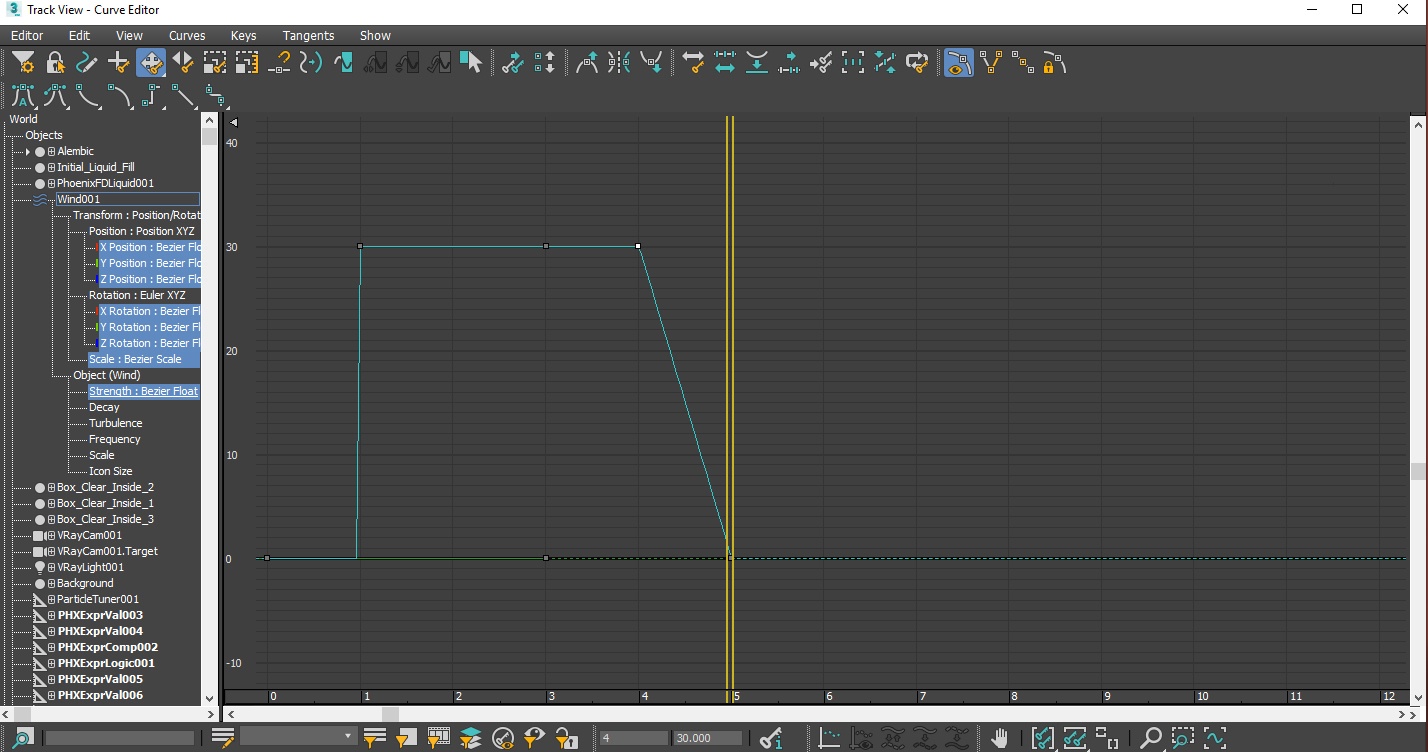
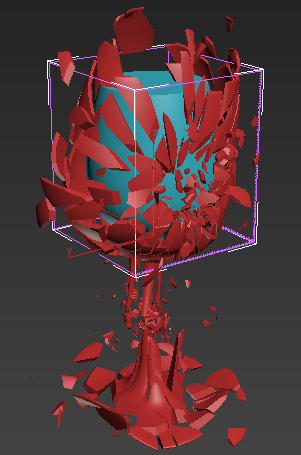
The instructions on this page guide you through the process of setting up an exploding Wine Glass simulation. The main takeaway of this tutorial is an understanding of how Surface Tension and the Steps per Frame parameters affect the movement of the liquid. The explosive effect is achieved through the use of a native Max Wind Force, which is the main driver of the simulation. Additional velocities are sourced into the simulation from the baked Rigid Body simulation of the wine glass and the Phoenix FD Turbulence force.
This simulation requires Phoenix FD 4 Official Release and V-Ray Next Official Release for Max 2017 at least. If you notice a major difference between the results shown here and the behavior of your setup, please send an email to support@chaosgroup.com.
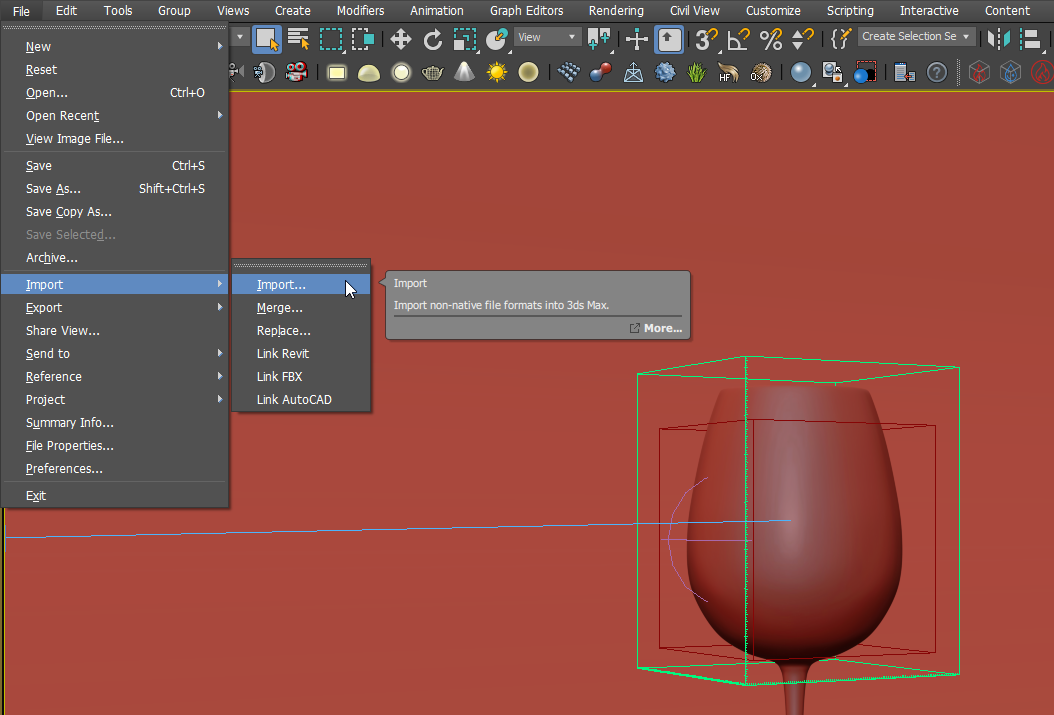
The Download button below provides you with an archive containing the start and end scenes.
|
System Units Setup
| Section | ||||||||||
|---|---|---|---|---|---|---|---|---|---|---|
|

Scene Setup
| Section | ||||||||||
|---|---|---|---|---|---|---|---|---|---|---|
|

| Section | ||||||||||
|---|---|---|---|---|---|---|---|---|---|---|
|
| Section | ||||||||||||||||||||
|---|---|---|---|---|---|---|---|---|---|---|---|---|---|---|---|---|---|---|---|---|
|
| UI Text Box | ||||
|---|---|---|---|---|
| ||||
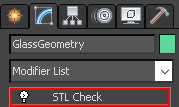
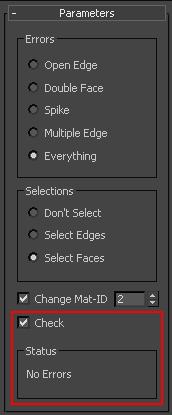
Note that Phoenix FD works best with closed geometry. You may check it with 3dsMax STL Check modifier. Geometry with a hole or other errors might cause problems when simulating. |
| Section | ||||||||||||||||||||
|---|---|---|---|---|---|---|---|---|---|---|---|---|---|---|---|---|---|---|---|---|
|
Forces
| Section | |||||||
|---|---|---|---|---|---|---|---|
|
| Section | ||||||||||
|---|---|---|---|---|---|---|---|---|---|---|
|
| Section | ||||||||||
|---|---|---|---|---|---|---|---|---|---|---|
|
| Section | ||||||||||
|---|---|---|---|---|---|---|---|---|---|---|
|

| Section | ||||||||||
|---|---|---|---|---|---|---|---|---|---|---|
|
Container Properties
| Section | ||||||||||
|---|---|---|---|---|---|---|---|---|---|---|
|
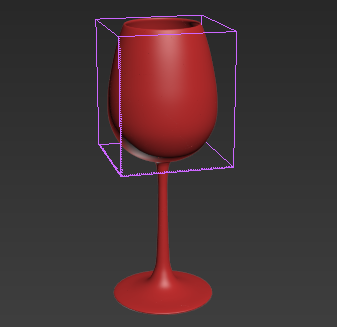
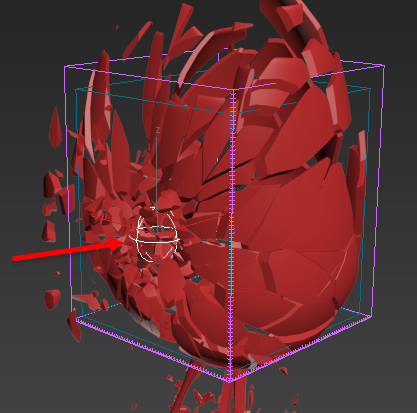
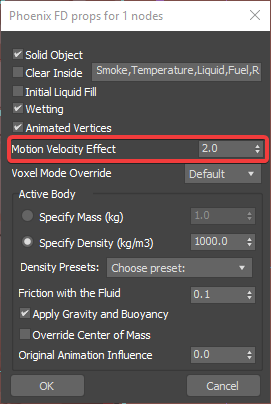
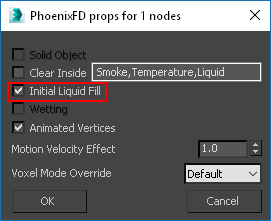
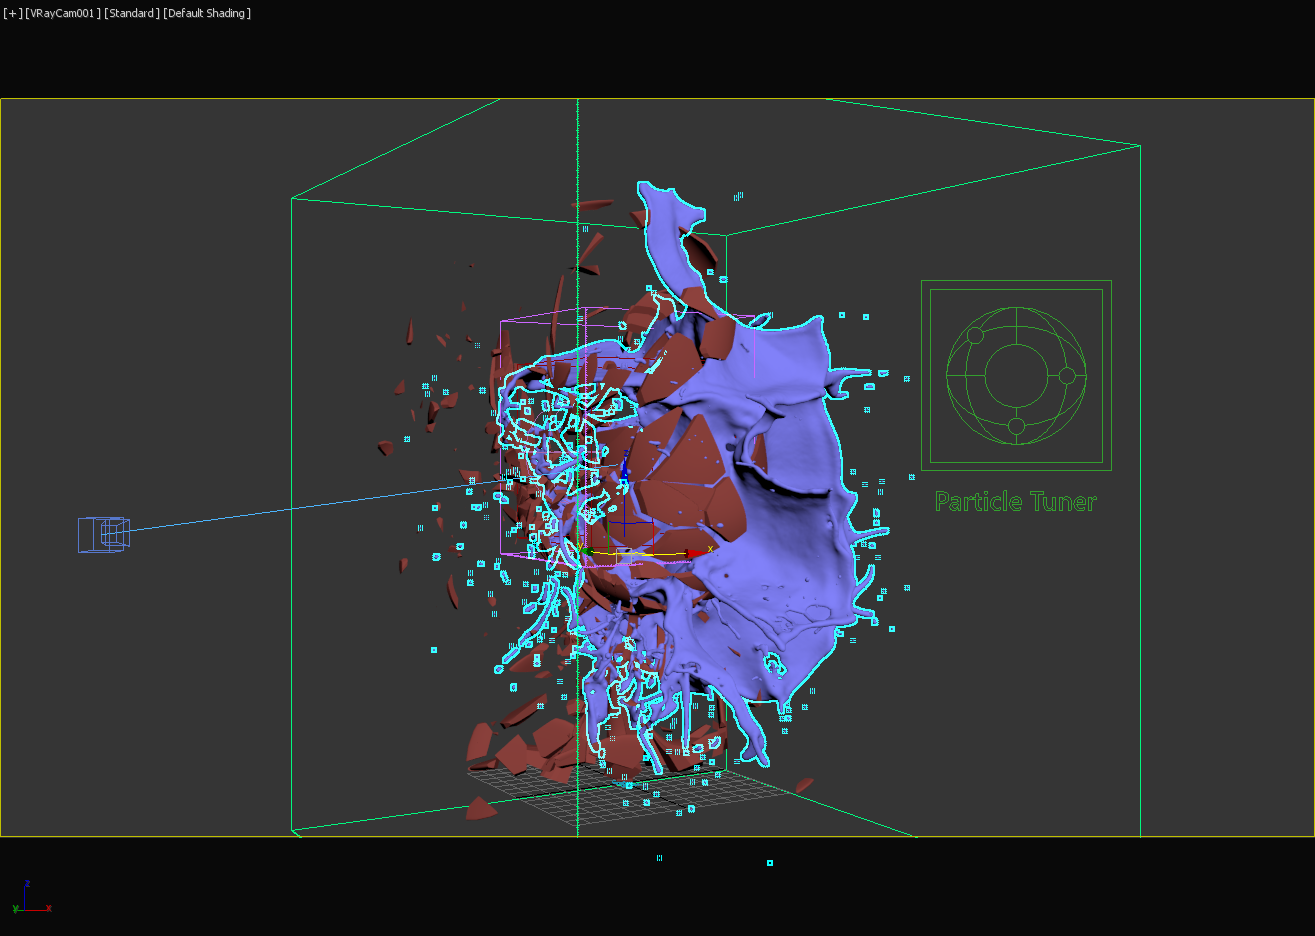
In the image below, the blue geometry in the inside of the glass is used for the initial filled state of the liquid. For more information on creating this, see the Using Initial Liquid Fill with Containers tutorial. Right click to access its Phoenix FD Properties and make sure Initial Liquid Fill is enabled.
| Section | ||||||||||||||||||||
|---|---|---|---|---|---|---|---|---|---|---|---|---|---|---|---|---|---|---|---|---|
|
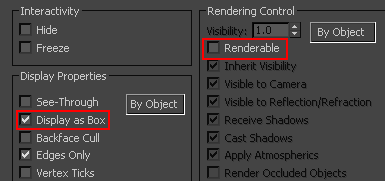
This piece of geometry will not need to be rendered or displayed in the viewport. Access its Object Properties from the quad menu and enable Display as Box and disable Renderable.
| Section | ||||||||||
|---|---|---|---|---|---|---|---|---|---|---|
|
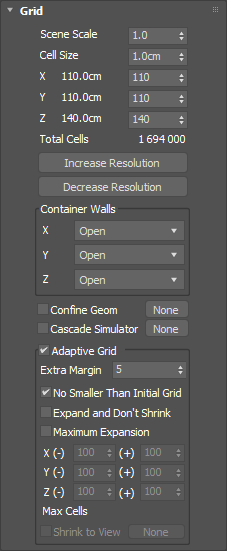
| Note |
|---|
Increasing the resolution of the grid can sometimes alter the shape and behavior of the simulation. Remember that higher resolution does not necessarily mean more realistic simulations. It depends on the project. Sometimes the resolution is too high, and there are too many details, or the look is not what the director is asking for. You have to find a good balance. |
| Section | ||||||||||
|---|---|---|---|---|---|---|---|---|---|---|
|
| Section | ||||||||||
|---|---|---|---|---|---|---|---|---|---|---|
|
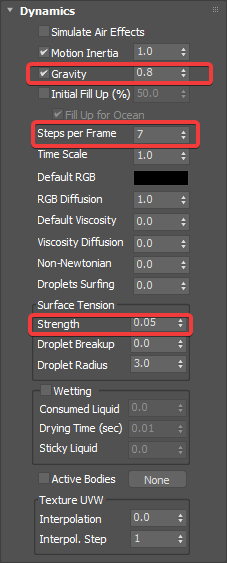
First, let's look at Steps per frame (SPF).
| UI Text Box | ||||
|---|---|---|---|---|
| ||||
One of the most important parameters of the simulator, with significant impact on quality and performance. To understand how to use it, keep in mind that the simulation is a sequential process and happens step by step. It produces good results if each simulation step introduces small changes, but it's also a trade-off between performance and detail, as described below. For example let's take an object that is hitting the liquid surface with high speed. If at the first step the object is far away from the water and at the second step, the object is already deep under the water - the result won't look good. You have to introduce intermediate steps until the changes of each step get small enough. The Steps per frame option creates these steps within each frame. A value of 1 means that there are no intermediate steps and each step is exported into the cache file. A value of 2 means that there is one intermediate step, i.e. each second step is exported to the cache file while the intermediate steps are just calculated, but not exported. Signs that the Steps per frame need to be increased are:
More often than not, those issues will be caused by the simulation moving too quickly (e.g. the emission from the source is very strong or the objects in the scene are moving very fast). In such cases you should use a higher SPF. Keep in mind that higher Steps Per Frame decreases the performance in a linear way, i.e. if you increase the SPF twice, your simulation will go twice as slow. However, the quality does not have a linear relation to the SPF. Each simulation step kills fine details, and thus for maximum detail it's best to use the lowest possible SPF that runs without any of the issues mentioned above. For additional information, please refer to Phoenix FD Explained. |
The following examples show the simulation with different SPF values.
| Section | ||||||||||
|---|---|---|---|---|---|---|---|---|---|---|
|
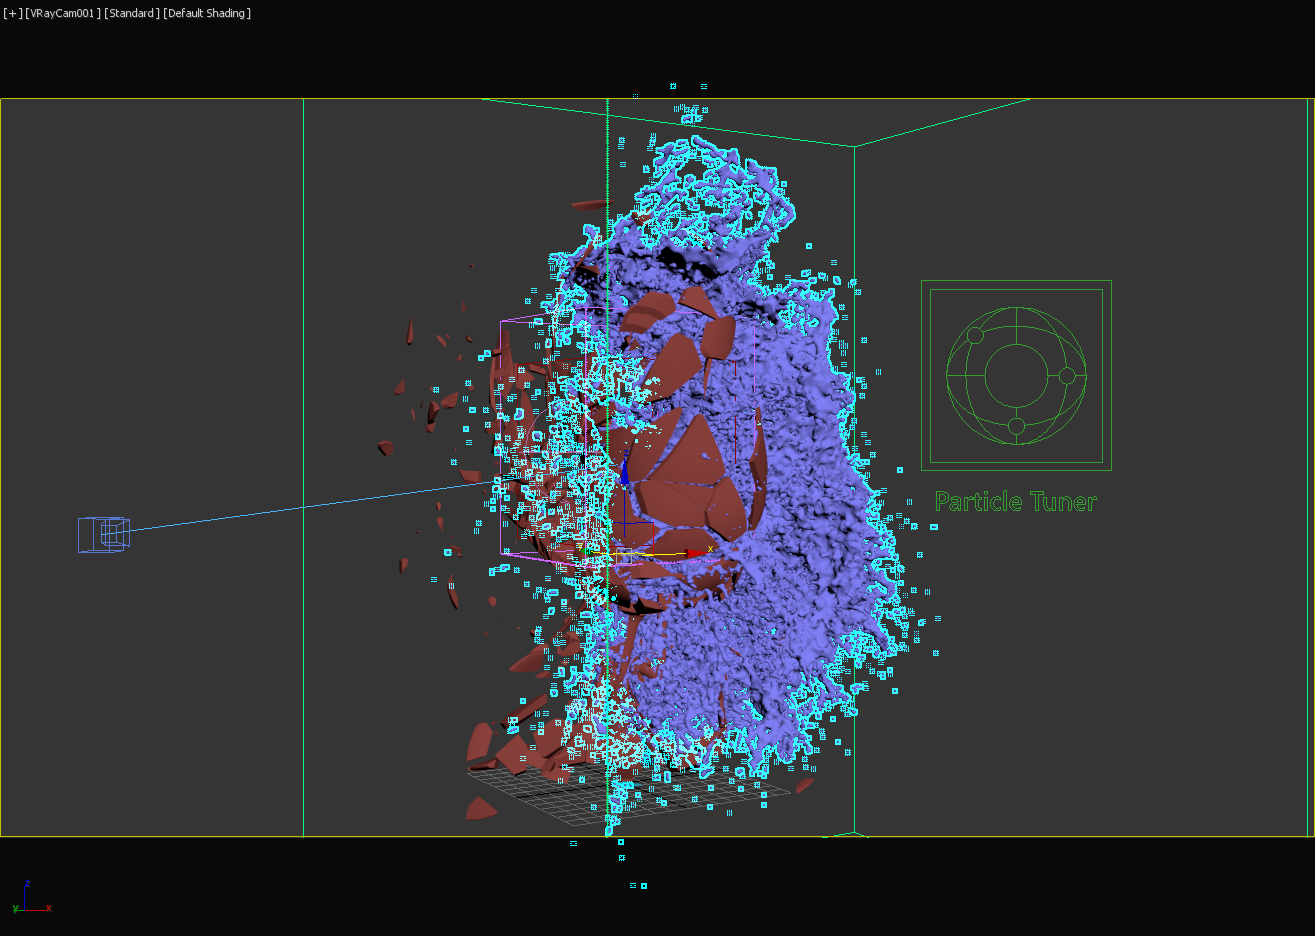
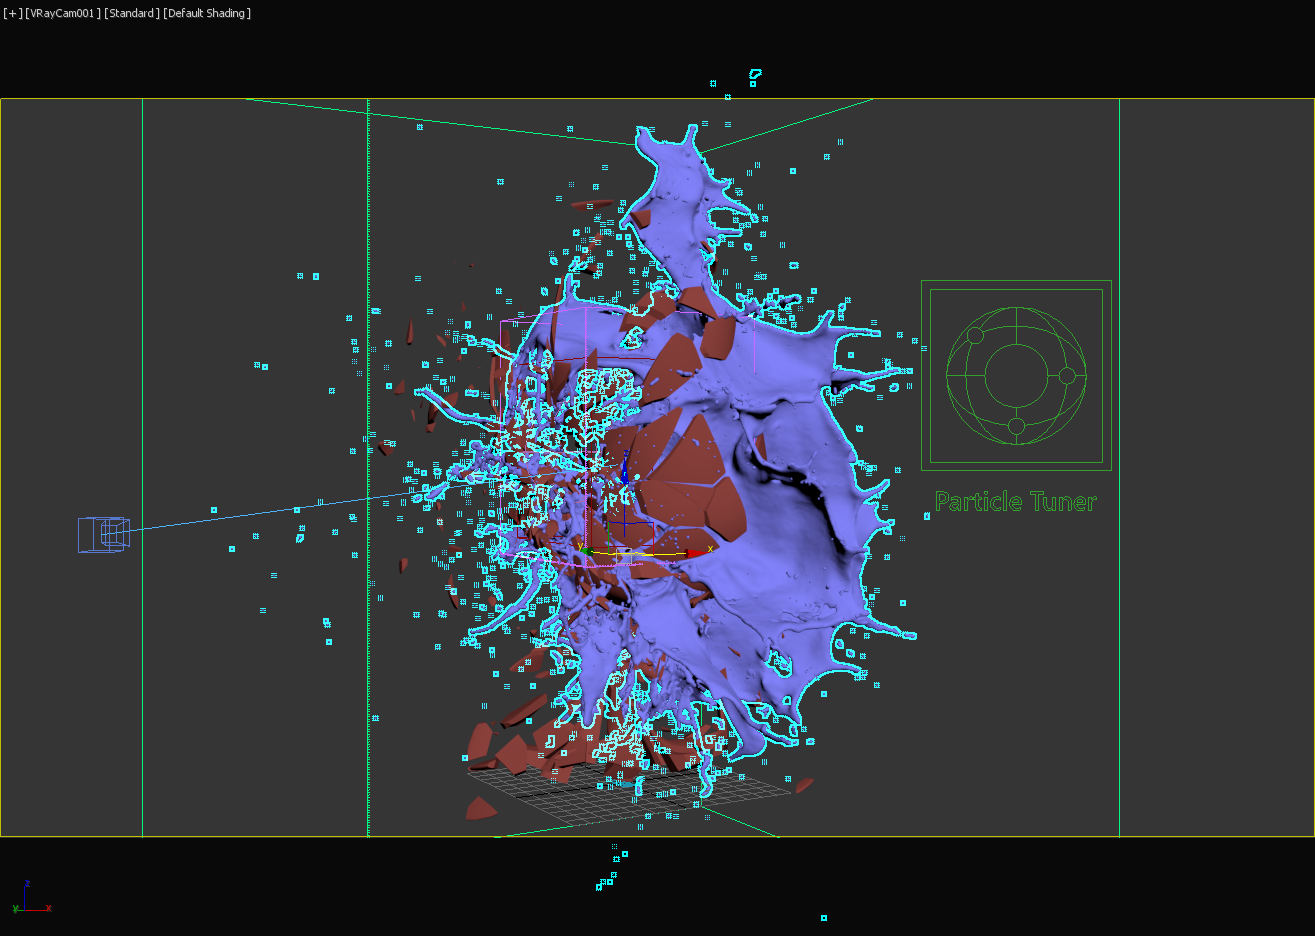
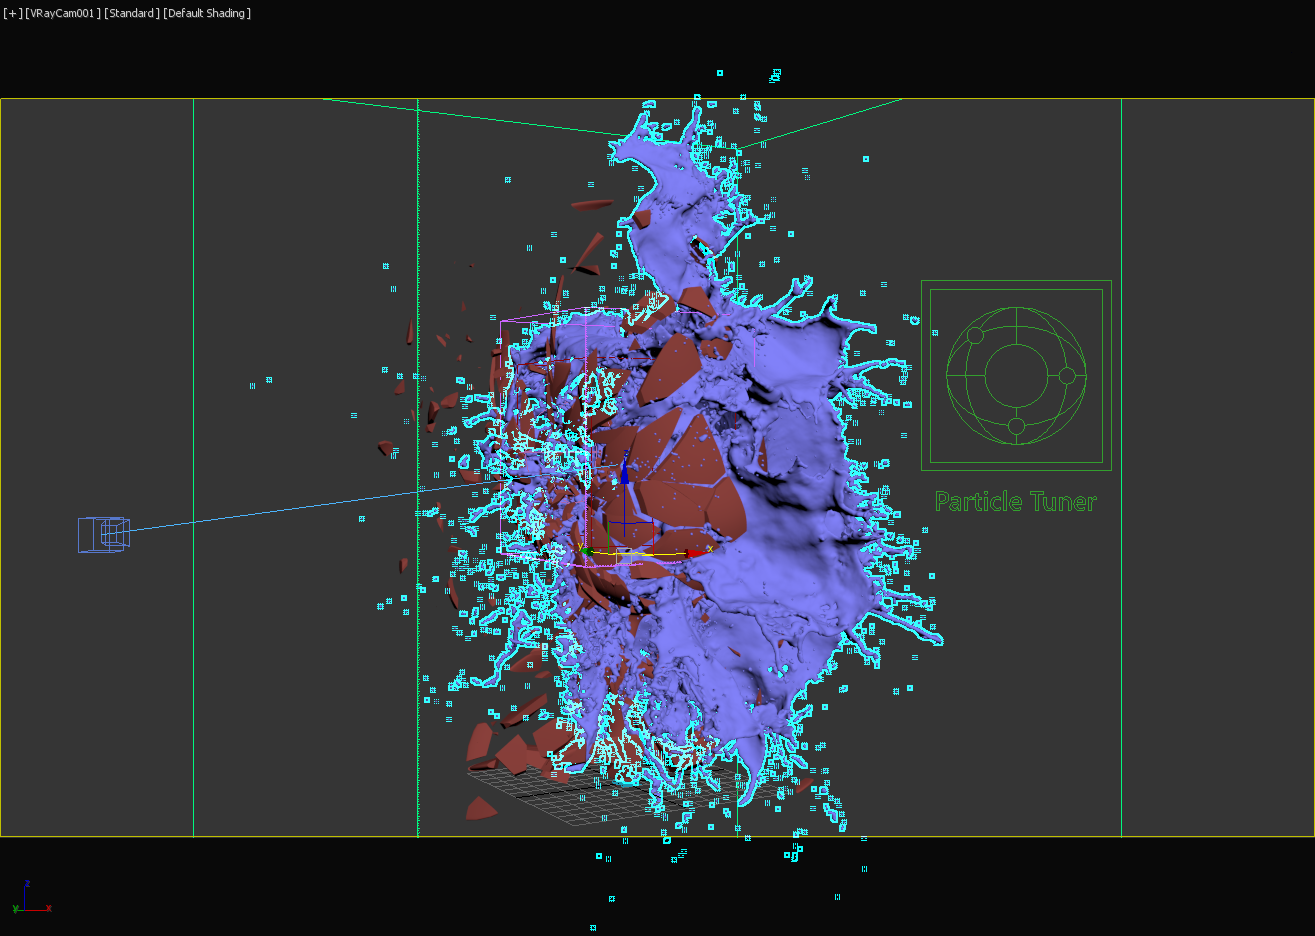
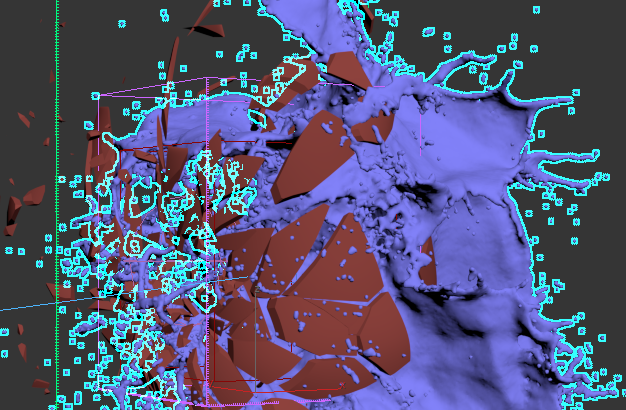
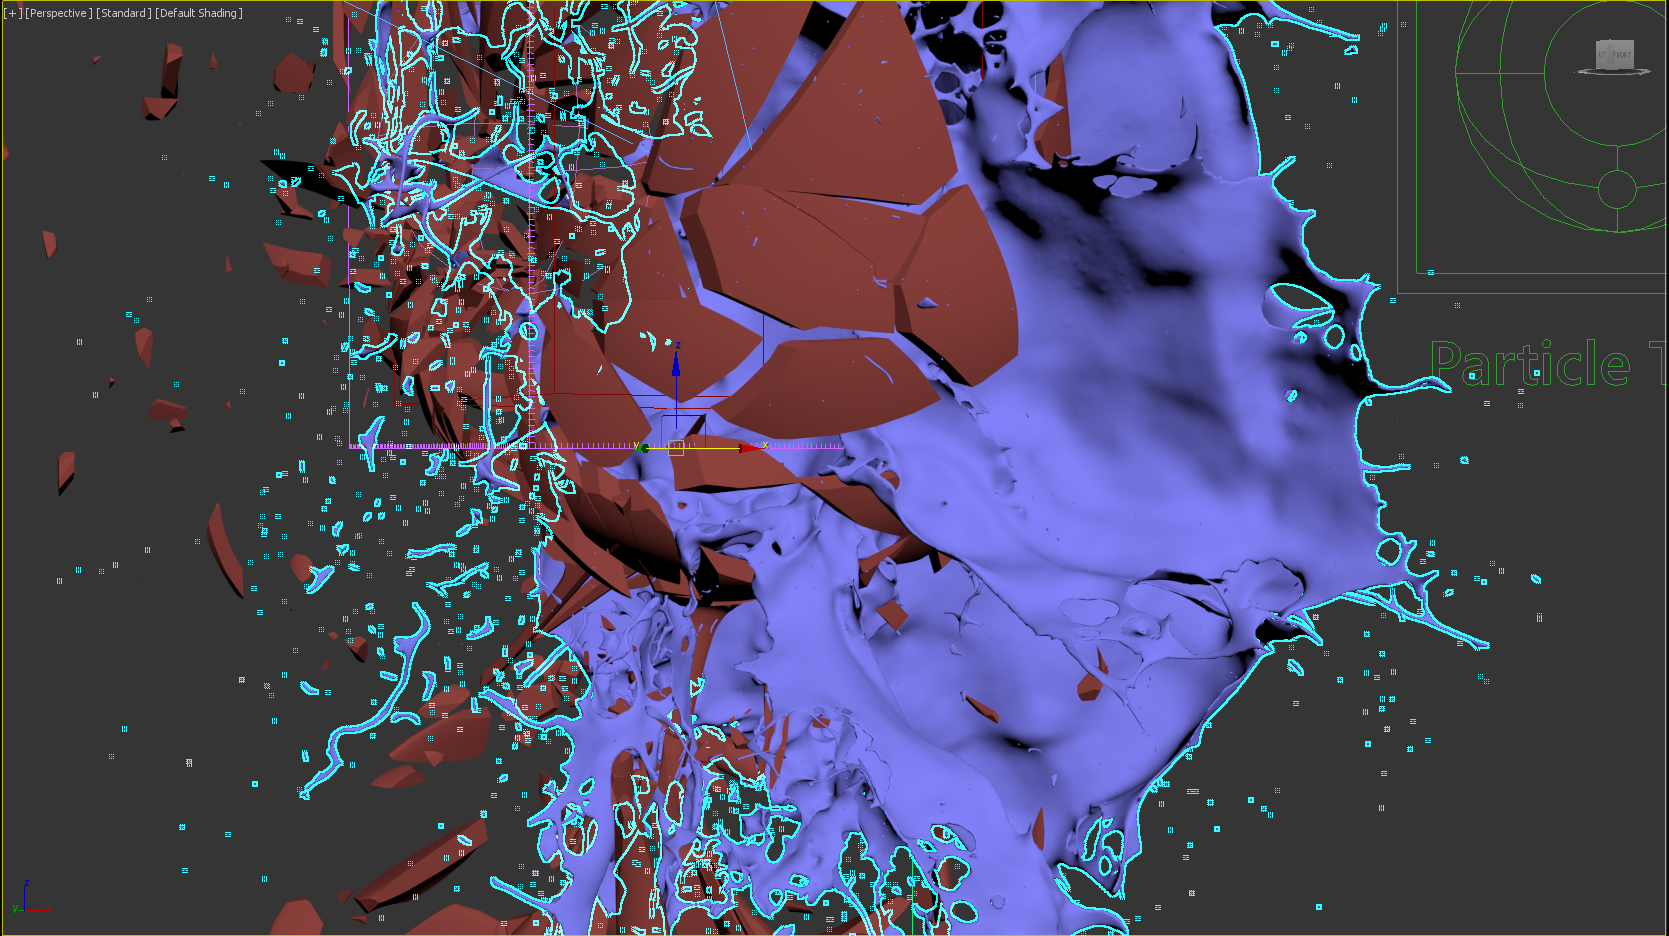
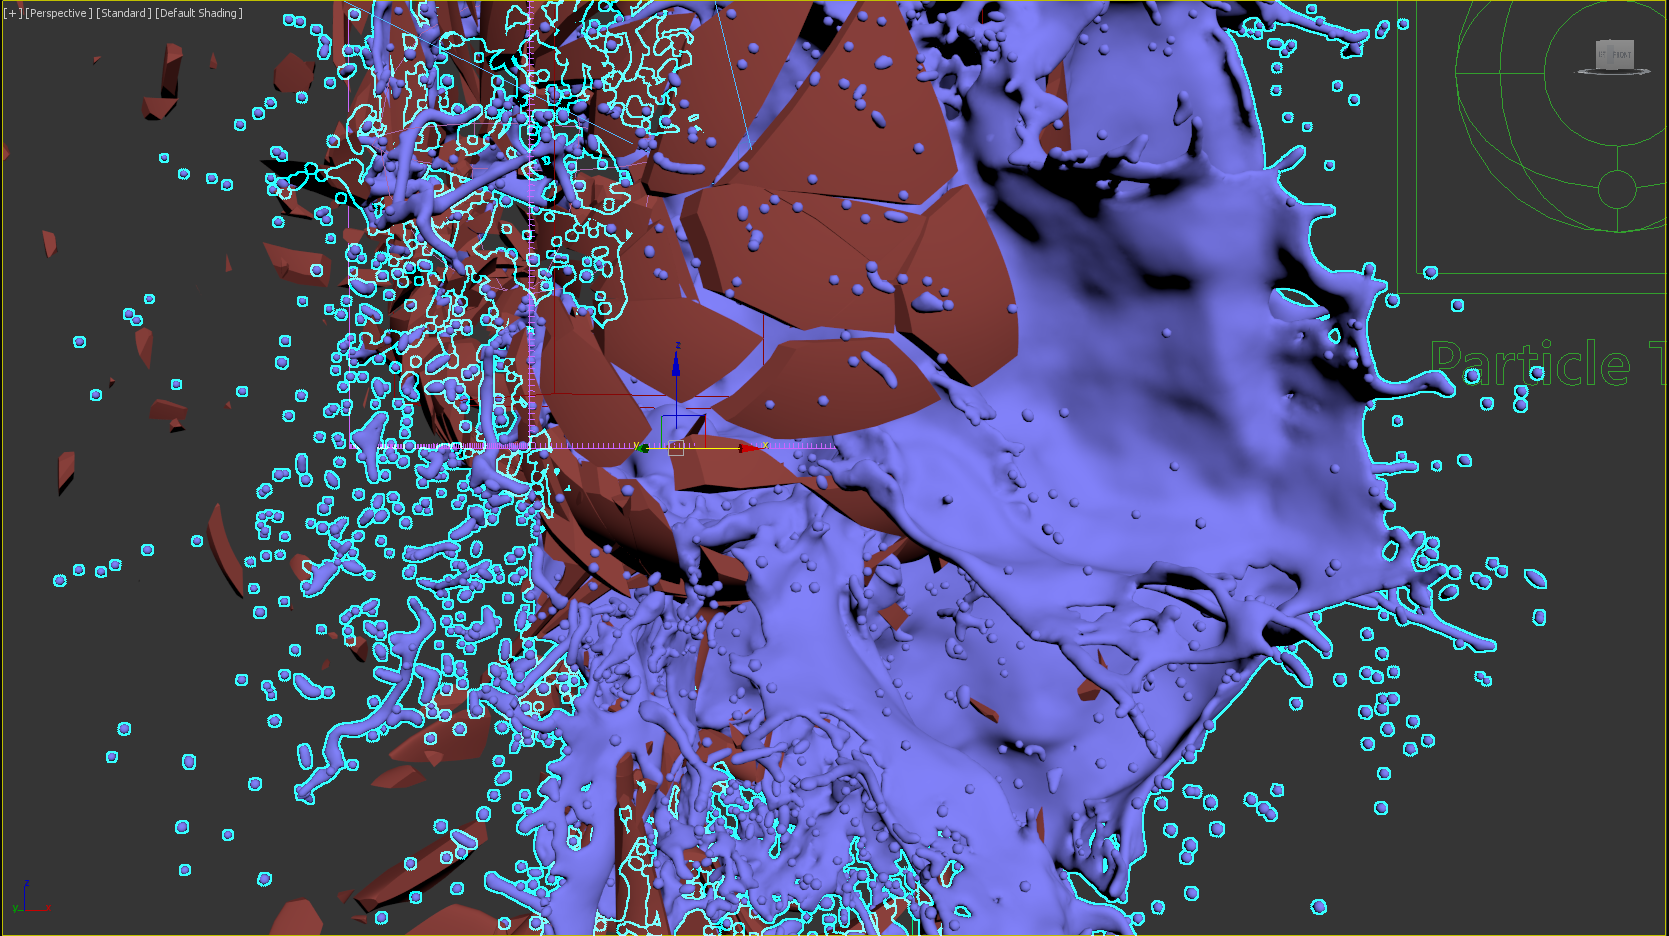
Next is the Surface Tension Strength.This parameter plays an important role in small-scale liquid simulations because an accurate simulation of surface tension indicates the small scale to the audience. Lower Strength values will cause the liquid to easily break apart into individual liquid particles, while higher values will make it harder for the liquid surface to split and will hold the liquid particles together.
The following examples show the simulation with different Surface Tension Strength values.
| Section | |||||||||||||||||||||||||
|---|---|---|---|---|---|---|---|---|---|---|---|---|---|---|---|---|---|---|---|---|---|---|---|---|---|
|
| Section | ||||||||||
|---|---|---|---|---|---|---|---|---|---|---|
|
| Section | ||||||||||
|---|---|---|---|---|---|---|---|---|---|---|
|
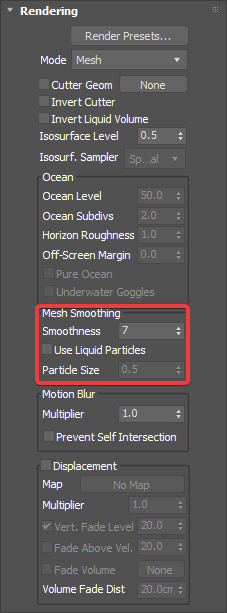
| Section | ||||||||||
|---|---|---|---|---|---|---|---|---|---|---|
The following examples show the simulation with different Smoothness values.
|
| Section | ||||||||||
|---|---|---|---|---|---|---|---|---|---|---|
Phoenix FD also offers a particle-based method for creating the liquid mesh that can be enabled through the Use Liquid Particles option. The resulting mesh will become thinner depending on the specified Particle Size. We will leave Use Liquid Particles disabled for our scene.
|
| Section | ||||||||||
|---|---|---|---|---|---|---|---|---|---|---|
|
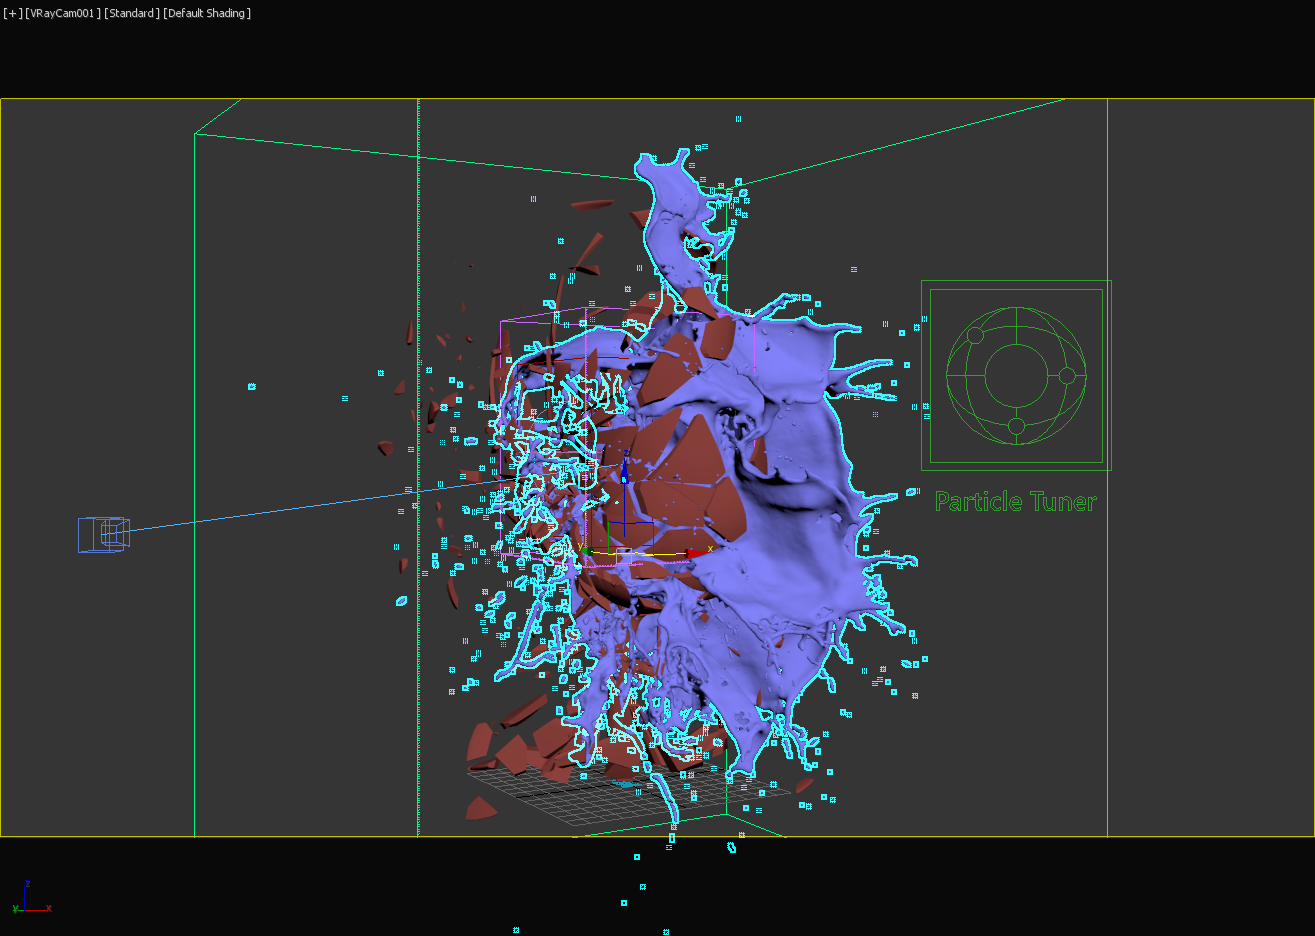
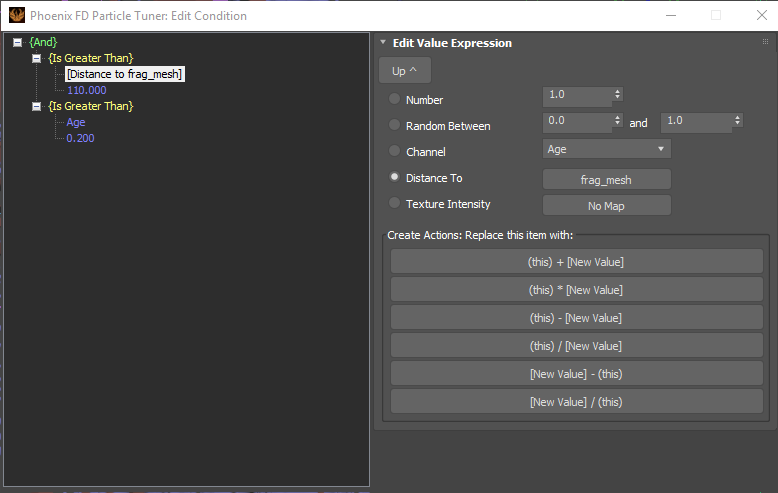
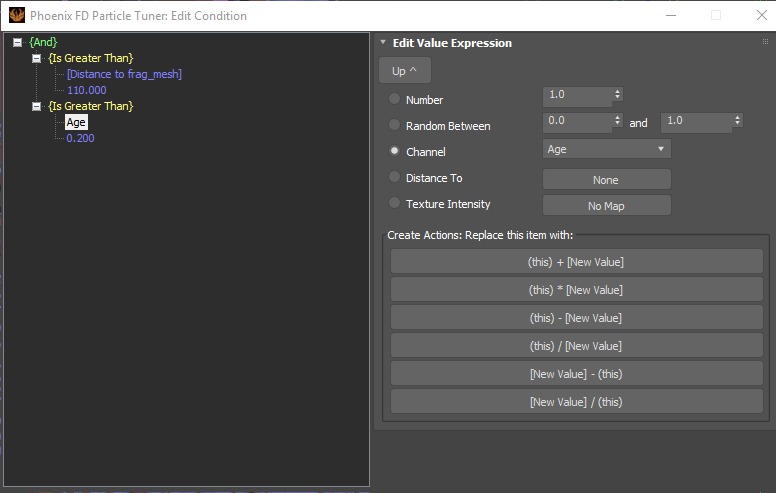
Particle Tuner
| Section | ||||||||||||
|---|---|---|---|---|---|---|---|---|---|---|---|---|
|

| Section | ||||||||||
|---|---|---|---|---|---|---|---|---|---|---|
|
| UI Text Box | ||||
|---|---|---|---|---|
| ||||
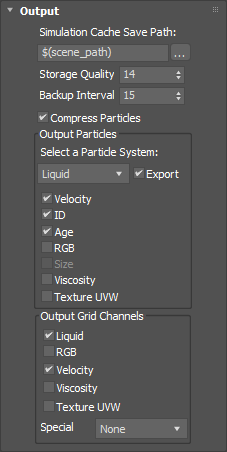
When using the Age channel as a condition in the Particle Tuner - make sure that the Age checkbox for the affected particle group is enabled in the Output rollout of the simulator. |
| UI Text Box | ||||
|---|---|---|---|---|
| ||||
It is very important to pick the correct mesh for the distance expression. In this case "frag_mesh" mesh should be selected, because this is the existing one in the scene after the 2nd frame of the animation. |
Materials
Wine Glass Material
| Section | ||||||||||
|---|---|---|---|---|---|---|---|---|---|---|
|
Wine Liquid Material
| Section | ||||||||||
|---|---|---|---|---|---|---|---|---|---|---|
|
The red wine itself has a special color, it's transparent but not completely translucent. That's why in this material uses the Fog color, which specifies the attenuation of light as it passes through the material. This option allows the user to simulate the fact that thick objects look less transparent than thin objects. Note that the effect of the fog color depends on the absolute size of the objects and is therefore scene-dependent unless the Fog system units scaling is enabled. Another option, helping to improve the material presentation, is the Fog multiplier, which can be used to fine-tune the strength of the fog. In addition, the Fog bias allows you to control the color transition. A negative value will make the liquid to appear thicker.
| Section | ||||||||||||||||||||
|---|---|---|---|---|---|---|---|---|---|---|---|---|---|---|---|---|---|---|---|---|
The following examples show the simulation with different Fog bias values.
|
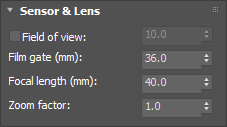
Lighting and Camera
| Section | ||||||||||
|---|---|---|---|---|---|---|---|---|---|---|
|
| Section | ||||||||||
|---|---|---|---|---|---|---|---|---|---|---|
|
| Section | ||||||||||
|---|---|---|---|---|---|---|---|---|---|---|
|
Render Settings
| Section | ||||||||||
|---|---|---|---|---|---|---|---|---|---|---|
|
| Section | ||||||||||
|---|---|---|---|---|---|---|---|---|---|---|
|
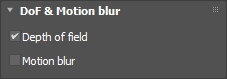
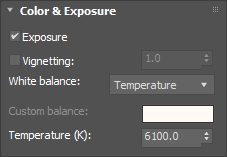
| Section | |||||
|---|---|---|---|---|---|
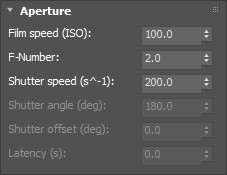
The V-Ray Physical Camera offers additional exposure controls, but you can also fine-tune renders using the V-Ray Frame Buffer. In this case the Curves setting is used to add more contrast to the image.
|
Final Results
| Section | ||||||||||
|---|---|---|---|---|---|---|---|---|---|---|
|