![]()
Page History
...
Overview
...
| Section | |||||||||||||||
|---|---|---|---|---|---|---|---|---|---|---|---|---|---|---|---|
|
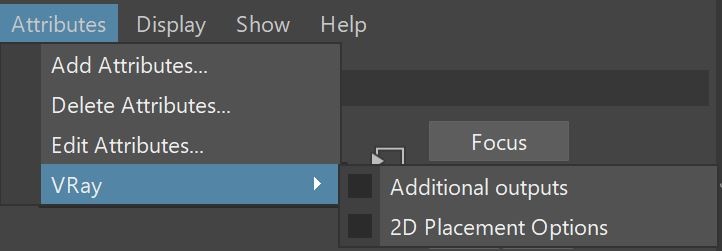
Additional Outputs
...
| Section | ||||||||||||||||
|---|---|---|---|---|---|---|---|---|---|---|---|---|---|---|---|---|
|
Common Uses
...
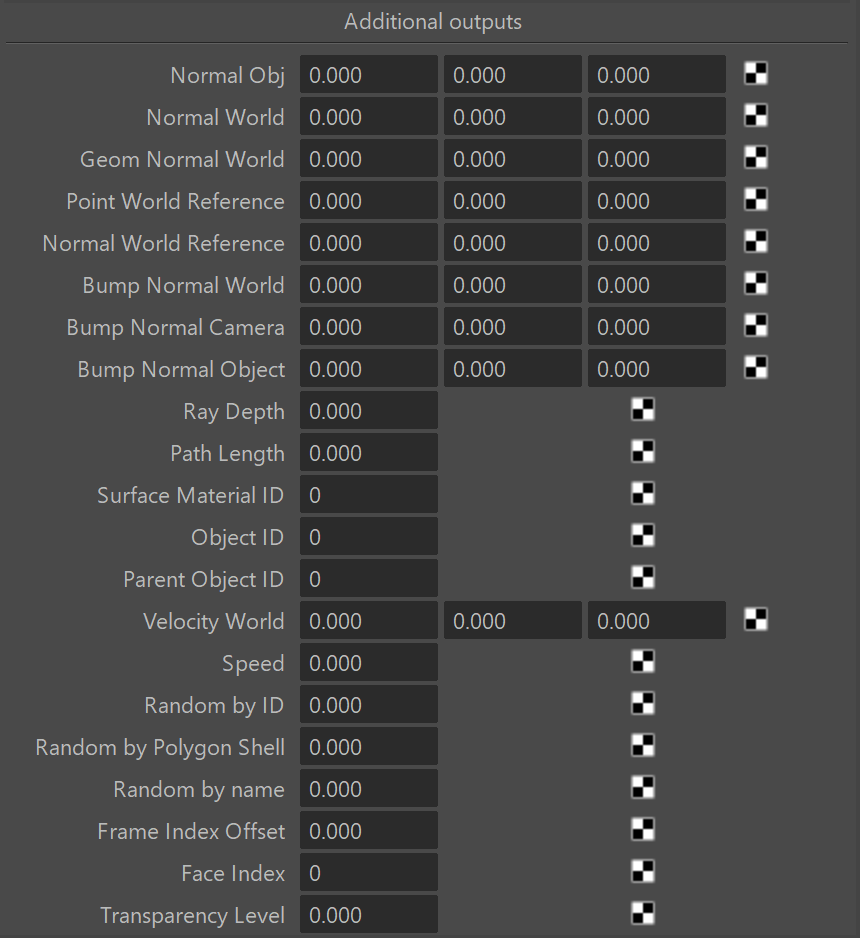
The SamplerInfo node extracts particular information about the scene. It then converts the gathered information into RGB data. It can be used within the Maya Hypershade or to drive a material channel to achieve various effects. This can provide more render passes with information that can allow more possibilities to editing during the compositing process.
...
| Section | ||||||||||||||||||||
|---|---|---|---|---|---|---|---|---|---|---|---|---|---|---|---|---|---|---|---|---|
|
...
| Anchor | ||||
|---|---|---|---|---|
|
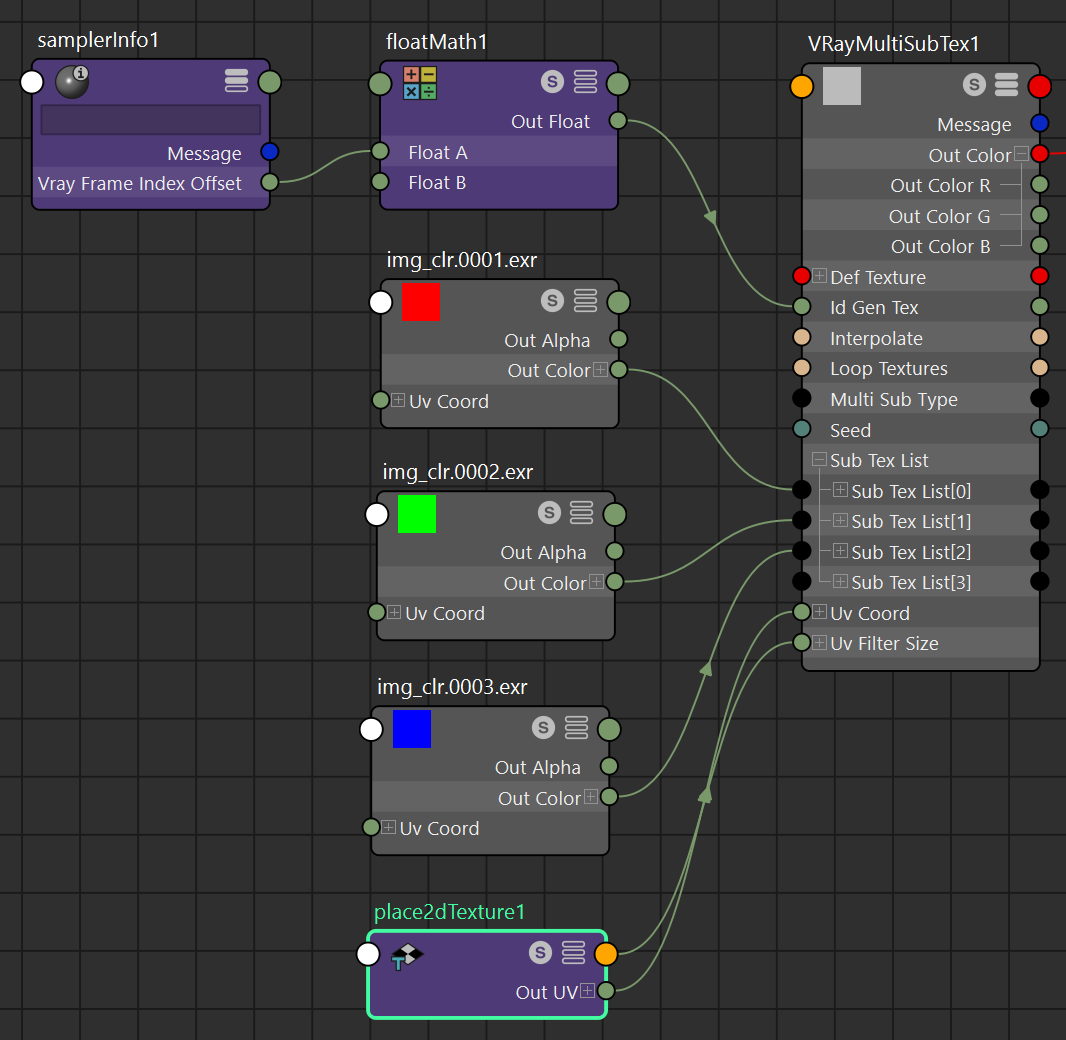
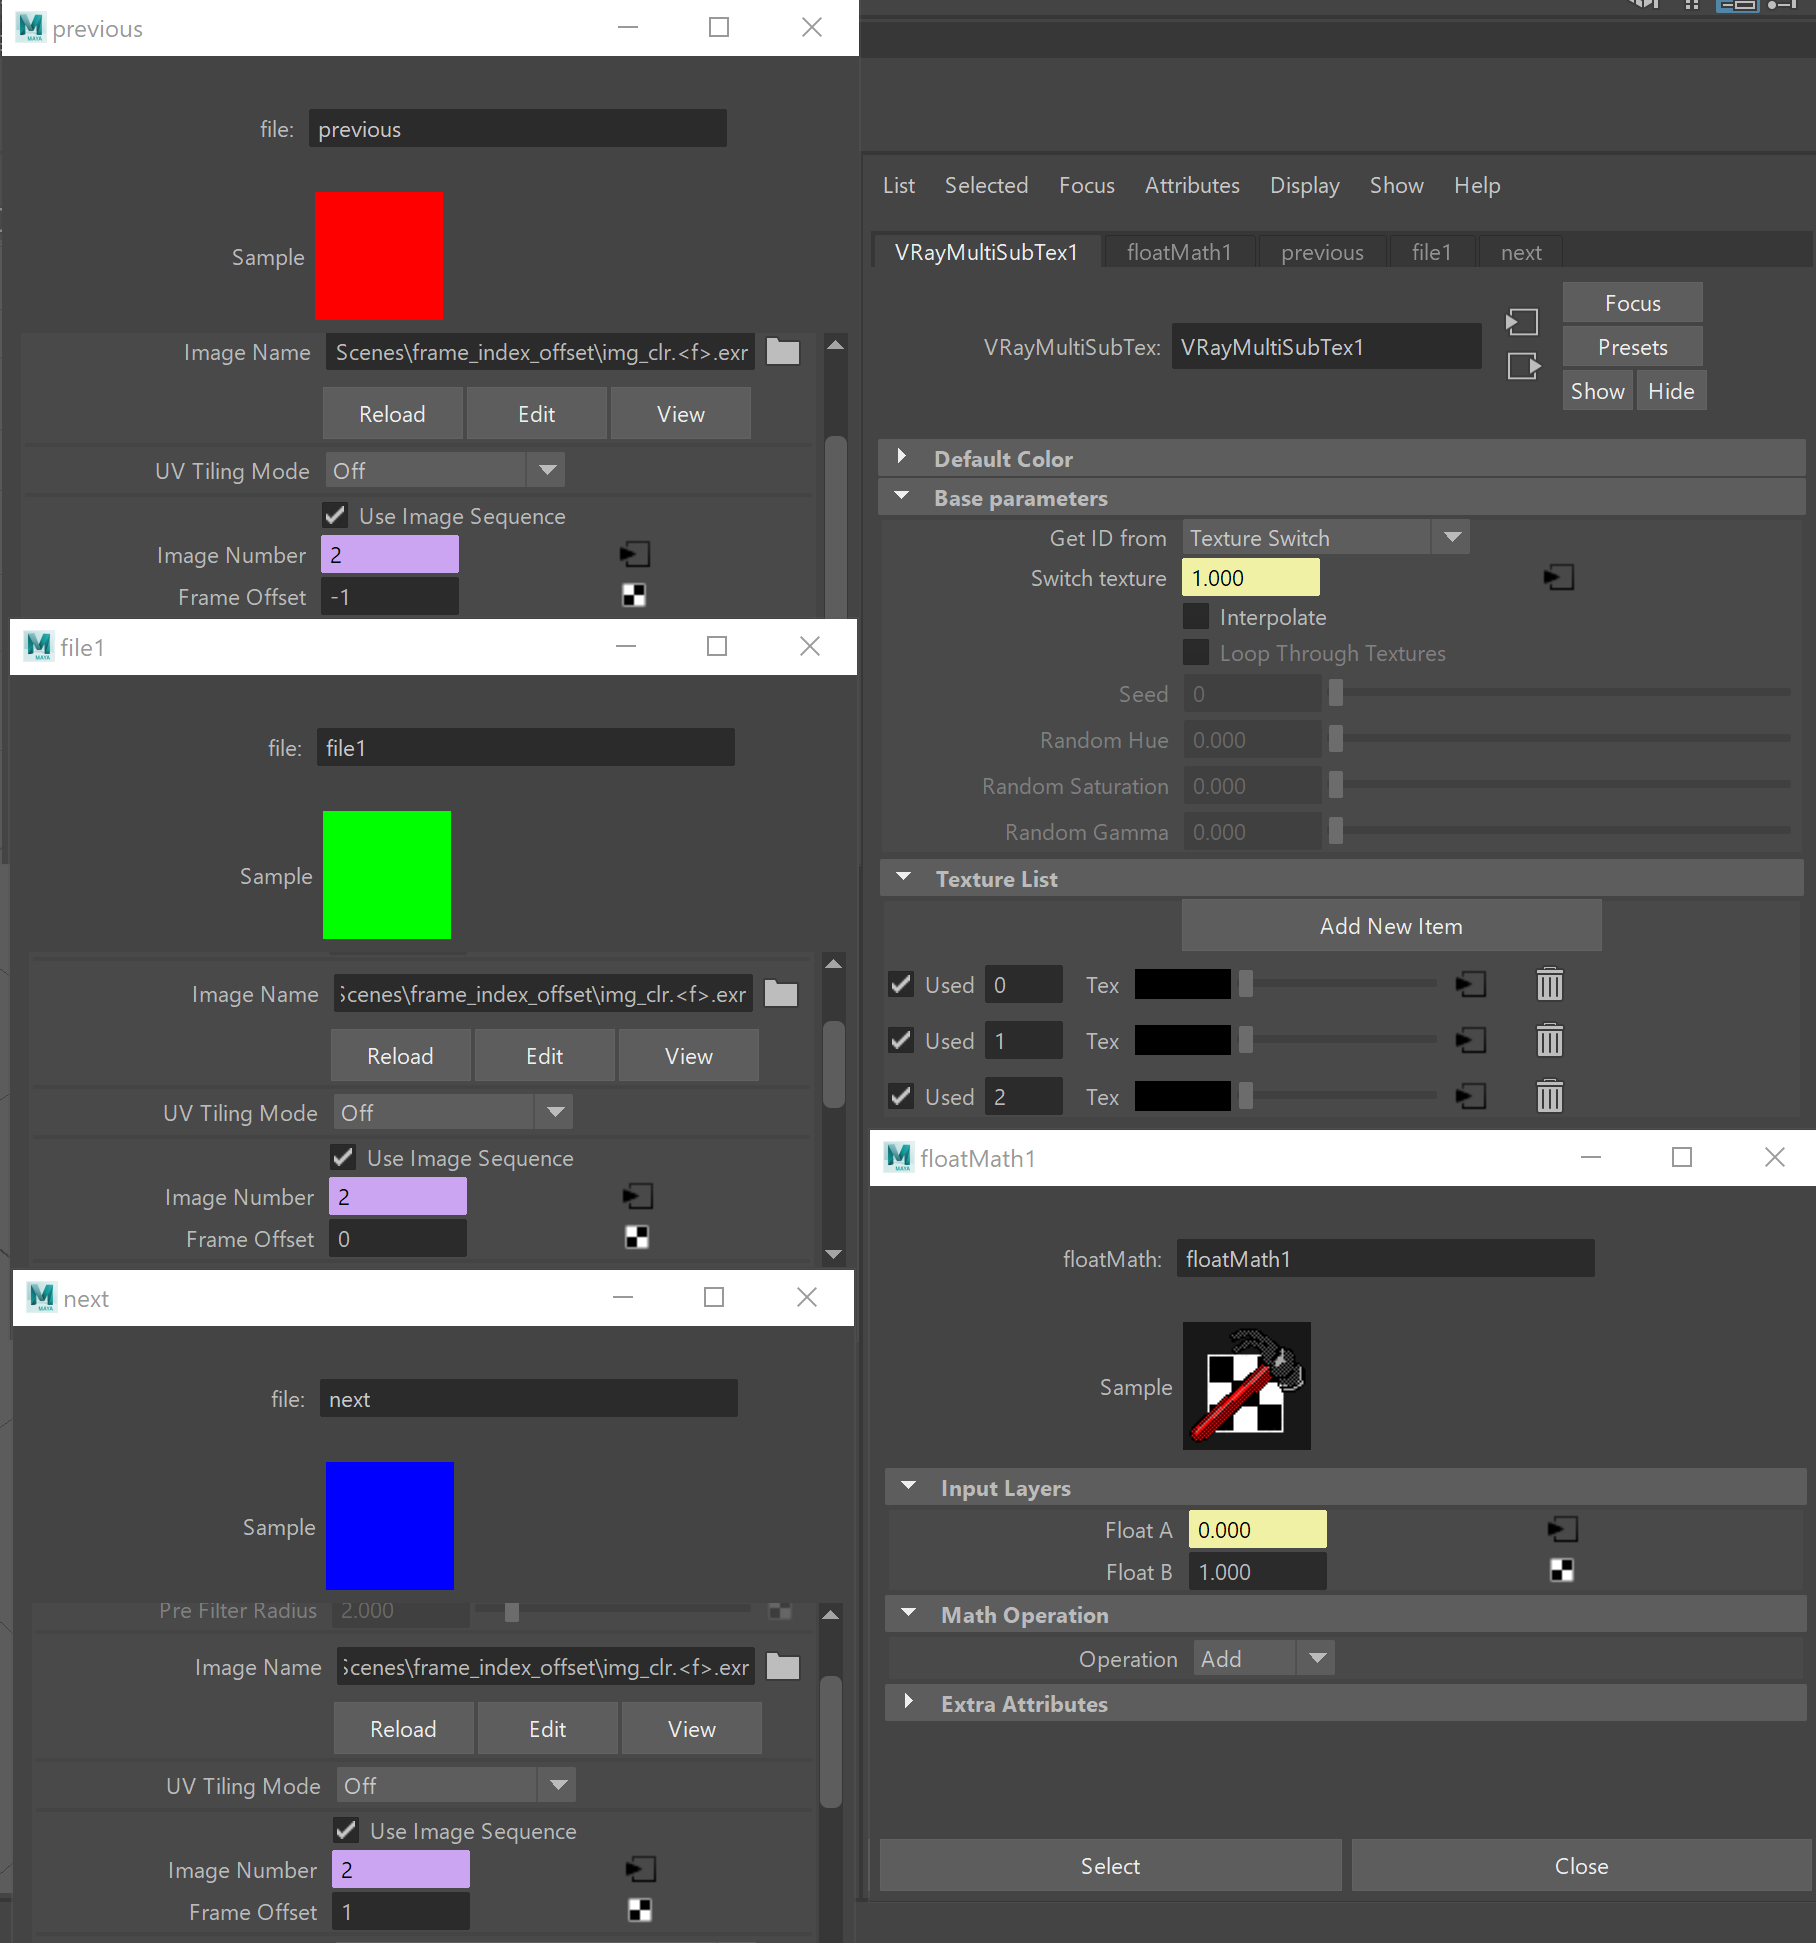
Example: Frame Index Offset
With Maya SamplerInfo's extra attribute Frame Index Offset you can simulate a motion blur effect on a sequence of textures. In this example, we have a sphere object that changes its position with with each frame. The Camera Motion Blur options are enabled with Duration set to 2 frames. The object is initially assigned a material with an Image sequence file connected to its Color. This results in motion blurred geometry that only uses a single texture per frame.
To achieve the mixing between the textures, a VRayMultiSubTex with three sub-textures starting from 0 is created and linked to the Color input instead. The three textures are connected to three file nodes within the same sequence, but a different Frame Offset: -1 for previous, 0 for current and 1 for next.
The VRayMultiSubTex Get ID from is set to Texture Switch and a floatMath node is connected to control the Switch texture. This is done because VRayMultiSubTex cannot have negative values for input.
The SamplerInfo's extra attribute Frame Index Offset is plugged in Float A. Float B is set to 1 with an Add operation between the two. Now the 0 texture is used for the -1 or previous frame, 1 for the current or 0 frame and 2 for the +1 or next frame.
| Section | |||||||||||||||
|---|---|---|---|---|---|---|---|---|---|---|---|---|---|---|---|
|
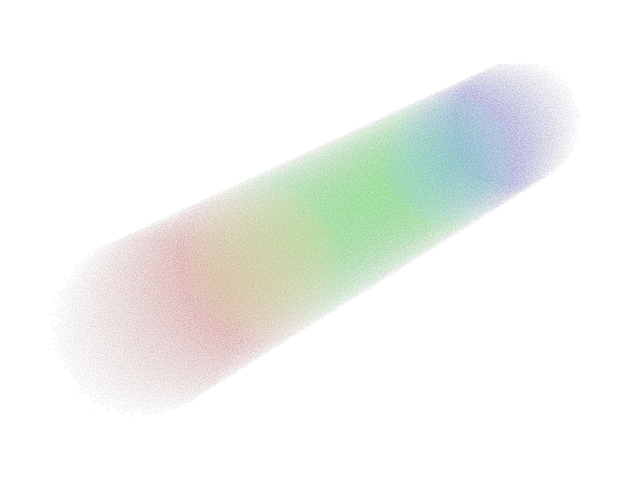
Duration (frames) is set to 2 - the effect interpolates between the three frames using the three textures.
...
| Anchor | ||||
|---|---|---|---|---|
|
Example: Translucency Level
The Translucency level output in the Additional Outputs of the samplerInfo node indicates the number of transparency intersections at a shaded point. In this example, we set up a VRaySwitchMtl with two semi-transparent materials: a reflective material at input 0 and a diffuse material at input 1. We use a floatLogic node to check the Transparency Level output and to return 0 (or false) when there are no more than 1 transparency intersections or 1 (true) when there are more than 1 intersections. The floatLogic then drives the VRaySwitchMtl so that the reflective material is assigned when we shade the first transparent object, but the diffuse material is used for the rest of the objects only when they are seen through the first transparent object. Download the scene to take a closer look at the setup.
| UI Button | ||||||||||
|---|---|---|---|---|---|---|---|---|---|---|
|
| Section | |||||||||||||||
|---|---|---|---|---|---|---|---|---|---|---|---|---|---|---|---|
|