![]()
Page History
Floatingpagetoc
This page provides information about the installation process of Project Lavina and how to start it.
| CSS Stylesheet |
|---|
@media only screen and (min-width:1550px) { .UIImage { max-width: 800px900px; margin-left: 0 auto; } }margin-right:auto; } |
| Section | |||||||||||||||
|---|---|---|---|---|---|---|---|---|---|---|---|---|---|---|---|
|
|
|
Installing Chaos Vantage
The Chaos Vantage
Installing Project Lavina
The Project Lavina installer automatically removes any previous installations. This allows seamless Thus, you can seamlessly upgrade from previous versions. If If you experience problems, you can manually uninstall the previous versions to perform a clean install.
Before running the installation, make sure your Windows account has administrative privileges.
Run the installer.
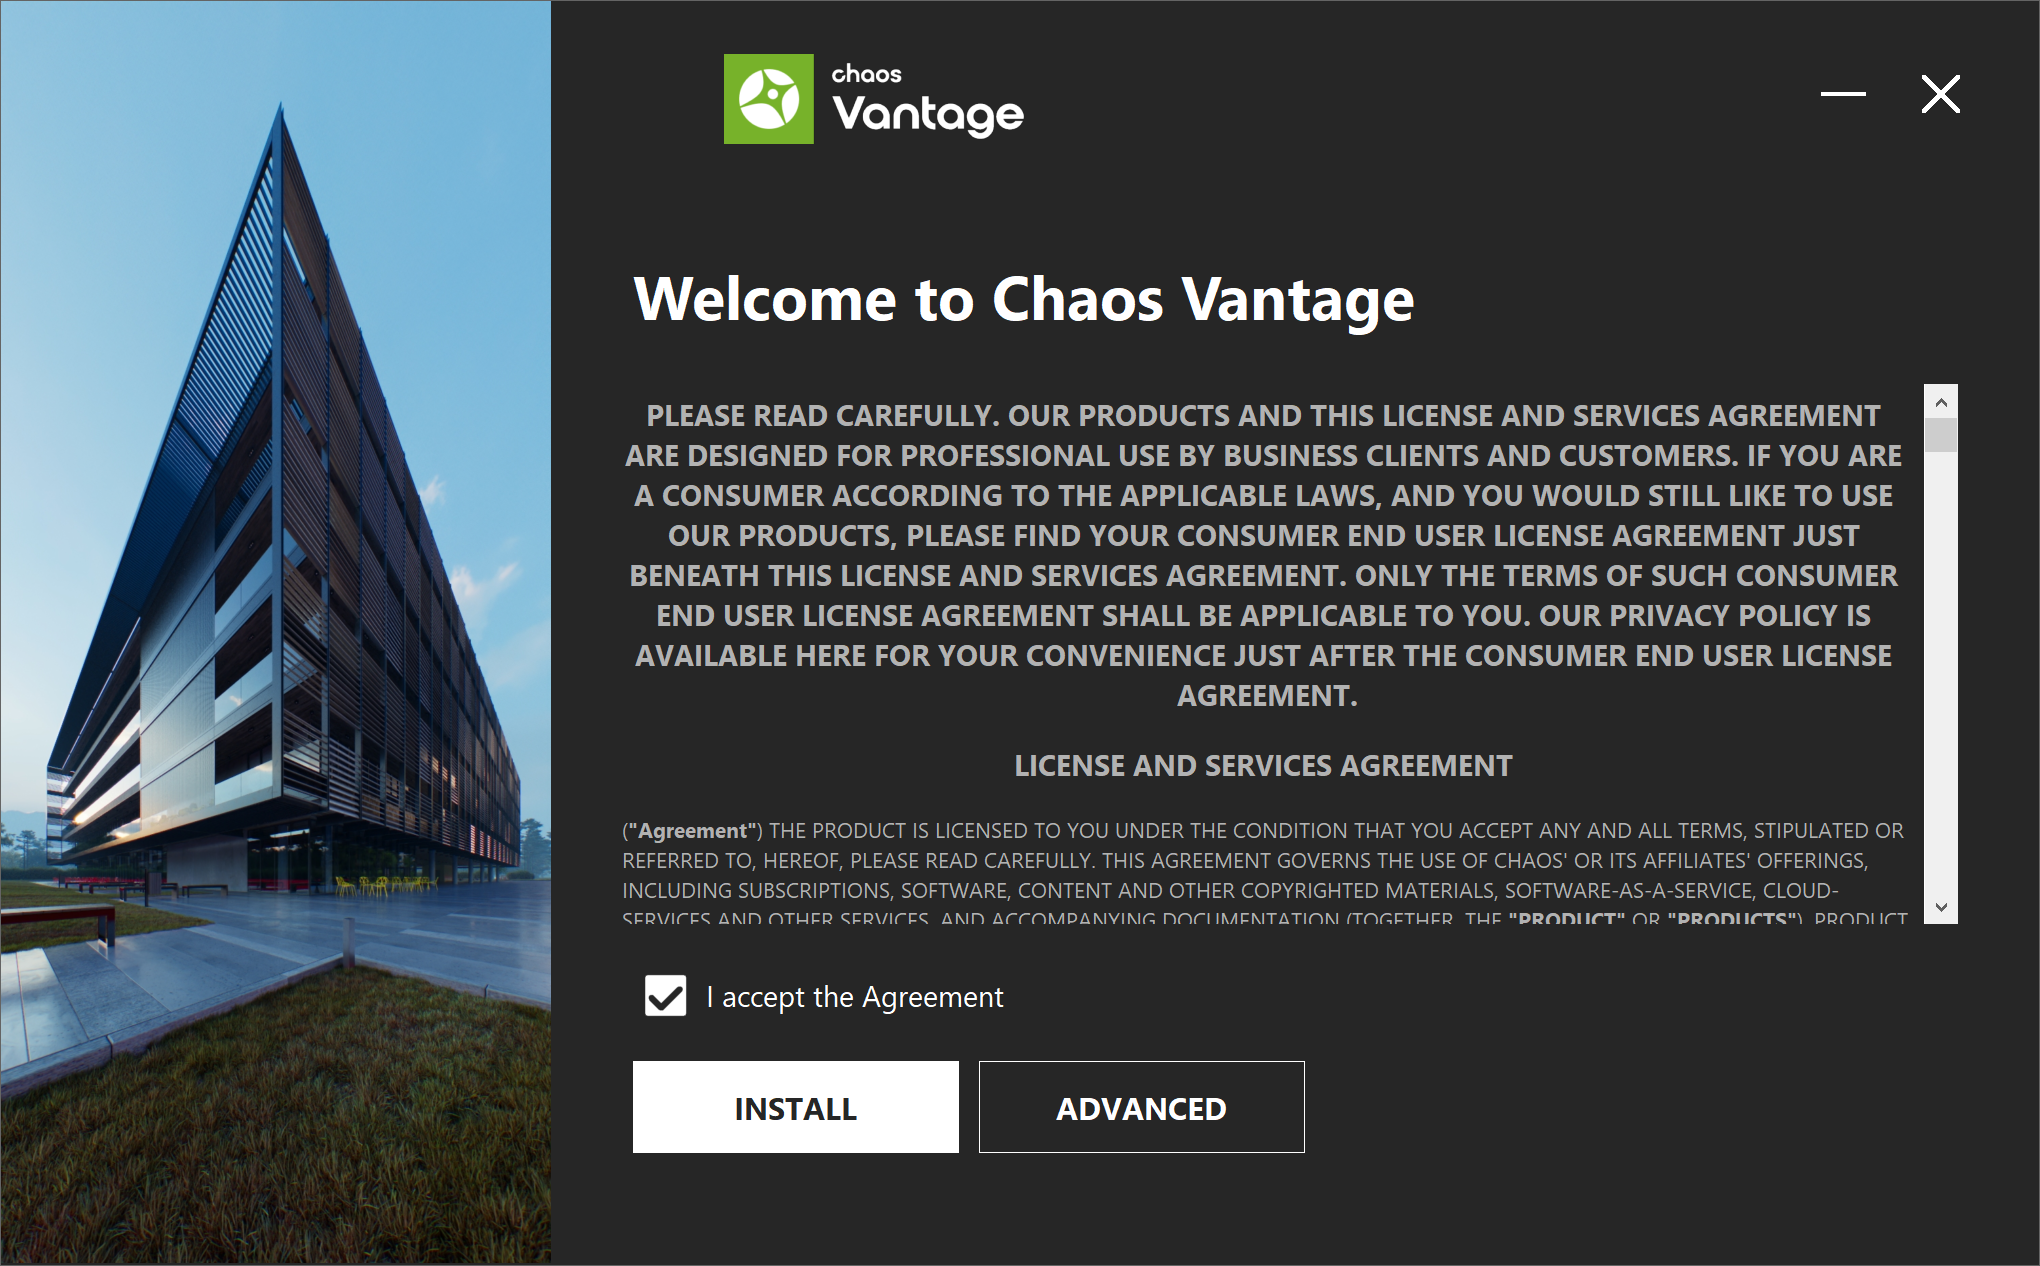
1. Upon the start of the installation, Windows may ask you for permission to run the installer with administrator privileges. Please confirm.
2. You are presented with the Lavina Chaos Vantage licensing agreement. Please take a moment to review the agreement. Check Enable the I accept the Agreement checkbox and click Install to proceed with standard installation.
If you need to customize your Lavina Chaos Vantage installation, press click the Advanced button.
| UI Text Box | ||||
|---|---|---|---|---|
| ||||
The Install option enables Telemetry by default, uses the localhost for licensing and installs the software in a default directory. |
| Div | ||
|---|---|---|
| ||
|
| UI Expand | ||||||||||||||||||||||||||||||||||||||||||||||||||||
|---|---|---|---|---|---|---|---|---|---|---|---|---|---|---|---|---|---|---|---|---|---|---|---|---|---|---|---|---|---|---|---|---|---|---|---|---|---|---|---|---|---|---|---|---|---|---|---|---|---|---|---|---|
| ||||||||||||||||||||||||||||||||||||||||||||||||||||
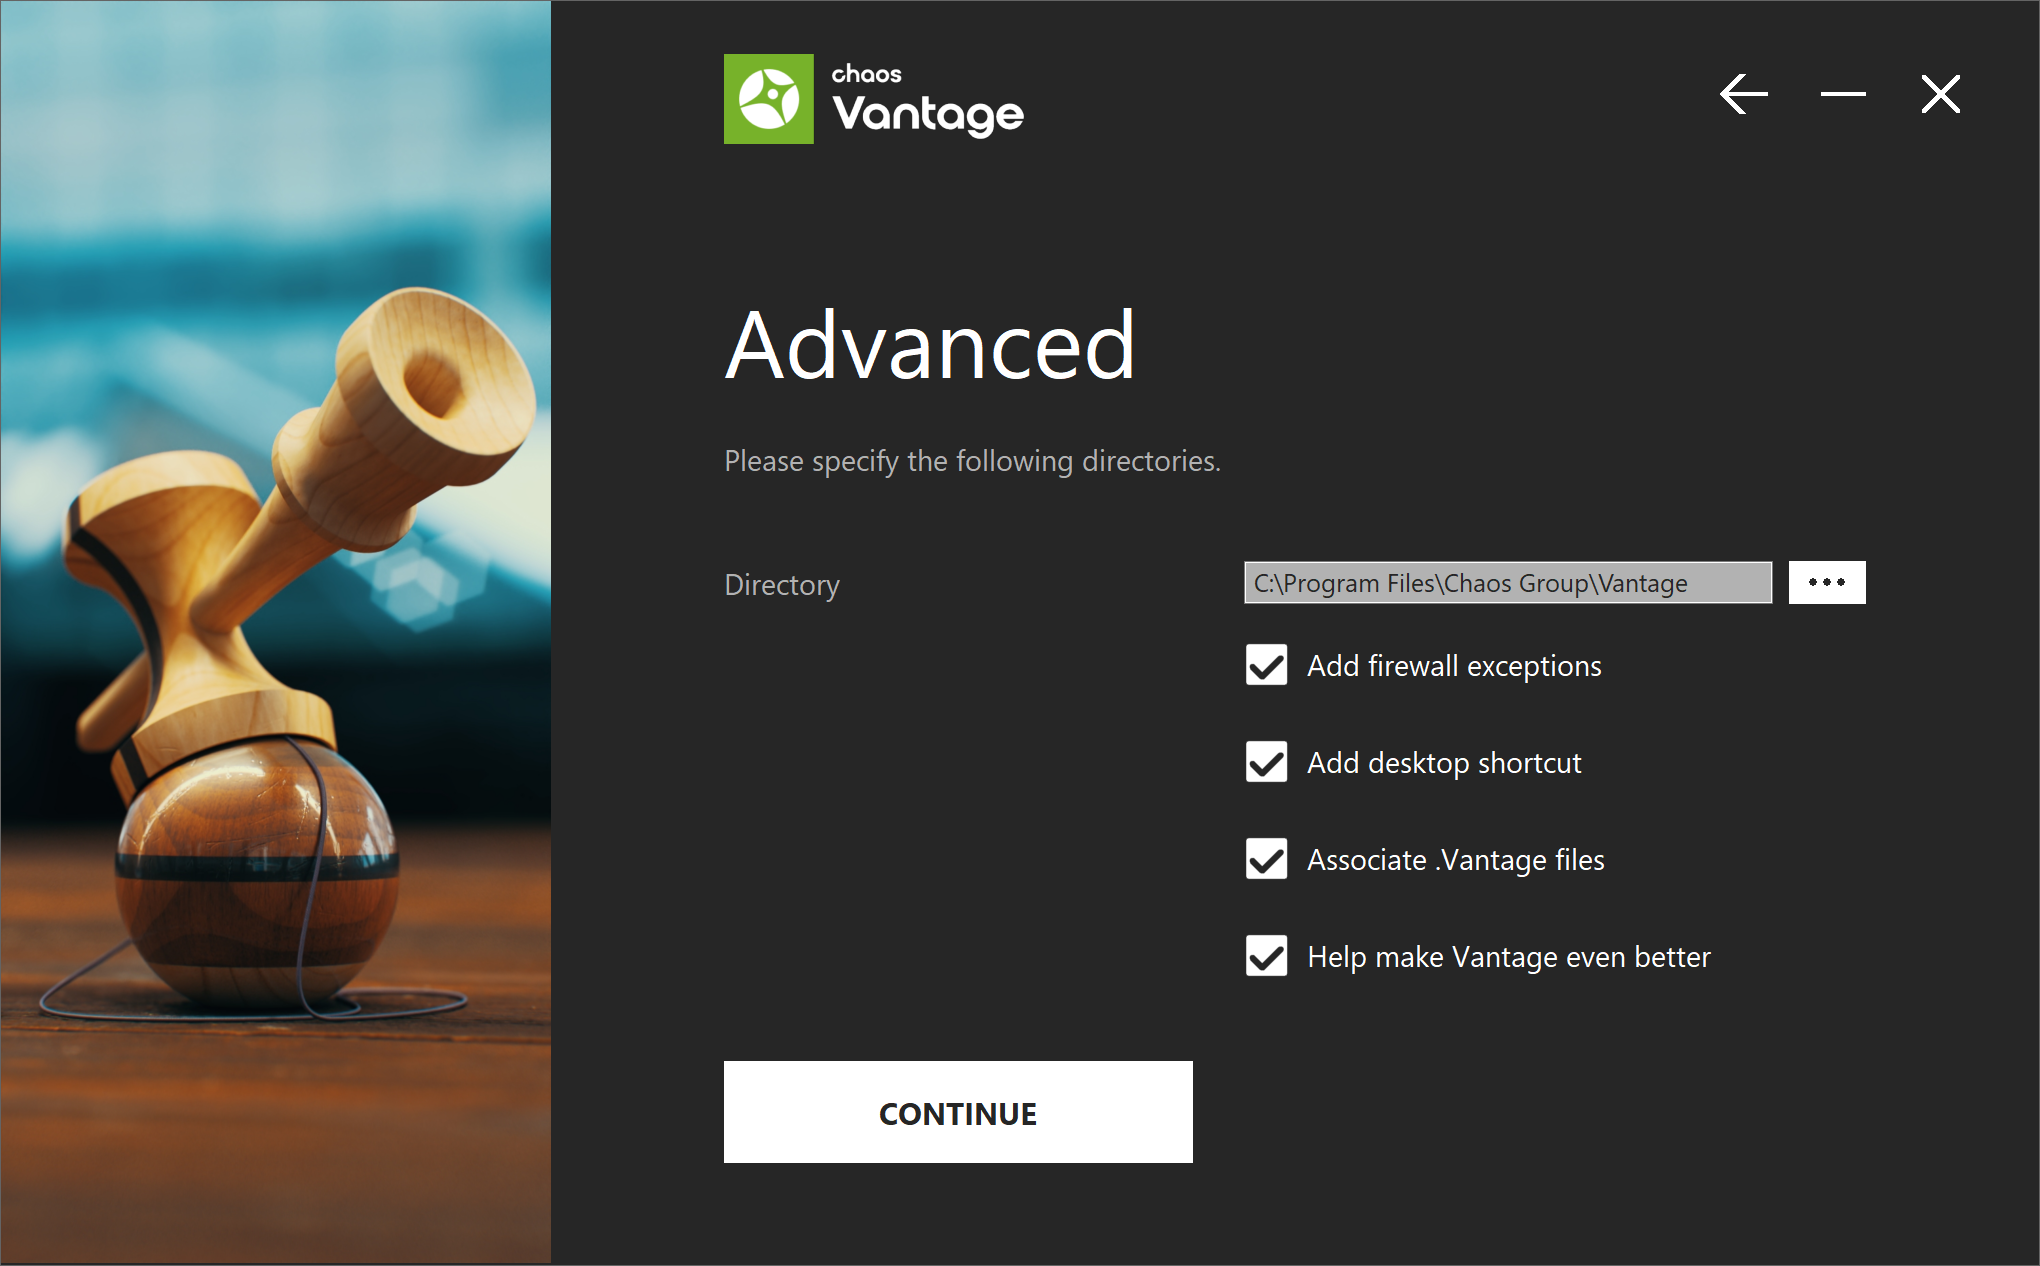
2a. In the next screen, you can change the installation directory and specify whether:
If you are installing Chaos Vantage for the first time and use the Advanced installation, you are presented with a Help make Vantage even better screen where you can specify whether to Share Analytics Data. Otherwise, the Feedback program is activated by enabling Help make Vantage even better checkbox, available upon clicking the Advanced button of the installer. For more information, see the Chaos Feedback Program page. Click Continue to proceed with customizing the installation.
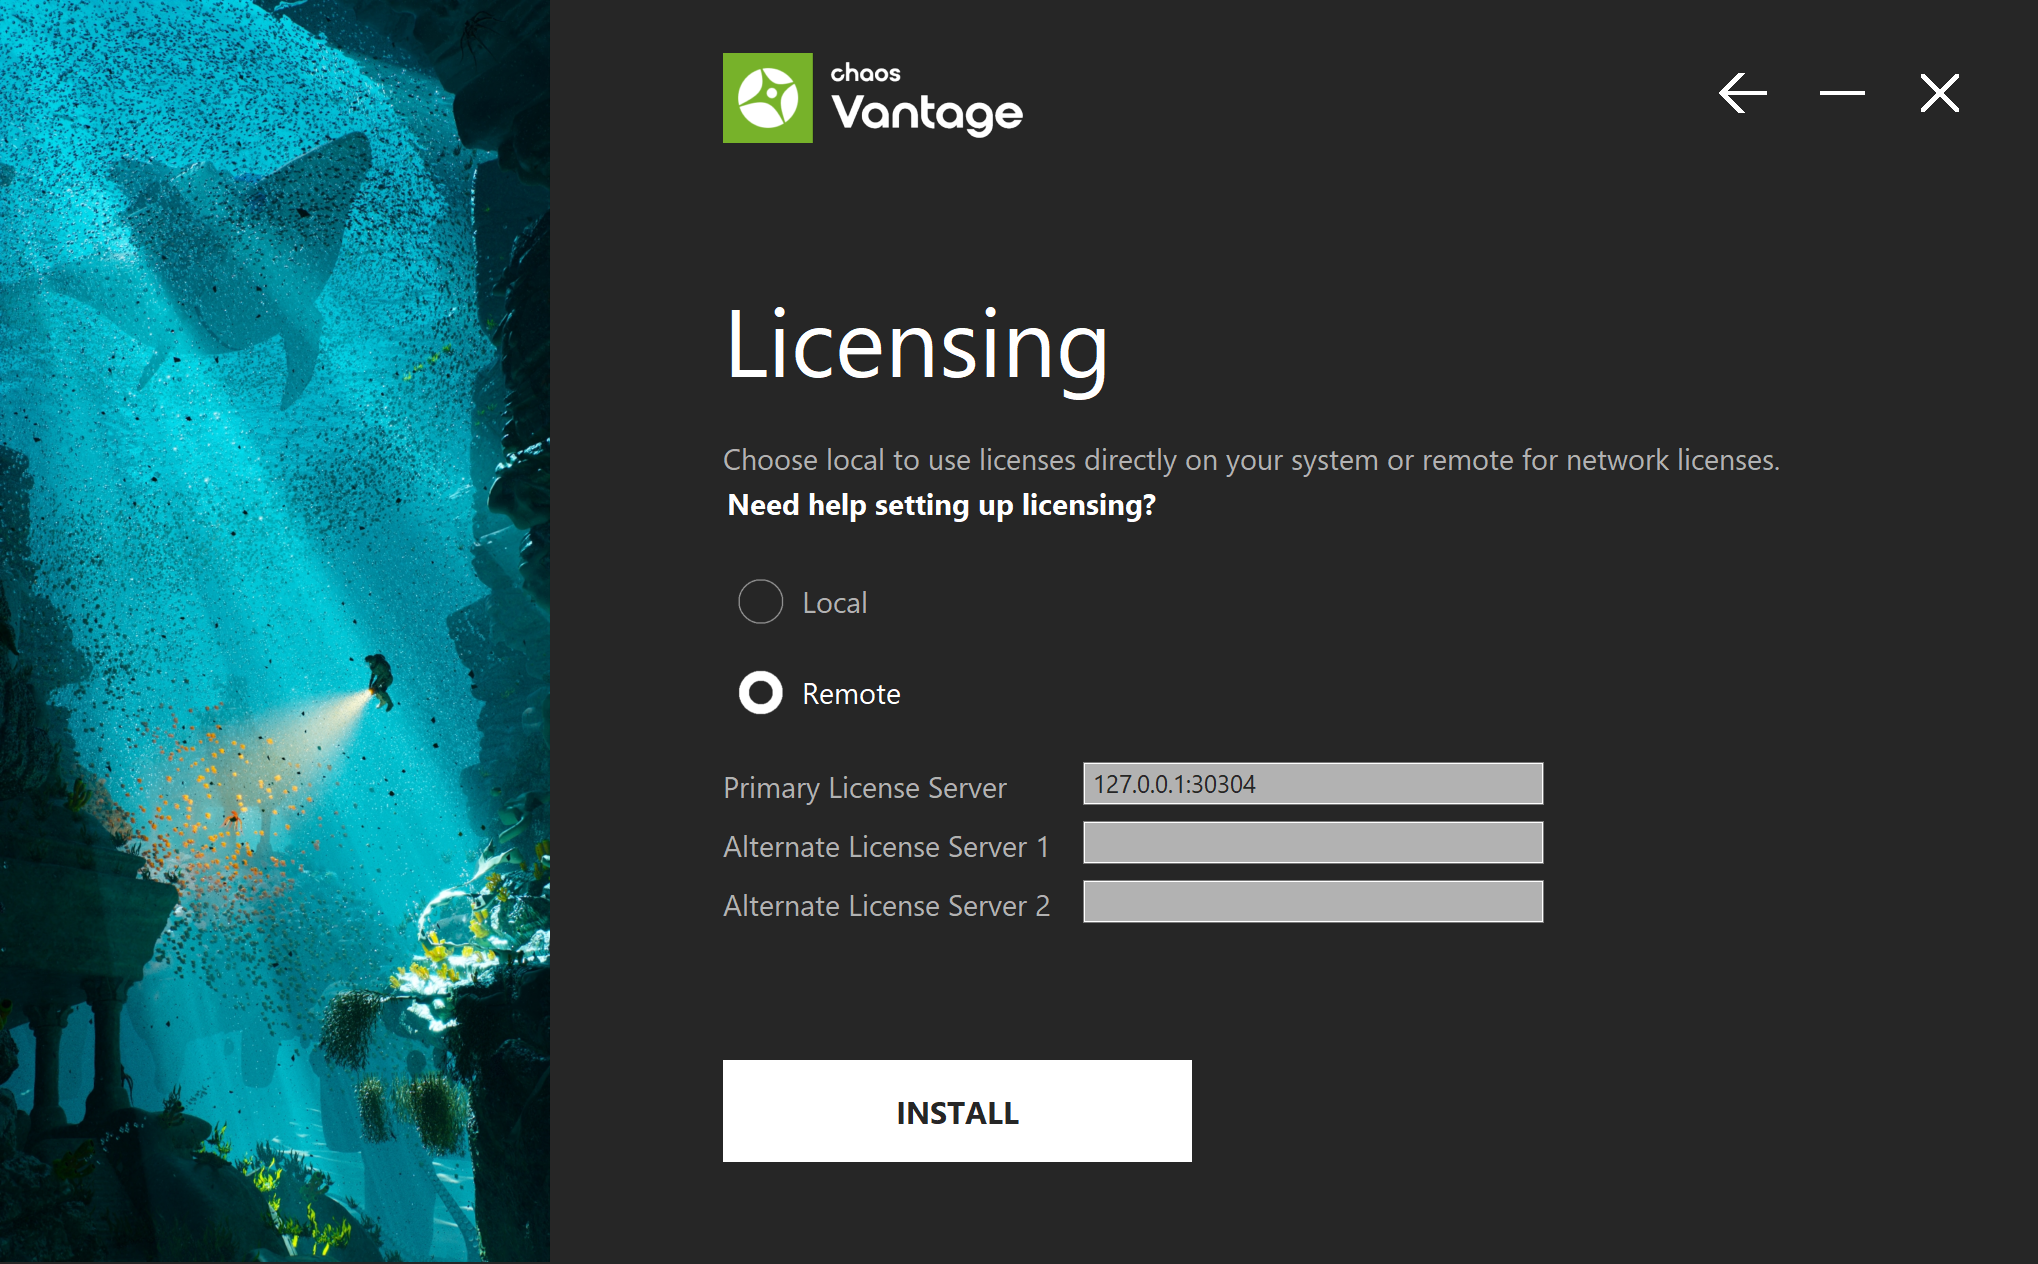
2b. In this step, you can specify whether the Lavina license server will run runs locally or on another machine. If you select the option Remote option, you have to fill in the IP address of your Lavina Chaos license server in the field Primary License Server. Please leave the port 30304 unchanged. An Alternate License Server is used when the primary one does not respond. See the Licensing page for more information.
2c. When ready, click the Install button. If the installer detects previous versions of LavinaChaos Vantage, they are automatically uninstalled. If the installer detects any applications that need to be closed, they are automatically closed. |

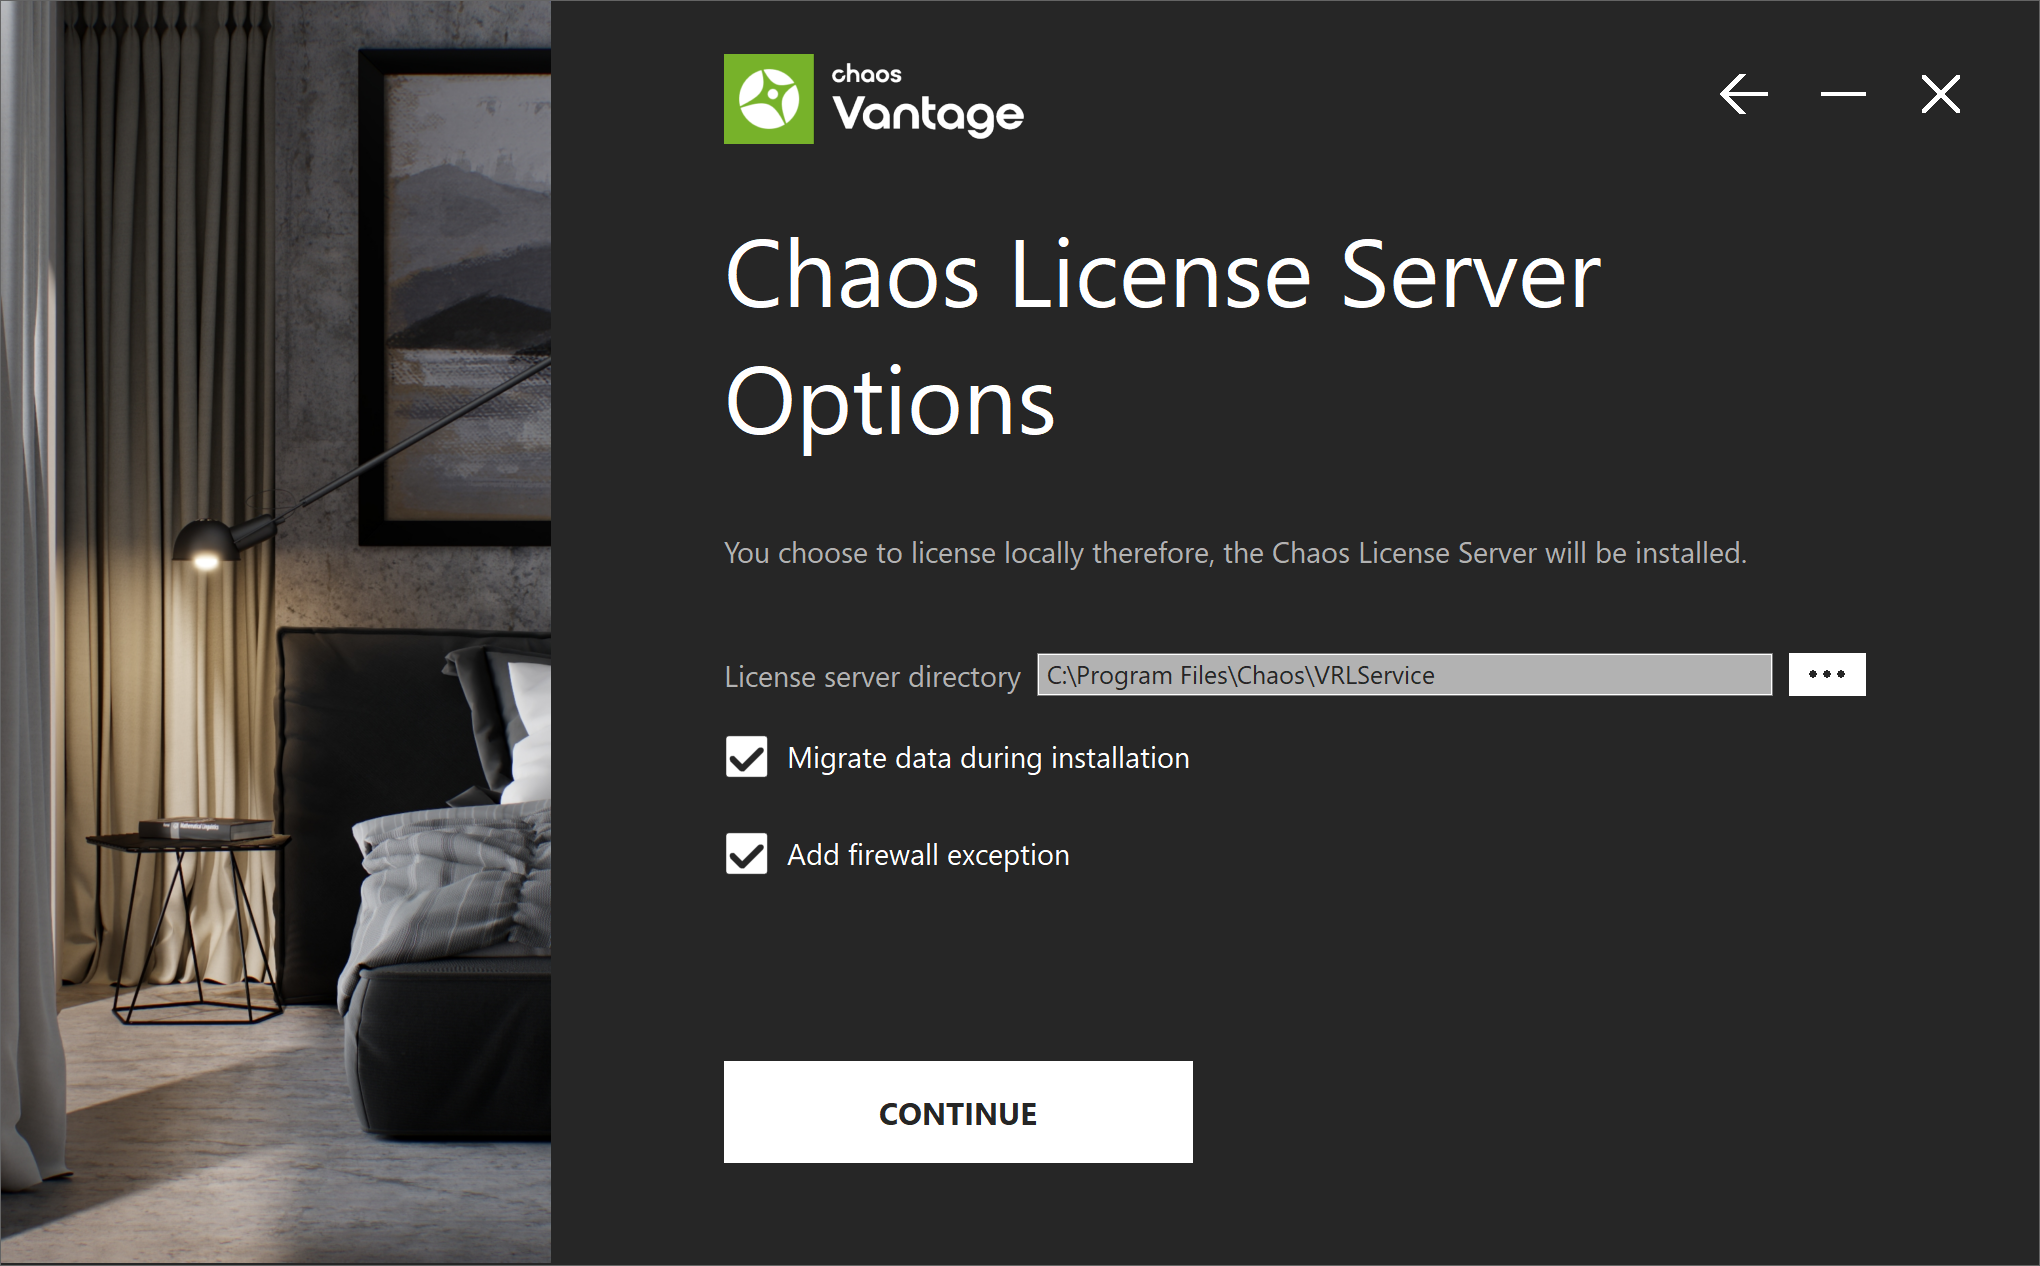
3. If you are installing a Chaos product for the first time and choose to use the license server locally, the Chaos License Server installation option is presented.
At this step you can choose the license server directory.
The Migrate data during installation option transfers all of your settings made with earlier versions of the License Server, such as enabled dongle subsystem, proxy settings, etc. Disabling this option installs the License Server with all settings at their defaults and any custom settings from the previous installation are lost.
Add firewall exception option allows the default licensing port (TCP 30304) in the firewall. If you disable it at this step, you will need to manually add firewall exceptions later.
| Div | ||
|---|---|---|
| ||
|
4
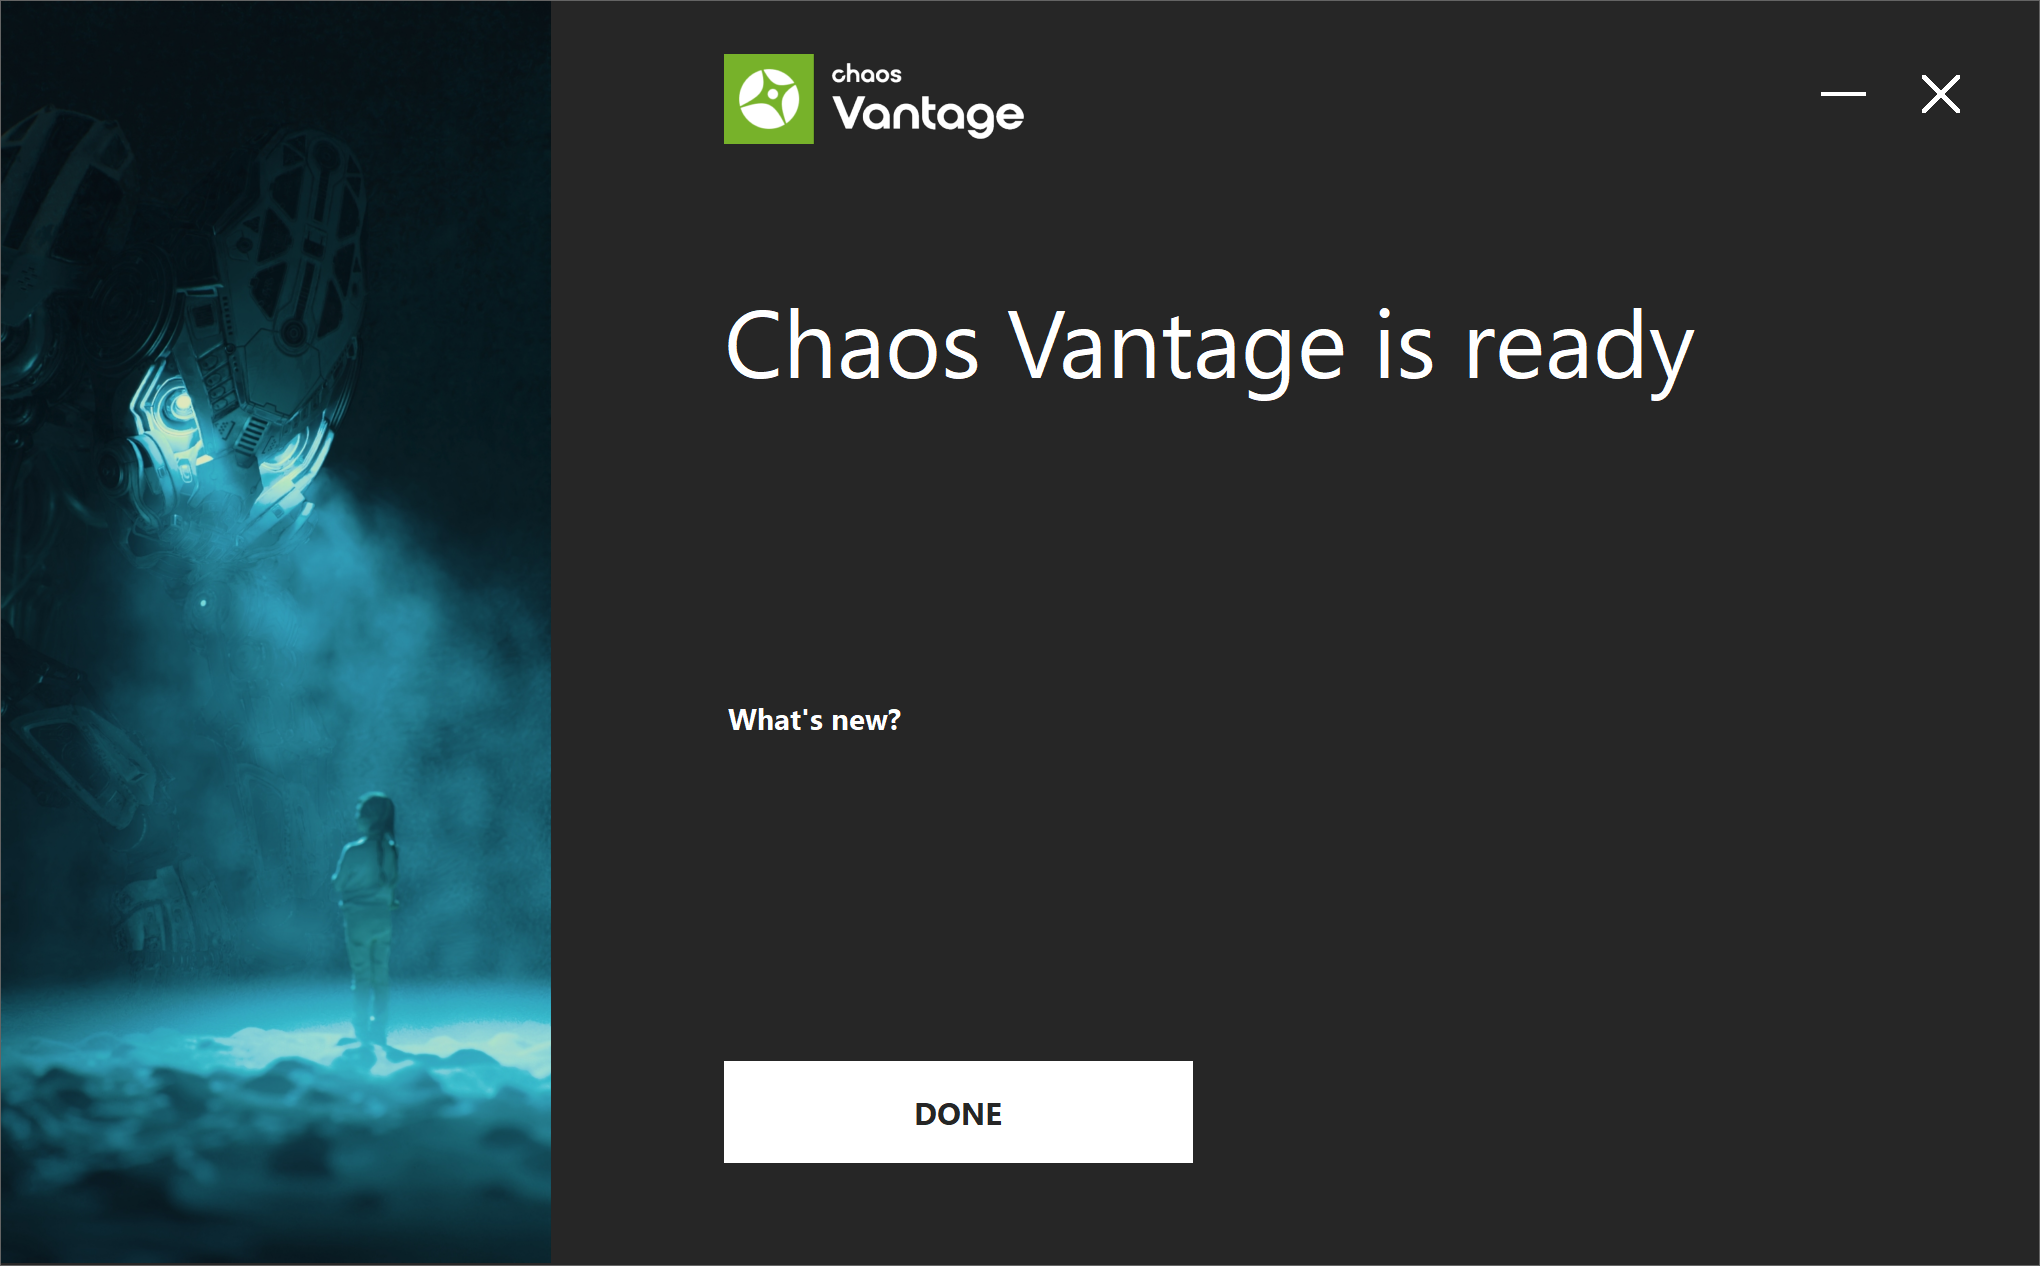
3. If the installation is successful, you will get this screen. Press the Finish buttonClick the Done button.
| Div | ||
|---|---|---|
| ||
|
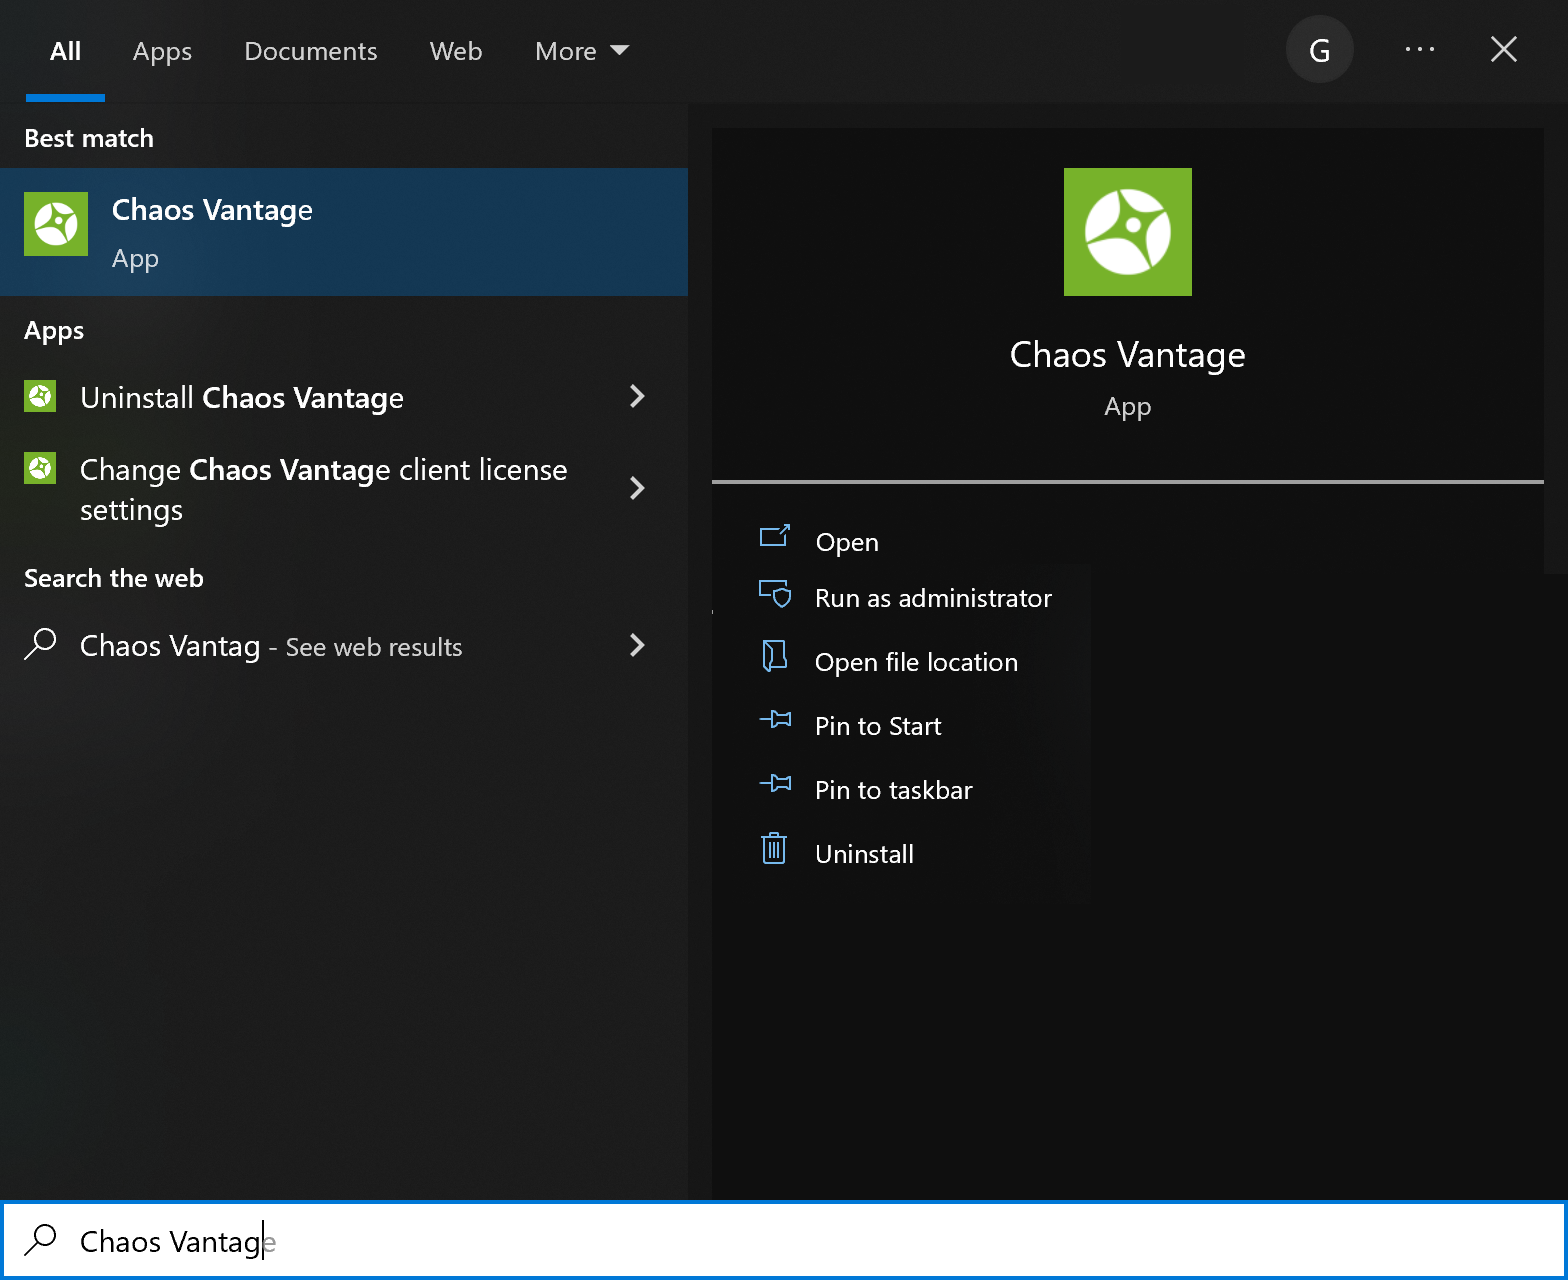
Start
Project LavinaChaos Vantage
| width | 40% |
|---|
Once installed, you can start
Project LavinaChaos Vantage from the Start menu >
Project LavinaChaos Vantage > Start
Project LavinaChaos Vantage or search it directly in the Start menu.
You can also start it from its installation directory. The default directory is C:\Program Files\Chaos Group\
Project LavinaVantage where you can find and execute the
lavinavantage.exe file.
| Div | ||
|---|---|---|
| ||
| 5% | |
| ||
| Column | ||
|