![]()
Page History
...
| Section | ||||||||||||||||||||||||||||||||||||||||||||||||||||||||||||||||||||||
|---|---|---|---|---|---|---|---|---|---|---|---|---|---|---|---|---|---|---|---|---|---|---|---|---|---|---|---|---|---|---|---|---|---|---|---|---|---|---|---|---|---|---|---|---|---|---|---|---|---|---|---|---|---|---|---|---|---|---|---|---|---|---|---|---|---|---|---|---|---|---|
| ||||||||||||||||||||||||||||||||||||||||||||||||||||||||||||||||||||||
| Section |


| ui- | |||||||||||||||||||||||||||||||||||||||||||||||||||||||||||||||||||||||||||||||||||||||||||||||||||||||||||||||||||||||||||||||||||||||||||||||||||||
|---|---|---|---|---|---|---|---|---|---|---|---|---|---|---|---|---|---|---|---|---|---|---|---|---|---|---|---|---|---|---|---|---|---|---|---|---|---|---|---|---|---|---|---|---|---|---|---|---|---|---|---|---|---|---|---|---|---|---|---|---|---|---|---|---|---|---|---|---|---|---|---|---|---|---|---|---|---|---|---|---|---|---|---|---|---|---|---|---|---|---|---|---|---|---|---|---|---|---|---|---|---|---|---|---|---|---|---|---|---|---|---|---|---|---|---|---|---|---|---|---|---|---|---|---|---|---|---|---|---|---|---|---|---|---|---|---|---|---|---|---|---|---|---|---|---|---|---|---|---|
| |||||||||||||||||||||||||||||||||||||||||||||||||||||||||||||||||||||||||||||||||||||||||||||||||||||||||||||||||||||||||||||||||||||||||||||||||||||
| |||||||||||||||||||||||||||||||||||||||||||||||||||||||||||||||||||||||||||||||||||||||||||||||||||||||||||||||||||||||||||||||||||||||||||||||||||||
| ui-text-box | |||||||||||||||||||||||||||||||||||||||||||||||||||||||||||||||||||||||||||||||||||||||||||||||||||||||||||||||||||||||||||||||||||||||||||||||||||||
| |||||||||||||||||||||||||||||||||||||||||||||||||||||||||||||||||||||||||||||||||||||||||||||||||||||||||||||||||||||||||||||||||||||||||||||||||||||
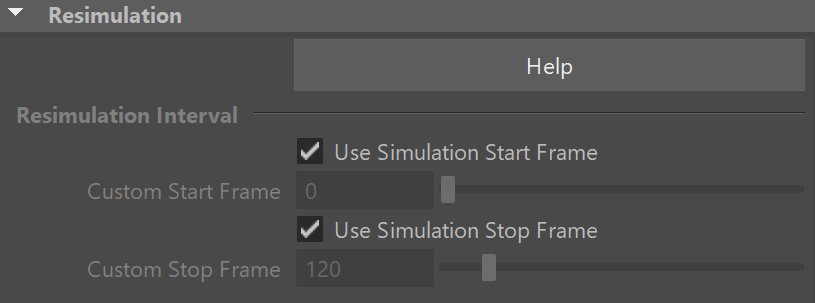
UI Path: ||Select PhoenixFDSim|| > Attribute Editor > Resimulation rollout |


...
Parameters
...
| Section | ||||||||||
|---|---|---|---|---|---|---|---|---|---|---|
|

...
|
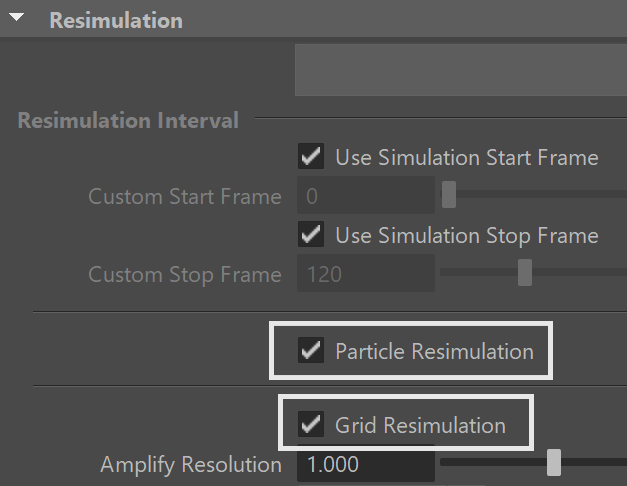
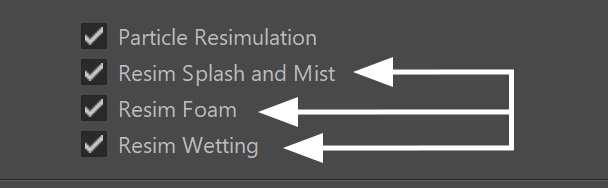
Particle Resimulation
...
| Section | ||||||||||||||||||||||||
|---|---|---|---|---|---|---|---|---|---|---|---|---|---|---|---|---|---|---|---|---|---|---|---|---|
|


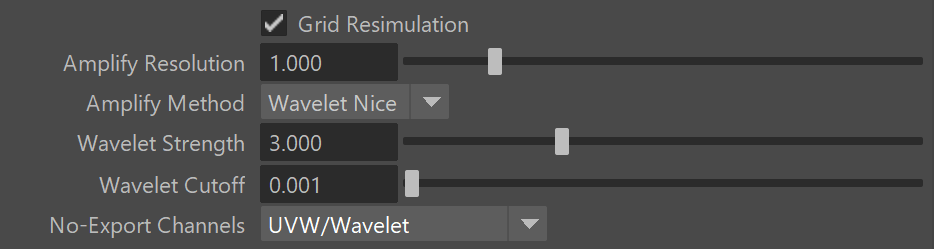
Grid Resimulation
...
| Section | ||||||||||
|---|---|---|---|---|---|---|---|---|---|---|
|
...
| Section | ||||||||||||||||||||||||||||||
|---|---|---|---|---|---|---|---|---|---|---|---|---|---|---|---|---|---|---|---|---|---|---|---|---|---|---|---|---|---|---|
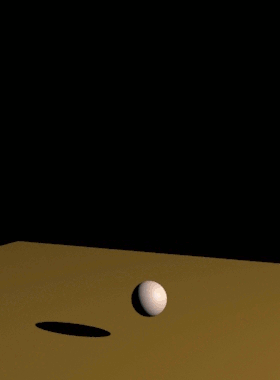
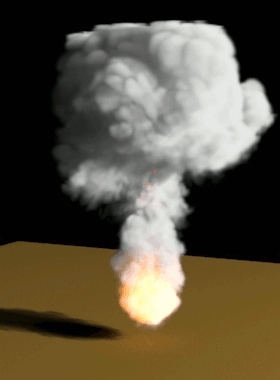
Example: Resimulation with Wavelet Turbulence
|

| Anchor | ||||
|---|---|---|---|---|
|
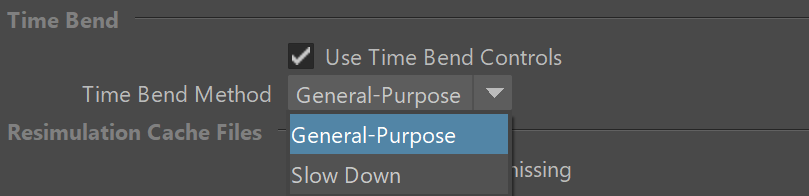
Time Bend Resimulation
...
| Section | ||||||||||
|---|---|---|---|---|---|---|---|---|---|---|
|

| Section | ||||||||||||||||||||||||||||||||||
|---|---|---|---|---|---|---|---|---|---|---|---|---|---|---|---|---|---|---|---|---|---|---|---|---|---|---|---|---|---|---|---|---|---|---|
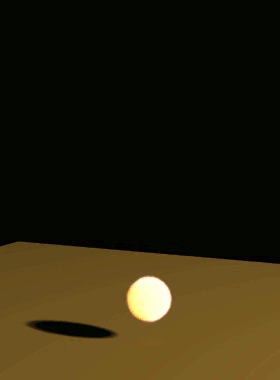
Example: Time Bend Resimulation
|

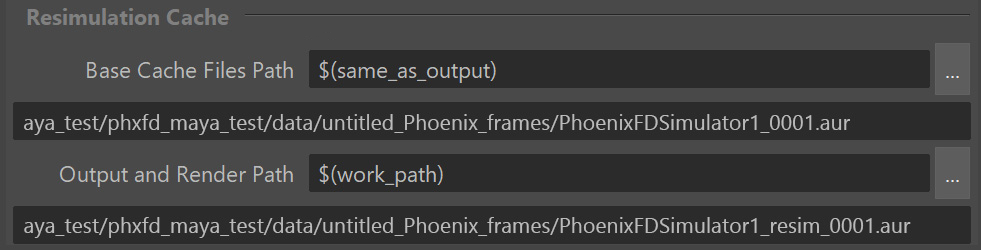
Resimulation Cache
...
| UI Text Box | ||
|---|---|---|
| ||
During resimulation, Phoenix reads cache files from the Base Cache Files Path, performs resimulation operations, and then saves a new cache sequence in the Output and Render Path. For information on changing the default paths for resimulation, see the Tips and Tricks page. |
| Section | ||||||||||||
|---|---|---|---|---|---|---|---|---|---|---|---|---|
|
| UI Text Box | ||
|---|---|---|
| ||
You can use the same Output and Render Path as the Base Cache Files Path, and this way Phoenix will not create a separate cache sequence for resimulation, but will overwrite the base simulation caches instead. It's valid to do so if you need a more complicated setup or when not enough disk space is available. This way you can increase the resolution more and more each time you start a resimulation. |
| UI Text Box | ||
|---|---|---|
| ||
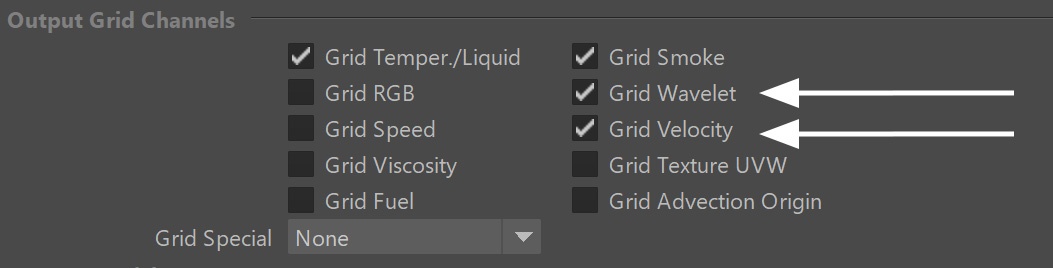
The following error message may appear when you start a re-simulation: "Cannot start the Re-Simulation! Please make sure the simulation was run with the 'Velocity' channel checked under the 'Output' rollout, and that the cache files in the Simulation Input path exist." The reason may be that either the files in the Input Simulation Path do not exist at all, or they do not have Grid Velocity Channel exported when you have simulated them beforehand. Of course, you may use more complicated setups where you resimulate over an already resimulated cache file, or you may Load an existing base cache file as the initial state of the re-simulation. These are all possible; you just need to have velocity in the base cache and an existing path to it. Column | | |
|
