![]()
Page History
This page provides a step-by-step introduction to V-Ray for Unreal.
| Anchor | ||||
|---|---|---|---|---|
|
| Floatingpagetoc |
|---|
Introduction
...
| Section | |||||||||||||||||||
|---|---|---|---|---|---|---|---|---|---|---|---|---|---|---|---|---|---|---|---|
|
...
Tutorial Assets
...
To download the files used in this tutorial, please click on the button below.

Part I - Exporting the vrscene
...
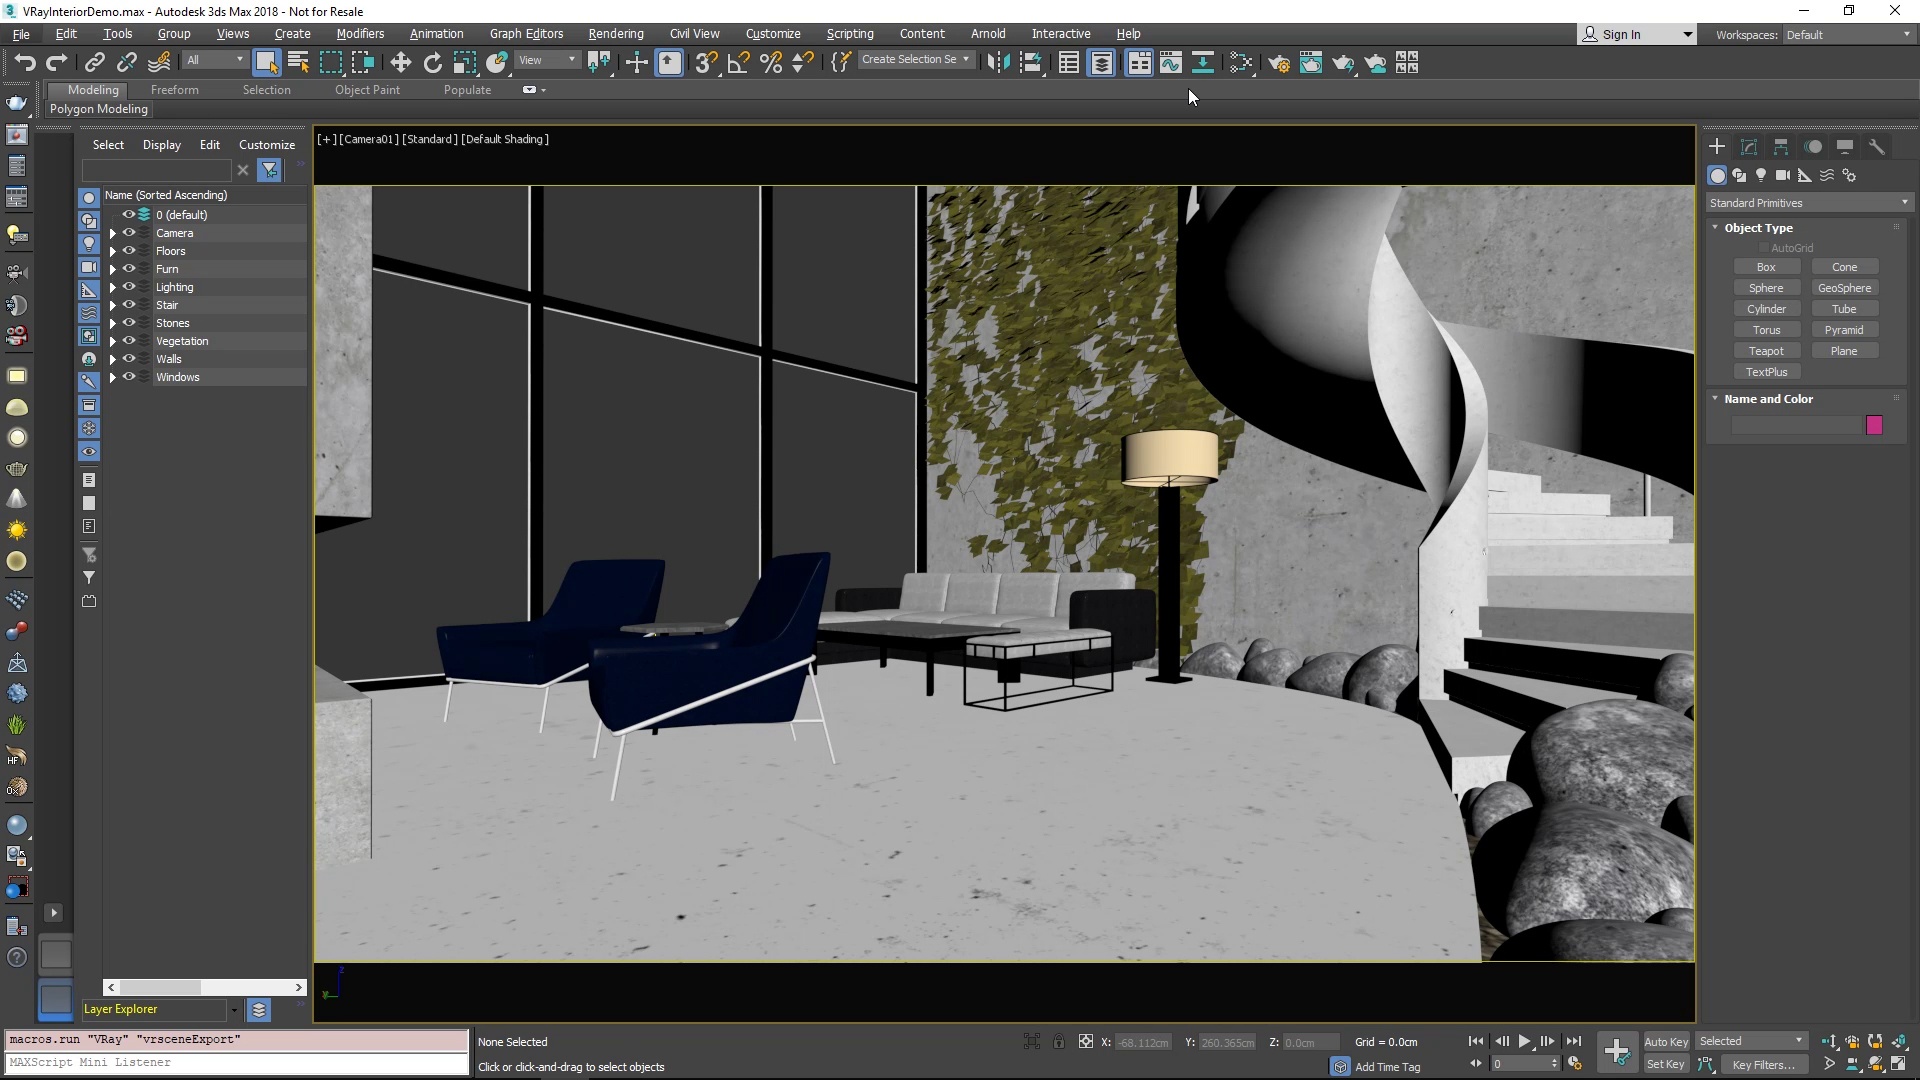
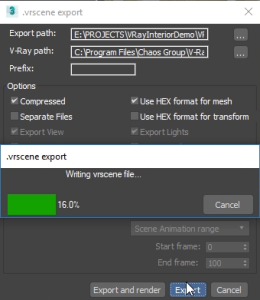
From 3ds max make sure you are looking through the camera you wish to render later in Unreal (1.1). Then you right click and select from the quad menu .vrscene exporter. A new window appears and where you select the export path and other various options. When finished click export (1.2). With this our vrscene is generated and we are ready to import it into Unreal engine.
| Section | ||||||||||
|---|---|---|---|---|---|---|---|---|---|---|
|
...
Step 1. Launch Unreal Engine 4
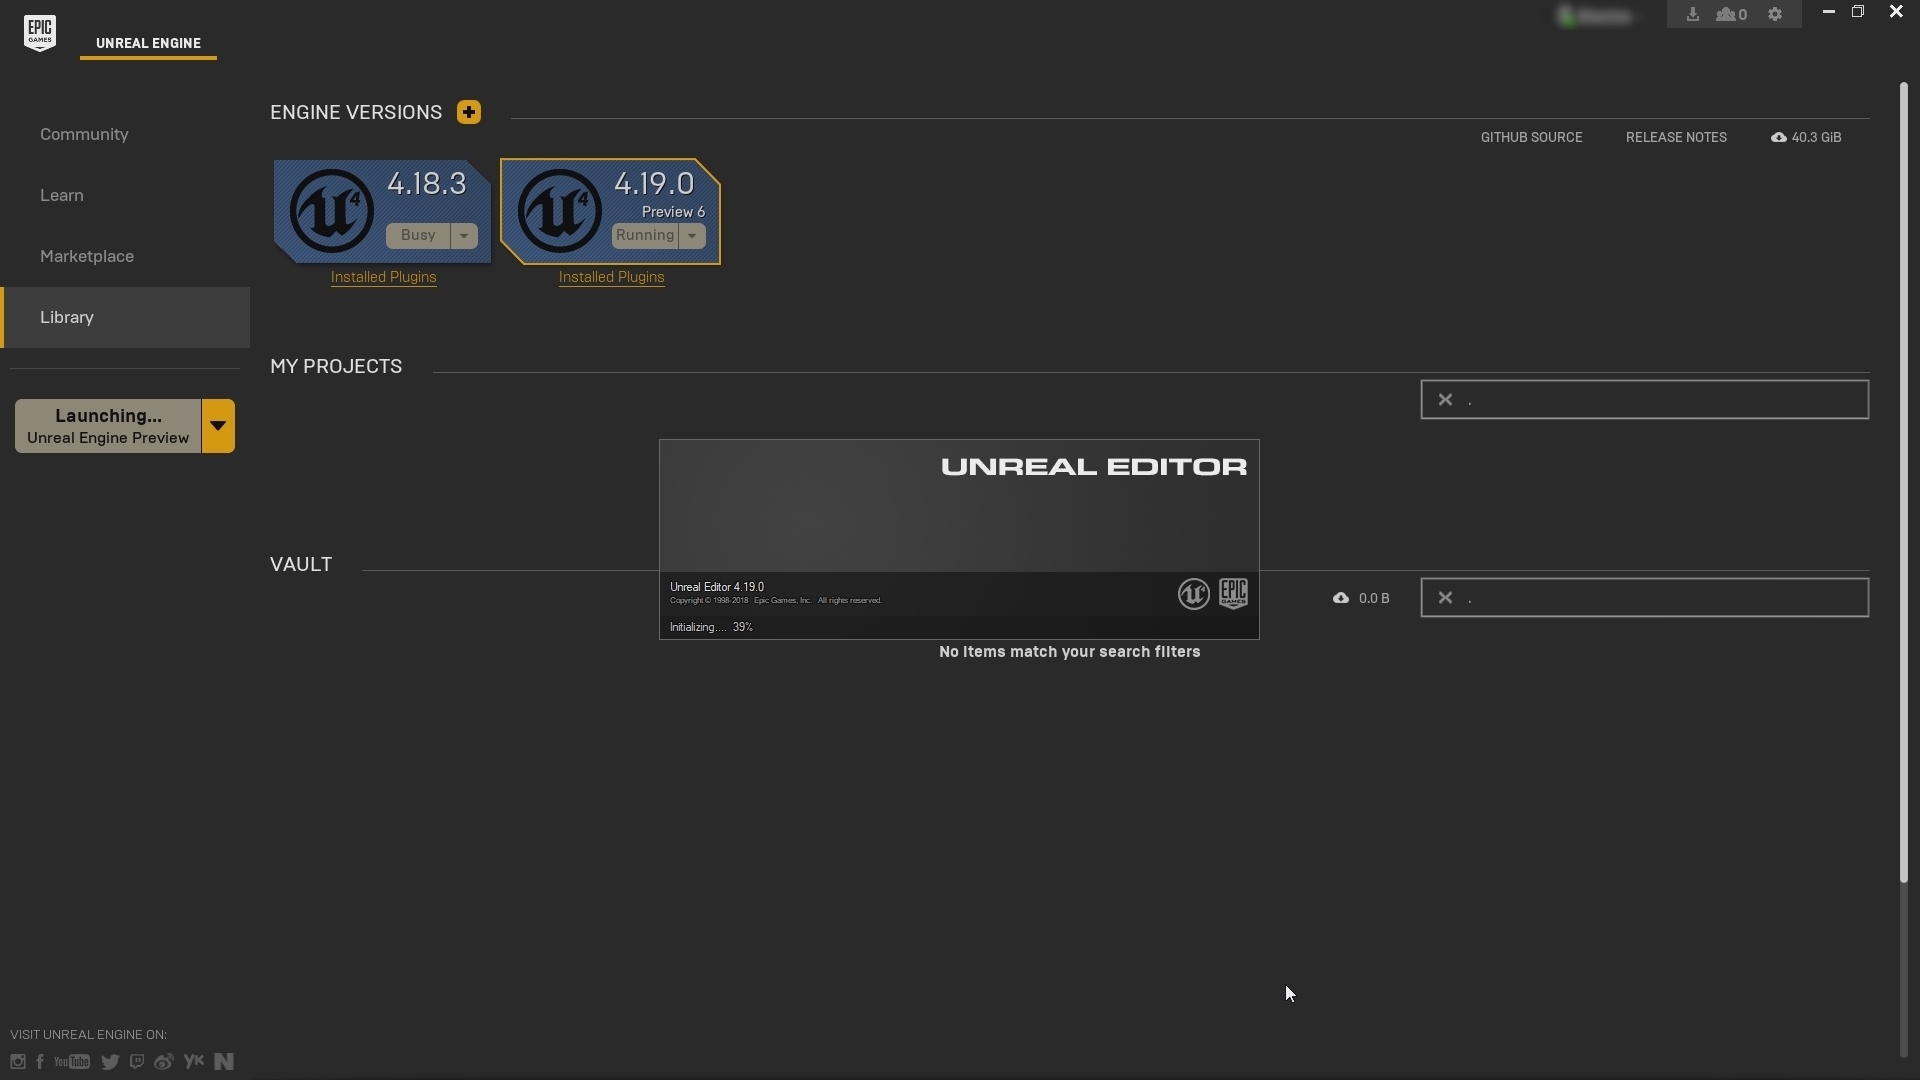
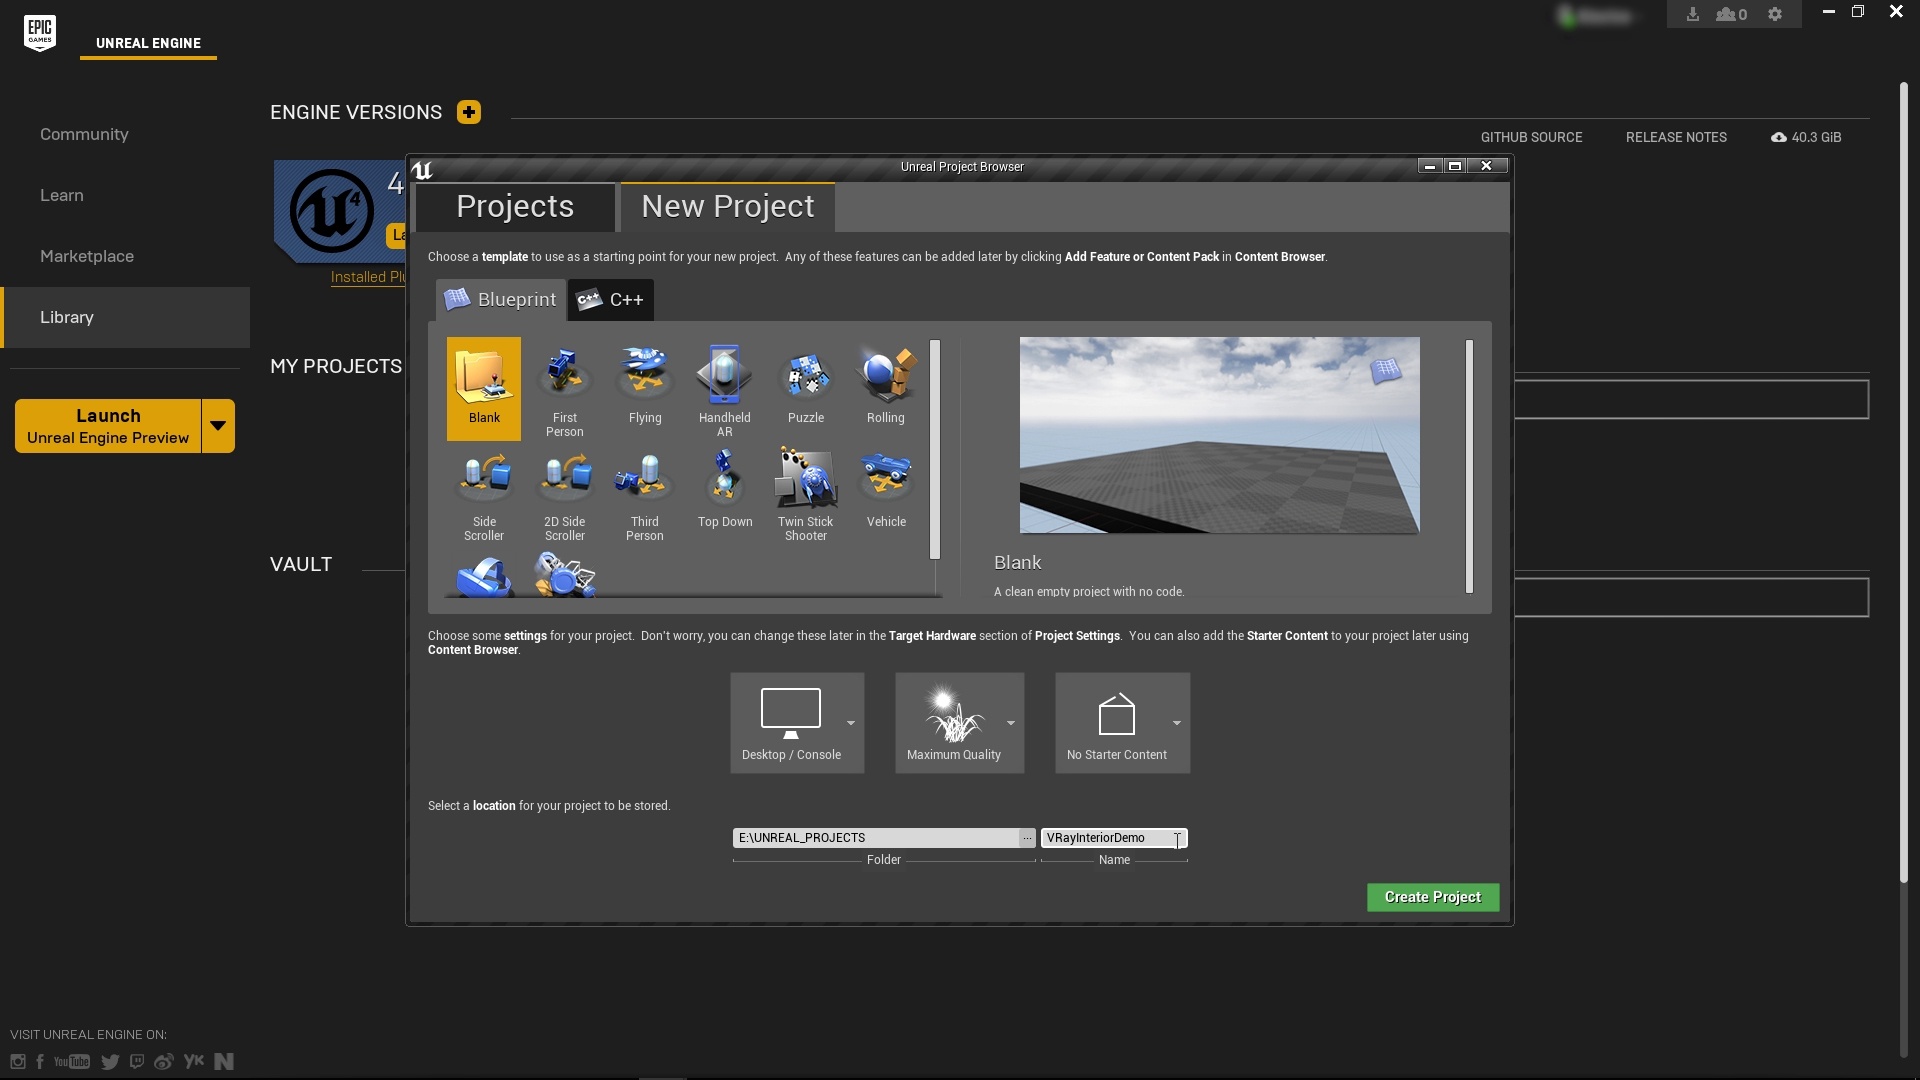
Launch you version of Unreal from the Epic Games Launcher. (currently supported versions are 4.18.3 and 4.19)(1.1). A window appears. In the New Project Tab select the Blank template, Desktop/Console hardware, Maximum quality for the Editor and No Starter Content as initial setup. Choose the directory where you wish to create the project, name it and click the Create Project button (1.2).
| Section | ||||||||||
|---|---|---|---|---|---|---|---|---|---|---|
|
...
Step 2. Enable The V-Ray Plugin
...
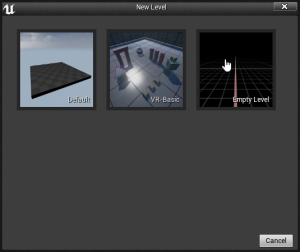
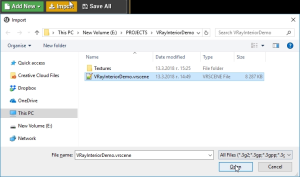
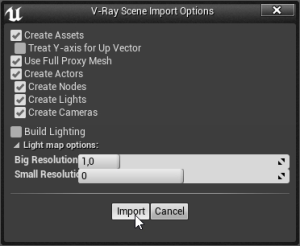
Next create a new level by going to File > New Level > Empty Level (3.1). In the Content Browser create a new folder, name it VRayInteriorDemo and open it. Next click on the Import Button, navigate to the path where you generated the vrscene file and open it (3.2). The V-Ra Scene Import Options dialogue appears (3.3). Use default values and click Import.
| Section | |||||||||||||||
|---|---|---|---|---|---|---|---|---|---|---|---|---|---|---|---|
|
...
| UI Text Box | ||
|---|---|---|
| ||
Be advised that when importing a vrscene for the first time all materials created by V-Ray for Unreal have to be compiled by the Unreal editor (shader compiling message in bottom right hand corner of the screen). This means all materials will not look properly until all shader compilations are finished. This process is part of the standard workflow in Unreal Engine. |
...
Step 4. Test Lightbake
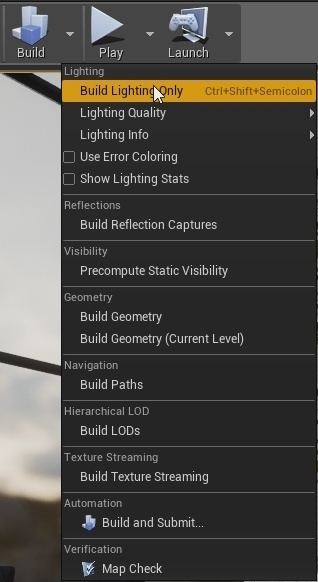
Now do a test light bake to get a feel of the lighting in the scene. The scene contains one VRay Light Dome with an HDRI image plugged into the Dome Tex slot (4.1). Make sure to be on Preview in the Lighting quality to speedup the baking process (4.2). To do a test light bake go to Build options menu > Build Lighting Only (4.3).
| Section | |||||||||||||||
|---|---|---|---|---|---|---|---|---|---|---|---|---|---|---|---|
|


...
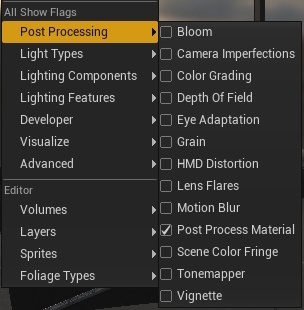
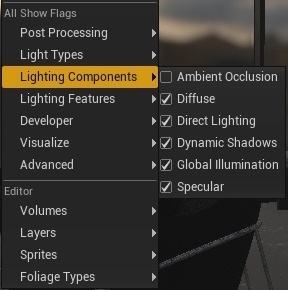
In order to have maximum visual parity between viewport and final render you have to disable some of the Unreal posprocess and lighting components. You can do so from in viewport Show > Post Processing and leave only Postprocess Material (5.1) . From Show > Lighting Component uncheck Ambient Occlusion (5.2).
| Section | ||||||||||
|---|---|---|---|---|---|---|---|---|---|---|
|
...
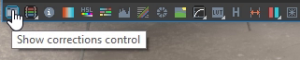
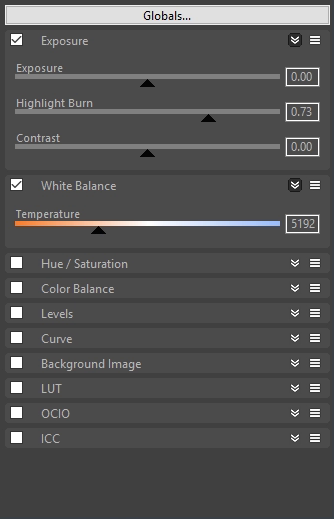
In the VFB, open up the Show Corrections Control panel by clicking on the icon at the bottom right of the window (2.1). Here you'll be able to fine-tune the render by turning on and manipulating the parameters. Tune down the Highlight Burn in the Exposure tab. Adjust the White Balance to turn down the warmth in the image (2.2). For more details see documentation on V-Ray Frame Buffer.
| Section | ||||||||||
|---|---|---|---|---|---|---|---|---|---|---|
|
...
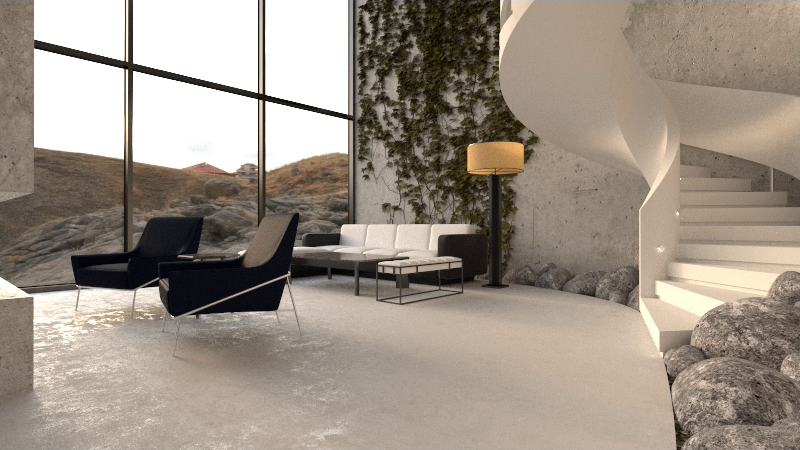
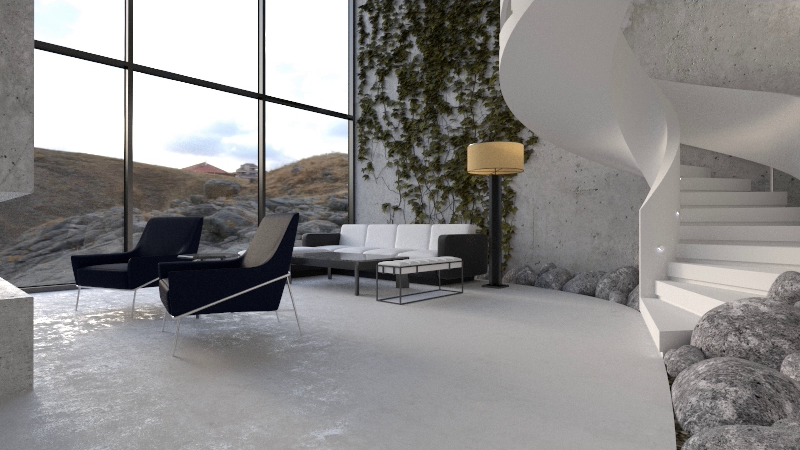
Check the final result with and without to see the difference (2.3).
| Section | |||||||||||||||||||||||||||||||||||
|---|---|---|---|---|---|---|---|---|---|---|---|---|---|---|---|---|---|---|---|---|---|---|---|---|---|---|---|---|---|---|---|---|---|---|---|
|
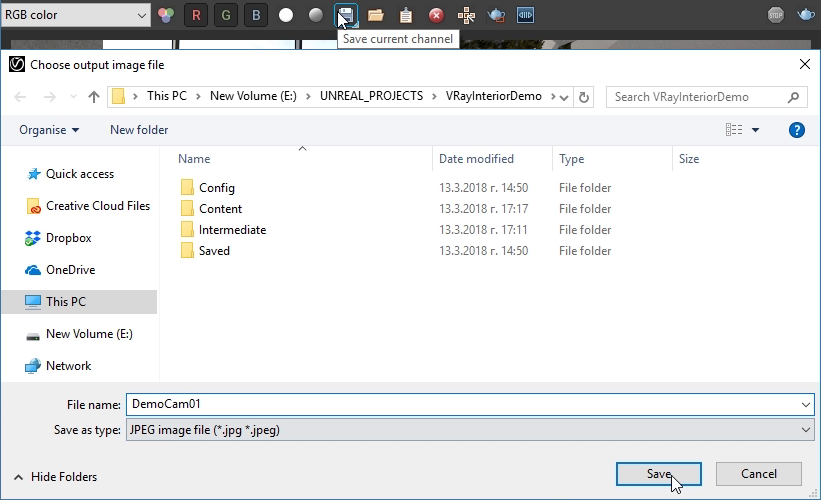
Step 3. Save the Render
Now that the render’s done, from the VFB by click the Save button and select any of these image formats. We’ll select JPG here.
| Section | |||||
|---|---|---|---|---|---|
|
...