![]()
Page History
This page provides a detailed QuickStart guide to using V-Ray lights in Nuke.
Page Contents
| Table of Contents | ||
|---|---|---|
|
Overview
...
In this tutorial we are going take a look at the V-Ray lights in V-Ray for Nuke. In the Lights menu are are several options, which we explore in this tutorial:
...
| Align | ||
|---|---|---|
| ||
|
...
Tutorial Assets
...
To download the files used in this tutorial, please click on the button below.
| Note |
|---|
Due to licensing issues, the Road_A.hdr file used in the tutorial video is not included in the downloadable assets. Instead, please use one of the provided HDR images in its place. |
Tutorial Steps
...
1) Adjusting the VRayLightDome
...
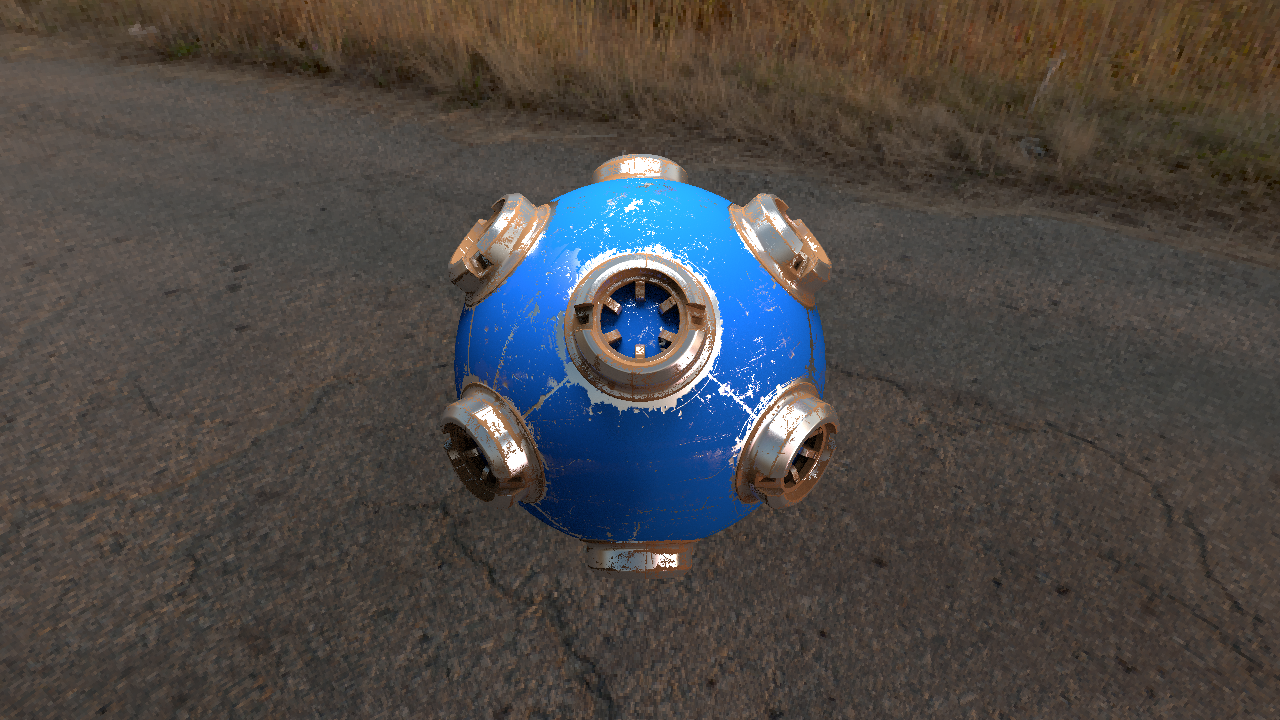
Enable the Dome Spherical checkbox to make the VRayLightDome a sphere. You now have a full sphere with the HDR texture lighting the geometry and filling in these areas with light. Disable the Invisible checkbox so the HDR is visible as a texture on the VRayLightDome. The HDR is now both above and below the geometry, and wraps around it as a full sphere.
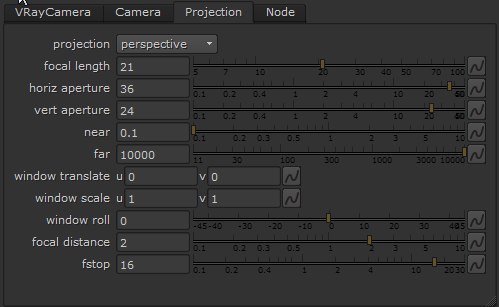 Focal length properties
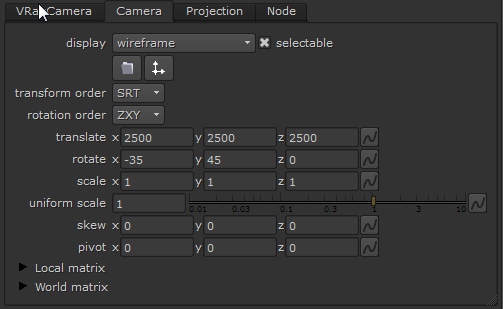 eVRayCamera translate and rotate values
Change the camera angle by clicking the VRayCamera and changing the x rotate value under the Camera tab of the VRayCamera properties from -35 to -15. Now you can see the horizon on the HDR. To see this in the render, disable the Dome Spherical checkbox so that the VRayLightDome is a hemisphere.
Enable the Dome Spherical checkbox again, and reposition the x rotate value back to -35. Disconnect this light from the scene for now and move it to one side so it doesn’t get in the way.
 VRayLightDome with Dome Spherical checked
...
You’ll notice that the light isn’t illuminating things at all at this stage. The brightness level can be changed by either increasing the light’s Intensity value or by adjusting the scale for the VRayLightRect. In this case we have a very large scene, so it makes more sense to increase the uniform scale value under the Axis tab. Change the uniform scale value to 1000. Now you should be able to see the VRayLightRect lighting the geometry from above.
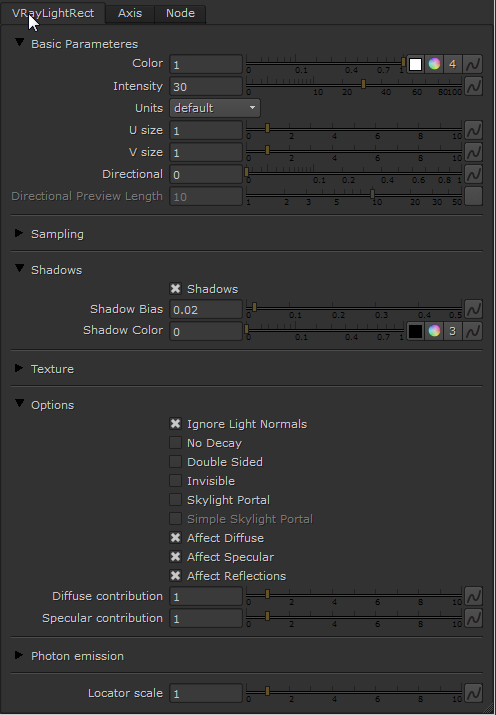 VRayLightRect properties
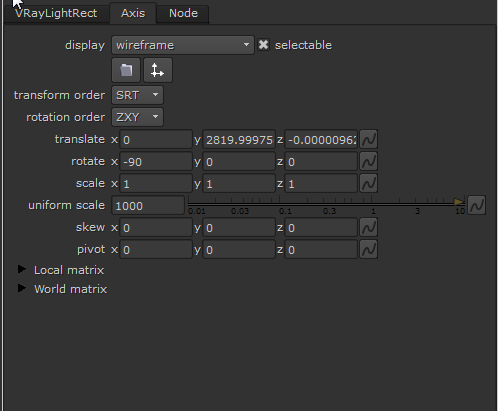
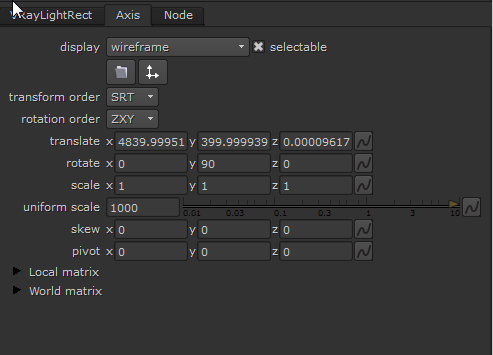
VRayLightRect position and rotate values
 VRayLightRect2 position and rotation
Duplicate the VRayLightRect and connect this new light into the Lights scene. Right now this new light has exactly the same position and intensity as the version you copied it from. You are going to change this so that the new light illuminates the geometry from the side. First, press Pause on the interface to stop Nuke from updating the render in the viewer while you work on the VRayLightRect settings. Grab the new VRayLightRect, move it to the right in the 3D view, and pull it downwards in the Z axis so it’s level with the geometry as shown:
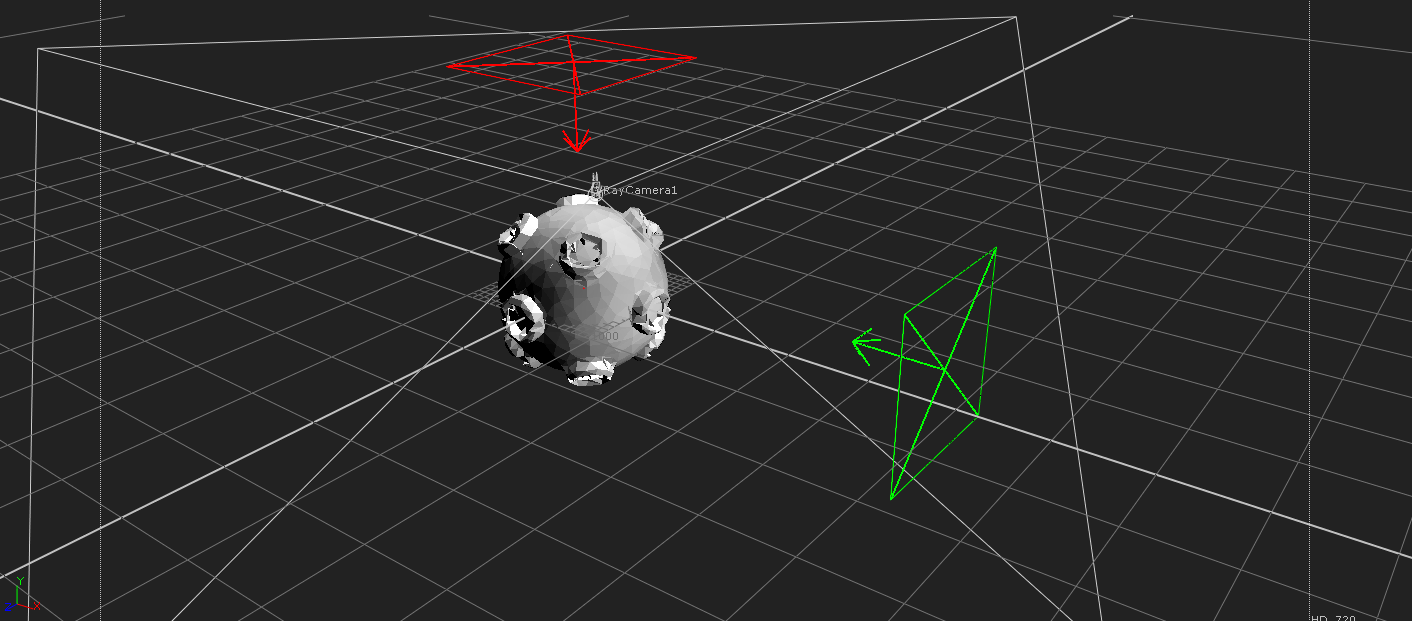
VRayLightRect2 position
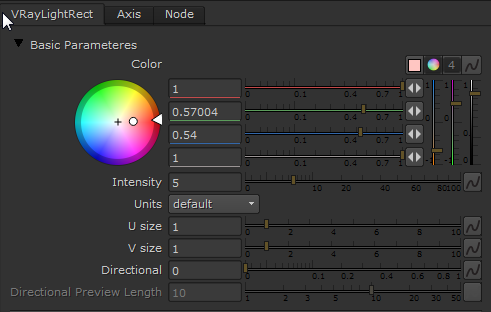
Under the Axis tab, change the rotate values to 0, -90, and 0 for x, y, and z respectively. To make this light less intense and not as strong as the first VRayLightRect, change its Intensity value to 5. Let’s change the color produced by this light by clicking on the color wheel button and changing the color to a warm red color. It’s a good idea to disable the other VRayLightRect (by hovering over it and pressing the D key) so we can see exactly how the second light is affecting the scene while we make any tweaks or changes to its color. We are aiming for a warm color as shown, without it being too saturated.
VRayLightRect2 light color settings
...
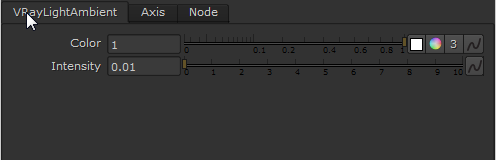
You will notice that this light’s default intensity is very strong and flattens out the lighting. Change its Intensity value to 0.01. This lights the dark areas in the render so that you don’t have total blackness in those parts of the image. At this low intensity, the effect is very subtle.
VRayLightAmbient properties
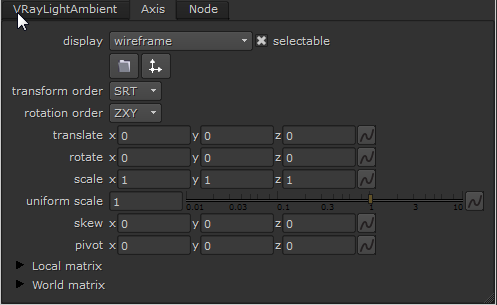
VRayLightAmbient position
If you change the connection over from the VRayLightAmbient to the VRayLightDome (with the HDR connected to its tex slot) you can compare how the fill lighting compares. If you drag and select each VRayLightRect and enable and disable it, you can see how each of those lights affect the scene.
...
Add a VRayLightSphere (a point source light) into the Nuke script and connect it to the Lights scene. Disable all the other lights in the Nuke script so you can work on setting up the VRayLightSphere on its own. In the 3D view, move this light over to the right a little. As this is a large scene, we will need to scale up the light by changing the uniform scale value to 100.
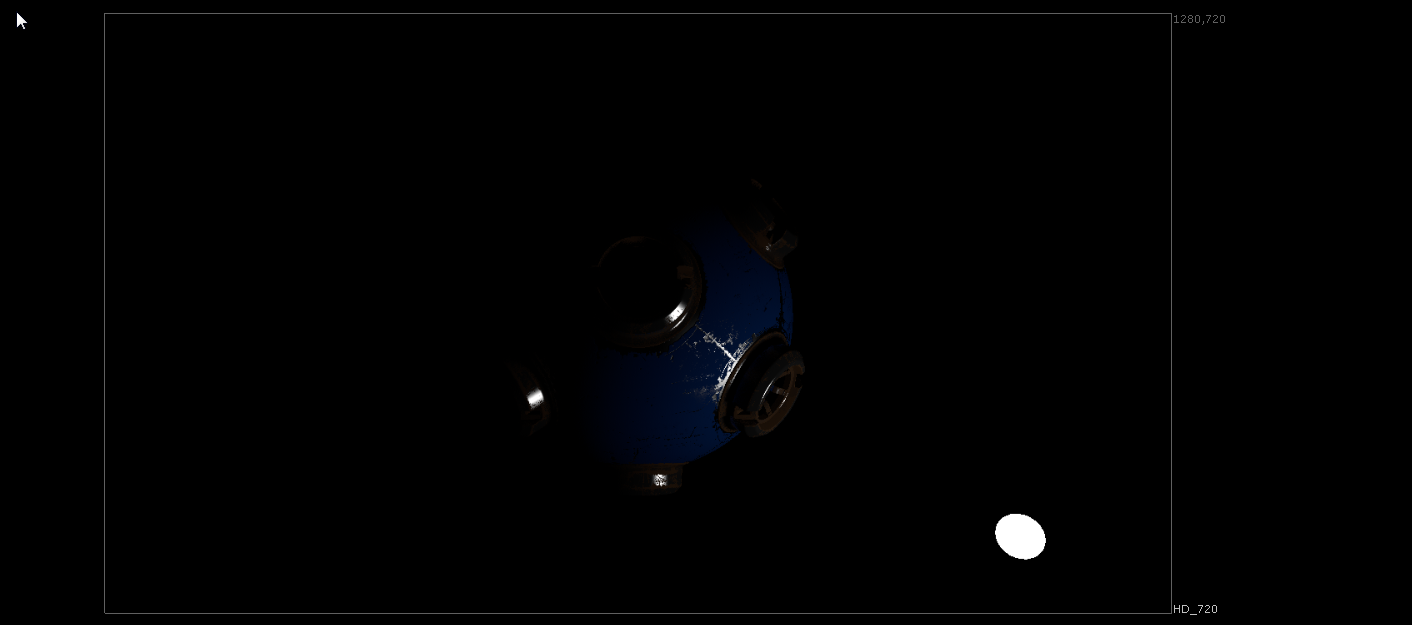
VRayLightSphere visible in the render
You will now be able to see the VRayLightSphere lighting the geometry, but you can also see the light itself in the render. Under the Options section for the VRayLightSphere, enable the Invisible checkbox. You will notice that although the light is still lighting the geometry, it is no longer visible in the render.
VRayLightSphere now invisible in the render
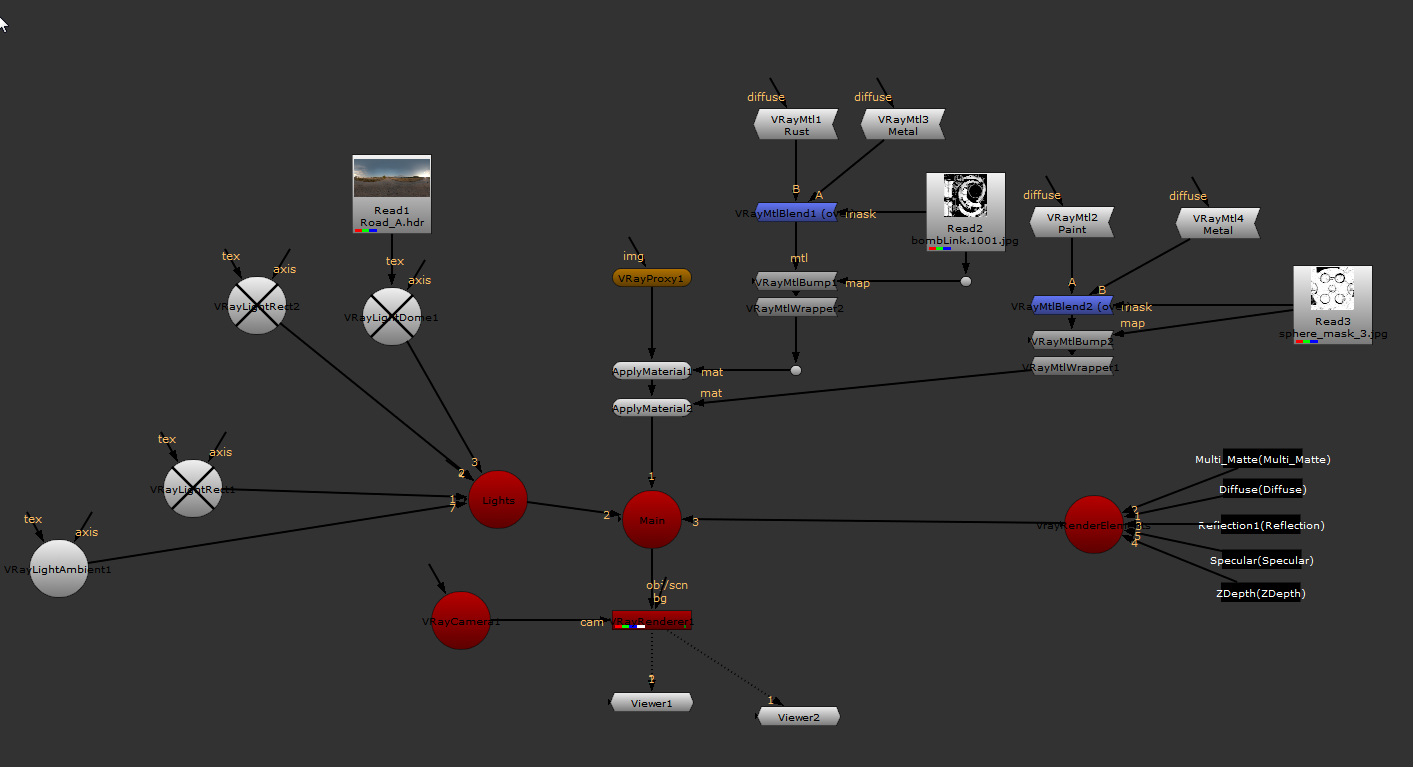
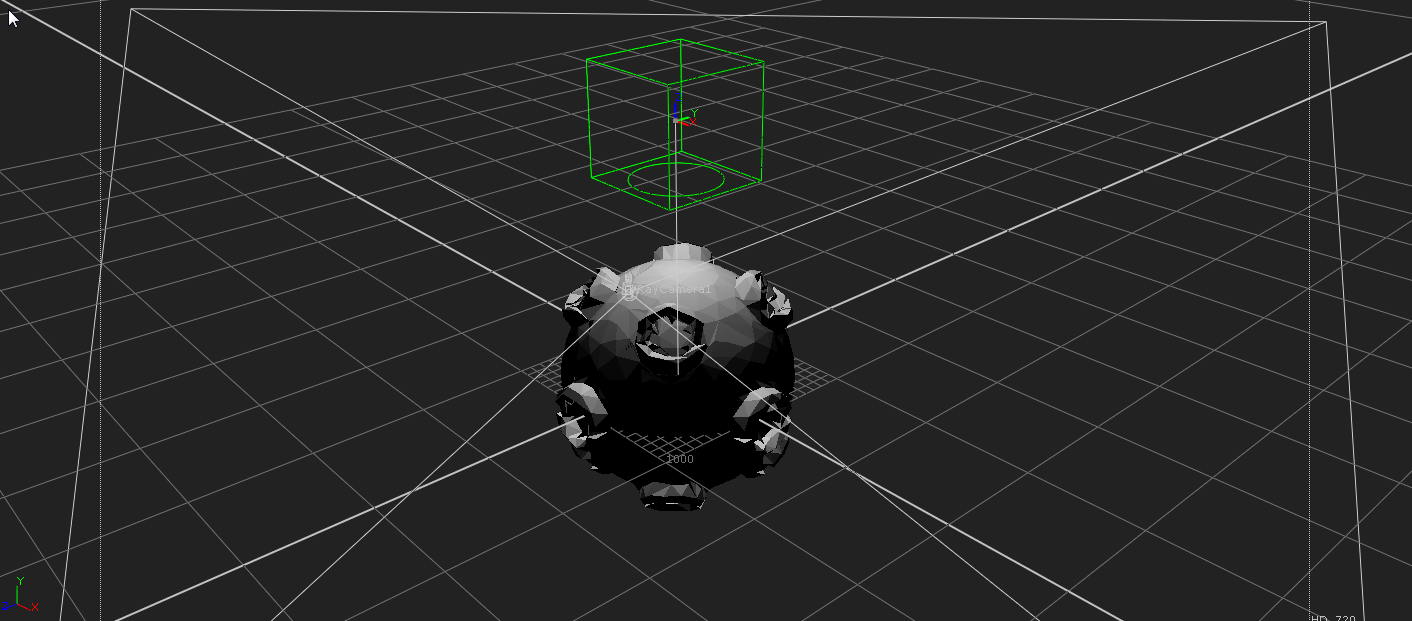
The layout of the Nuke script so far
...
An IES file is a descriptor of a real world light. In the properties for this light, browse for the Overhead.IES file so it is used to illuminate the scene.
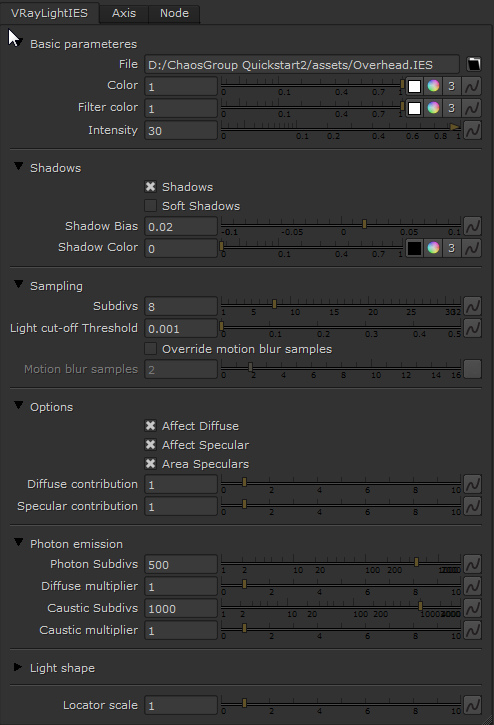
VRayLightIES properties
Move this light up above the geometry change its uniform scale value to 1000. You can tell which way it is pointing by looking at the circle on the shape that represents the VRayLightIES. As you can see, it’s currently not pointing at the geometry. Change its rotate x value under the Axis tab to -90 to make the light point at the geometry.
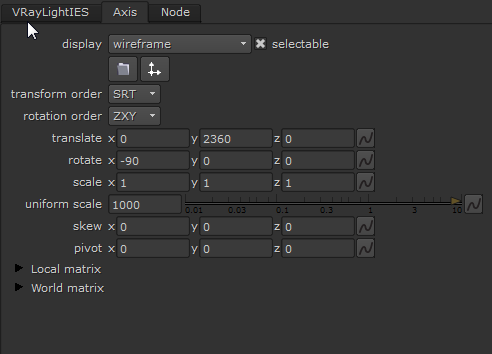
VRayLightIES position
Once again you should now have the light pointing at the geometry from the top, which you will now be able to see in the render.
The VRayLightIES’s position in the 3D viewport
...
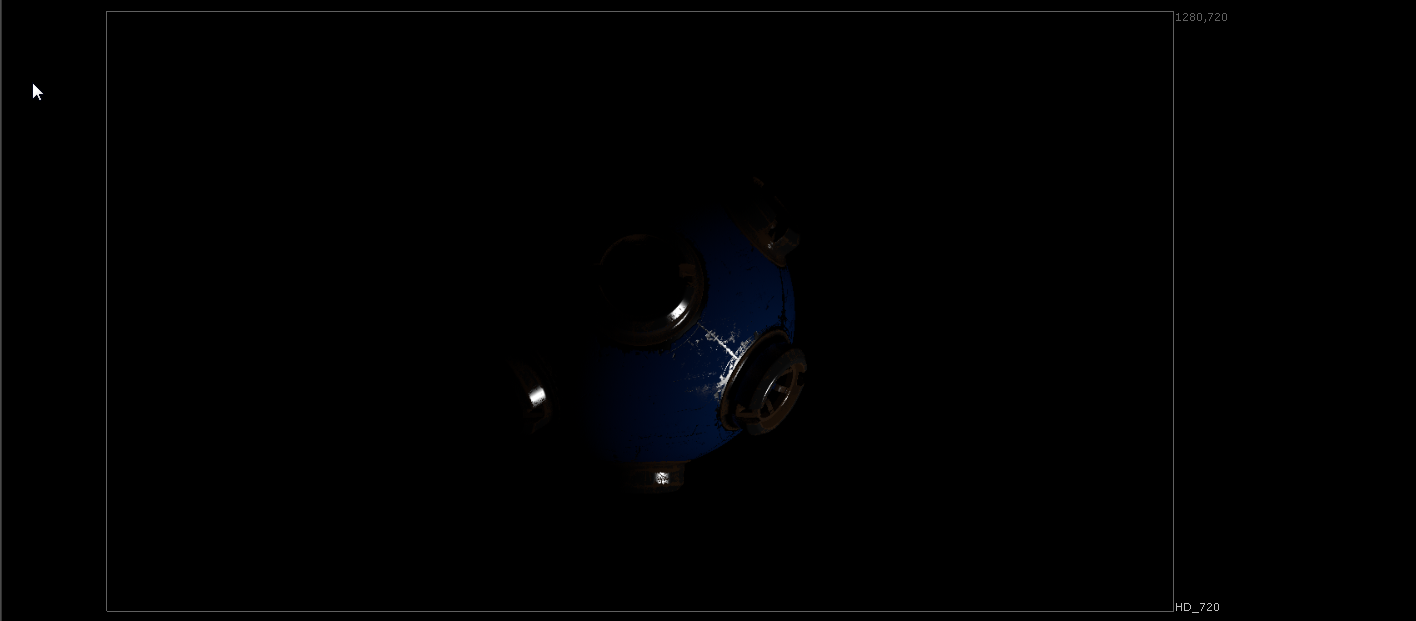
Now that you can see the VRayLightIES’s lighting contribution to the render, we can turn its Intensity value up to 30. You’ll now notice that its lighting contribution is considerably brighter.
The lighting using the Overhead.IES file in the VRayLightIES
...
Swap the Overhead.IES file out for a pear-shaped IES light by clicking on the VRayLightIES node and then browsing for pear.IES. You should be able to see the difference in the light shape in the render.
 Lighting using pear.IES file in the VRayLightIES
...
Let’s check out the VRayLightMesh next. This allows any mesh to be used as a light source within the Nuke script. Add a VRayLightMesh node into the Nuke script and connect it to the Lights scene. Add a Cube node (which we will use as geometry for the VRayLightMesh) and connect this to the mesh input of the VRayLightMesh node.
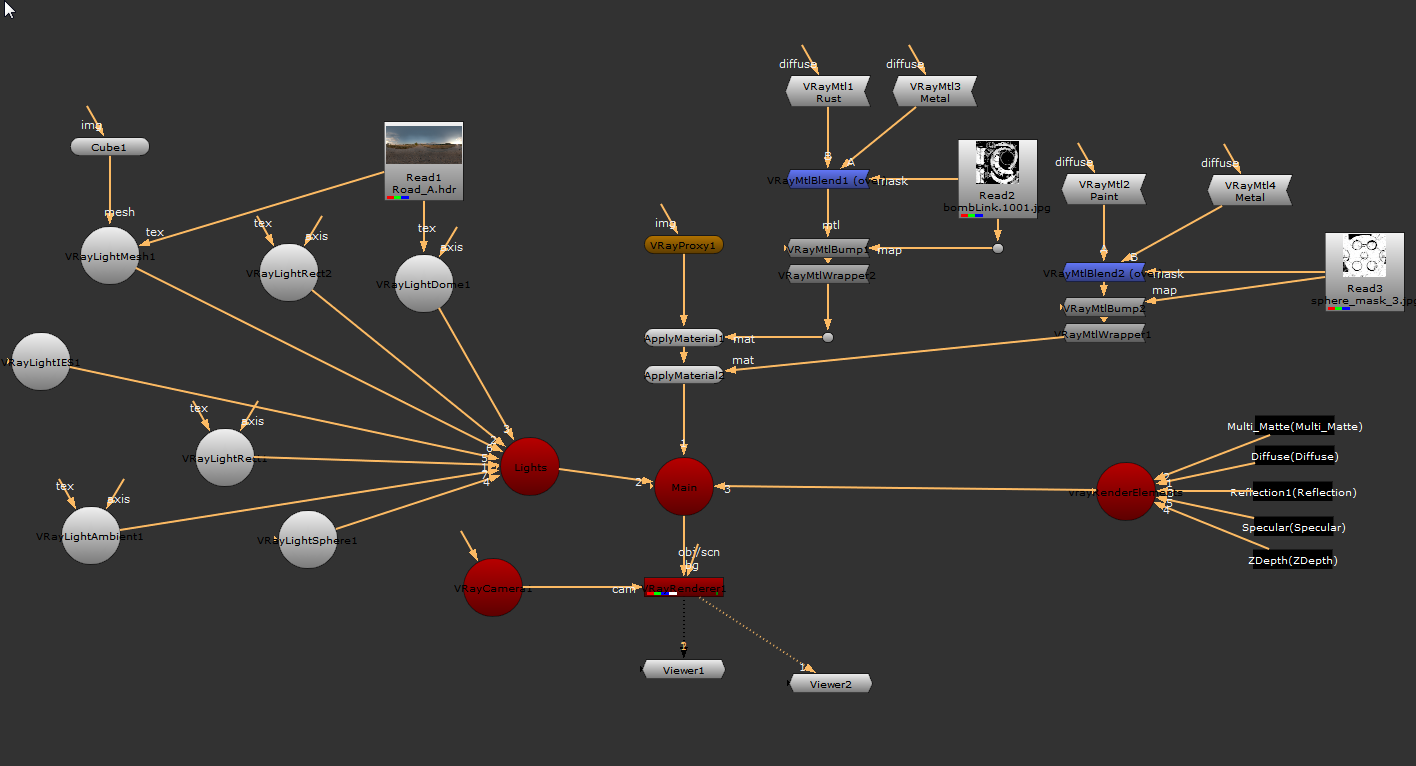
Final Scene layout of the Nuke script
...
Move the VRayLightMesh up on the Y axis in the 3D view, and move it to one side on the X axis. Now once again the scale is too small for the large scene scale, so change the uniform scale under the Axis tab to 500. Connect the tex input of the VRayLightMesh to the Road_A.HDR that we have been using so far in all the QuickStart videos. You can now see that the VRayLightMesh is both illuminating the render and also is visible in the render. Go to the main properties for the VRayLightMesh and enable the Invisible option. You will no longer be able to see the VRayLightMesh within the renders, even though it is still lighting the scene.
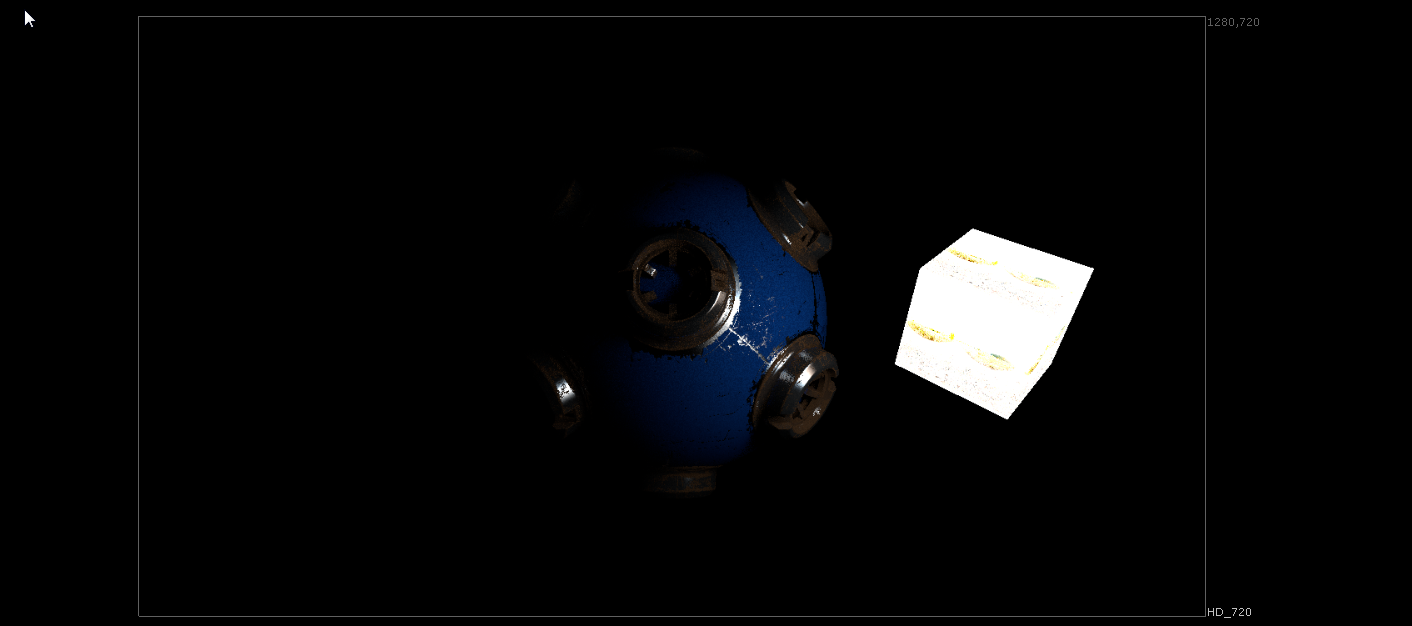
The VRayLightMesh visible in the render prior to setting it to Invisible
...
Return the viewer to normal once again and enable the Invisible checkbox.

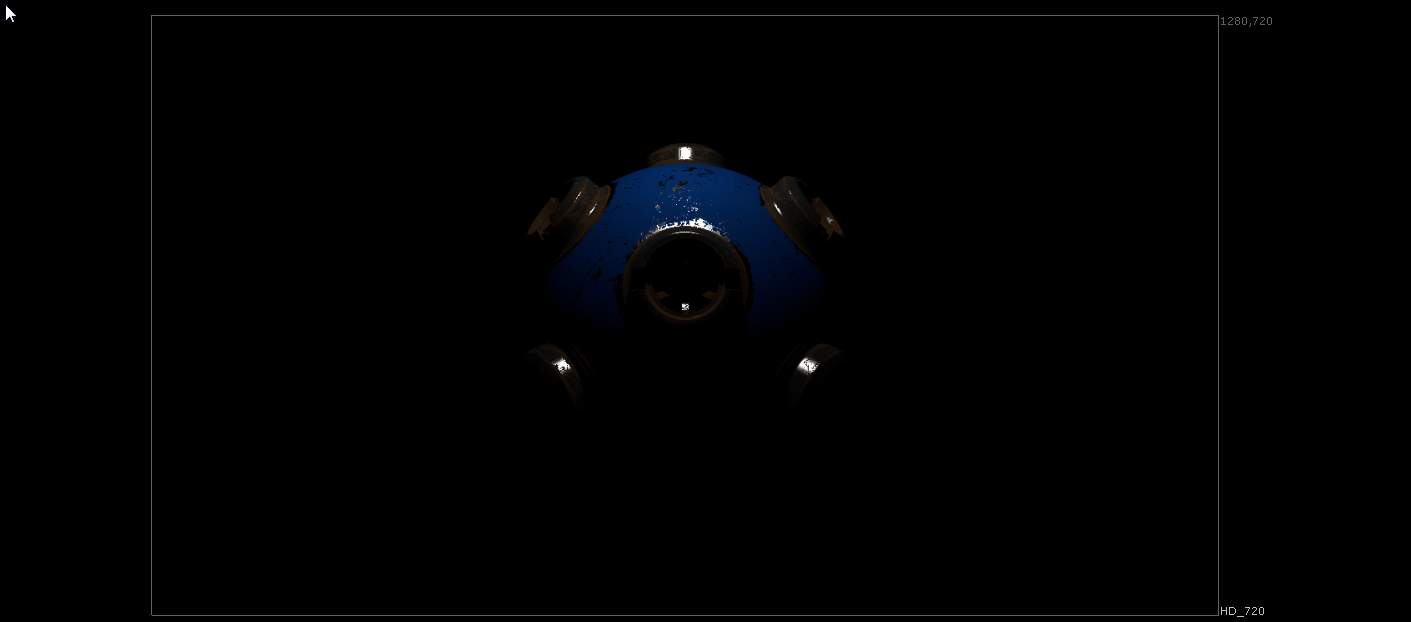
With viewport exposure turned down, light from texture on the mesh is visible
...
The Cube we are using as the mesh input for this light could be moved around or even animated. If you have an animated mesh object in your scene, you could have that object produce light within the render.
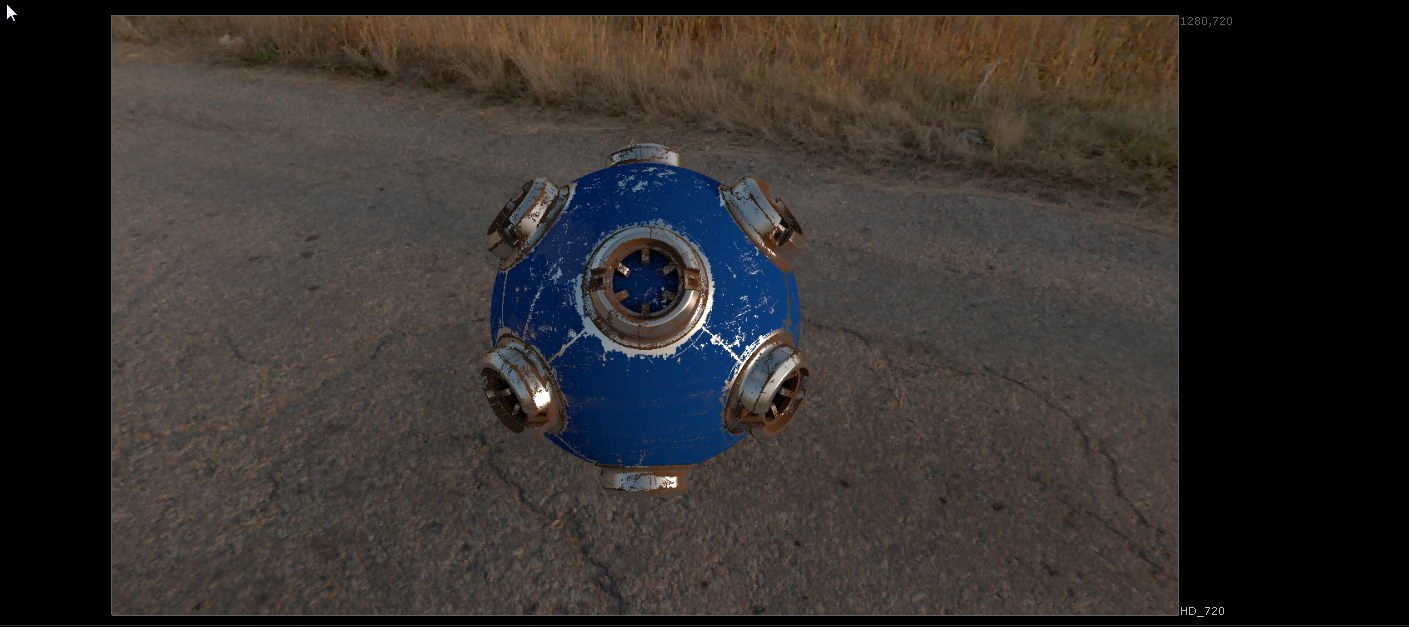
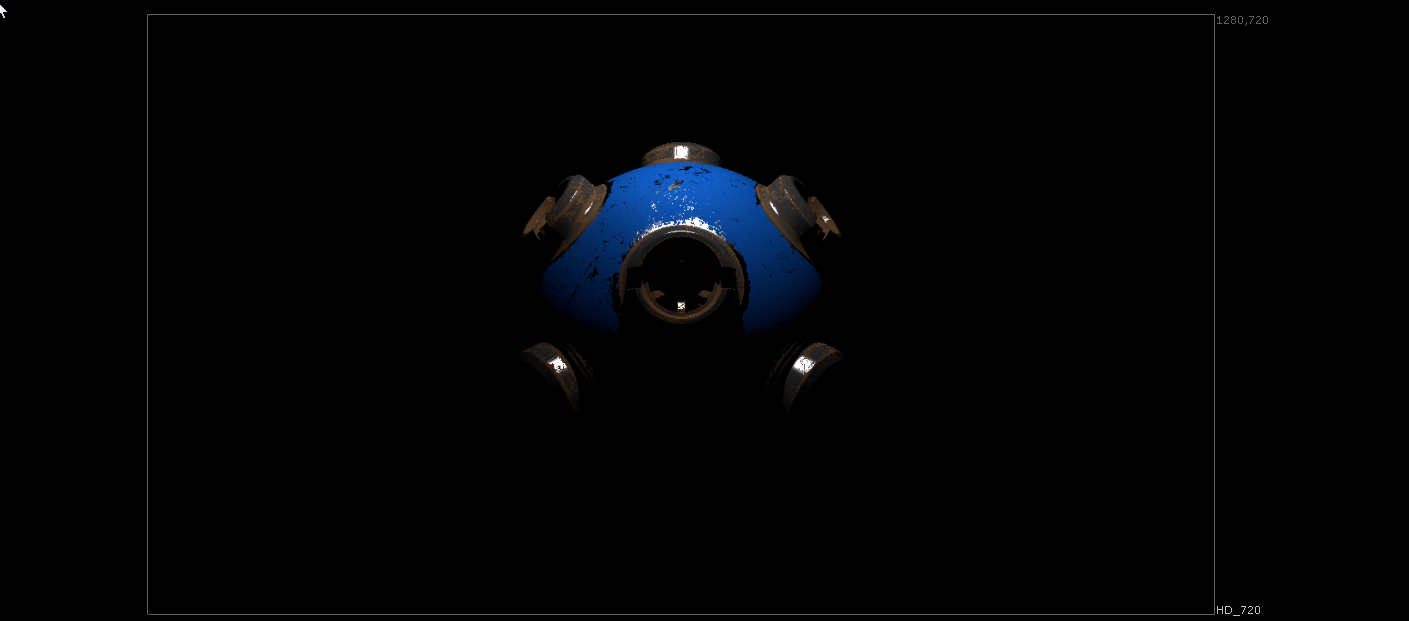
Final render with all lights active
...
In this tutorial, we have covered all the different light types that come with V-Ray for Nuke and how you can use them to light a scene.