![]()
Page History
This page provides a QuickStart guide to using V-Ray Materials and Textures in Nuke.
Page Contents
Table of Contents style circle
Introduction
...
In this tutorial we are going to show V-Ray for Nuke’s ability to generate a rendered element. We’ll also take a look at the VRayMaterialPreview node and how it can be used to rapidly develop the look of a shader using just the VRayMaterialPreview node and a VRayMtl node or shading network that you create, without having to set up an entire scene.
To follow this tutorial, you will need to have the V-Ray for Nuke plugin installed. This tutorial is a companion to go along with the QuickStart video posted on our YouTube channel.
| Align | ||
|---|---|---|
| ||
|
Tutorial Assets
...
To download the files used in this tutorial, please click on the button below.

| Note |
|---|
Due to licensing issues, the Road_A.hdr file used in the tutorial video is not included in the downloadable assets. Instead, please use one of the provided HDR images in its place. |
...
In a similar way, we can change the HDR used to any of a number of presets via the HDR dropdown, and the entire HDR can be rotated using the Light Rotation slider. We can also change the Format via its dropdown from the default setting of 128x128 to a higher resolution such as 256x256 or 512x512 so you can see more detail.
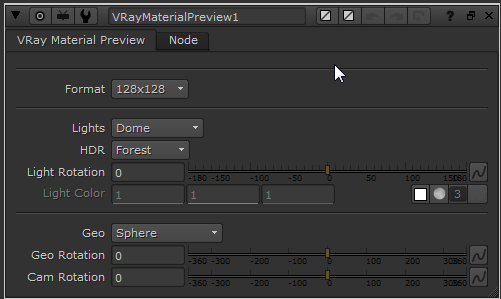 VRayMaterialPreview Default settings
...
You can use the VRayMaterialPreview to preview and help us develop a V-Ray material. Create a VRayMtl node and connect it to the material slot on the VRayMaterialPreview node. This simple, fast setup aids in developing the look of a material without your having to set up any other nodes.
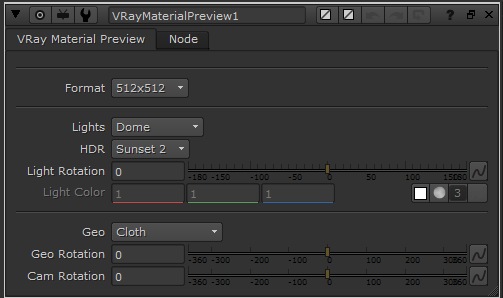
VRayMaterialPreview node properties
Click the VrayMtl1 node and change the Diffuse Color values to 1, 0.25, 0.25, and 0.5. The change is represented in the VRayMaterialPreview render using both the selected HDR (complete with the rotation we set) and the Cloth geometry that we set in the Geo dropdown.
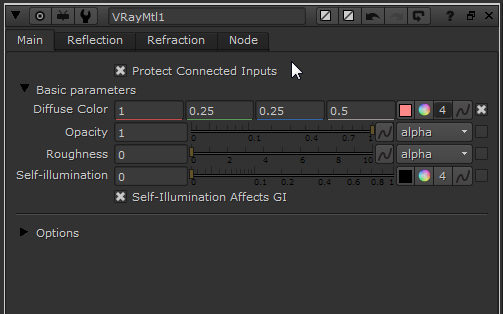
VRayMtl1 Main tab properties
...
Move to the Reflection tab and change the Reflection Color value to 0.5. This change is also represented in the VRayMaterialPreview render.
This is just one simple example; the VRayMaterialPreview node can also develop complex V-Ray materials.
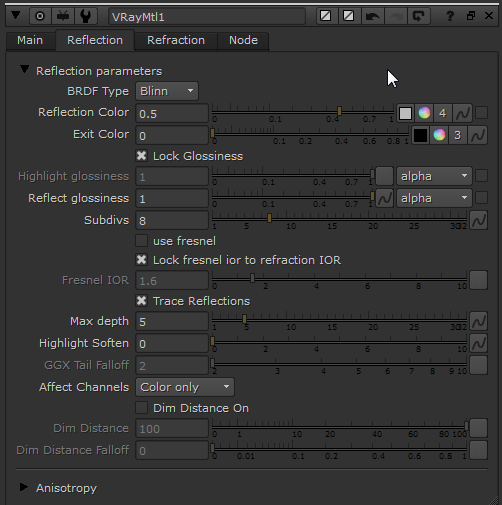
VRayMtl1 Reflection tab properties
3) Setting up the main scene – Starting the basic setup
...
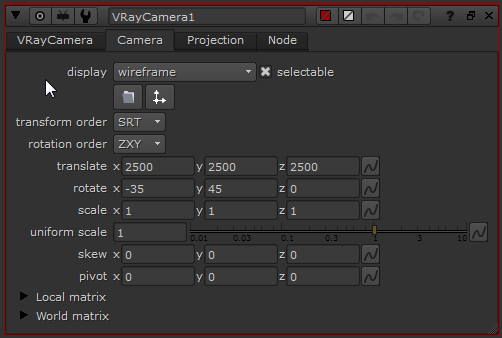
Create a VRayCamera and set all three translate values to 2500. In the rotate values, set x to -45 and y to 35. This will enable you to see the geometry when you load it.
VRayCamera Properties
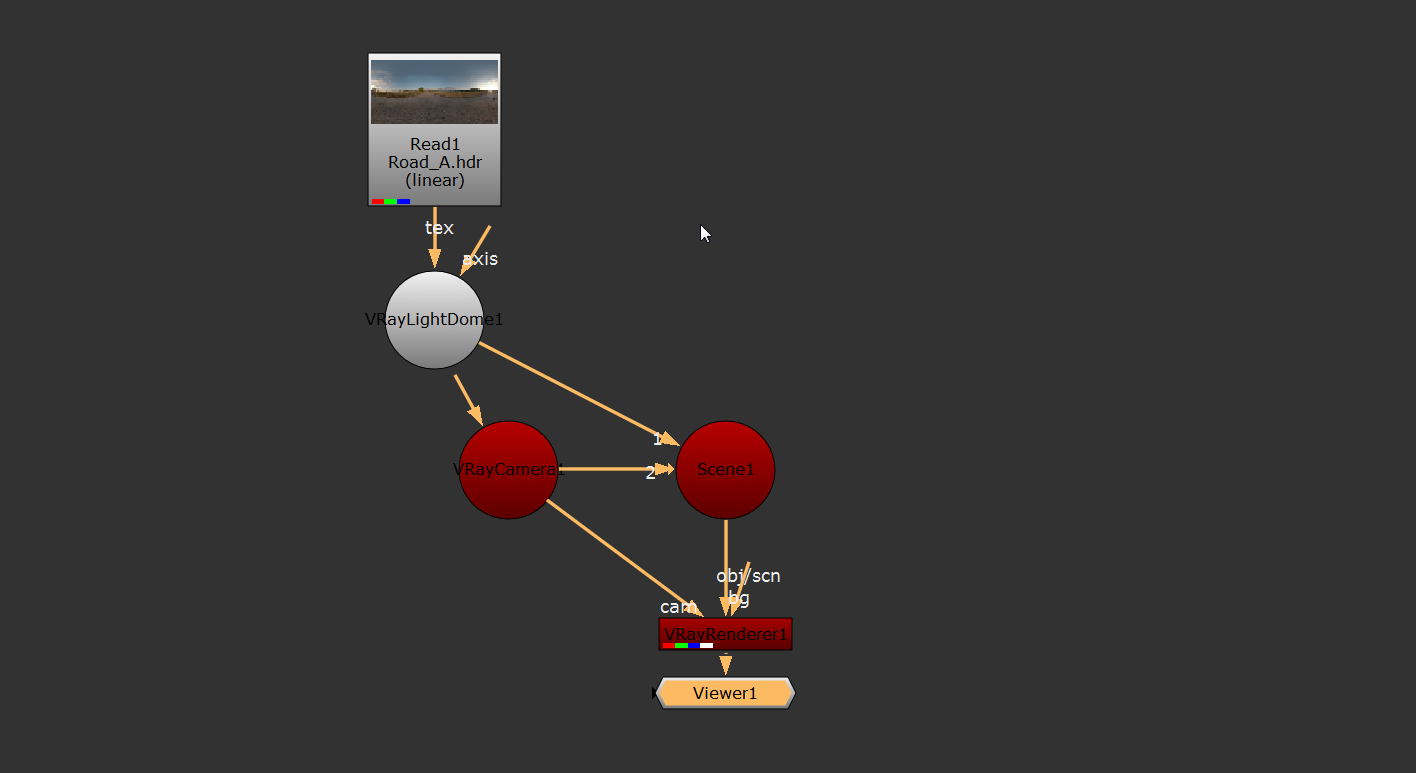
Next, create a VRayRenderer node and connect the Cam connector to the VRayCamera that you just created. Then create a Scene and connect the VRayRenderer to it.
You’ll need a light in the scene so you can see how light affects the material. Create a VRayLightDome. Next, create a Read node (shortcut key: R) and browse for the file Road_A.hdr supplied with this tutorial. Connect the Read node to the tex input of the VRayLightDome so it uses the HDR to light the scene. Then connect the VRayLightDome to your Scene.
Basic Starting Scene Layout
...
You can now see the geometry through the camera in the render being lit by the HDR that is acting as texture to the VRayLightDome.
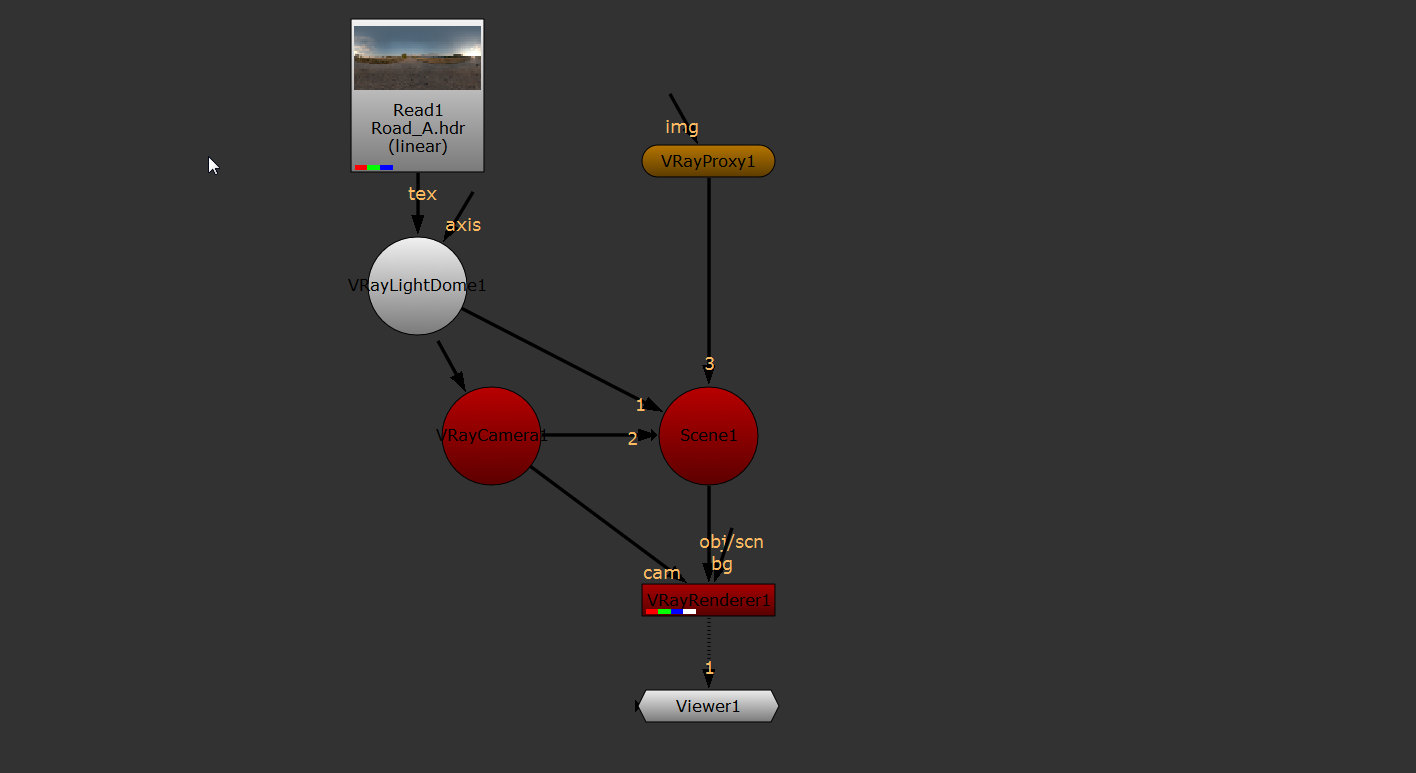
Basic Scene Layout With VRayProxy loading the Geometry
4) Adding materials and assigning them to the geometry
...
Click the ApplyMaterial2 node and in its properties set the filter dropdown box to name, click choose, and pick sphere_VRayMaterial1. This means that VRayMtl1 is now set to be on that geometry.
5) Modifying the Materials
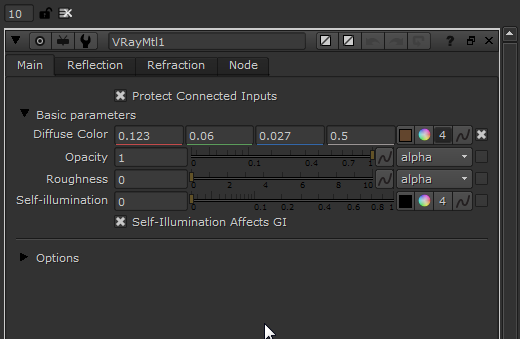
Now it’s time for us to modify the materials. First, let’s change the VRayMtl1 (the Rust material) by clicking it, going to its properties, and setting the Diffuse Color values to 0.123 in the red channel, 0.06 in the green channel and 0.027 in the blue channel.
VRayMtl1 (Rust) Properties – Main tab
...
Swap to VRayMtl2 (the Metal material) and set the values in its Diffuse Color to 0.018 in the red channel, 0.004 in the green channel and 0.0036 in the blue channel. You should now see these changes reflected in the render.
Now it’s time to make some changes. Go to the Node tab of VRayMtl2 and change the label to Paint instead of Rust. Then change the RGB values of its Diffuse Color to red 0.0029, green 0.057 and blue 0.29.
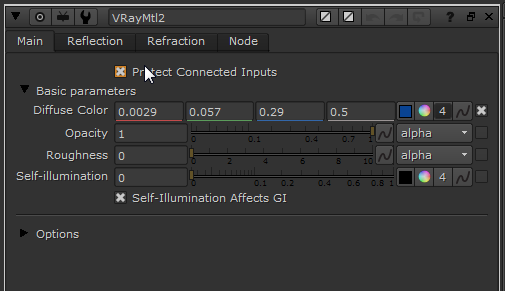
VRayMtl2 (Paint) Properties – Main tab
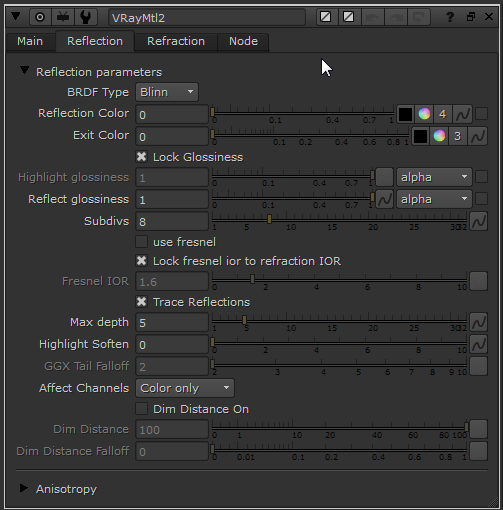
VRayMtl2 (Paint) Properties – Reflection tab
Create another VRayMtl node (VRayMtl3) and in the label field of the Node tab, type in Metal. Set the Diffuse Color in the Main tab to values of red 0.1, green 0.1 and blue 0.1.
One of the powerful capabilities of V-Ray for Nuke is the ability to blend materials. To see how this works, create a VRayBlend node and connect VRayMtl1 (Rust) to the B input and VRayMtl2 (Metal) to the A input.
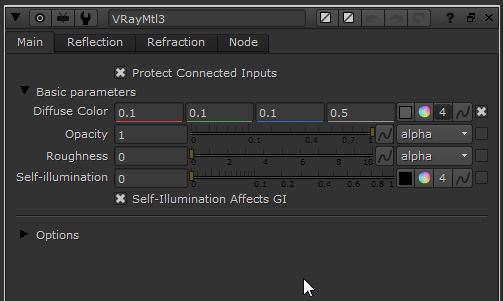
VRayMtl3 (Metal) Properties – Main tab
...
The metal material is not quite reflective enough so let’s modify its settings by clicking on VRayMtl3 (Metal) and setting the Reflection Color in the Reflection tab to a value of 0.7. Set the Reflect glossiness to a value of 0.8 to make the reflection on the metal material blurrier. These settings contribute to the metal looking more realistic.
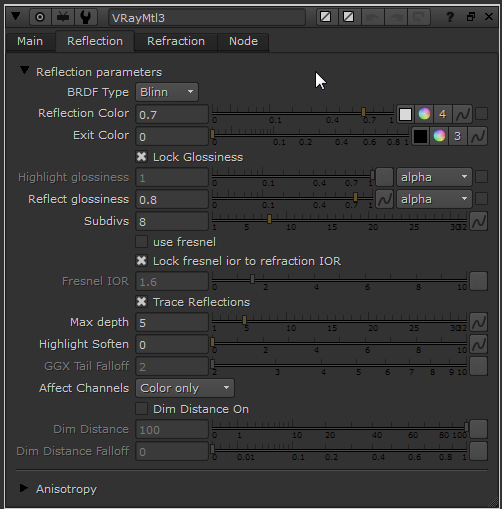
VRayMtl3 (Metal) Properties – Reflection tab
...
Let’s change the values on the VRayMtl4 (Metal) node by going to the Main tab in its properties and setting the Diffuse Color to a red value of 0.018, a green value of 0.004 and a blue value of 0.00036. In the Reflection tab change the value of its Reflection Color to 1 and change the Highlight glossiness value to 0.7. Below the VRayMtlBlend add a VRayMtlBump node and connect this also to the sphere_mask_3.jpg texture. Below the VRayMtlBump add a VRayMtlWrapper node and under the Material ID section set the Multimatte ID to a value of 2.
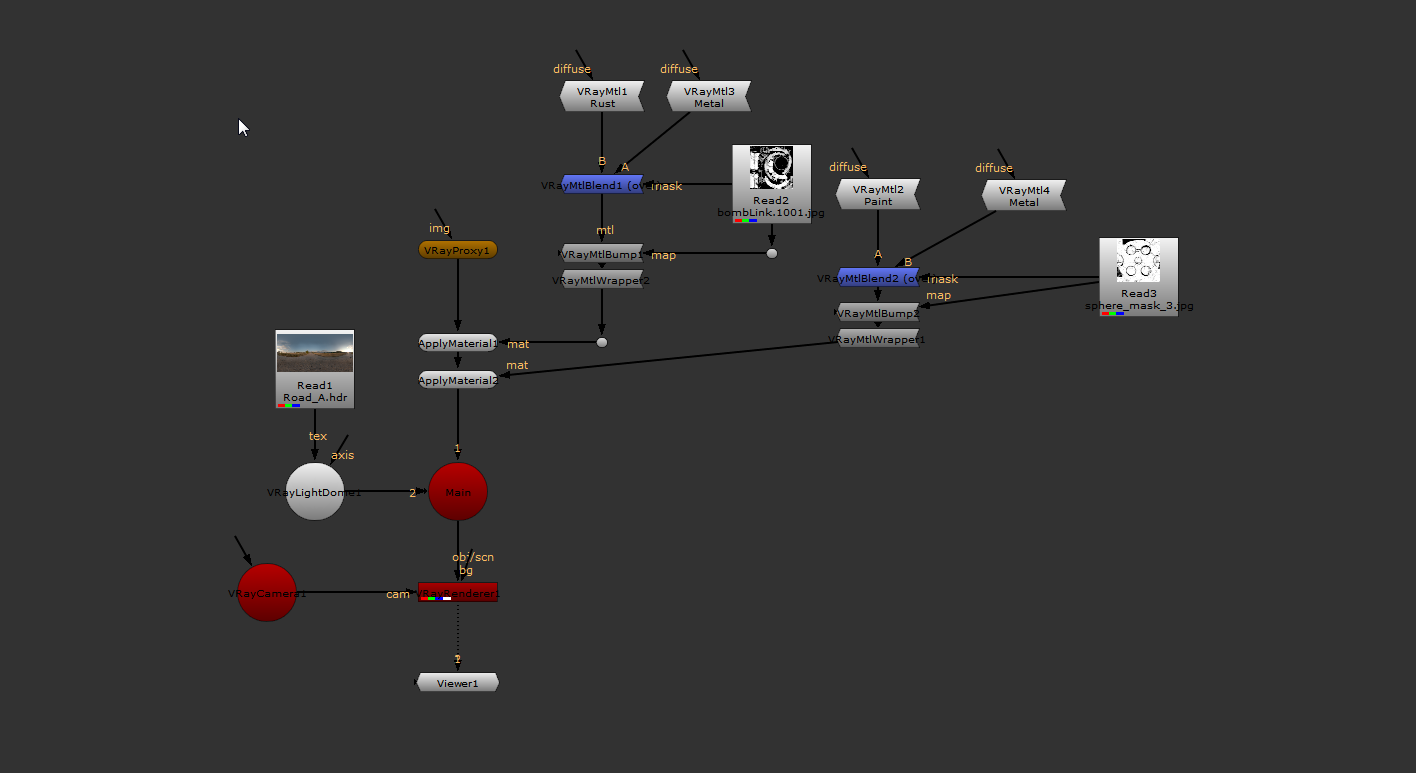
The scene layout up to this point
...
Add a VRayRenderElements node and connect it to your Scene. Set its Render Element dropdown box to Multi Matte and change the value of Red object ID to 1, and Blue object ID to 2. Make sure that you have the Use material IDs checkbox enabled. This will populate the multimatte pass later.
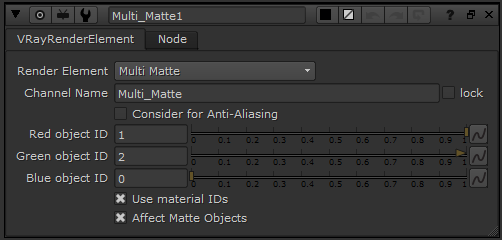
VRayRenderElement Multi_Matte Properties
...
Lastly, create a fifth VRayRenderElements node and again connect it to the Scene, but set the Render Element dropdown box to ZDepth. Set its Depth White value to 1 and make sure the Depth Clamp checkbox is disabled.
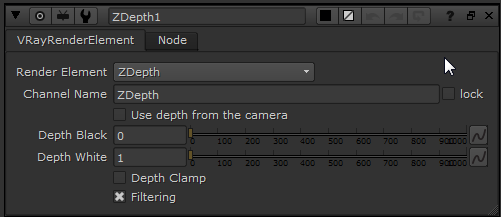
VRayRenderElement ZDepth properties
...
In Nuke, you can now see all the channels for V-ray render elements that you have just set up. To keep the Nuke script looking clean and tidy, put another Scene in between the main Scene (Scene1) and arrange the render elements as shown below.
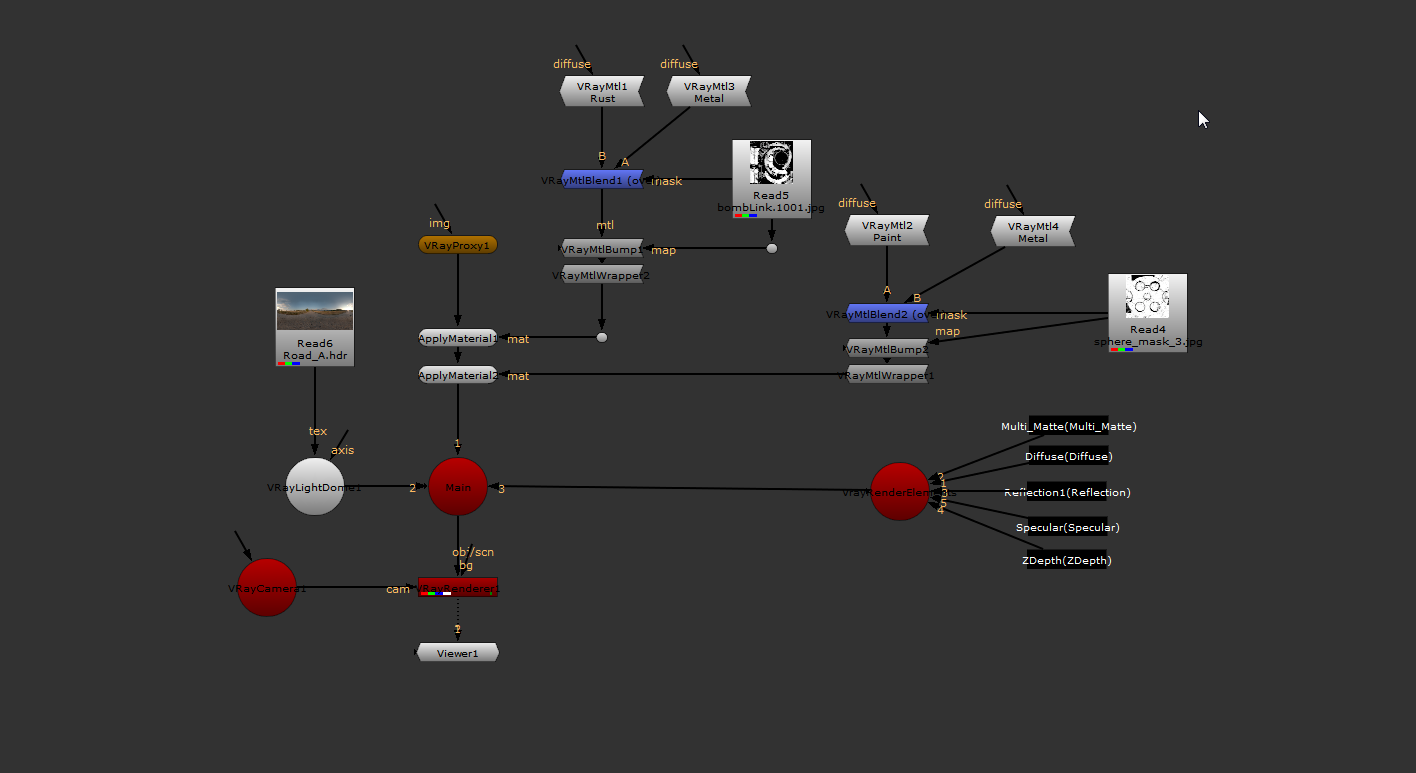
The final Scene layout
Once you have a set of V-Ray render elements that you like, you can group these into a ToolSet for use in another Nuke script. Select the VRayRenderElements nodes and the Scene2 Scene, and on the toolbar at the side click the ToolSet icon and click Create. This will bring up a dialog where you can give this group a meaningful name. Type in VRayChannels as a descriptive name for the grouping.
If you now delete your VRayRenderElements and Scene2 node, you can test this ToolSet by pressing Tab and typing in the name of the grouping, then connecting it back to the main Scene. We can, of course, change the Multi_Matte values if we ever need to do so.E
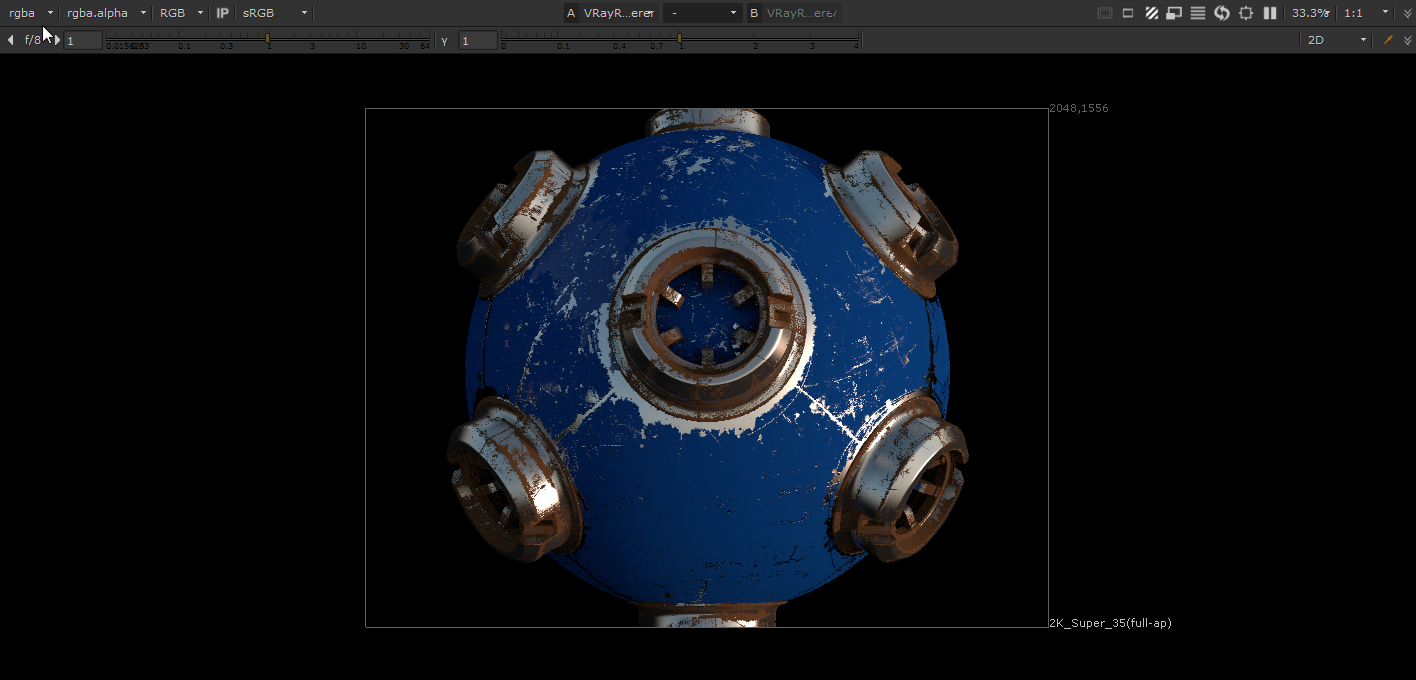
The final render
In this tutorial we have taken a look at the VRay material preview node, built an entire scene from scratch, and learned how we can blend and control materials using textures and values on geometry we read in using a VRayProxy node. We’ve also taken a look at setting up VRayRenderElements and learned how we can create a ToolSet for later use in other Nuke scripts.