Page History
This page provides a step-by-step introduction to V-Ray for Unreal.
Page Contents
| Table of Contents | ||
|---|---|---|
|
| Anchor | ||||
|---|---|---|---|---|
|
Overview
...
| Section | ||||
|---|---|---|---|---|
|
...
|
...
|
...
|
...
|
...
|
...
|
...
|
...
|
|
...
Tutorial Assets
...
To download the files used in this tutorial, please click on the button below.
...
| Note |
|---|
You can right-click the download button and choose "Save Link As..." or "Save target as.." depending on your browser.. This will bring up a dialog to save the zip file without having to wait for the Preview mode to load. |
Tutorial Steps
Part I - Opening Unreal project and initial setup
...
Step 1. Launch Unreal Engine 4
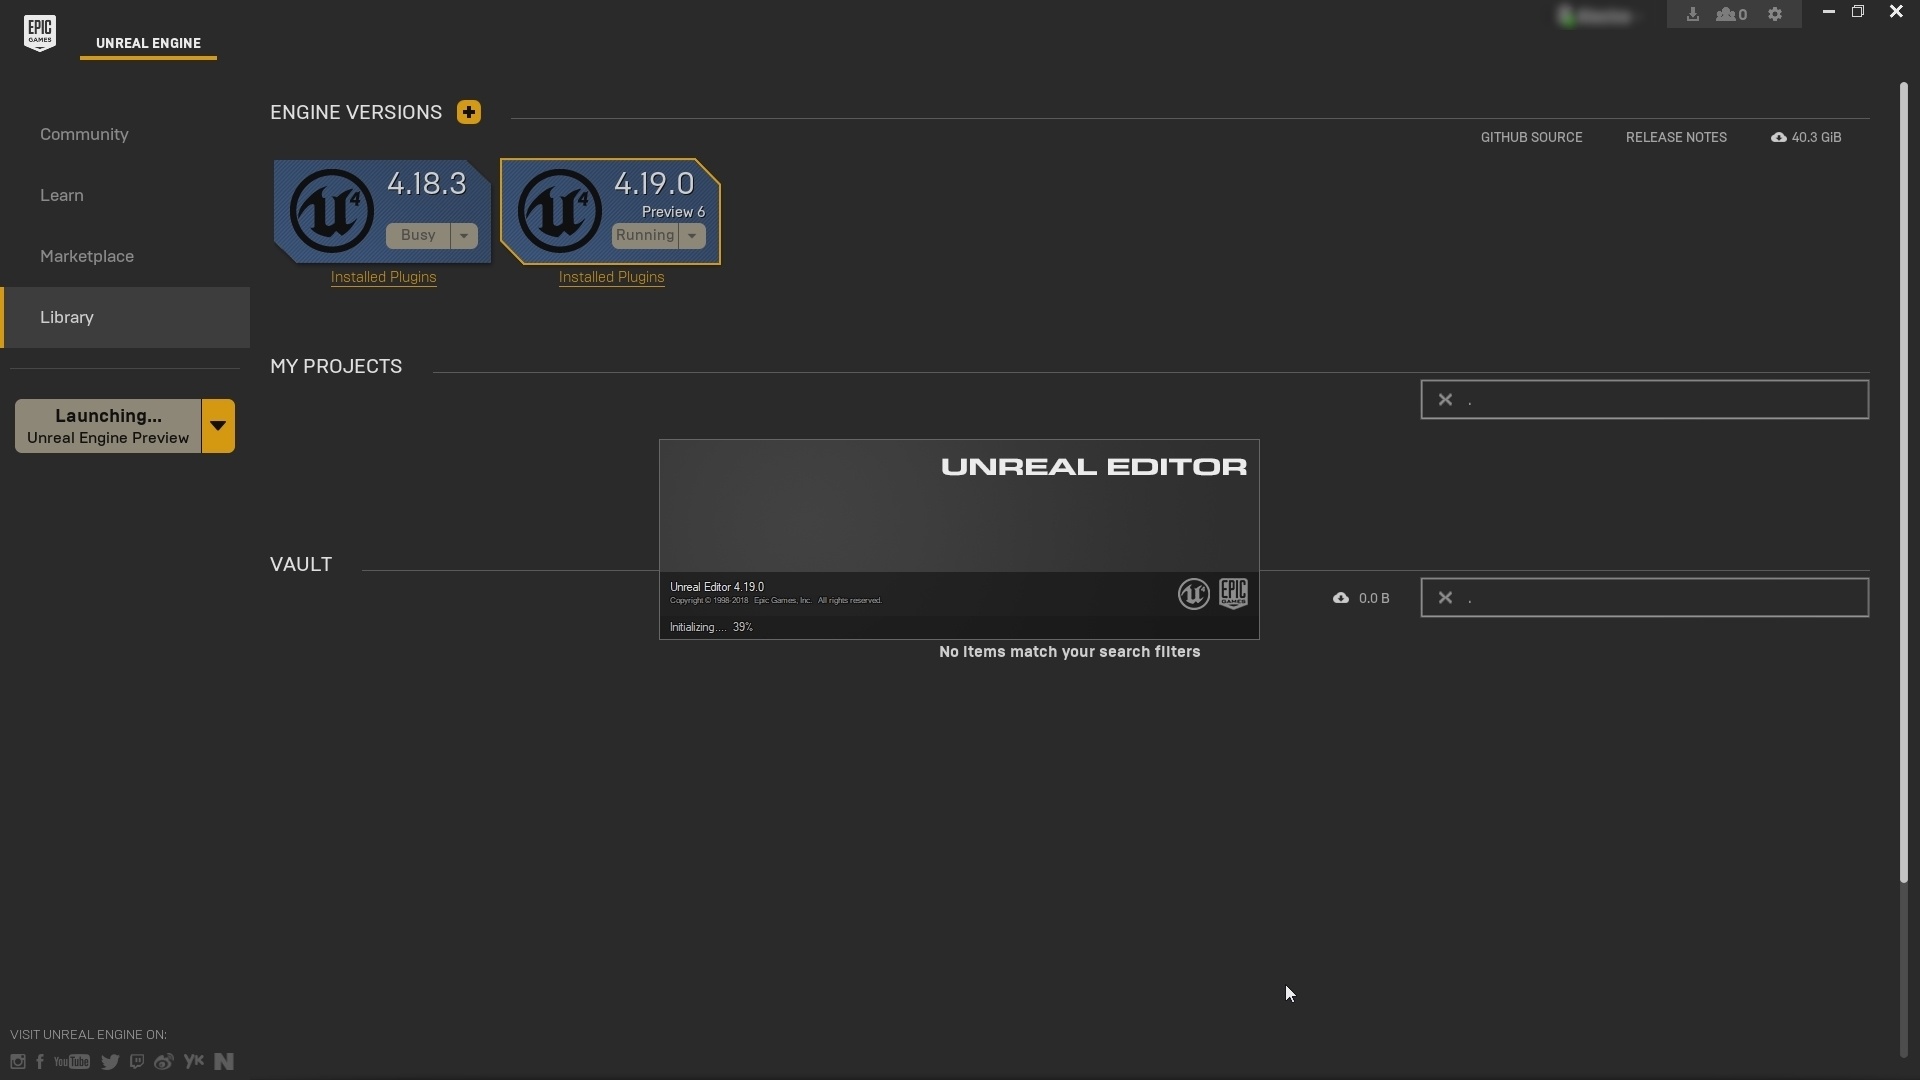
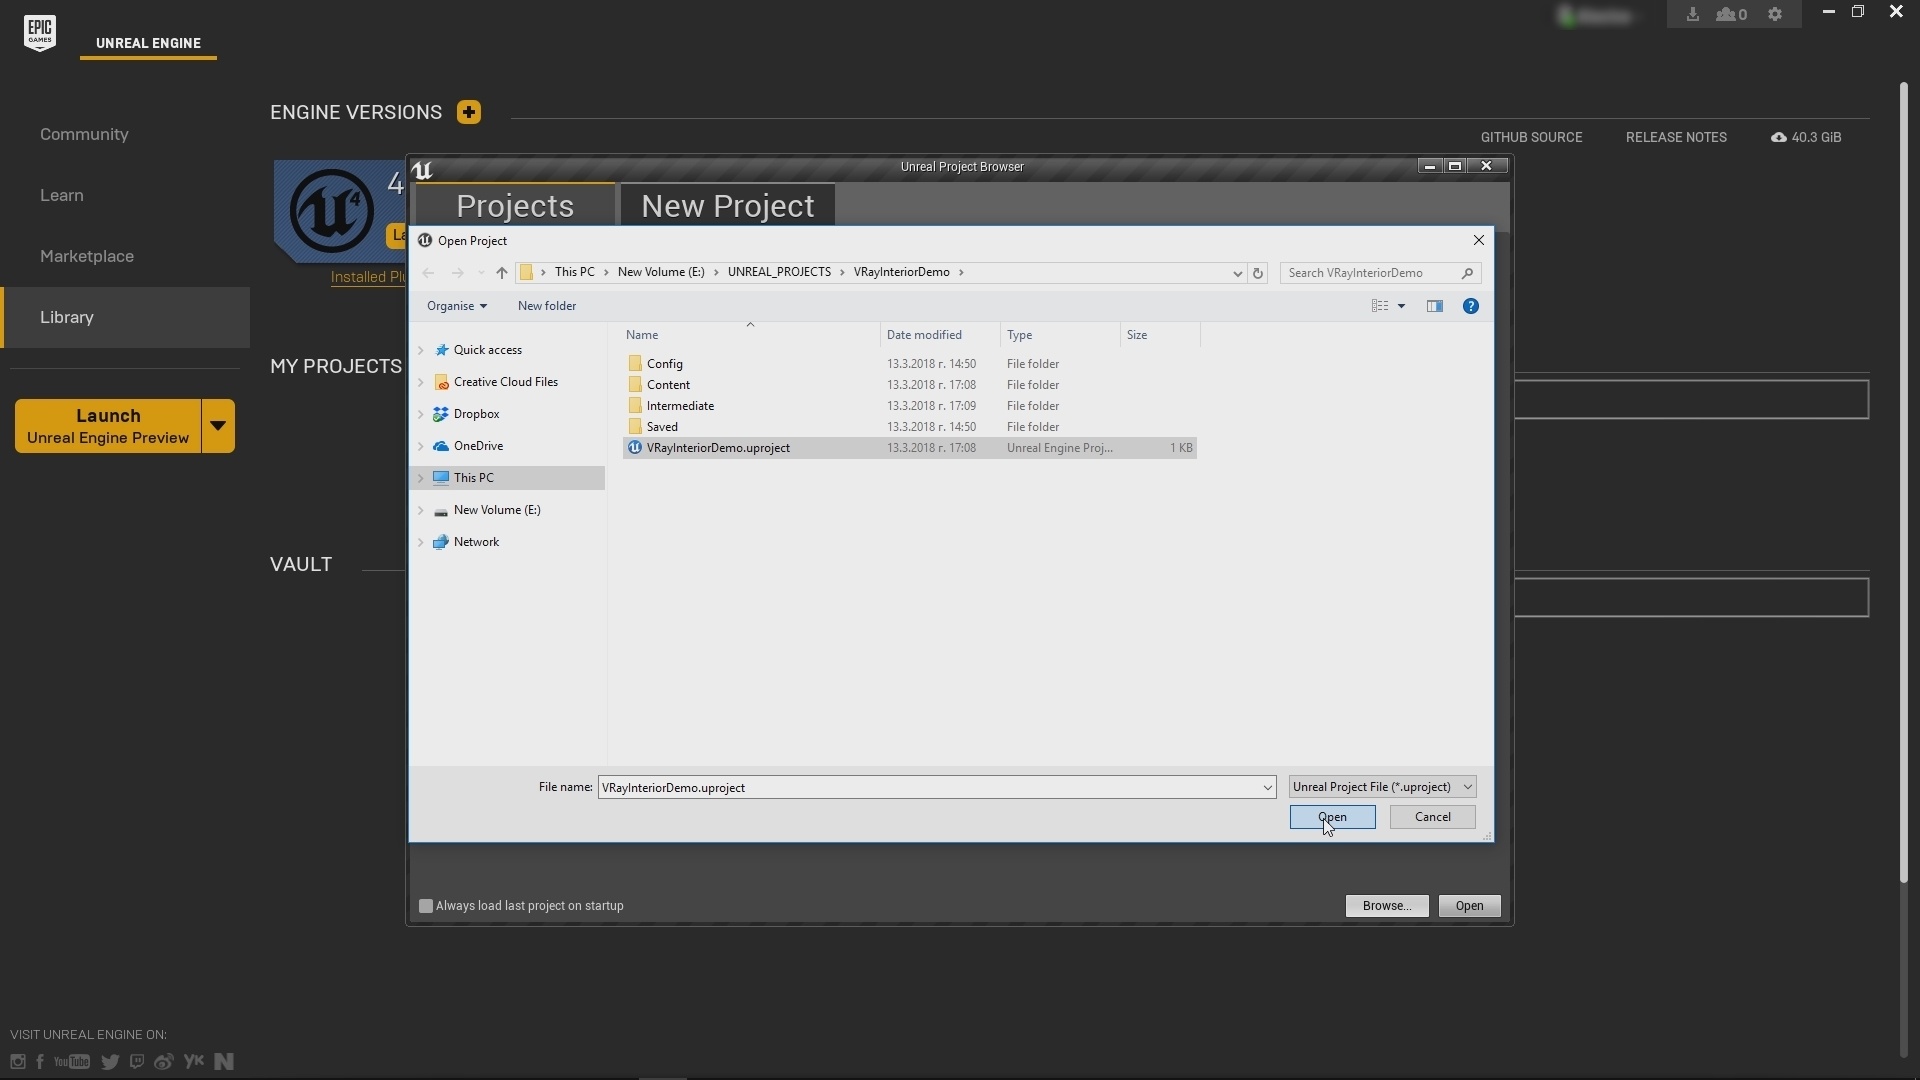
Launch you version of Unreal from the Epic Games Launcher. Launcher (V-Ray currently supported supports versions are 4.18.3 and 4.19) (1.1). Click the Browse button and navigate to the project you wish to open. In this case, the project is called VRayInteriorDemo.uproject. (1.2)
| Section | ||||||||||
|---|---|---|---|---|---|---|---|---|---|---|
|
| UI Text Box | ||
|---|---|---|
| ||
Be advised that when opening a project for the first time all materials have to be compiled by the Unreal editor (shader compiling message in bottom right hand corner of the screen). This means all materials will not look properly until all shader compilations are finished. This process is part of the standard workflow in Unreal Engine. |
Step 2. Enable The V-Ray Plugin
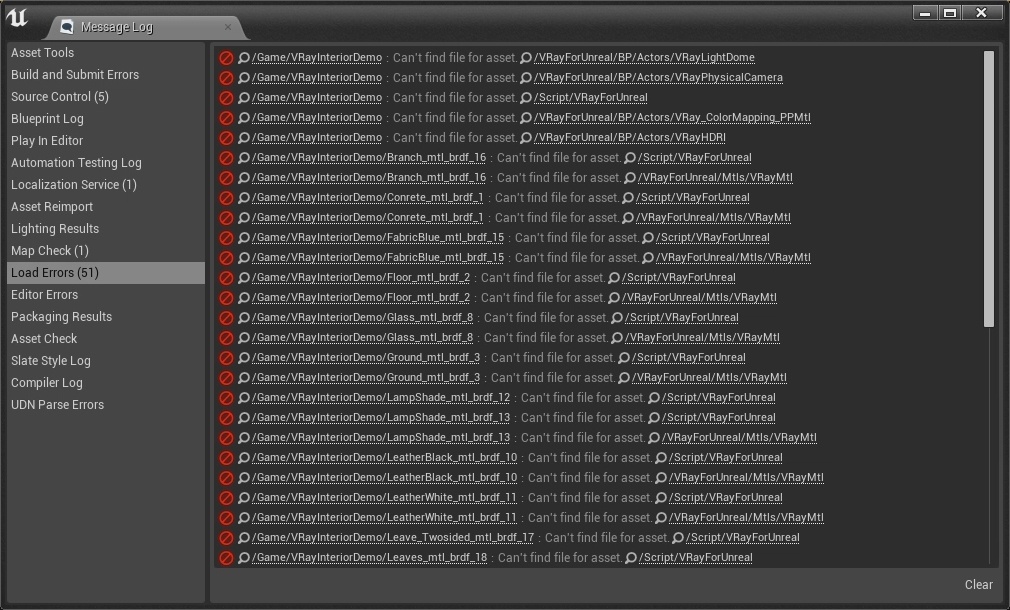
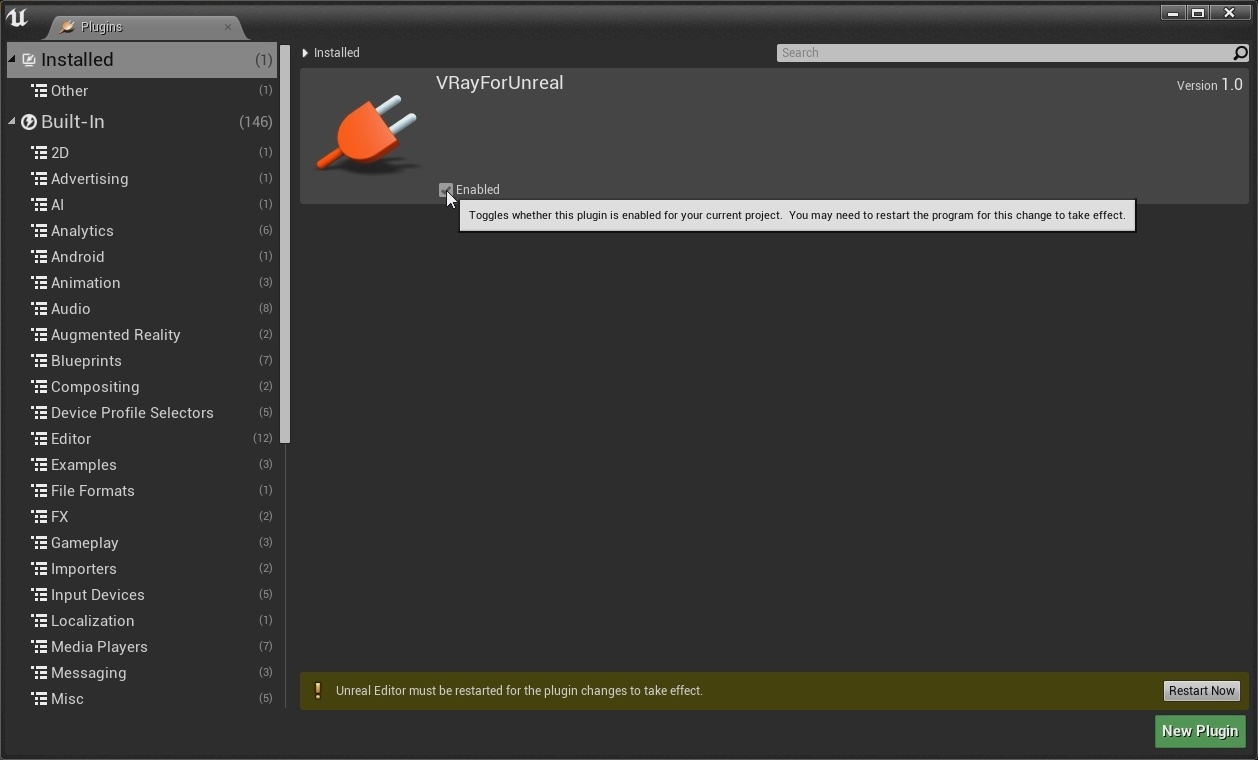
From "When you open a project created with V-Ray for Unreal and you get a warning message (2.1) that means that the V-Ray plugin is not enabled. From Edit/Plugins" enable enable the VRayForUnreal plugin. You will need to restart Unreal for this to take effect. (2.2)
...
...
| Section |
|---|
Adjust Lighting
Set up Camera
Inrease Lightbake Settings
Adjust Camera Settings
Render Image
Refine the Render inside the VFB
Save the Render
We’ll start off by rendering a view from an existing scene camera. Click on the From Yard 3D view in the project browser to open that window.
Click the Disable Shadows button at the bottom of the window to speed up the interface a bit.
First thing you’ll notice is that the Revit interface locks out controls for plugins while in a perspective view. This is true for all plugins in Revit and is normal behavior. Switch back to the title page view, and you’ll see controls are active again.
Disabled in 3D View
Enabled on Title Page
Set up Draft V-Ray RT render settings
For a real-time render of the yard view, select View from the V-Ray Toolbar and select the From Yard option.
Go ahead and leave the Quality set to Draft for now.
Click on resolution Icon in the V-Ray tab to open a V-Ray Resolution window. You can select from preset resolutions, enter your own, or use Crop Region which is similar to Revit’s existing workflow. Let’s use the 800x450 preset, the fewer pixels V-Ray needs to calculate the faster the render will be.
Next you can toggle artificial lights on or off by clicking the Artificial Lights icon. Leave them off for now.
Next we can choose how the environment will light the scene by using a V-Ray Sun light or use a Dome light. With dome lights you can use image based lighting to help create more realistic reflections and highlights. Click on the drop-down menu and select V-Ray Sun to use V-Ray's built in sun and sky system.
Click on Render with V-Ray drop-down. Here you can choose Render with V-Ray RT to start a real time rendering of the From Yard view we selected. The render will continue to get less noisy as it continues to run.
Stop the render by clicking the Stop icon at the top right of the in V-Ray Frame Buffer. (VFB) Now that we have a visual, we can make some adjustments to the scene.
Update the Grass material
Let’s now replace the grass material with a V-Ray material. Click on the Material Browser in the V-Ray toolbar.
All standard materials from Revit are supported in V-Ray, which allows scenes to render without creating any new materials. However, V-Ray materials can offer more surface possibilities if required.
Locate a grass material by searching in the filter box. Browser.
AutoGen means the material is using a standard Revit material. Click on the AutoGen drop-down to Switch it to the V-Ray material. This opens a browser to load a VRmat material. Use the material this tutorials assets called Gren_Grass_Dark.vrmat. You’ll find that material in the assets you can download for this tutorial from the button at the top of this page.
Similar to Revit materials, you'll need to set a size for this material. Since this VRayMaterial is a big map, use 10,000 by 10,000 mm, and then randomly pick a Rotation amount with the slider. Close the dialog when you're done.
Before we start another V-Ray RT render, you can optionally take full advantage of CUDA hardware rendering on an NVIDIA graphics card for a faster V-Ray RT render. If you have a strong NVIDIA GPU, click on the settings option go ahead and select the GPU Cuda option here, otherwise you can leave it at CPU.
Click on Render V-Ray RT to fire it up. Leave it running for the next step.
Reposition the Camera
Let’s change the location of our view by moving the camera around. As you let V-Ray RT run, the render will automatically update as the camera moves in Revit.
Go back to the From Yard view. Go ahead and press ZE to Zoom Extents to make this easier, and open up the Navigation Wheel and orbit the view. As you move the camera around, you can see how the image in the VFB updates fairly quickly. Go ahead and find a view you like.
Adjust the Environment Lighting
Let's address the sun angle next. In the Properties scroll down to the Camera heading and click Edit.
Changes made here will affect the render in real time when rendering with V-Ray RT. Click on Sun Settings button here which will bring up the window. Let’s change the time from 12pm to 3pm. You can also change the time of year, if you'd like, we'll leave it as is though. Click Apply, and you’ll see RT update the image to have a more afternoon-time light.
We can change from the sun lighting system to a High Dynamic Range Image (HDRI) for something a little more photoreal. HDR images can give exquisite results in lighting and reflections.
Switch back to the Project Title sheet to get access to the plugin settings again. Click on the V-Ray Sun icon to access environmental lighting and switch it to the Dome Light.
The RT render updates and you can see the dome light evenly lighting the scene with a single color specified by the Dome Color swatch. We’ll replace that with an HDR image by clicking the Use HDR Image check box. This will immediately update the VFB to show a new HDR environment. You can browse for any panoramic HDR or EXR image you have. There are plenty available online as well, so it’s easy to find an environment that fits your needs.
Use the Rotation value to orient the environment to your satisfaction. This will move the sun in the image which will change the lighting angle in the scene. The example below is using a value of 145 degrees.
Adjust the Camera Settings
Let's make some adjustments to the camera, such as increasing the exposure and adding depth of field.
Click on the Camera icon here to open the Camera Settings. Increase the Exposure to allow more light into the camera and brighten the image. Then adjust the White Balance to find a look you like.
In the Effects drop-down you can set depth of field with the Defocus and Focus Distance controls. RT updates in the VFB window as we go and updates/refines the blurring over time.
Go ahead and turn DoF off by changing Defocus back to 0, and now make a bit of a vignette by setting the Optical Vignetting parameter to 1.35
Enable V-Ray Production Render
Now let’s go and set our Render Quality to High. Next change the resolution to 1280x720. And we’ll also switch from RT to the Production Renderer.
Refine the Render inside the VFB
|
Step 3. Test Light bake
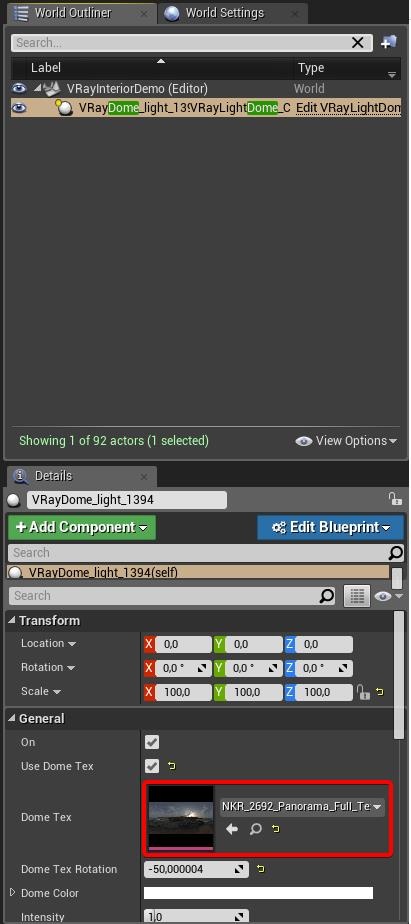
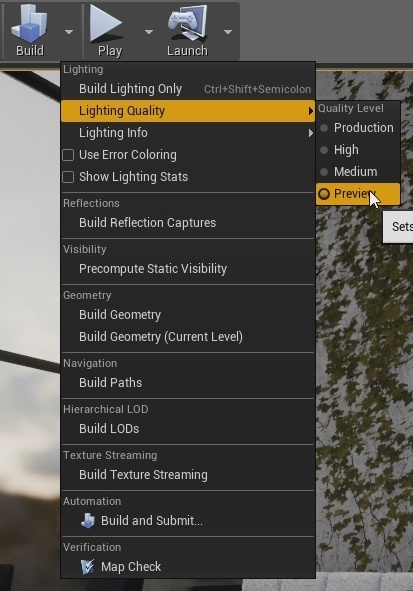
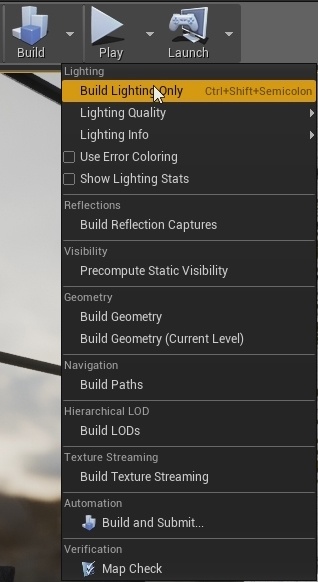
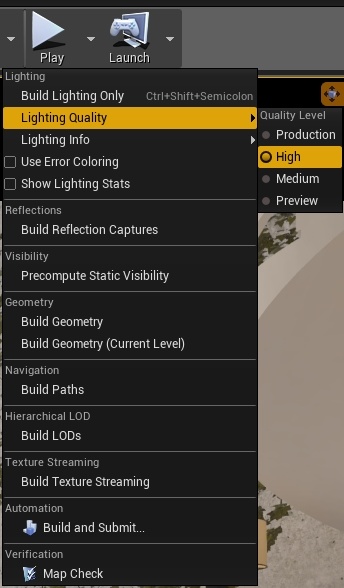
After Unreal is restarted and the project opened, do a test light bake to get a feel of the lighting in the scene. The scene contains one VRay Light Dome with an HDRI image plugged into the Dome Tex slot (3.1). Make sure to be on Preview in the Lighting quality to speedup the baking process (3.2). To do a test light bake go to Build options menu > Build Lighting Only (3.3).
| Section | |||||||||||||||
|---|---|---|---|---|---|---|---|---|---|---|---|---|---|---|---|
|
Part II - Camera, materials and Lightmass settings
...
Step 1. Post Process Settings
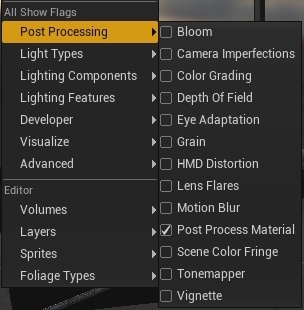
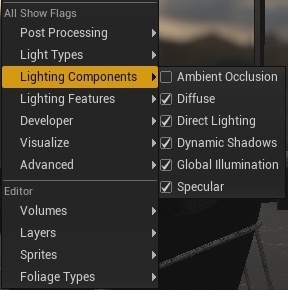
In order to have maximum visual parity between viewport and final render you have to disable some of the Unreal postprocess and lighting components. You can do so from in viewport Show > Post Processing and leave only Postprocess Material (1.1) . From Show > Lighting Component uncheck Ambient Occlusion (1.2).
| Section | ||||||||||
|---|---|---|---|---|---|---|---|---|---|---|
|
Step 2. Enabling VRayPlugin in Content Browser
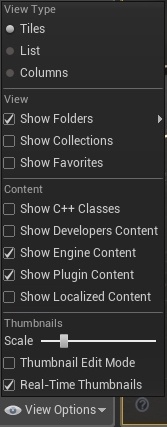
To create a V-Ray supported content such as lights and cameras you will have to enable its visibility in the Content Browser. Go to View Options and enable Show Engine Content and Show Plugin Content (2.1).
| Section | |||||
|---|---|---|---|---|---|
|
Step 3. Set up Camera
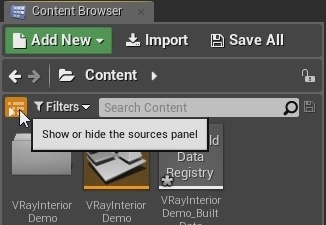
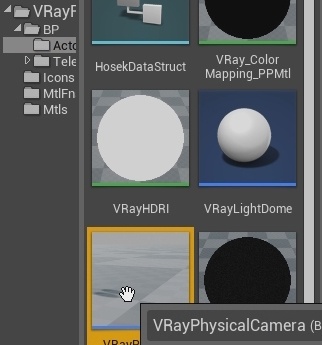
Let's now create a camera. Click on the Show or hide the source panel button to see the tree structure of the Content Browser (3.1). From there go to VRayForUnreal > Content > BP > Actors and drag and drop in the viewport the VRayPhysicalCamera (3.2).
| Section | ||||||||||
|---|---|---|---|---|---|---|---|---|---|---|
|
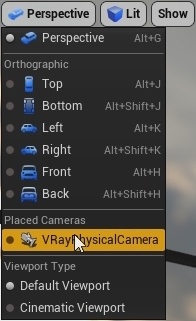
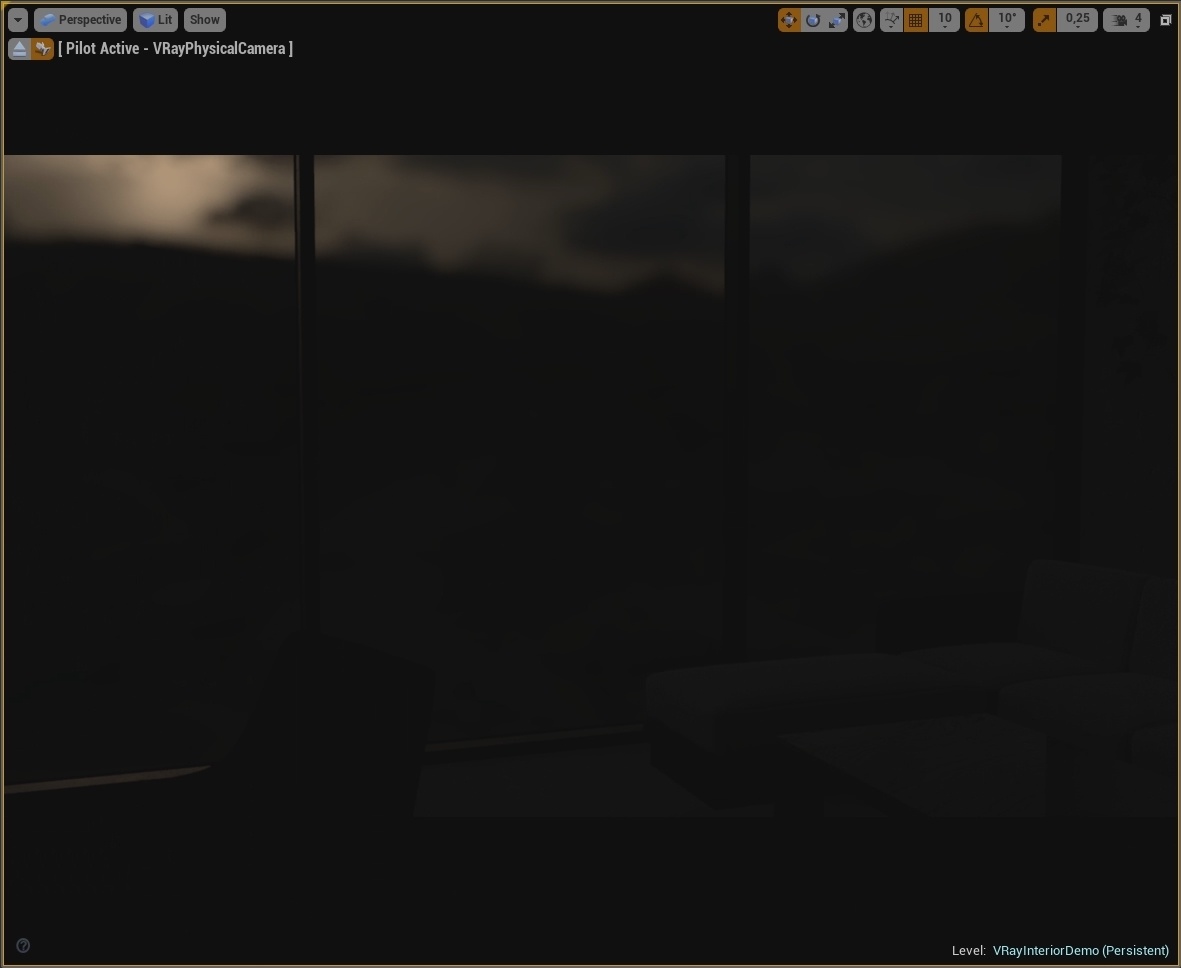
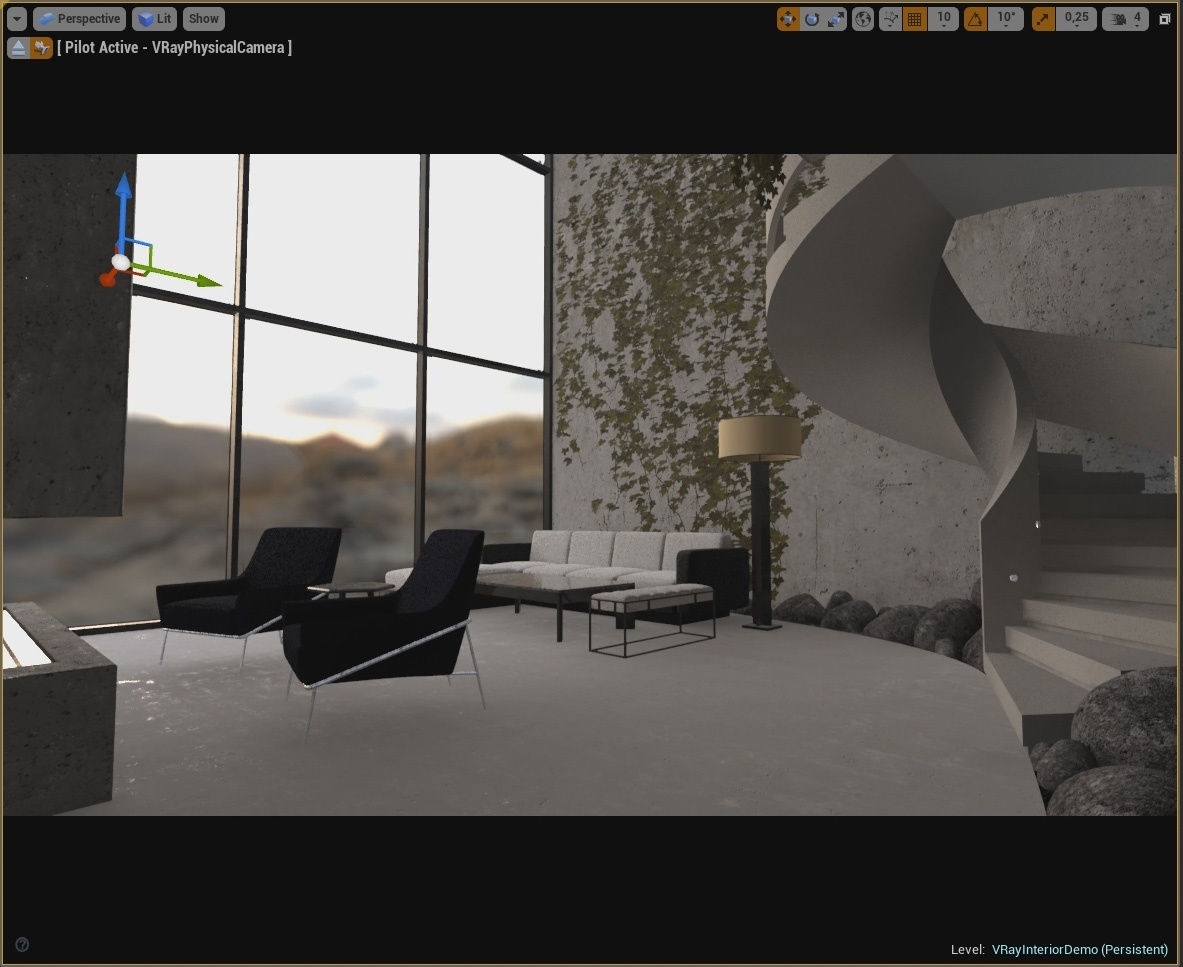
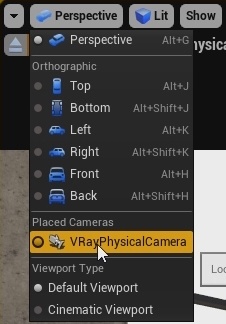
After you've placed the VRayPhysicalCamera in the level you can look through it by going to the Viewport Types and select VRayPhysicalCamera from the dropdown menu (3.3). After that you can position the camera by holding down the Right Mouse Button and using the WASD keys for translation and the mouse for rotation (3.4).
| Section | ||||||||||
|---|---|---|---|---|---|---|---|---|---|---|
|
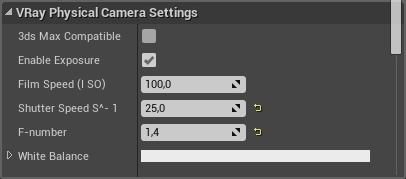
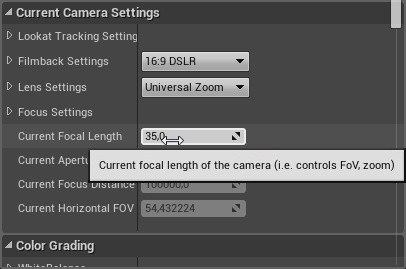
The view looks dark due to the fact that the camera's exposure is not set correctly for this lighting scenario. To change the exposure parameters select the VRayPhysicalCamera and go VRayPhysical Camera Settings category and adjust the Shutter Speed=25 and F-number=1.4 (3.5). Next adjust the Current Focal Length value by going to Current Camera Settings category to make the camera more panoramic. Set Current Focal Length=20 (3.6). Then make any additional changes to the camera's position to make the final composition (3.7). For more details see documentation on VRayPhysicalCamera.
| Section | |||||||||||||||
|---|---|---|---|---|---|---|---|---|---|---|---|---|---|---|---|
|
Step 4. Adjust Materials
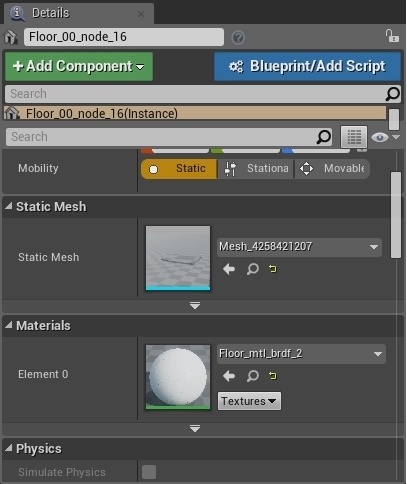
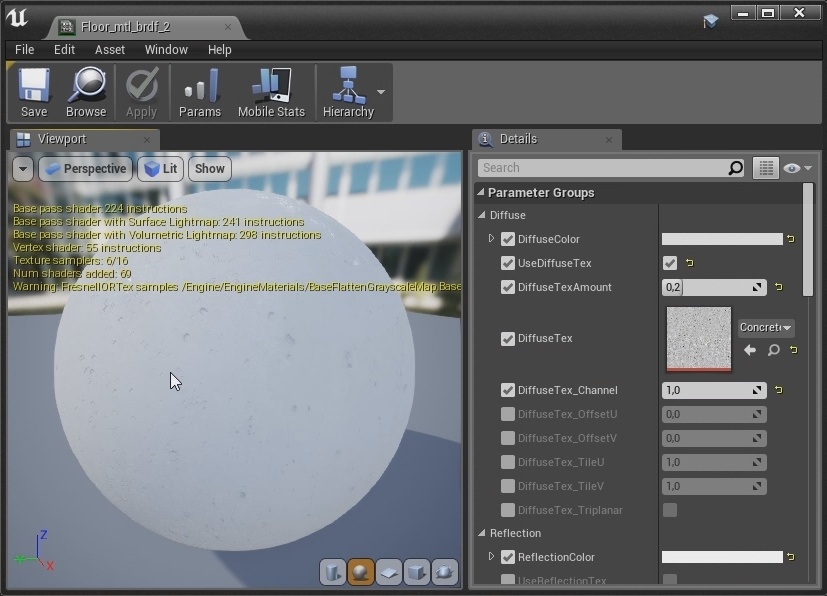
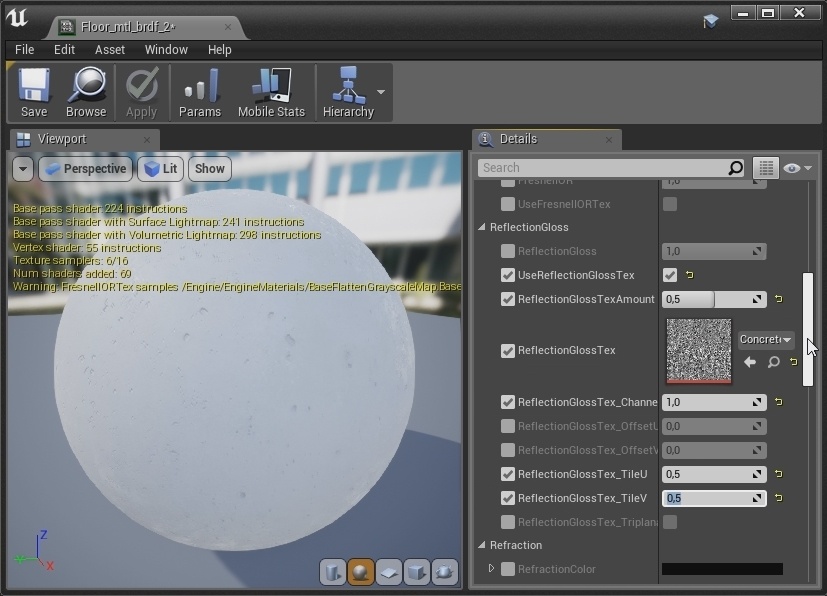
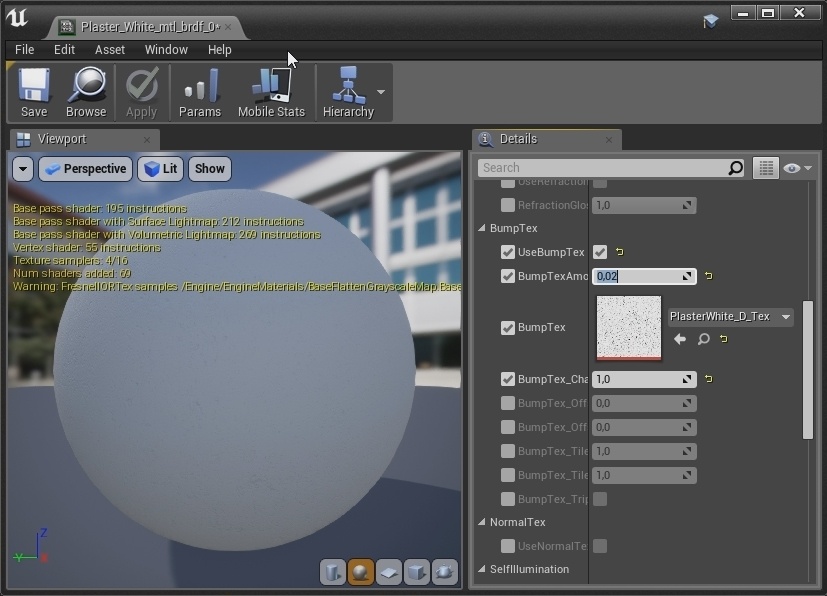
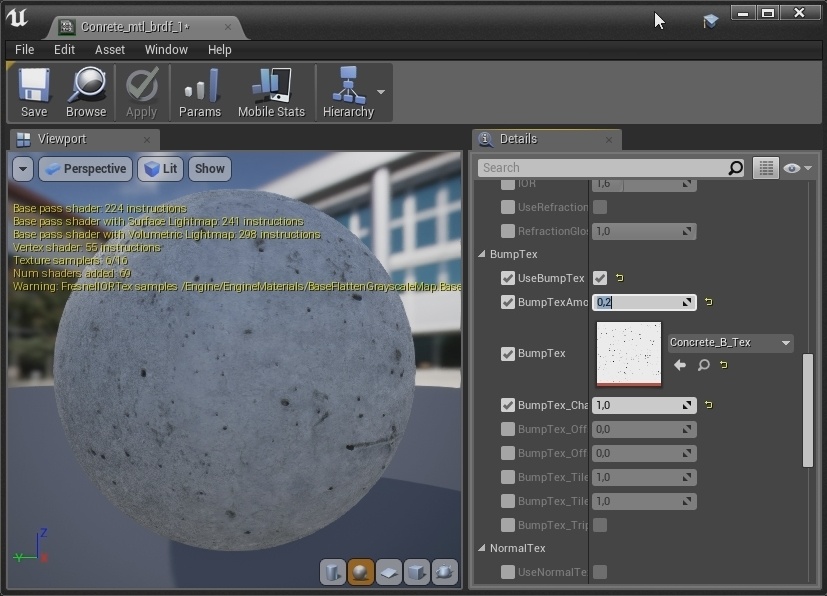
Let's now edit the materials. To edit materials you select the mesh whose material you wish to modify, go to the Materials category in the Details panel and double click the assigned material in the Element slot (4.1). A window appears with a preview of the material and a Details tab with all the parameters for the material (4.2).
| Section | ||||||||||
|---|---|---|---|---|---|---|---|---|---|---|
|
Make any changes to the material and you will see them update in the viewport. In this scenario we will be modifying the Floor (4.3), Plaster (4.4) and Concrete (4.5) materials. For more details see documentation on Materials.
| Section | |||||||||||||||
|---|---|---|---|---|---|---|---|---|---|---|---|---|---|---|---|
|
Step 5. Inrease Lightmass Settings
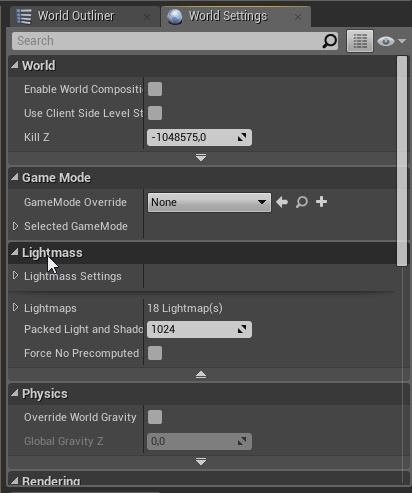
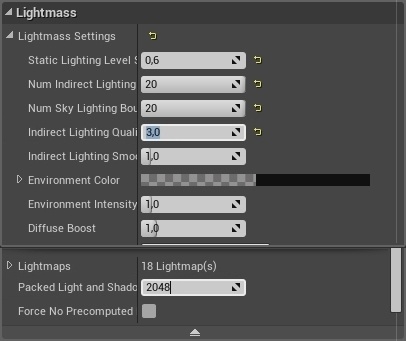
Let's now increase the Lightmass settings for a better lighting quality. Go to World Settings tab (Window>World Settings) and look for Lightmass category and open Lightmass Settings (5.1). We will increase the Static Lighting Level Scale=0.5; Num Indirect Lighting Bounces = 20; Num Sky Lighting Bounces = 20; Indirect Lighting Quality = 3. Also change the Packed Light and Shadows Map Texture Size = 2048 (5.2). For more information on what these parameters do see Unreal's Lightmass documentation. Next increase the Lighting Quality to High and hit the Build Lighting Only button(5.3).
| Section | |||||||||||||||
|---|---|---|---|---|---|---|---|---|---|---|---|---|---|---|---|
|
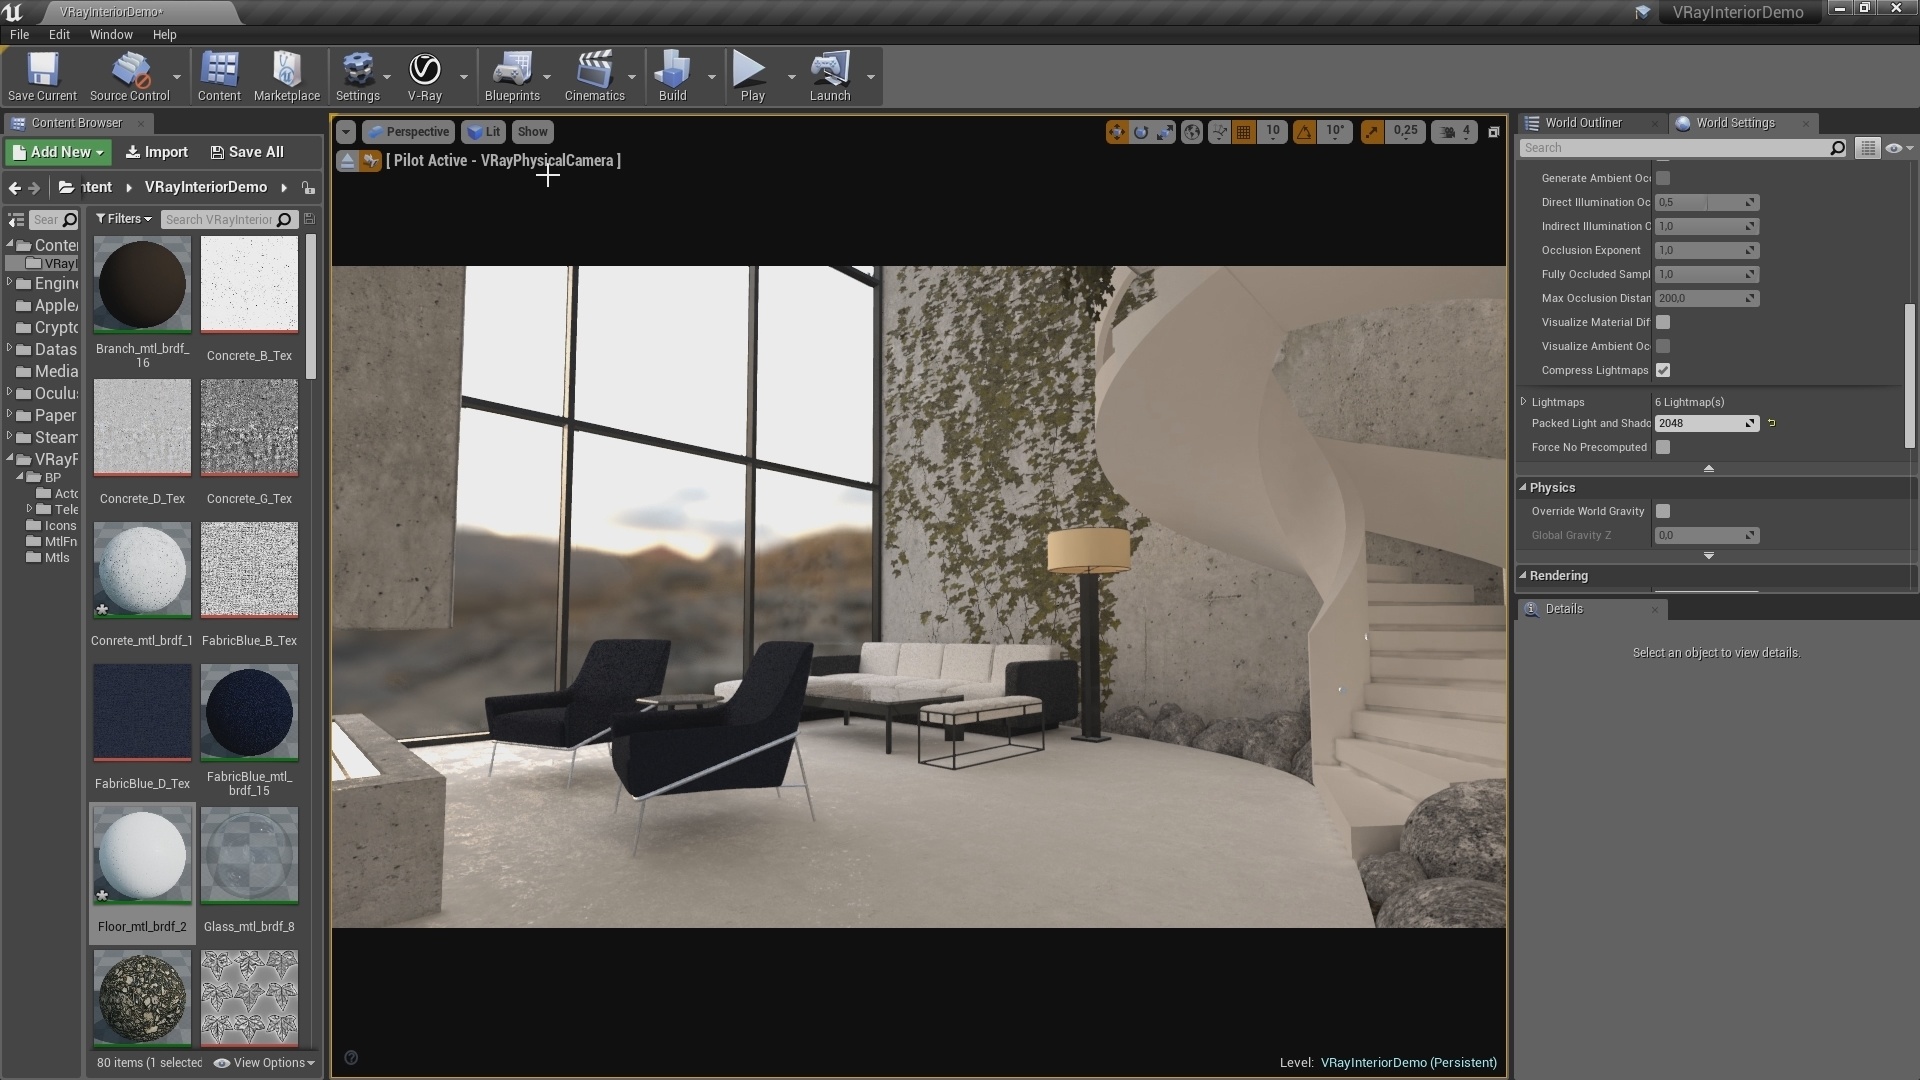
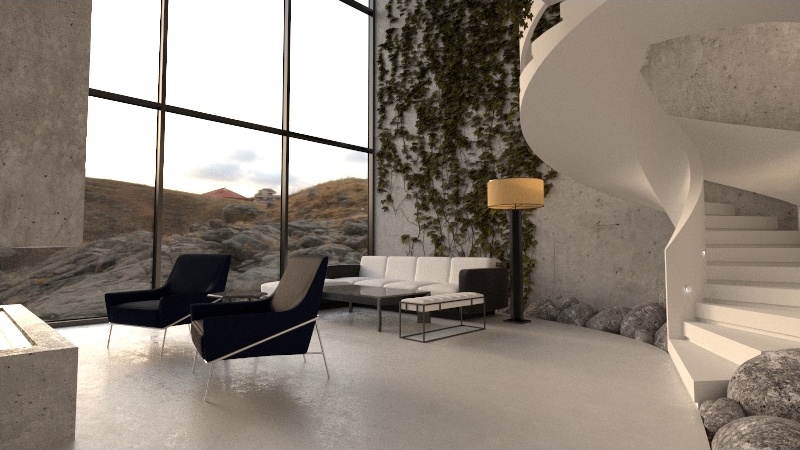
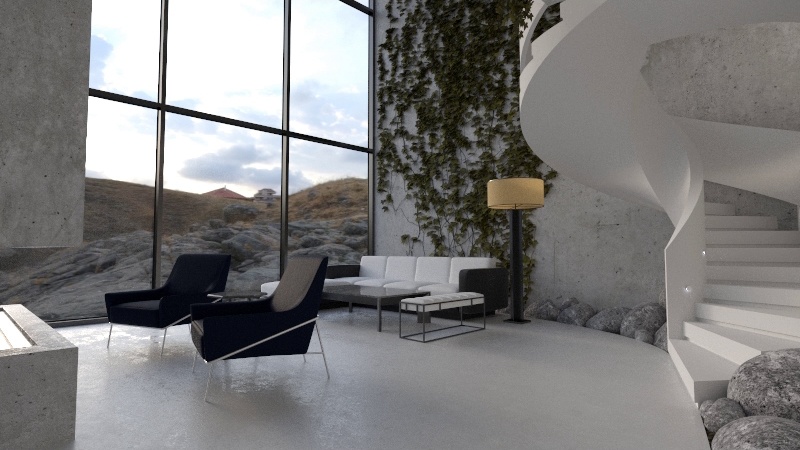
After a few minutes the final light bake is complete and we are ready for the final render (5.4).
| Section | |||||
|---|---|---|---|---|---|
|
Part III - Rendering the final image
...
Step 1. Render Image
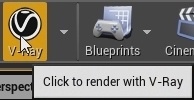
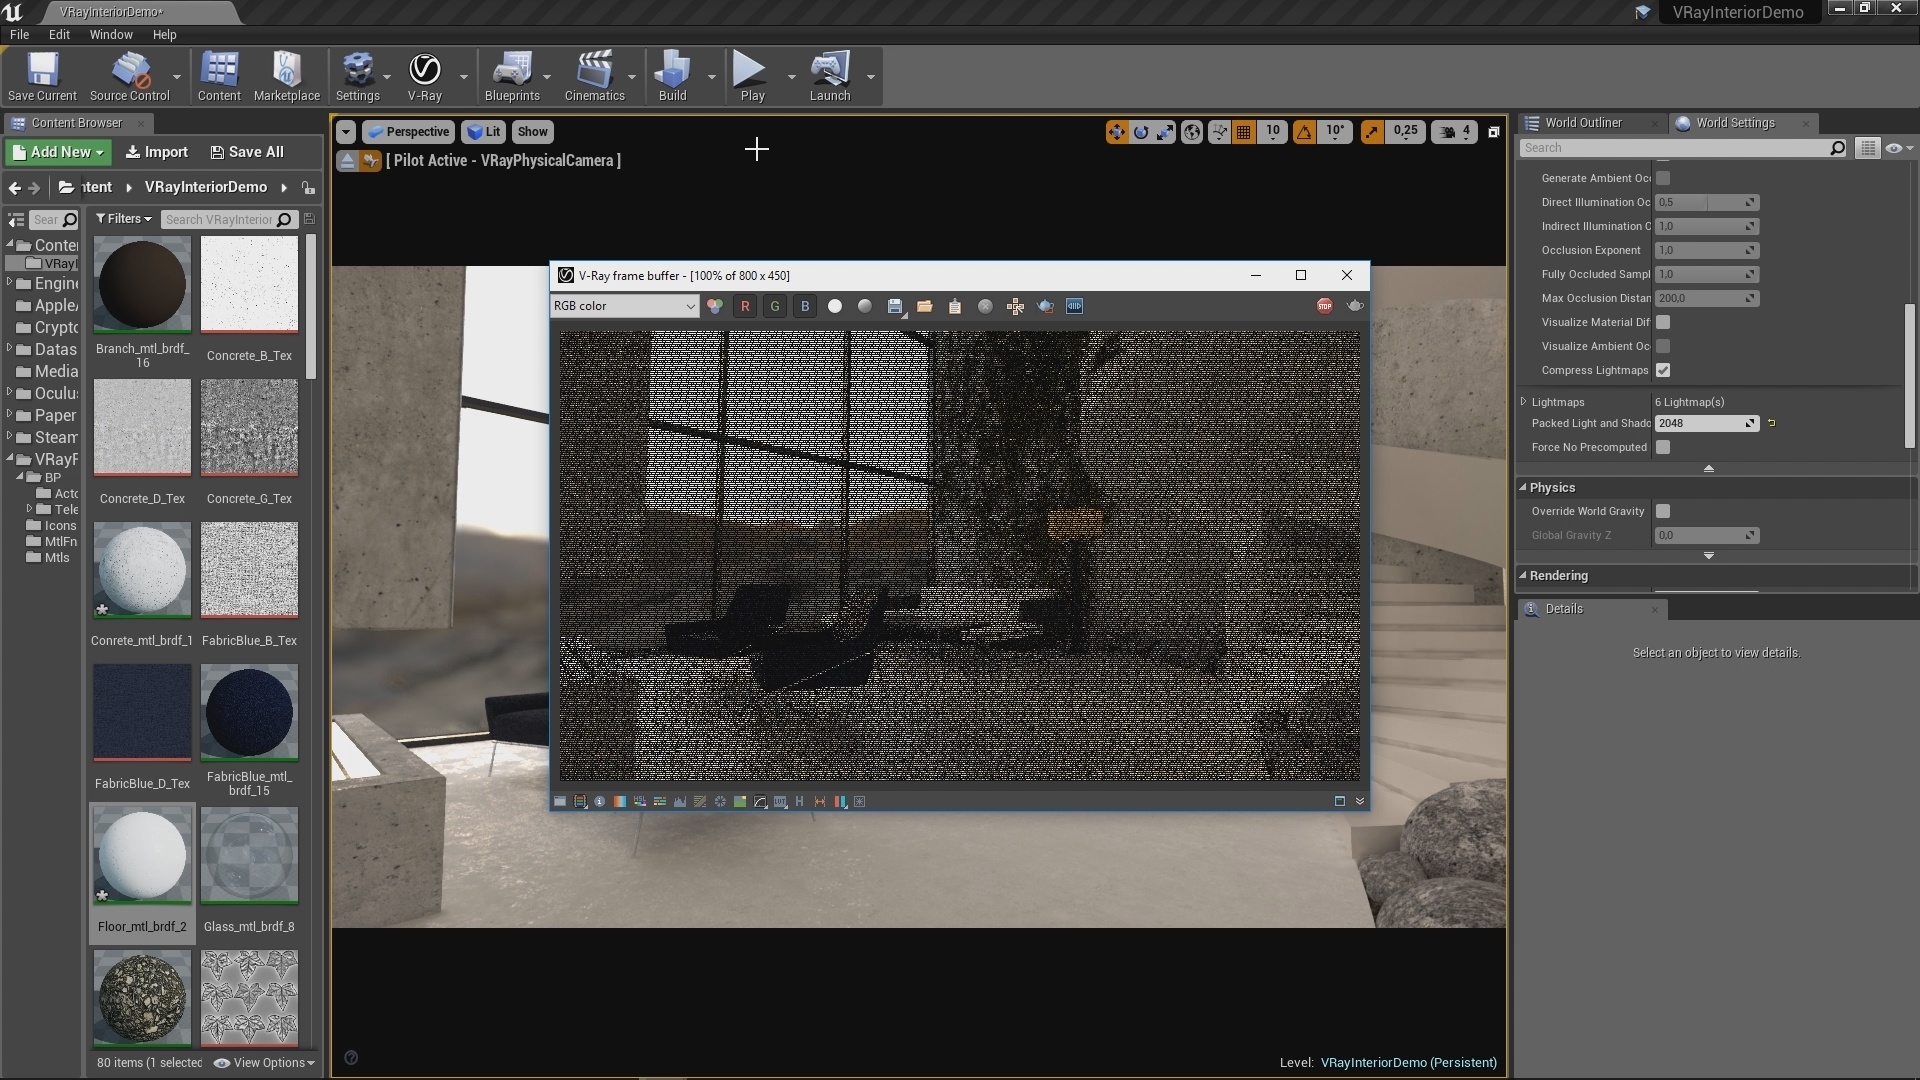
To render an image from Unreal using V-Ray make sure in the viewport you are looking from the camera (1.1) To render the image click the V-Ray button in the toolbar (1.2) (1.3).
| Section | |||||||||||||||
|---|---|---|---|---|---|---|---|---|---|---|---|---|---|---|---|
|
Step 2. Refine the Render inside the VFB
...
As you can see the render begins filling in over time. Once we get past the earlier passes, we can fine tune the render without the need for external photo editing applications while the render continues to a cleaner and cleaner result.
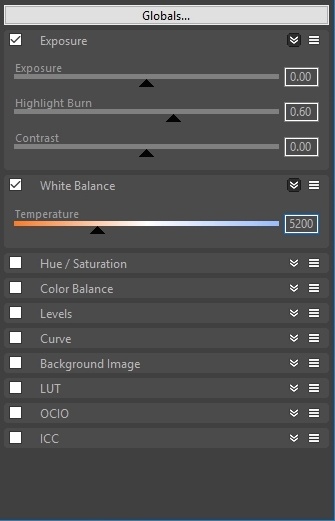
In the VFB, open up the Show Corrections Control Control panel by clicking on the icon at the bottom right of the window .
(2.1). Here you'll be able to fine-tune the render by turning on and manipulating the parameters. Increase the Exposure further and tune Tune down the Highlight Burn in the Exposure tab. Adjust the White Balance to turn down the warmth in the image . You can play with the saturation and Hue levels further down in the controls. Curve the image a little bit here and then check it on and off to see the difference.
Since the process is a progressive render, meaning it will continue to clean up the image as you allow the render to continue, you can click on the Track Mouse While Rendering icon to tell V-Ray to concentrate on the area the mouse is placed for cleanup before moving out to other areas of the image if you want one part of the image to resolve sooner than the rest.
By this time the image is resolved pretty nicely. Once you're happy with the image quality go ahead and click the Stop sign icon to halt the render.
Save the Render
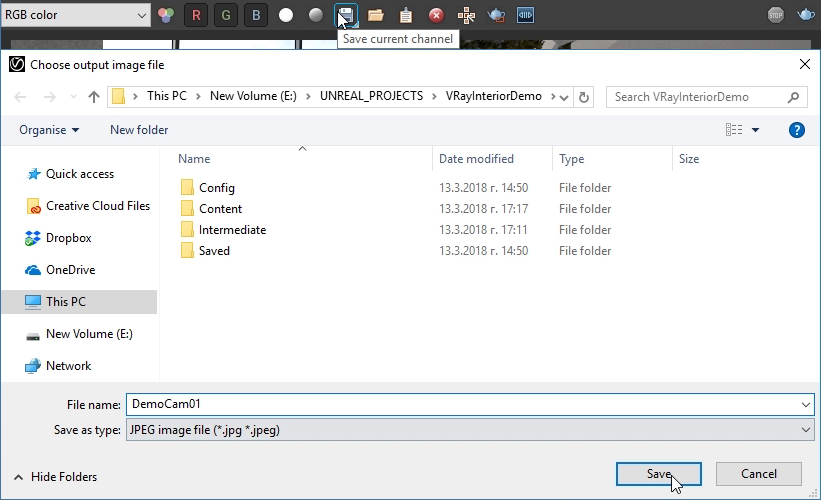
(2.2). For more details see documentation on V-Ray Frame Buffer.
| Section | ||||||||||
|---|---|---|---|---|---|---|---|---|---|---|
|
Check the final result with and without to see the difference (2.3).
| Section | ||||||||||||||||||||||||||||||||
|---|---|---|---|---|---|---|---|---|---|---|---|---|---|---|---|---|---|---|---|---|---|---|---|---|---|---|---|---|---|---|---|---|
|
Step 3. Save the Render
Now that the render’s done, from the VFB by click the Save button and select Now that the render’s done, there are a few ways that you can save it. One way is directly from the VFB by clicking the Save button and selecting any of these image formats. We’ll select PNG JPG here.
| Section |
|---|
...
|
...
|
Alternatively, the image can be saved directly from the Project Gallery.
Close the VFB and open the Project Gallery from the Render dropdown on the Toolbar. Select the From Yard view that you rendered to see a history of all the renderings from that view. Just click the Save to Disk icon to save the image to a folder.
Below that icon is a Save to Project Icon. By default it will try to over-write the existing view Choose No and it will create a new view under Renderings. And there it is, it’s now in your project and available to drag it out onto your sheets.
|

