Versions Compared

Key

  • This line was added.
  • This line was removed.
  • Formatting was changed.

...

Above the Simulation rollout are several actions for controlling the simulation.


Section
Column
width40%

Start, Pause, Stop, Resume – Starts, pauses and stops the simulation. Once the simulation has been paused, the option to Resume becomes available. Note that you can stop a running simulation using the Shift + Escape key combination, or with the Escape key, if the option to do so is enabled in the Phoenix FD Global Preferences.


Column
width60%


Anchor
Restore
Restore
Restore – Continues a simulation from the currently viewed frame on the timeline, or the latest Backup frame containing the full simulation state up to the current timeline frame, which is controlled by the Backup Interval parameter in the Output rollout. This way, a Phoenix simulation that has been stopped previously can be resumed from the point you left off, even after the software has been closed and reopened.

...

UI Text Box
typeinfo
Section
Column
width40%

When running a new simulation, Phoenix saves each simulated frame in a cache file with a .aur or .vdb extension, numbered using the frame index. By default, the cache files are stored under the data folder of the Maya project folder. They are put in a folder with the same name as the scene and with "_Phoenix_frames" appended:

Column
width60%


Section
Column
width40%

Inside the cache folder, the default names use the simulator's name. For example, a simulator named "PhoenixFDSimulator1" outputs these cache files:

Column
width60%


Section
Column
width40%

You can manually change the output path from the Output rollout. After Phoenix has created the .aur frame cache files, you can preview them in the viewport and render them using V-Ray or another renderer.

The diagram illustrates the basic simulation workflow.

For more information on changing paths for cache files, see the Tips and Tricks page.

Column
width60%

Parameters

...


Section
Column
width40%


Use Timeline Start Frame | start_from_timeline - When enabled, the Simulation will run from the Timeline Start Frame to the Timeline End Frame or the Custom Stop Frame, depending on the options.

Custom Start Frame | startFrame – Explicitly sets the Start frame of the Simulation. This can also be a negative number.

Use Timeline Stop Frame | stop_from_timeline - When enabled, the Simulation will run from the Timeline Start Frame or the Custom Start Frame to the end of the Timeline.

Custom Stop Frame | stopFrame – Explicitly sets the End frame of the Simulation. This can also be a negative number.

Skip Dynamics Before Start Frame | skipStartFrames – If enabled, the simulation will jump to the starting frame at the start of the simulation. Disabling will evaluate from the start of the timeline to allow Maya dynamics to run before simulating. For instance, Maya's nParticles are sensitive to large jumps in the timeline and disabling this option when the start frame for the Phoenix Simulator is different from the start frame of other dynamics in the scene could potentially resolve issues related to this. However, it is best to cache all dynamics before using them in a Phoenix simulation.

Auto Save Before Simulation | autoSave – The scene will be saved before starting the simulation.

Use Advection Origin for Motion Blur rendUVWForMB – The Advection Origin channel will be used to calculate the fluid movement for more precise motion blur, compared to using the Velocity channel which is the default way. Note that you must first enable the Advection Origin channel export from the Output rollout and then simulate, in order to be able to use Advection Origin for motion blur. Also note that it can be used only in Volumetric, Volumetric Geometry and Isosurface render modes.

Forward Simulation forwardSim – Enabling will first move the scene geometry and then simulate the fluid. This will fix simulation lag relative to scene changes.

Render On Each Sim Frame rend_sim_frame – During simulation, after each new frame is simulated, this option will start a render with your currently assigned production renderer and with the render settings you have dialed in your Render Settings Maya dialog. You need to have set a Render File Name Prefix in the Maya Render Settings in advance. In order to have the frame number in the file name, you can insert a "<frame>" token in the filename. For example, "image<frame>" will create files named "image1", "image2", "image3", etc. If you want to pad the number with zeros, you can use for example "image<frame04>", which will create files named "image0001", "image0002", "image0003", etc. You can use Render On Each Sim Frame when you leave a long simulation overnight, so you will have a ready rendered sequence when you come back to check on it, even if the entire simulation did not have time to finish. If you are doing test iterations and you don't need your fire/smoke to be rendered with production quality, you could enable the GPU Preview and use the Save Images During Simulation option instead.


UI Text Box
typetip

When doing test iterations on your simulation setup, you can also speed up the simulation by enabling Cacheless Simulation from the Output rollout.

UI Text Box
typetip

An alternative approach to Render On Each Sim Frame is to automatically start a sequence render after the entire simulation has finished by adding a 'RenderIntoNewWindow' command under the OnSimulationEnd() callback of the Use Script option below.


Column
width60%


...

UI Text Box
typetip

This section of the UI displays information on the current simulation.

Section
Column
width20%
 
Column
width60%

Column
width20%


...

Edit Script – Opens the script file in the default external editor.
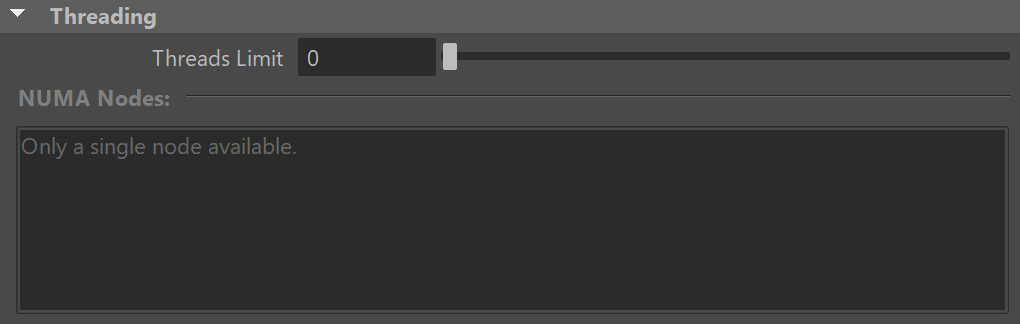
 

Threading

...


Section
Column
width40%

Threads Limit | threadsLimit – Specifies an upper limit on the number of threads used for the simulation. When the value is set to 0, the maximum number of threads (cores) will be used.

NUMA Node Start | NUMANode0 – If the value of Threads Limit is 0, this parameter specifies the starting index of the NUMA nodes that will be used for simulation.

NUMA Node End | NUMANode1 – If the value of Threads Limit is 0, this parameter specifies the end index of the NUMA nodes that will be used for simulation.

Column
width60%


...