Versions Compared

Key

  • This line was added.
  • This line was removed.
  • Formatting was changed.

...

Section
Column
width40%

Requires Phoenix 3.11.00 Official Release and V-Ray Next Official Release for 3ds Max 2015 +at least. If you notice a major difference between the results shown here and the behaviour behavior of your setup, please reach us using the Support Form.

The instructions on this page guide you through the process of using the Phoenix Particle Texture  to shade a particle simulation with Phoenix in 3ds Max.

The Download button below provides you with an archive containing the scene file.


UI Button
sizelarge
icondownload
titleDownload Project Files
urlhttps://drive.google.com/uc?export=download&id=1QrGid_mAPOyor6F73LHm9wCrm4VCQgDH1COJqpvGWvv3U4noCAbIxHoMaiu-j8xr-

Column
width60%
videoautoplayloop
Align
0Speed_Mult_RGB_dense.mp4
1100%
2100%
3true
4false
5true


Units Setup

aligncenter
HTML
<iframe width="800" height="450" src="https://www.youtube.com/embed/yp23FIvr6Yk?version=3&loop=1&playlist=yp23FIvr6Yk" frameborder="0" allowfullscreen></iframe>


Units Setup


Section
Column
width
Section
Column
width40%

Scale is crucial for the behavior of any simulation. The real-world size of the Simulator in units is important for the simulation dynamics. Large-scale simulations appear to move more slowly, while mid-to-small scale simulations have lots of vigorous movement. When you create your Simulator, you must check the Grid rollout where the real-world extents of the Simulator are shown. If the size of the Simulator in the scene cannot be changed, you can cheat the solver into working as if the scale is larger or smaller by changing the Scene Scale option in the Grid rollout.

The Phoenix solver is not affected by how you choose to view the Display Unit Scale - it is just a matter of convenience.

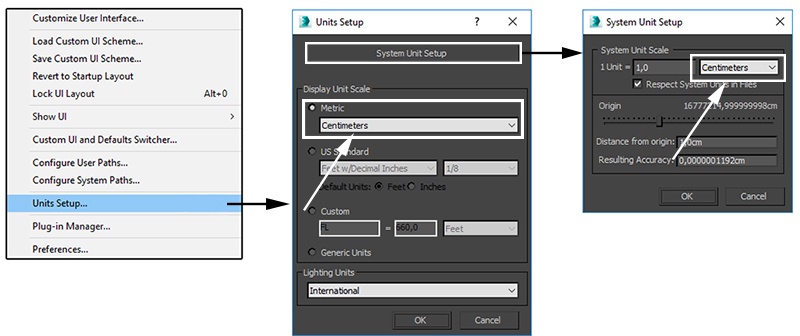
Go to Customize → Units Setup and set Display Unit Scale to Metric Centimeters.

Also, set the System Units such that 1 Unit equals 1 Centimeter.

Column
width60%


Scene Layout


...

Section
Column
width40%

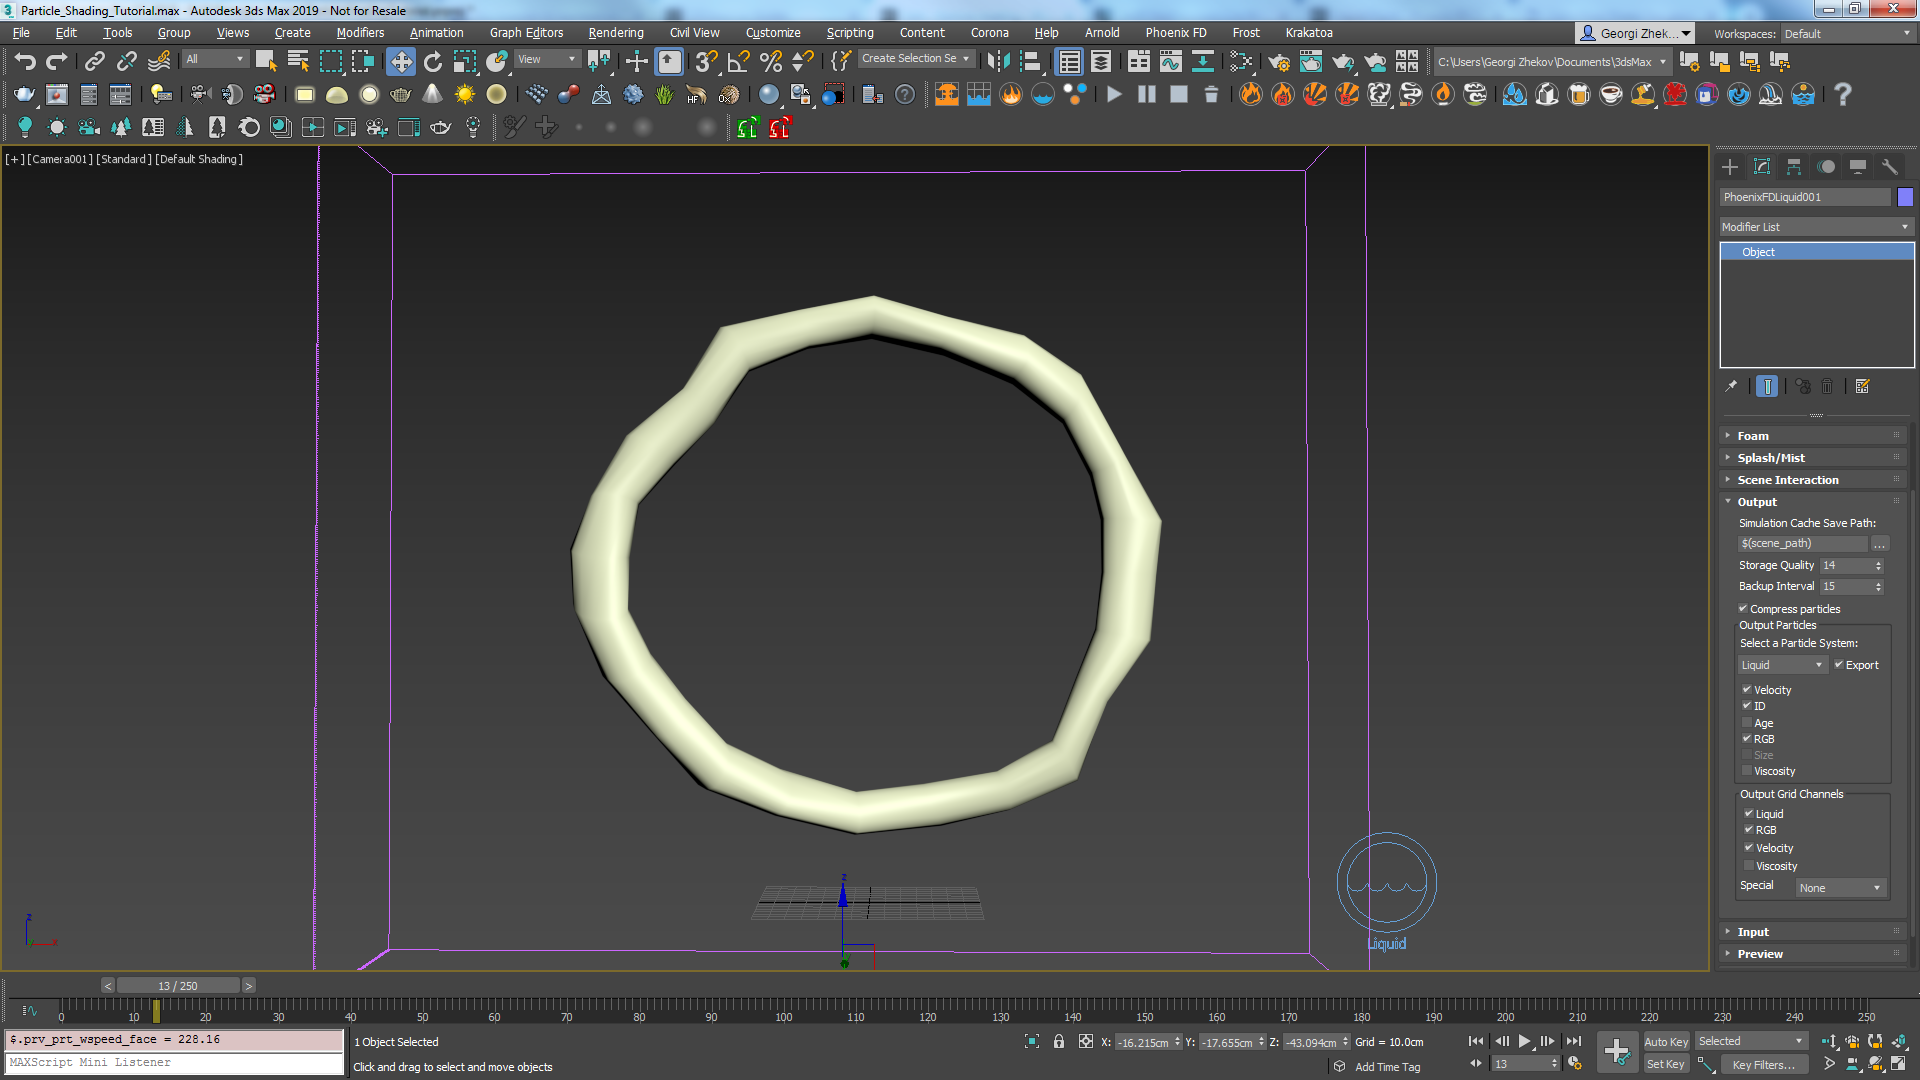
Here's how the simulation looks at the moment. The liquid starts falling down and doesn't stick to the animated Torus geometry.

We need to disable the Gravity and add a Body Force that will pull the liquid towards the Torus.

Column
width60%
videoautoplayloop
Align
0
align
Gravity.mp4
center
192%
2100%
3true
4false
5true


Phoenix Simulator Setup

HTML
<iframe width="800" height="450" src="https://www.youtube.com/embed/8GV90OhEC-M?version=3&loop=1&playlist=8GV90OhEC-M" frameborder="0" allowfullscreen></iframe>


Phoenix Simulator Setup


Section
Column
width40%

Select

Section
Column
width40%

Select the Phoenix Simulator and from the Dynamics rollout disable the Gravity checkbox. This way once the liquid is emitted it won't start falling down due to the gravity.

As later we would want to shade our particles based on the liquid channels we need to set those for export to the cache files.

In the Output rollout tick the checkboxes for Velocity and RGB for both the Output Particles and the Output Grid channels.

Column
width60%

...

Section
Column
width40%

Here's the result with the both Body Forces affecting the simulation.

Column
width60%
videoautoplayloop
Align
0
align
BodyForces.mp4
center
1
HTML
<iframe width="800
2540
3true
4false
5true


" height="450" src="https://www.youtube.com/embed/IuknEMYh00c?version=3&loop=1&playlist=IuknEMYh00c" frameborder="0" allowfullscreen></iframe>


Particle Shading


Section
Column
width40%

Now that we have the scene setup we need to render it out. By default the Phoenix Liquid Simulator will be rendered as mesh, though in this case we would like to render out the simulation as particles.

Select the Liquid Simulator, right-click and from the Object Properties disable Renderable.

Create a Phoenix Particle Shader and from the Add button select the Simulator and pick the Liquid particle group.

If we hit the render button now you will notice that the render is blank. In order to see something we will need some lights.

Create a V-Ray Ambient Light and then set the Color to 0, 0, 255 Hue, Saturation, Value and the Intensity to 2.

Column
width60%

...

true
Section
Column
width40%

Here's how the result looks in motion.

Column
width60%
videoautoplayloop
Align
0ShadeBy_RGB.mp4
1800
2540
3true
4false
aligncenter
HTML
<iframe width="800" height="450" src="https://www.youtube.com/embed/M5tcWUJY7Jw?version=3&loop=1&playlist=M5tcWUJY7Jw" frameborder="0" allowfullscreen></iframe>
5


Particle Shading By Speed

...

Section
Column
width40%

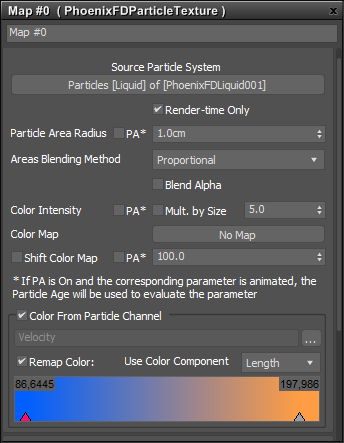
Turn on Remap Color from the Particle Texture options and set the Use Color Component to Length. This way the texture will use the speed of the particles, which is the length of the velocity vector.

Double click on the first color point to set its color and use 0.6, 1, 1 for Hue, Saturation, Value.

Double click on the second color point and set the color to 0.08, 0.734, 1.

Column
width60%


...


Section
Column
width60%40%

Moving the points, we can control how to colors are remapped based on the speed.

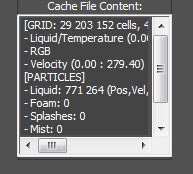
In order to figure out what the real velocity range is you can open the Simulation rollout of the Liquid Simulator and inside the Cache File Content check the range values for the Velocity channel. In this case it's from 0 to 279.40.

Column
40%
width10%


60%Image Added


Image Removed

Column
width
50%

Image Modified

Column
width40%


...


Section
Column
width40%

Move the first color point to position of 86 and the second one to 198. This way the gradient will tighten up and give the result a bit contrasty look. Note that the numbers displayed on the color gradient are the leftmost and rightmost points on the gradient, and not the positions of the color markers.

Column
width60%

...

Section
Column
width40%

Here's how the result looks in motion.

Column
width60%
Align
align
videoautoplayloop
0ShadeBy_Speed.mp4
1800
2540
3true
4false
5true


center
HTML
<iframe width="800" height="450" src="https://www.youtube.com/embed/sVYXoyhGZtg?version=3&loop=1&playlist=sVYXoyhGZtg" frameborder="0" allowfullscreen></iframe>


...


Section
Column
width40%

Another really cool thing that you can do with this approach is to combine both methods we have shown above.

So you can take the Particle Texture that reads the RGB channel and multiply it by the Particle Texture that reads the Speed of the Particles.

Duplicate the Particle Texture that we used for the Speed example above, set the Color from Particle Channel to RGB and turn off the color remapping.

In order to get a bit different result let's change the Color Remap gradient for the Speed Texture.

Set the first point to 0, 0, 0.1 Hue, Saturation, Value and move its position to 70. This sets the color to a dark gray and when we later multiply this color by the RGB texture some of the color will get through, but with a lower value.

Set the second point to 0, 0, 1 Hue, Saturation, Value and move its position to 100.

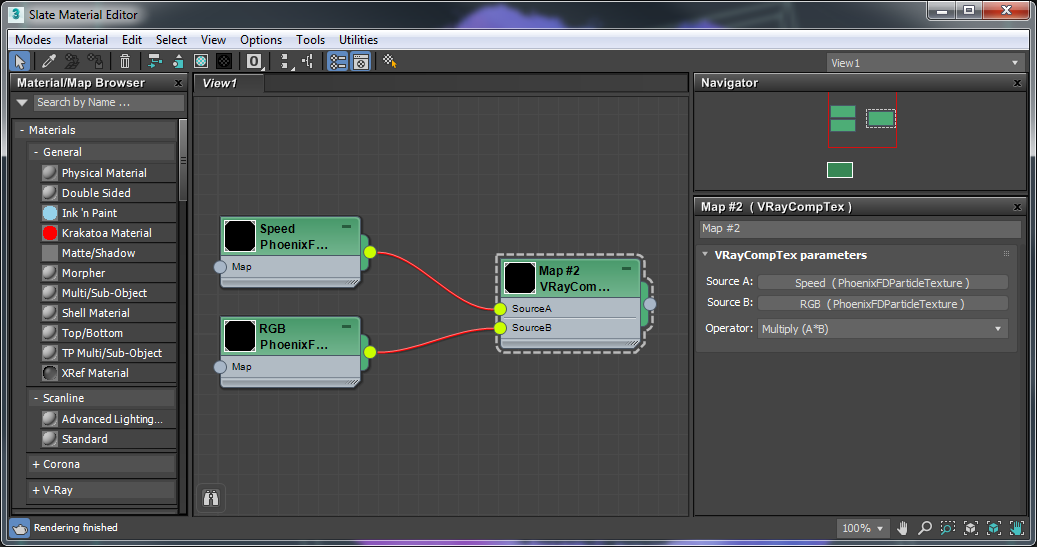
Create a V-Ray Comp Texture and connect the Speed and RGB particle textures to it.

Then set the Operator to Multiply and set the V-Ray Comp Texture as a Color map for the Particle Shader.

Column
width60%

...

Section
Column
width40%

Let's modify the overall look and make the particles a bit denser.

Select the Particle Shader and set the Point Alpha to 0.11 - this will bring the particles' opacity back up.

Set the Shadow Strength to 5 - this way we'll get stronger and darker shadows.

Now let's add some more V-Ray Lights.

Select the V-Ray Ambient Light we have already created and disable it.

Create a V-Ray Sphere Light and position it at X: 300, Y: -266, Z: 530. Set its Multiplier to 900.

Create another V-Ray Sphere Light and position it at X: -460, Y: 230, Z: 530. Set its Multiplier to 200.

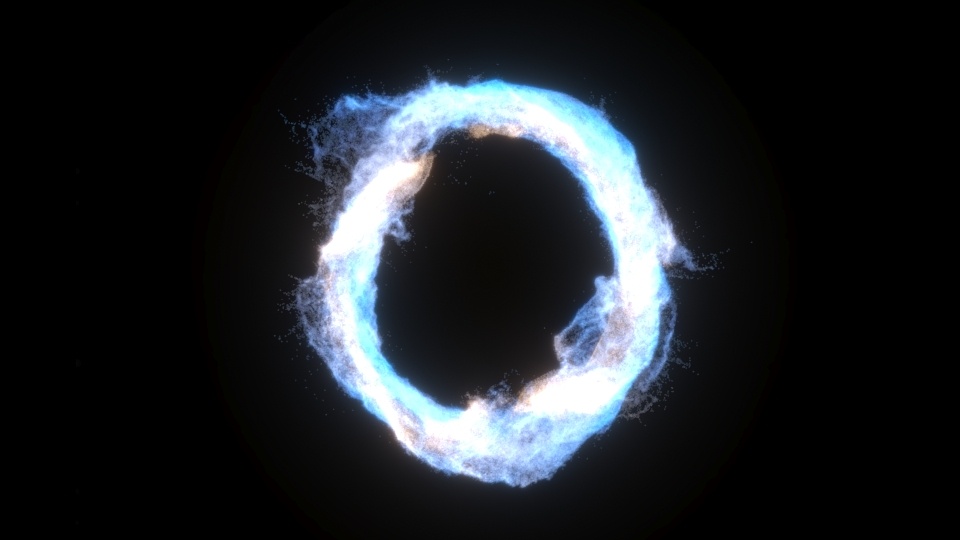
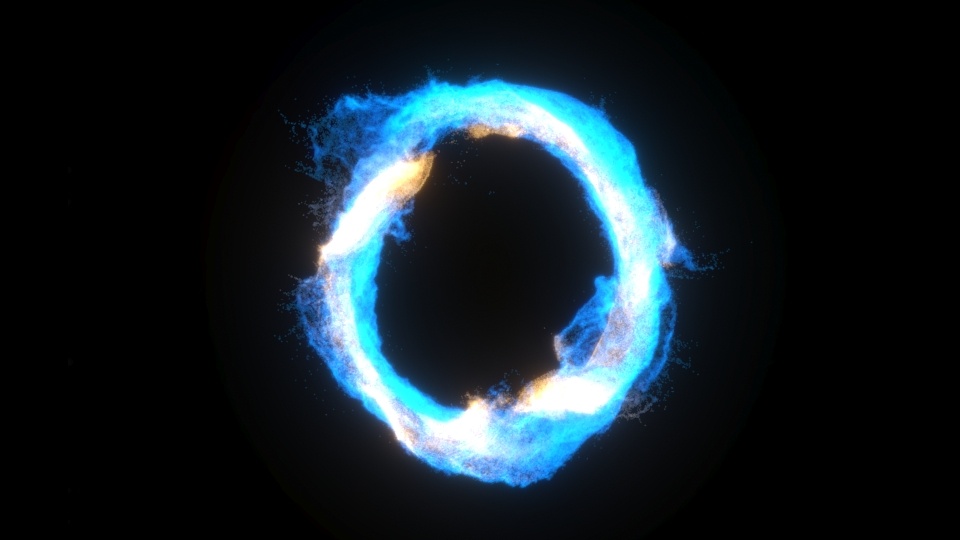
And this is how the final result looks like.

Column
width60%
videoautoplayloop
Align
aligncenter
HTML
<iframe width="800" height="450" src="https://www.youtube.com/embed/xMHa92A0jv4?version=3&loop=1&playlist=xMHa92A0jv4" frameborder="0" allowfullscreen></iframe>


...


Section
Column
width40%

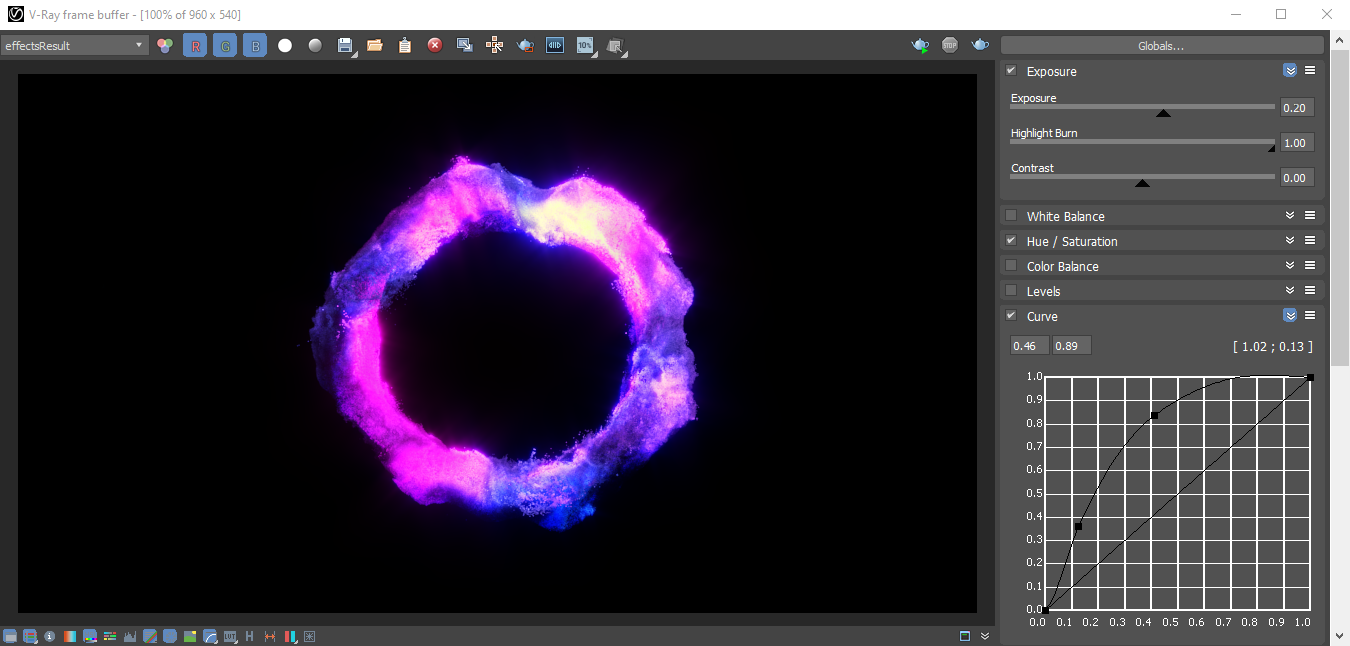
In addition, you can enable the Exposure and Curve options from the VFB Settings to make the render even more interesting.

Open the Exposure options and set the Exposure to 0.2.

Experiment with the Curve to achieve the desired look.

Column
width60%

Image Added


...


Section
Column
width40%

And here is the final rendered result.

true
Column
width60%
Align
aligncenter
HTML
<iframe width="800" height="450" src="https://www.youtube.com/embed/yp23FIvr6Yk?version=3&loop=1&playlist=yp23FIvr6Yk" frameborder="0" allowfullscreen></iframe>
0Speed_Mult_RGB_dense.mp4
1800
2540
3true
4false
5