Versions Compared

Key

  • This line was added.
  • This line was removed.
  • Formatting was changed.

...

UI Text Box
typetip

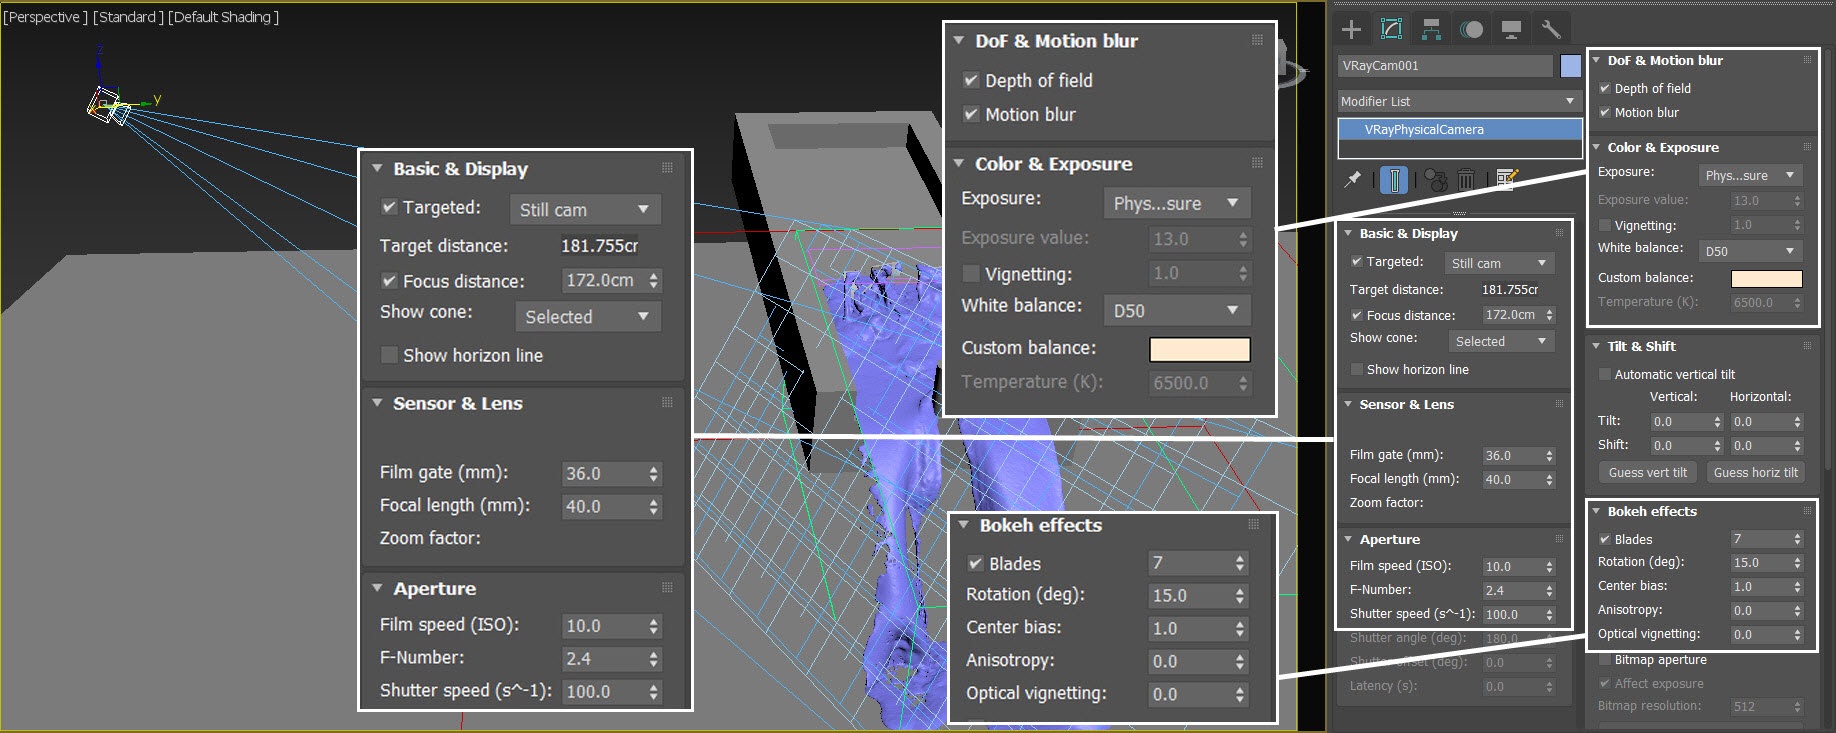
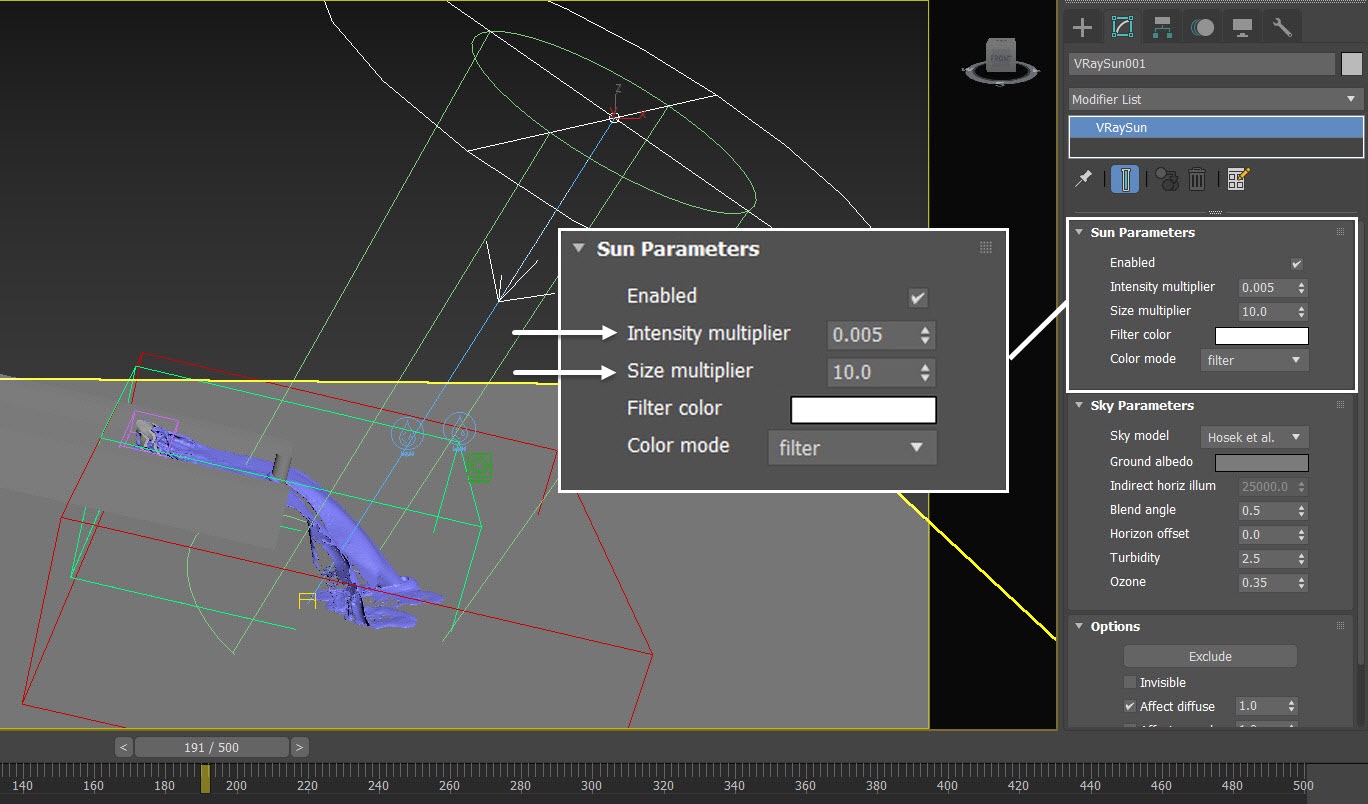
In this tutorial we have many steps to follow. To keep it concise, let's focus only on the Phoenix related steps and feel free to use the camera and light settings in the provided sample scene.

For your reference, below you can find the light and camera settings.


Expand
titleClick here to see the Camera and Light Settings...


Camera Setting


Section
Column
width40%

Add a Command Panel  Cameras → V-Ray → VRayPhysicalCamera.

The exact position of the Camera is XYZ: [ 150.0, -156.0, 129.0 ].

The Focus Distance is set to 172.0.

The exact position of the Camera Target is XYZ: [ 101.0, -9.0, 34.0 ].

Aperture  F-Number is set to 2.4.

Aperture  Shutter Speed is set to 100.

Color & Exposure  White Balance is set to D50 with RGB color (255, 210, 160).


In the Bokeh effects tab, the Blades option is enabled and set to 7, with a Rotation of 15. Center bias is set to 1.0.

Column
width60%


Lighting


Section
Column
width40%

From Command Panel  Lights → V-Ray → VRaySun, create a VRaySun in the scene.

The exact position of the VRaySun is XYZ: [ 189.5, -61.5, 190.0 ].

The exact position of the VRaySun Target is XYZ: [ 94.5, -4.0, 0.0 ].

Decrease the Intensity multiplier to 0.005.

Increase the Size multiplier to 10.0.

UI Text Box
sizemedium
typeinfo

VRaySun acts as a directional light, yet the sun disk provides reflection source for the lava material.

Column
width60%

...