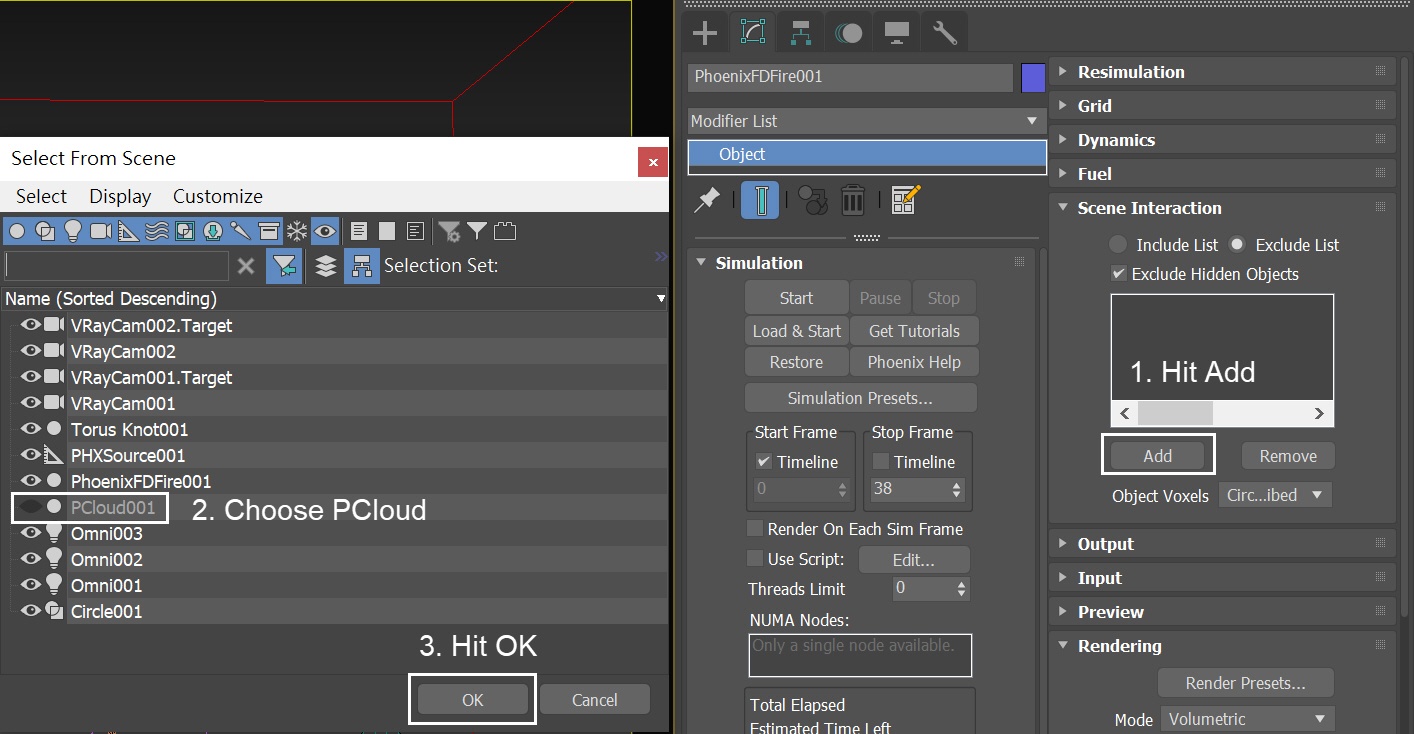
Select the Phoenix Simulator → Go to Scene Interaction rollout. Add the PCloud to the exclusion list.
UI Text Box
size
medium
type
note
Though every hidden object is excluded by default, in later steps, we will unhide the PCloud. However, there is a chance to forget to hide it again and it may affect our fluid simulation. Therefore, we added the PCloud to the exclude list as a precautionary step.
Column
width
60%
...
Section
Column
width
40%
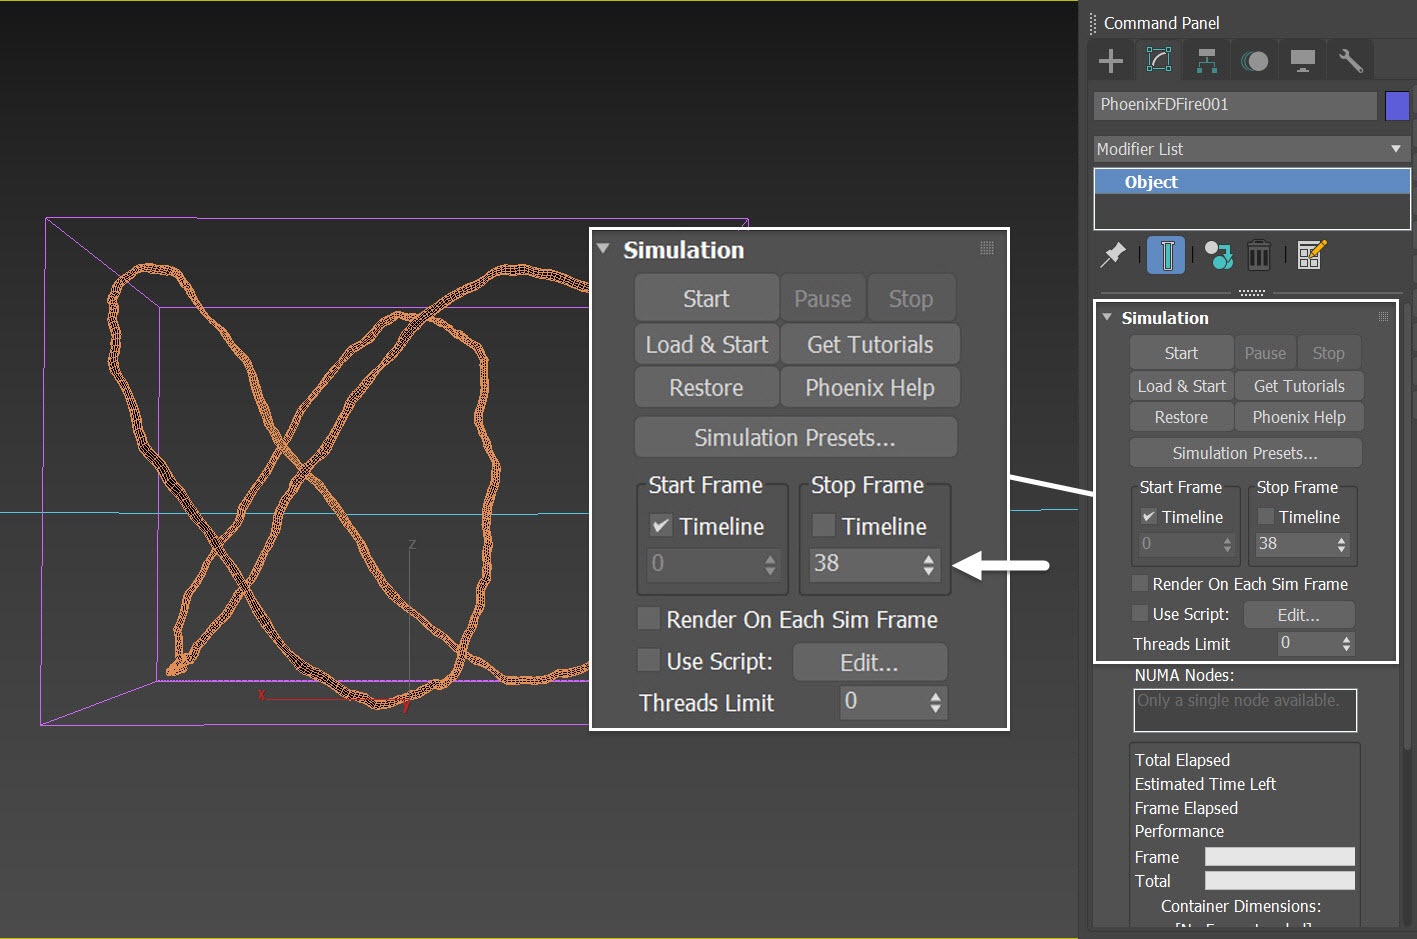
Set the Simulator → Simulation rollout → Stop Frame to 38.
UI Text Box
type
tip
The Timeline checkbox needs to be disabled for the numerical field to become untemplated. By default, the Timeline checkbox specifies the Start Frame as the first frame on the Timeline.
UI Text Box
size
medium
type
tip
The shape of the simulated smoke changes over time. You can use more or less frames for the simulation, to get the desired formation of the smoke (nebula). In this case, we choose to simulate to frame 38.
Column
width
60%
...
Section
Column
width
40%
Here is a Preview Animation of the simulation up to this step. It looks a bit dull now. It isn't anything like a nebula at all.
UI Text Box
type
tip
To enable the GPU Preview as seen in the video, select the Phoenix Simulator → Preview rollout → GPU Preview → Enable in Viewport.
UI Text Box
type
info
At this step, the nebula appears blue because the color of the Omni 001 is set to a light blue color.
Column
width
60%
HTML
<iframe width="800" height="450" src="https://www.youtube.com/embed/WocHKdysaWM" title="YouTube video player" frameborder="0" allowfullscreen></iframe>
...
Section
Column
width
45%
UI Text Box
size
medium
type
tip
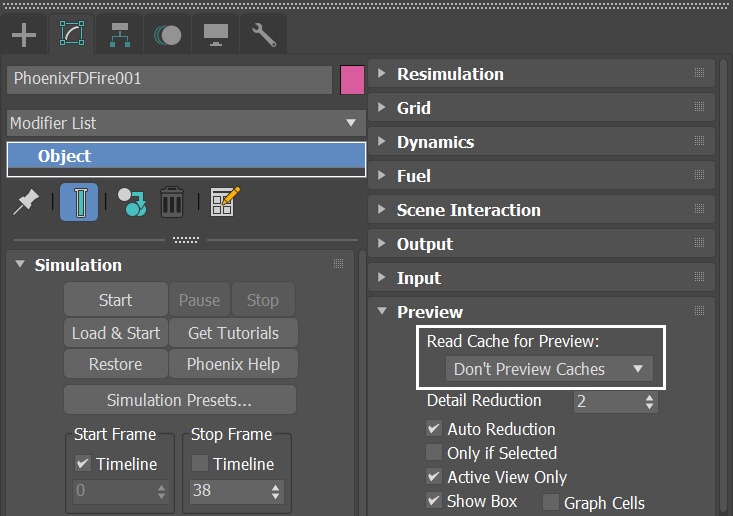
Due to the sheer amount of the cache data, if your viewport become less responsive, you can select the Phoenix Simulator → Go to Preview rollout → Read Cache for Preview, and temporarily change it to Don't Preview the Caches. Just be sure to switch back to Always when you need to see the cache preview.
In the final scene "nebula_max2017_final.max", the simulators are set to Don't Preview Caches for the same reason.
Column
width
55%
...
Section
Column
width
45%
Here is a test rendering up to this step.
UI Text Box
type
info
For test rendering, we set the Time Limit to 10.0 for the V-Ray GPU renderer. You can adjust the time limit depending on your hardware.
UI Text Box
size
medium
type
tip
The lights in the provided scene file are carefully positioned in the crevices of the smoke formation. If you didn't follow the exact steps of this tutorial (i.e: smoke is emitted from a different geometry), your render may be completely dark. You can nudge the lights to a sparse space so they won't be occluded by the smoke.
Column
width
55%
...
Section
Column
width
40%
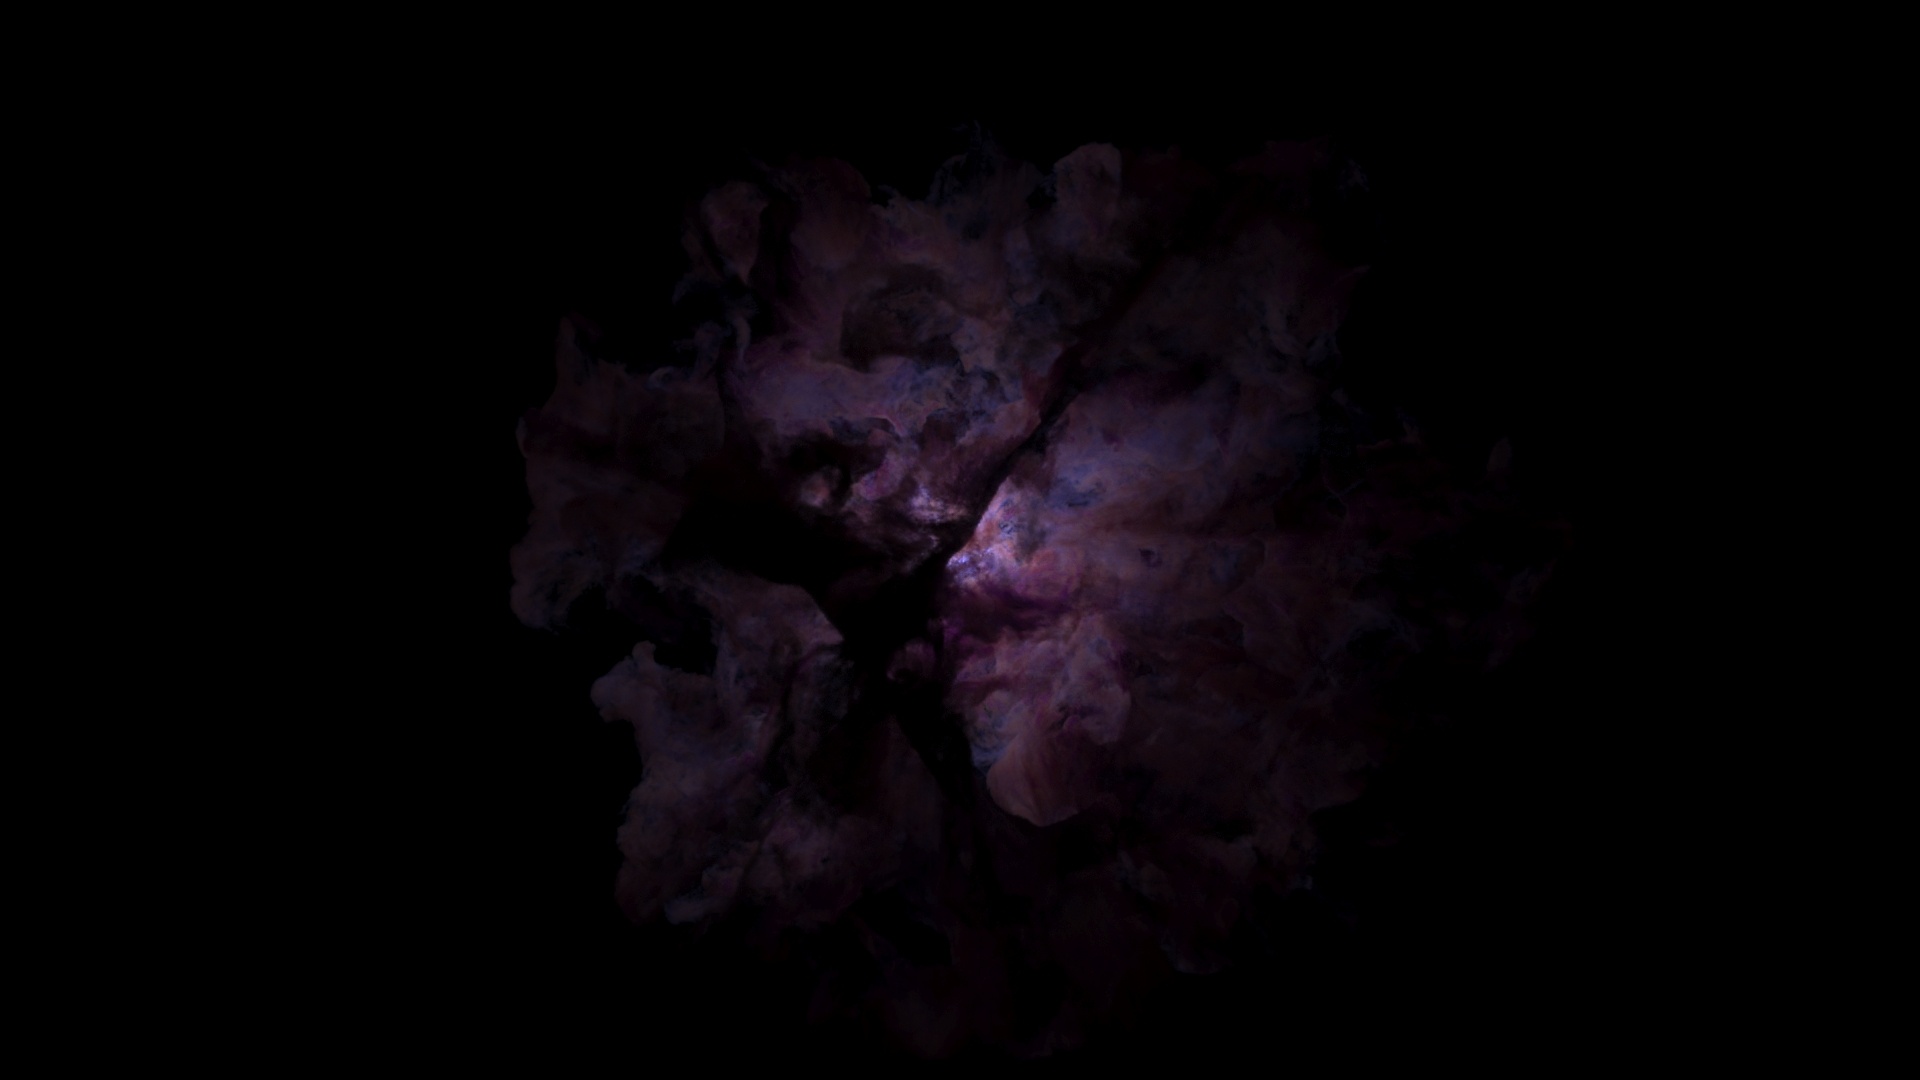
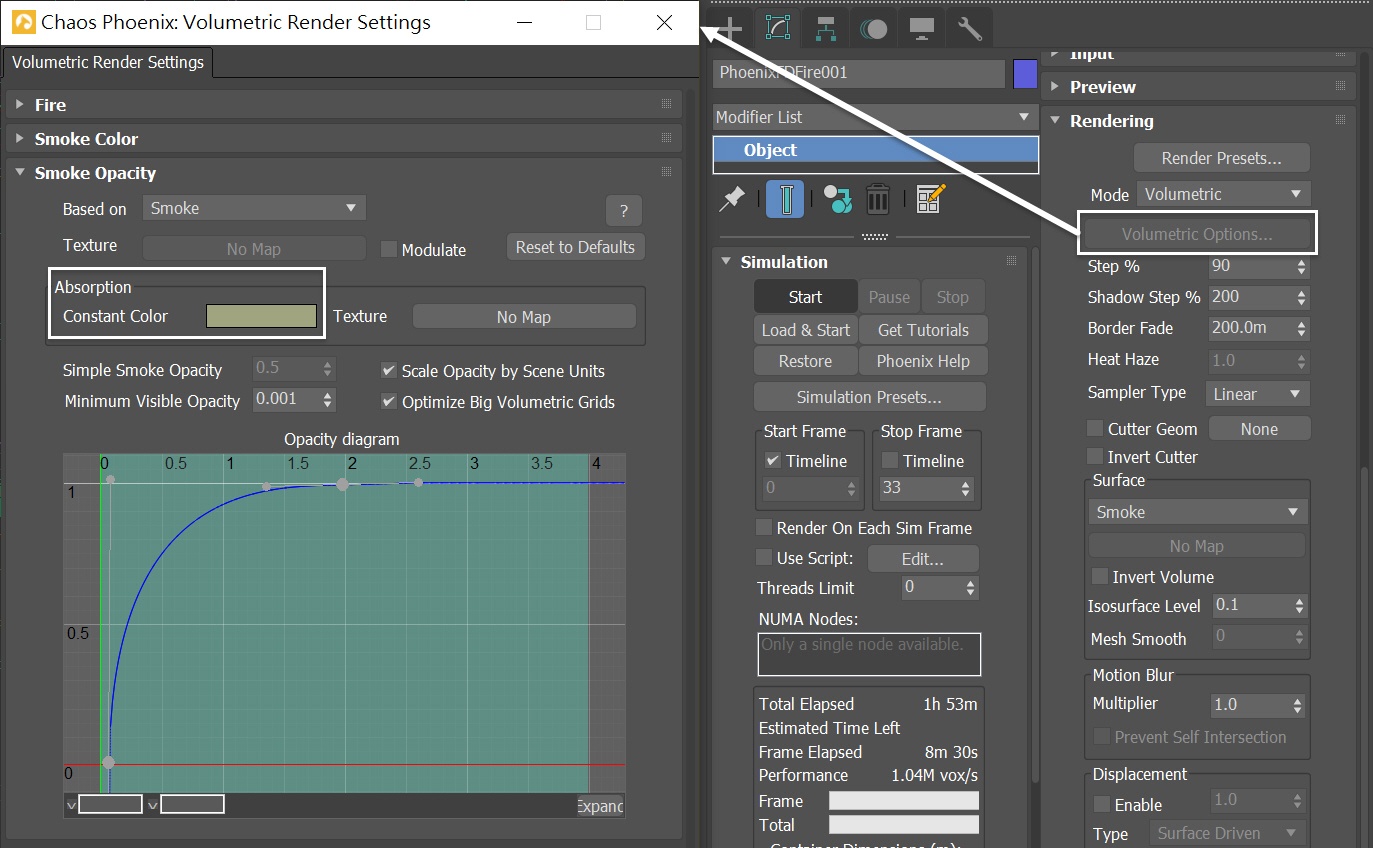
To further enhance the realism of the nebula, select the Phoenix Simulator, go to Rendering rollout → Volumetric Options. In the Smoke Opacity rollout, set the Absorption Constant Color to RGB (91, 96, 55).
UI Text Box
size
medium
type
info
The absorption color set here is basically complimentary to the purple color of the nebula. However, you can choose other color.
Column
width
60%
...
Section
Column
width
40%
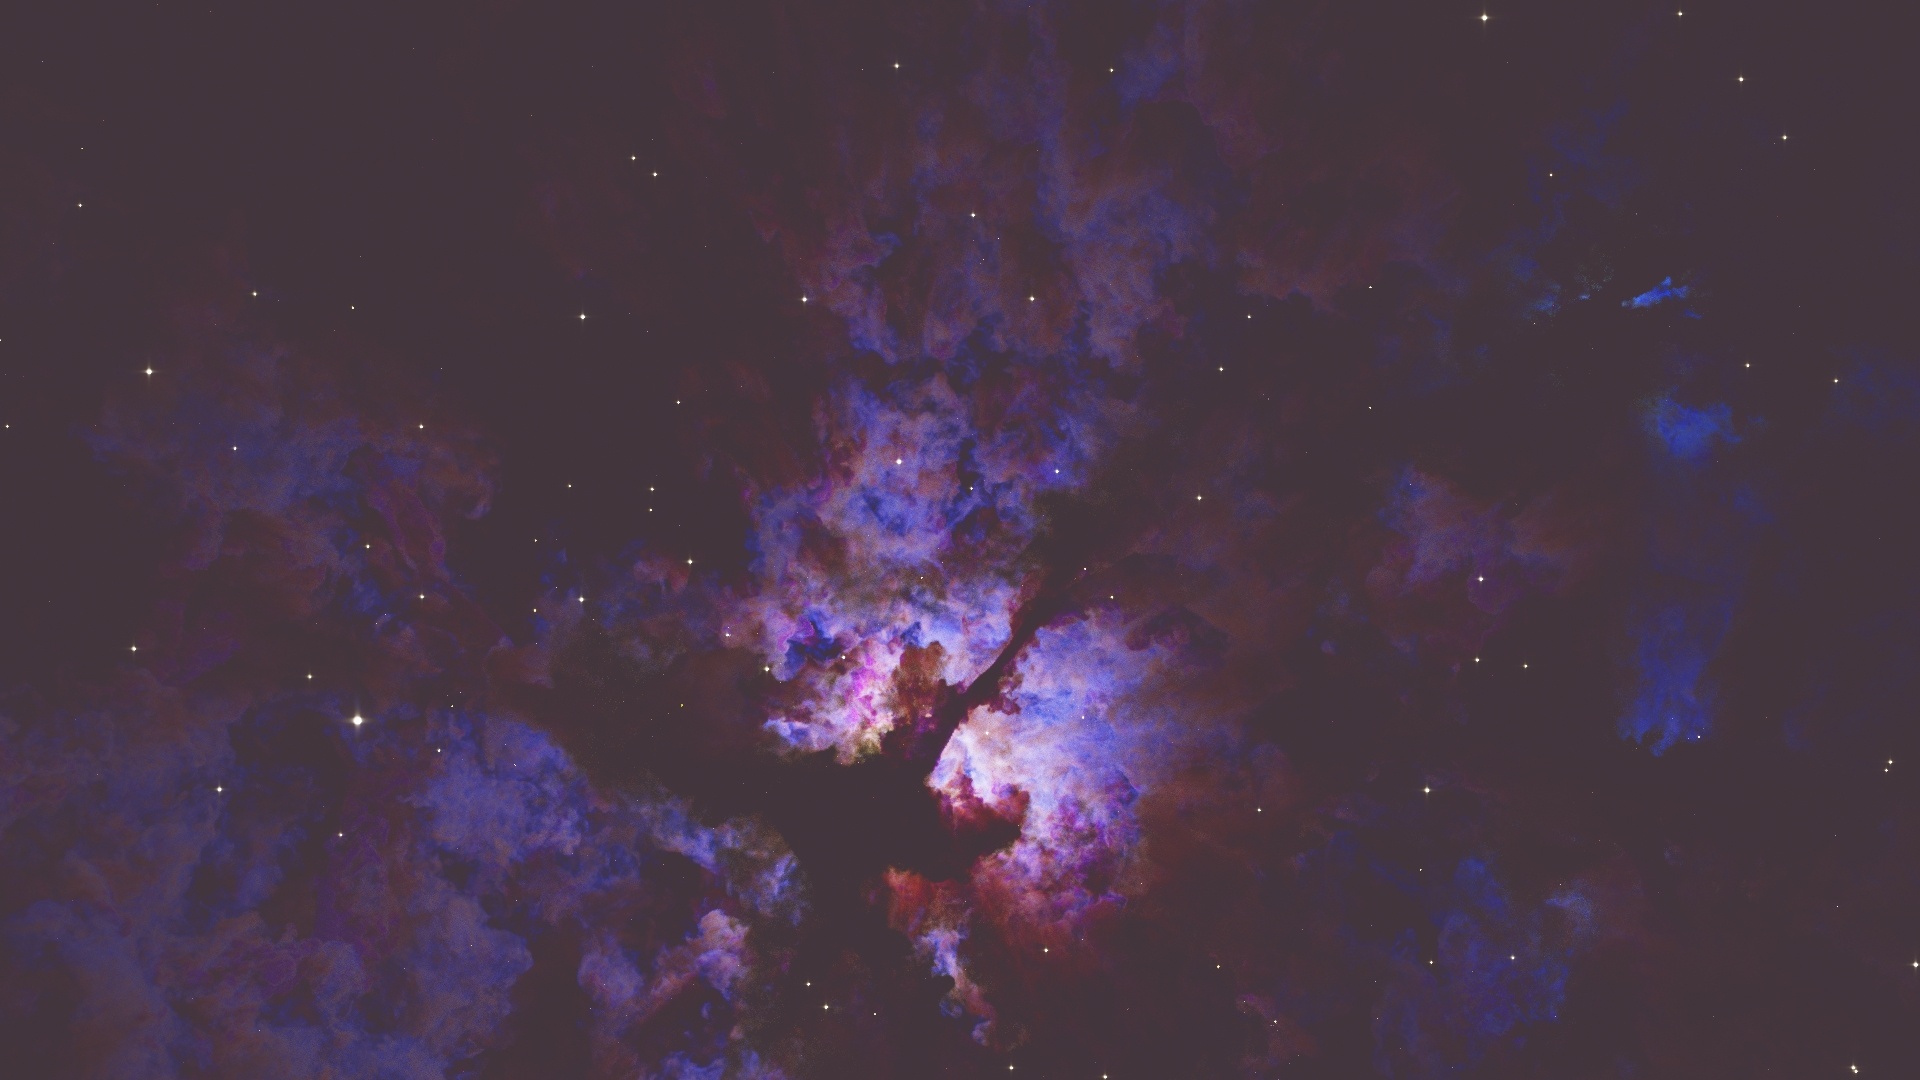
Here is the final image. You can see additional details in the nebula color thanks to the smoke absorption color settings.