Versions Compared

Key

  • This line was added.
  • This line was removed.
  • Formatting was changed.

This page provides a tutorial on using the Phoenix Particle Texture to shade a particle simulation with Chaos Phoenix FD in 3ds Max.

Overview 

...

size
UI Text Box
mediumtypeinfo

This is an Intermediate Level tutorial. Even though no previous knowledge of Phoenix FD is required to follow along, re-purposing the setup shown here to another shot may require a deeper understanding of the host platform's tools, and some modifications of the simulation settings.

Section
Column
width40%

Requires Phoenix FD 3.11.00 Official Release and V-Ray Next Official Release for 3ds Max 2015+. If you notice a major difference between the results shown here and the behaviour of your setup, please send an email to support@chaosgroup.com.

The instructions on this page guide you through the process of using the Phoenix Particle Texture  to shade a particle simulation with Phoenix FD in 3ds Max.

The Download button below provides you with an archive containing the scene file.


UI Button
sizelarge
icondownload
titleDownload Project Files
urlhttps://drive.google.com/uc?export=download&id=1QrGid_mAPOyor6F73LHm9wCrm4VCQgDH

Column
width60%

Videoautoplayloop
0Speed_Mult_RGB_dense.mp4
1100%
2100%
3true
4false
5true


Units Setup


Section
Column
width40%

Scale is crucial for the behavior of any simulation. The real-world size of the Simulator in units is important for the simulation dynamics. Large-scale simulations appear to move more slowly, while mid-to-small scale simulations have lots of vigorous movement. When you create your Simulator, you must check the Grid rollout where the real-world extents of the Simulator are shown. If the size of the Simulator in the scene cannot be changed, you can cheat the solver into working as if the scale is larger or smaller by changing the Scene Scale option in the Grid rollout.

The Phoenix FD solver is not affected by how you choose to view the Display Unit Scale - it is just a matter of convenience.

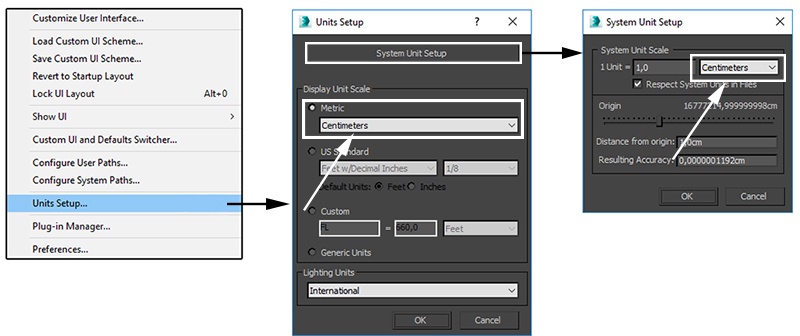
Go to Customize → Units Setup and set Display Unit Scale to Metric Centimeters.

Also, set the System Units such that 1 Unit equals 1 Centimeter.

Column
width60%


Scene Layout


Section
Column
width40%

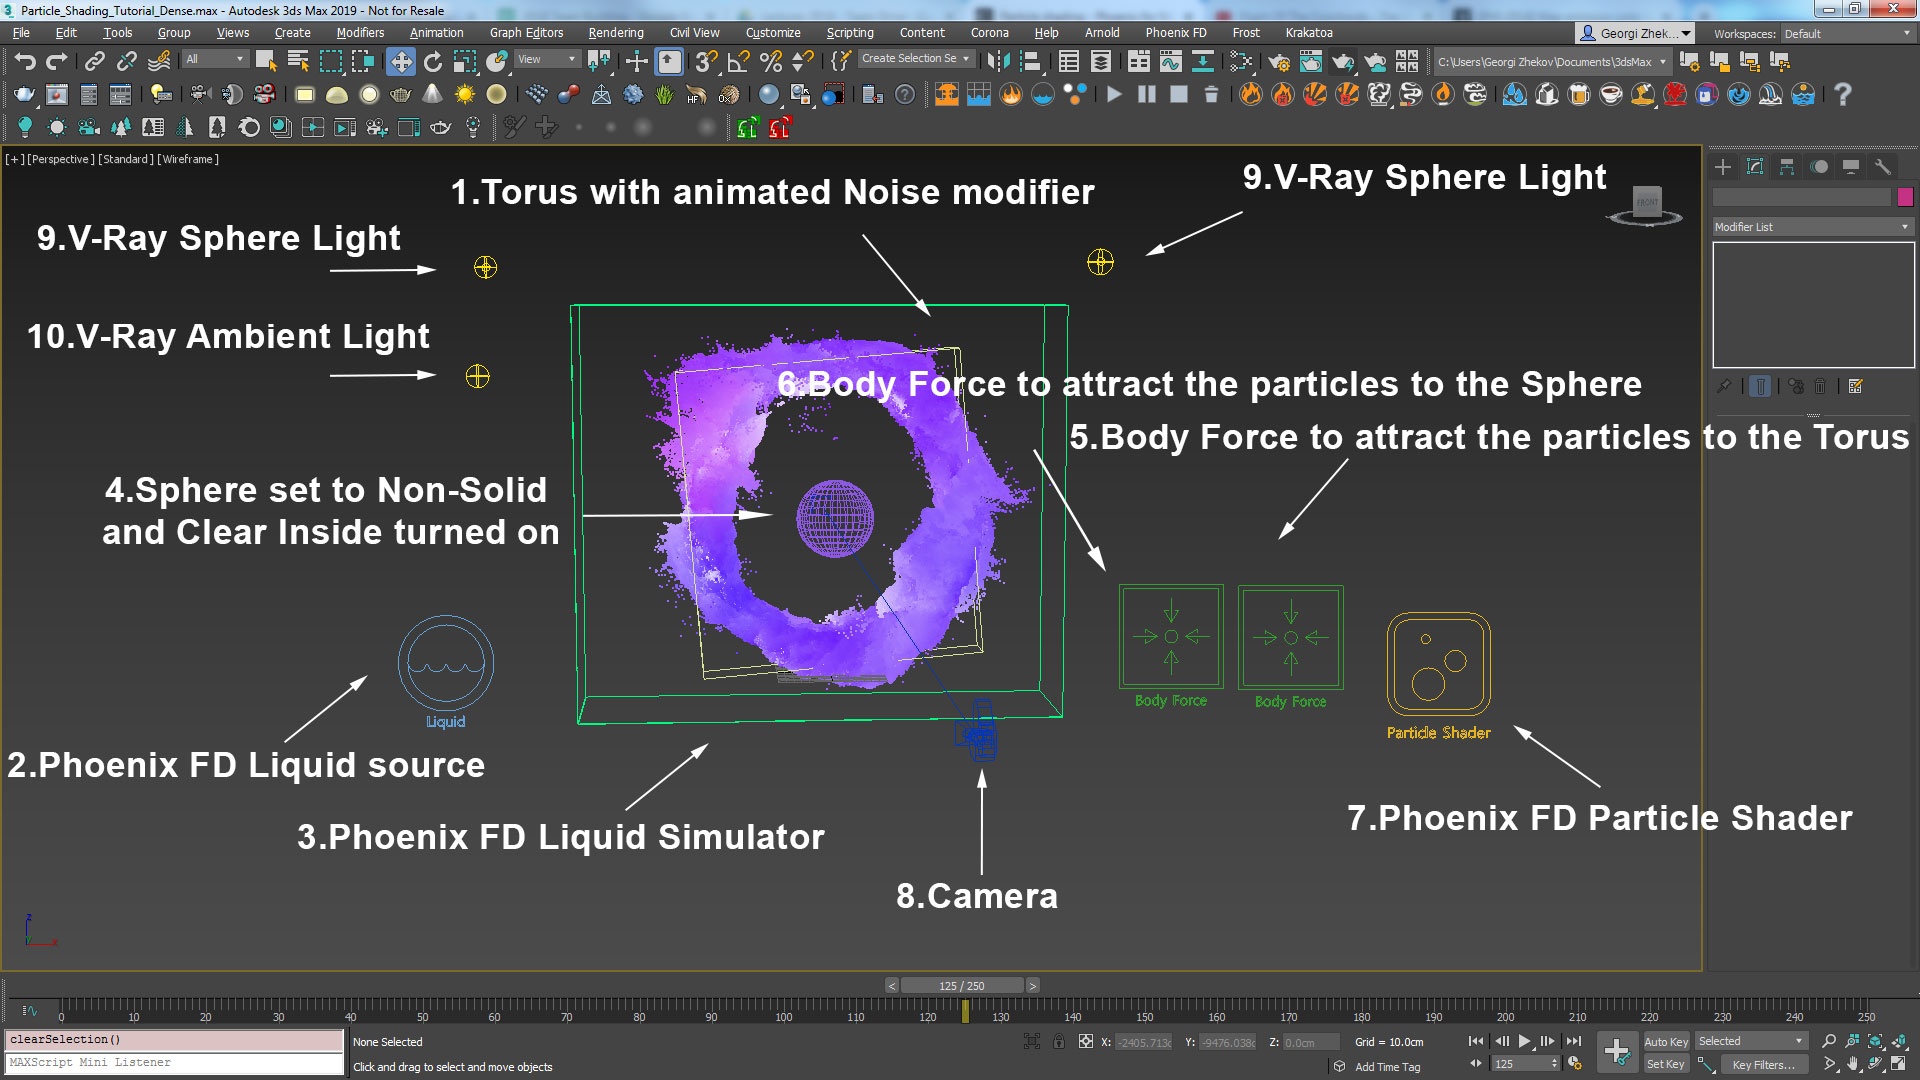
The final scene consists of the following elements:

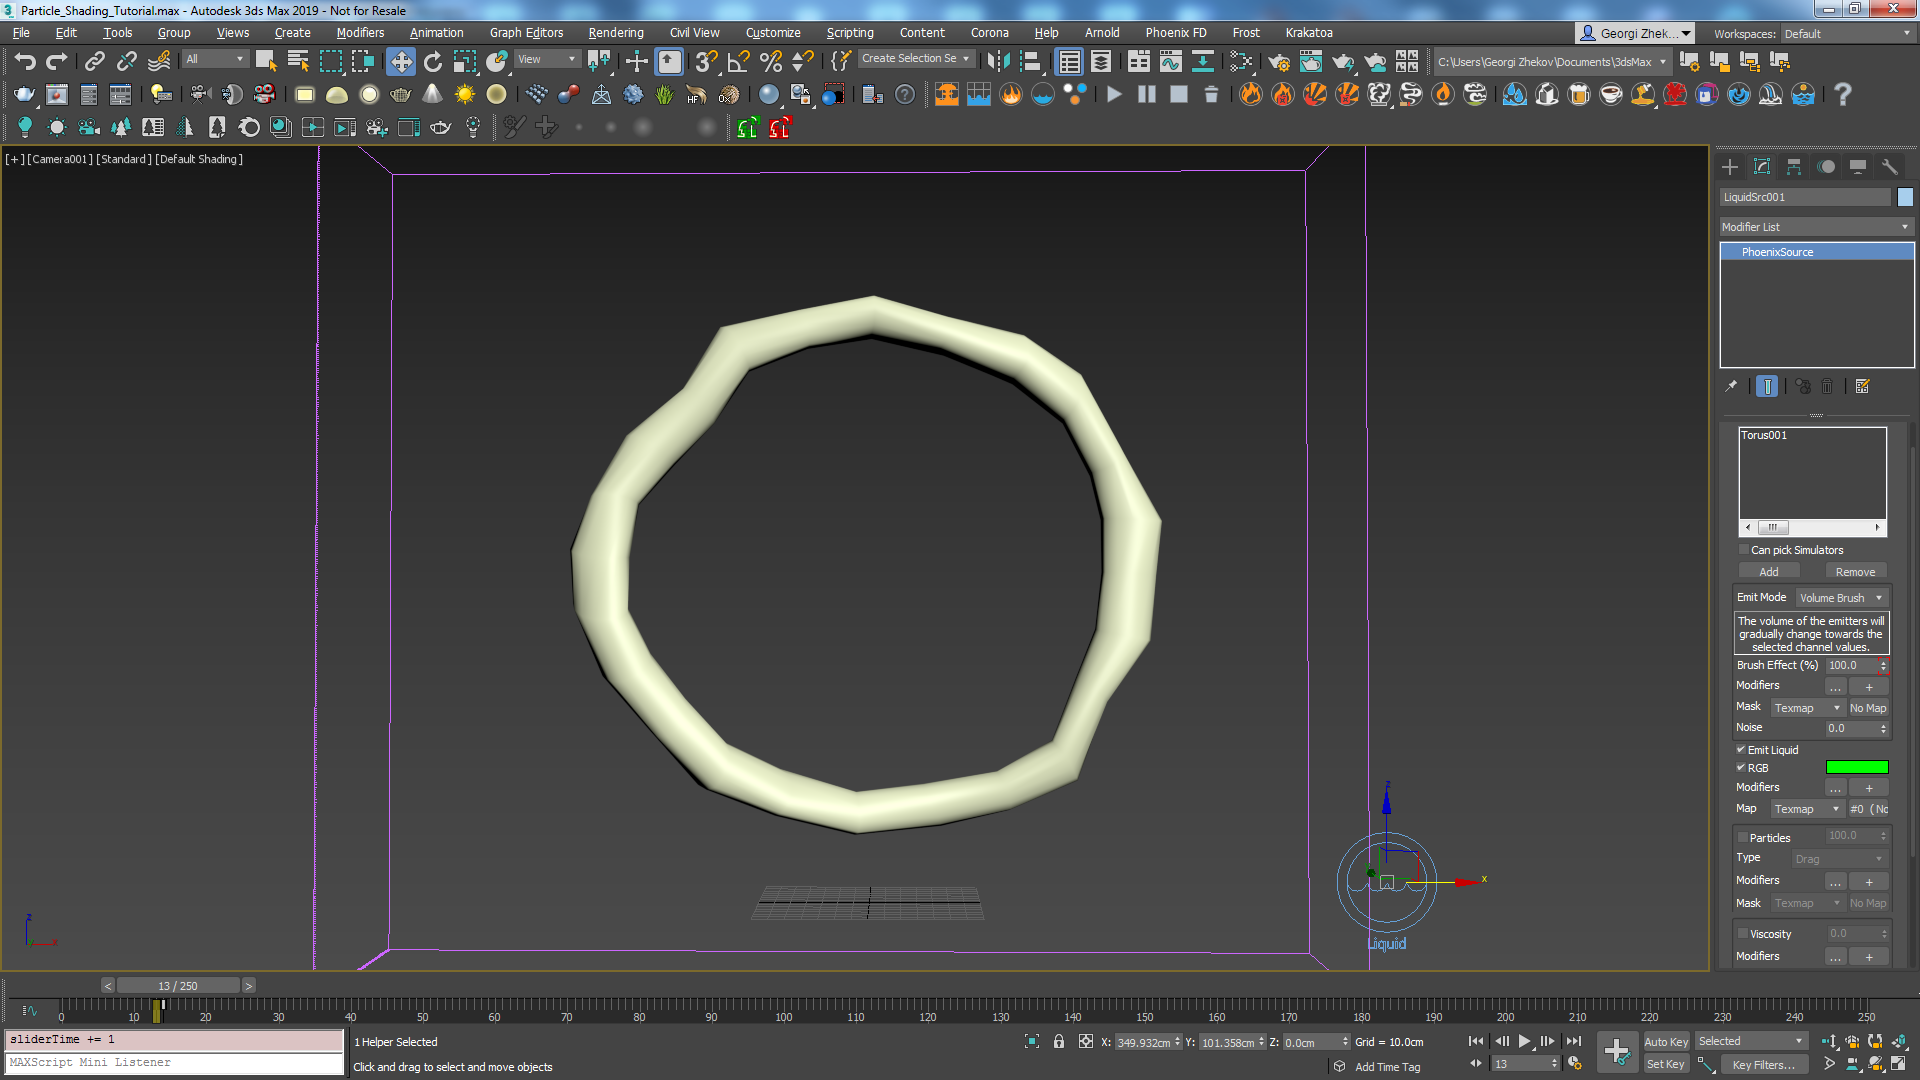
  1. A Torus used as the source geometry for Liquid particles. An animated Noise modifier is applied to the torus to break-up the motion of the liquid and produce interesting swirls.
  2. A Phoenix FD Liquid Source with the Torus in its Emitter Nodes list. The Source is in Volume Brush mode and is animated from 100% at frame 13 to 0% at frame 14.
  3. A Phoenix FD Liquid Simulator with some tweaks in the Grid and Dynamics rollouts.
  4. A Sphere set to Non-solid object from the Phoenix FD Properties and with Clear Inside turned on in order to delete all the particles that get inside of its volume.
  5. A Phoenix FD Body Force used to attract the liquid particles to the Torus. The Strength is animated from 300 at frame 140 to 100 at frame 145.
  6. A Phoenix FD Body Force to attract the liquid particles to the Sphere. The Strength is animated from 0 at frame 140 to 800 at frame 145.
  7. A Phoenix FD Particle Shader used to render the liquid particles.
  8. Standard Physical Camera for rendering.
  9. A V-Ray Sphere Lights for lighting the scene.
  10. A V-Ray Ambient Light for lighting the scene.
Column
width60%

...

Section
Column
width40%

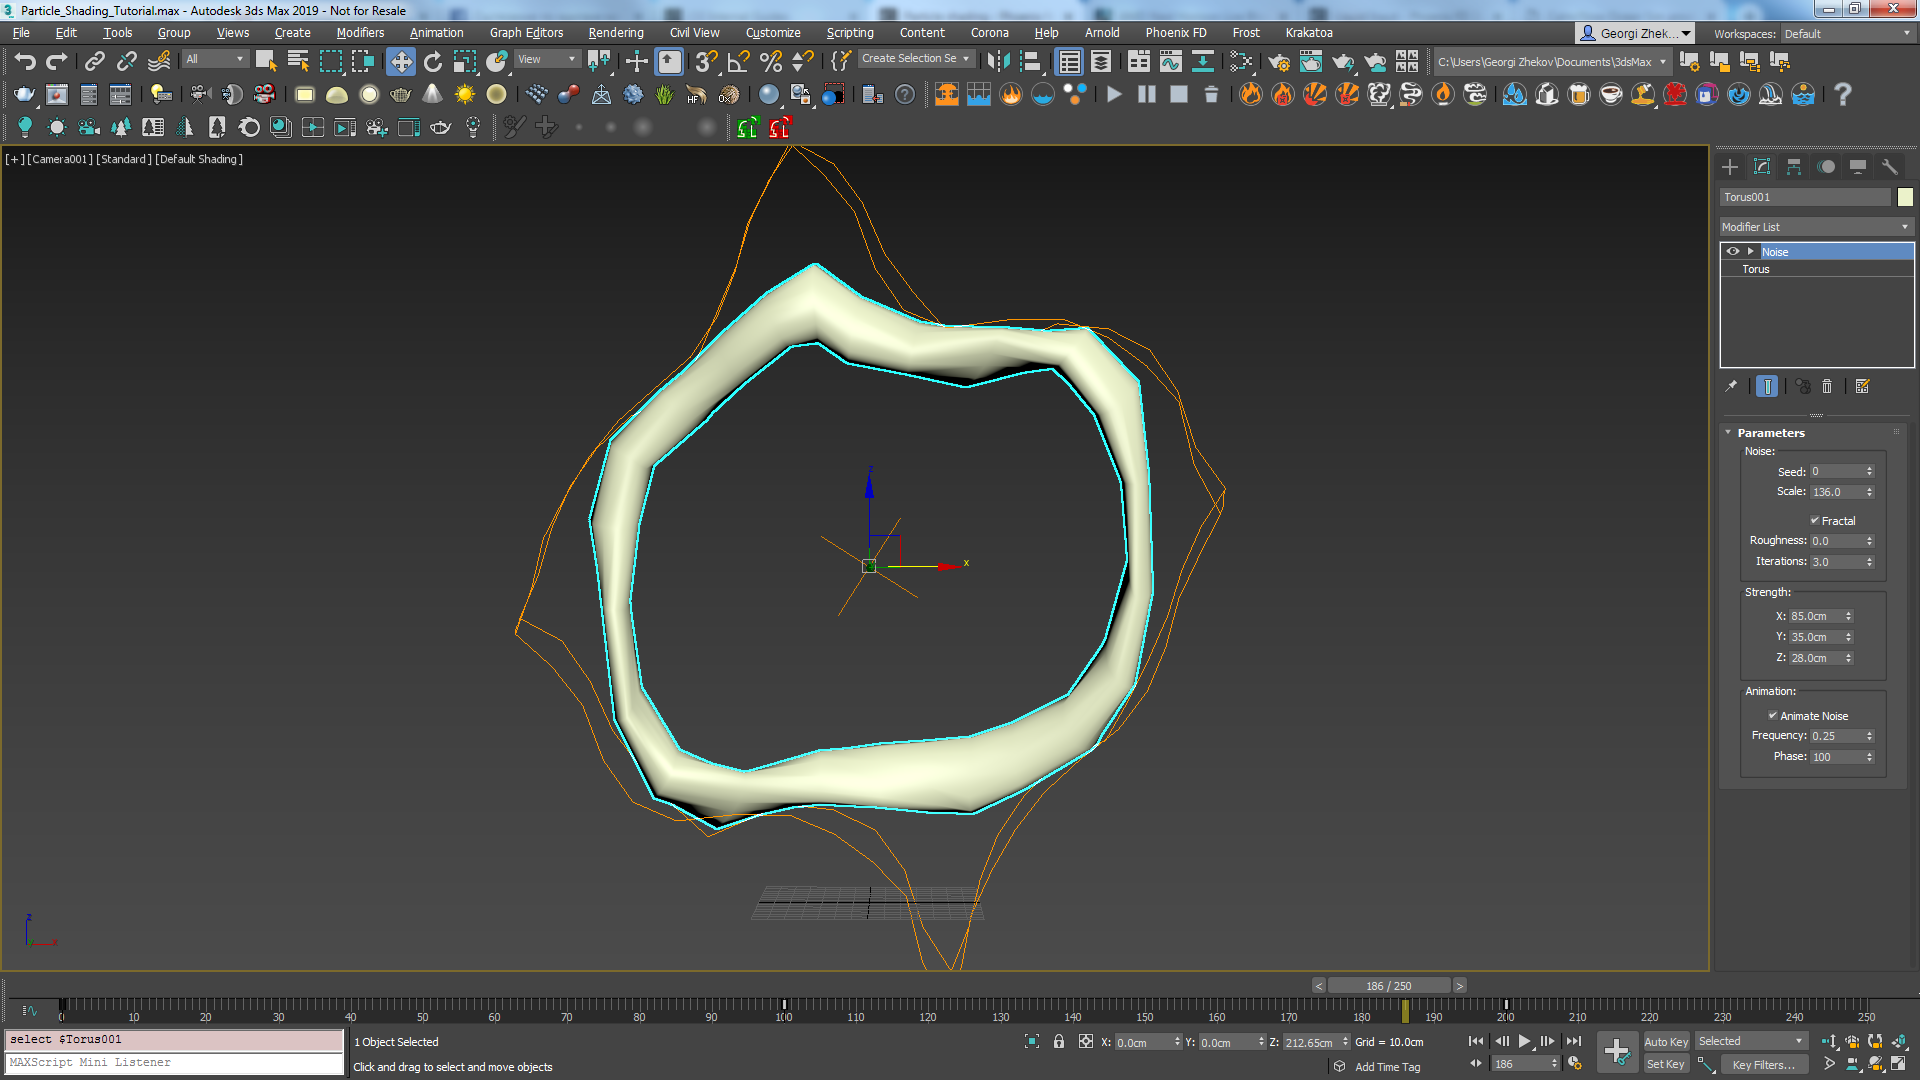
Apply a Noise modifier to the torus to give it irregular shape.

Set the Scale to 136. Turn Fractal on.

For the Strength set for X:85 Y:35 Z:28.

Turn on Animate Noise and animate the Phase from 0 at frame 0 to 100 at frame 100.

size
UI Text Box
mediumtypewarning

Using open geometry or geometry with no thickness can give you unpredictable simulation results. Making sure that your geometry is clean is crucial for a smooth workflow. Phoenix FD (and many simulation packages in general) use a volumetric representation of the emission geometry for the simulation. The process of creating this volumetric representation is called voxelization. The algorithms responsible for voxelizing the geometry can fail when using open (with holes) or planar (no thickness) geometry.

Column
width60%


Phoenix FD Setup

Phoenix Setup


Section
Column
width40%

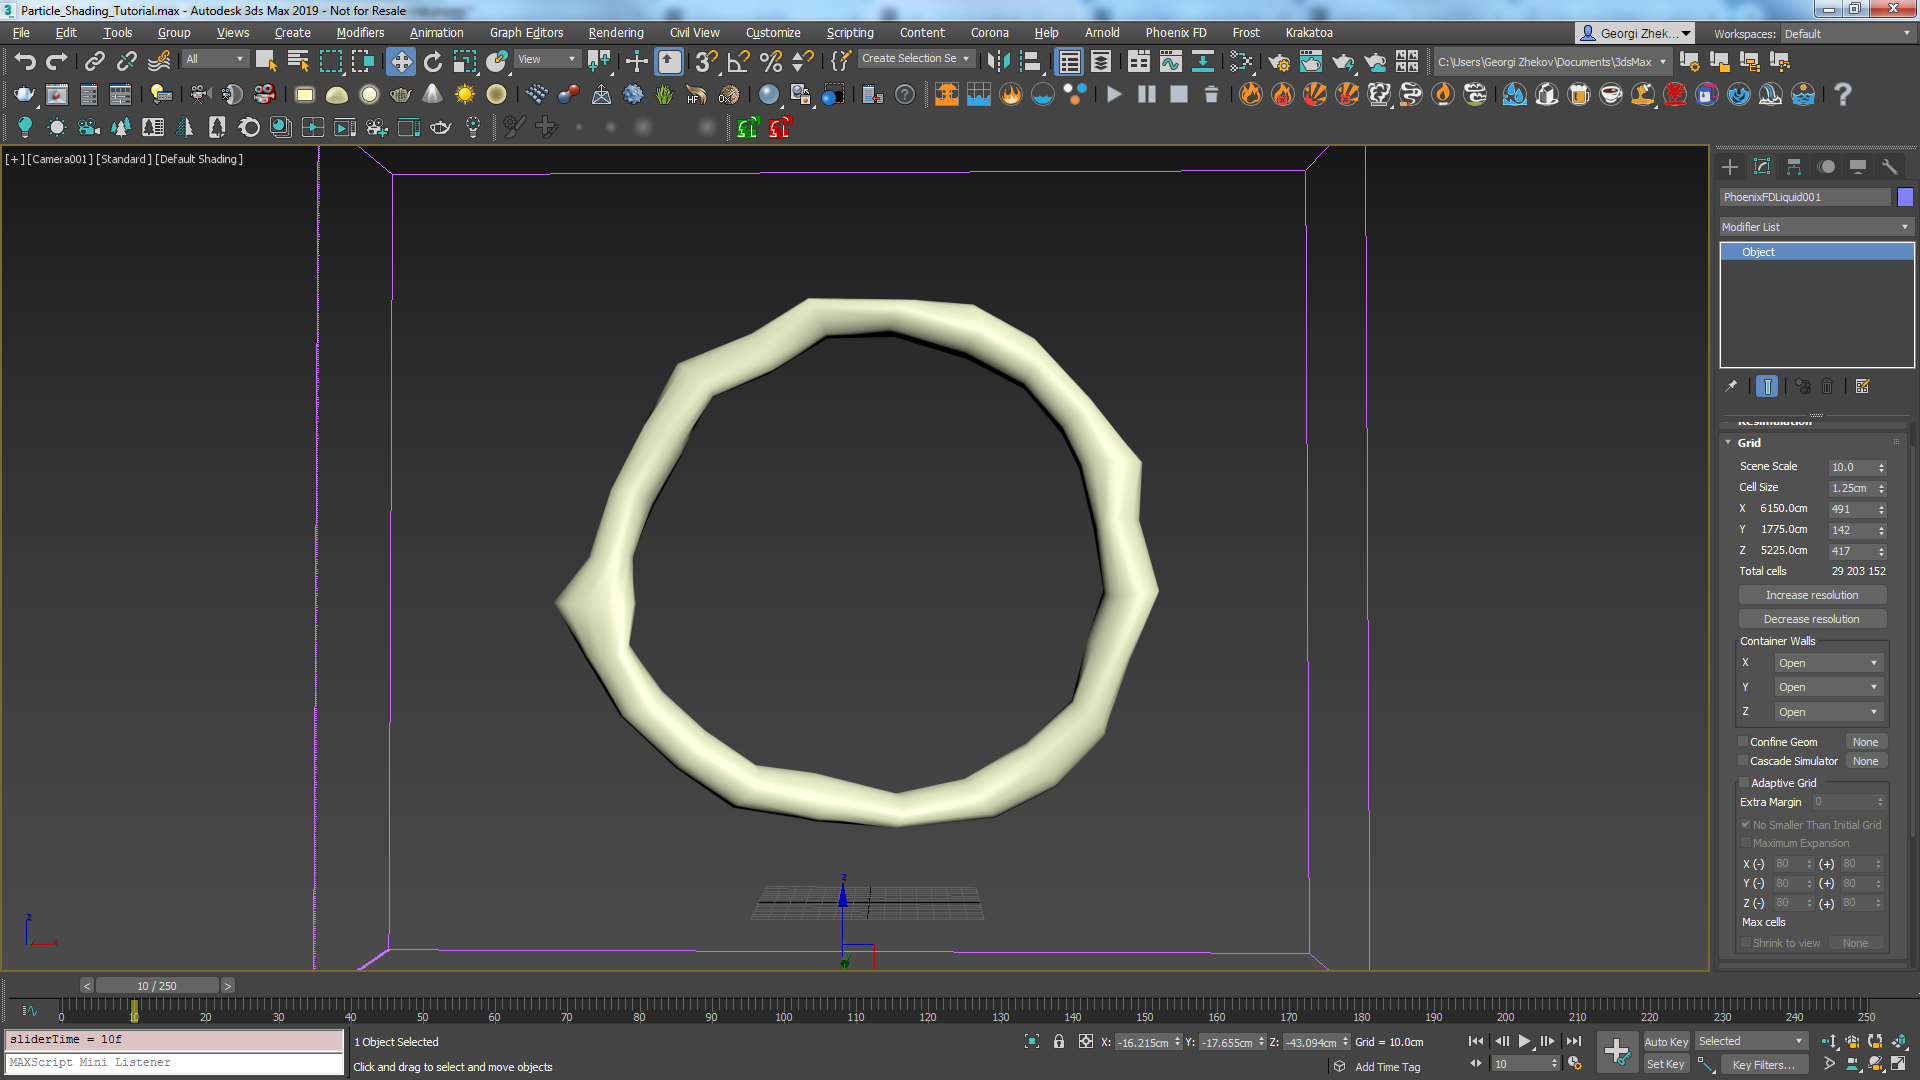
Create a Phoenix FD Liquid Simulator and set the Grid → Cell Size to 1.25.

Set the Size X / Y / Z to 491 / 142 / 417 respectively.

Set the Scene Scale to 10 - this would make our liquid swirls move a bit slower.

Column
width60%

...

Section
Column
width40%

Create a Phoenix FD Liquid Source and add the torus to the Emitter Nodes list by using the Add button.

Set the Emit mode to Volume Brush (you will be prompted with a message box letting you know that in order for the Volume Brush mode to work you need to set the object to Non-Solid, click on the Make Non-Solid button) and animate the Brush Effect from 100% at frame 13 to 0% at frame 14. Using the Volume Brush mode the volume of the emitter object will be gradually filled with liquid and in this way giving us a lot more particles to work with.

Turn on the RGB channel and plug a 3ds Max Noise texture in the map slot.

For the Noise texture set the Source to Object XYZ andthe Noise type to Fractal. Set the High value to 0.57 and the Low value to 0.5. Set the Levels to 6 and the Size to 120.

For the Color #1 of the Noise choose 214, 255, 255 for Hue, Saturation, Value respectively and for Color #2 161, 255, 255 for Hue, Saturation, Value.

Now that all the required elements for a liquid simulation are present ( (1) Emission Geometry, (2) Source and (3) Simulator ), we can run the simulation to see what we've got.

Column
width60%

...

Section
Column
width40%

Here's how the simulation looks at the moment. The liquid starts falling down and doesn't stick to the animated Torus geometry.

We need to disable the Gravity and add a Body Force that will pull the liquid towards the Torus.

Column
width60%

Videoautoplayloop
0Gravity.mp4
192%
2100%
3true
4false
5true


Phoenix FD Simulator

Phoenix Simulator Setup


Section
Column
width40%

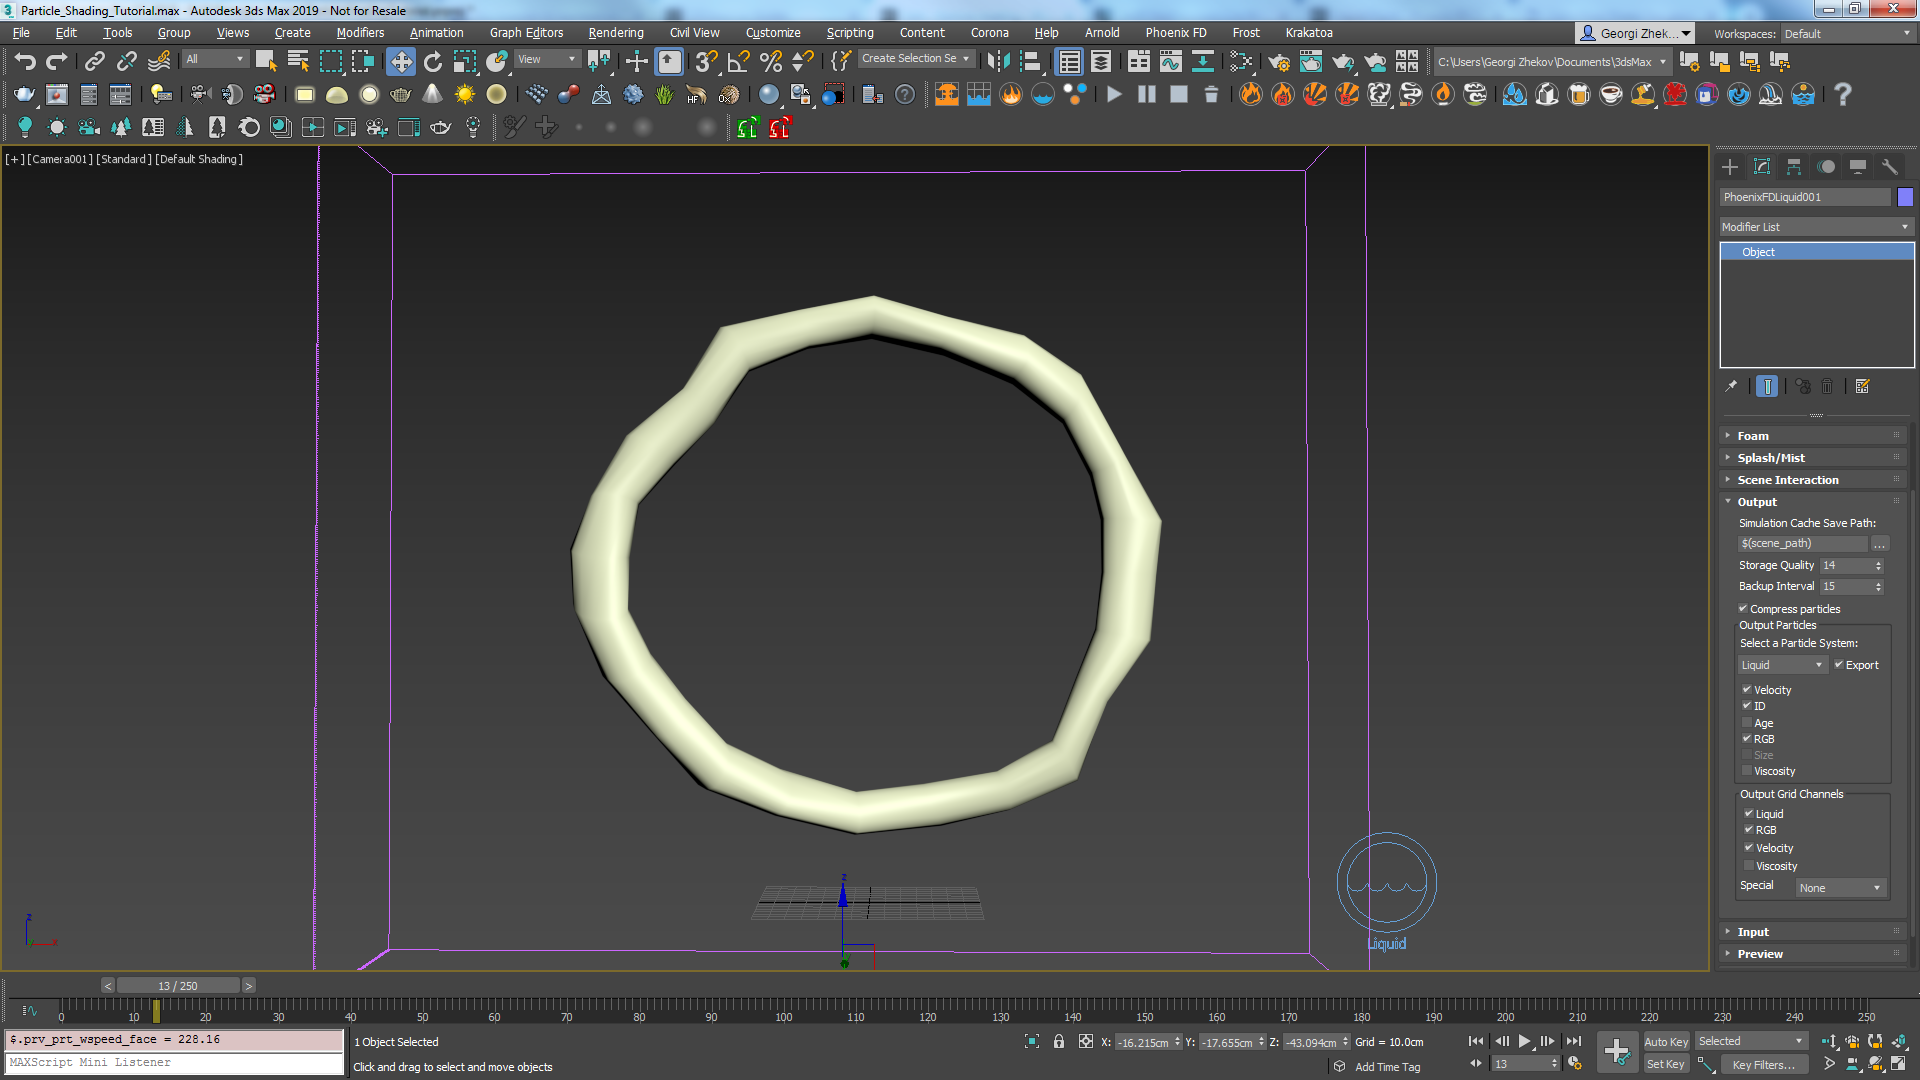
Select the Phoenix FD Simulator and from the Dynamics rollout disable the Gravity checkbox. This way once the liquid is emitted it won't start falling down due to the gravity.

As later we would want to shade our particles based on the liquid channels we need to set those for export to the cache files.

In the Output rollout tick the checkboxes for Velocity and RGB for both the Output Particles and the Output Grid channels.

Column
width60%

...

Section
Column
width40%

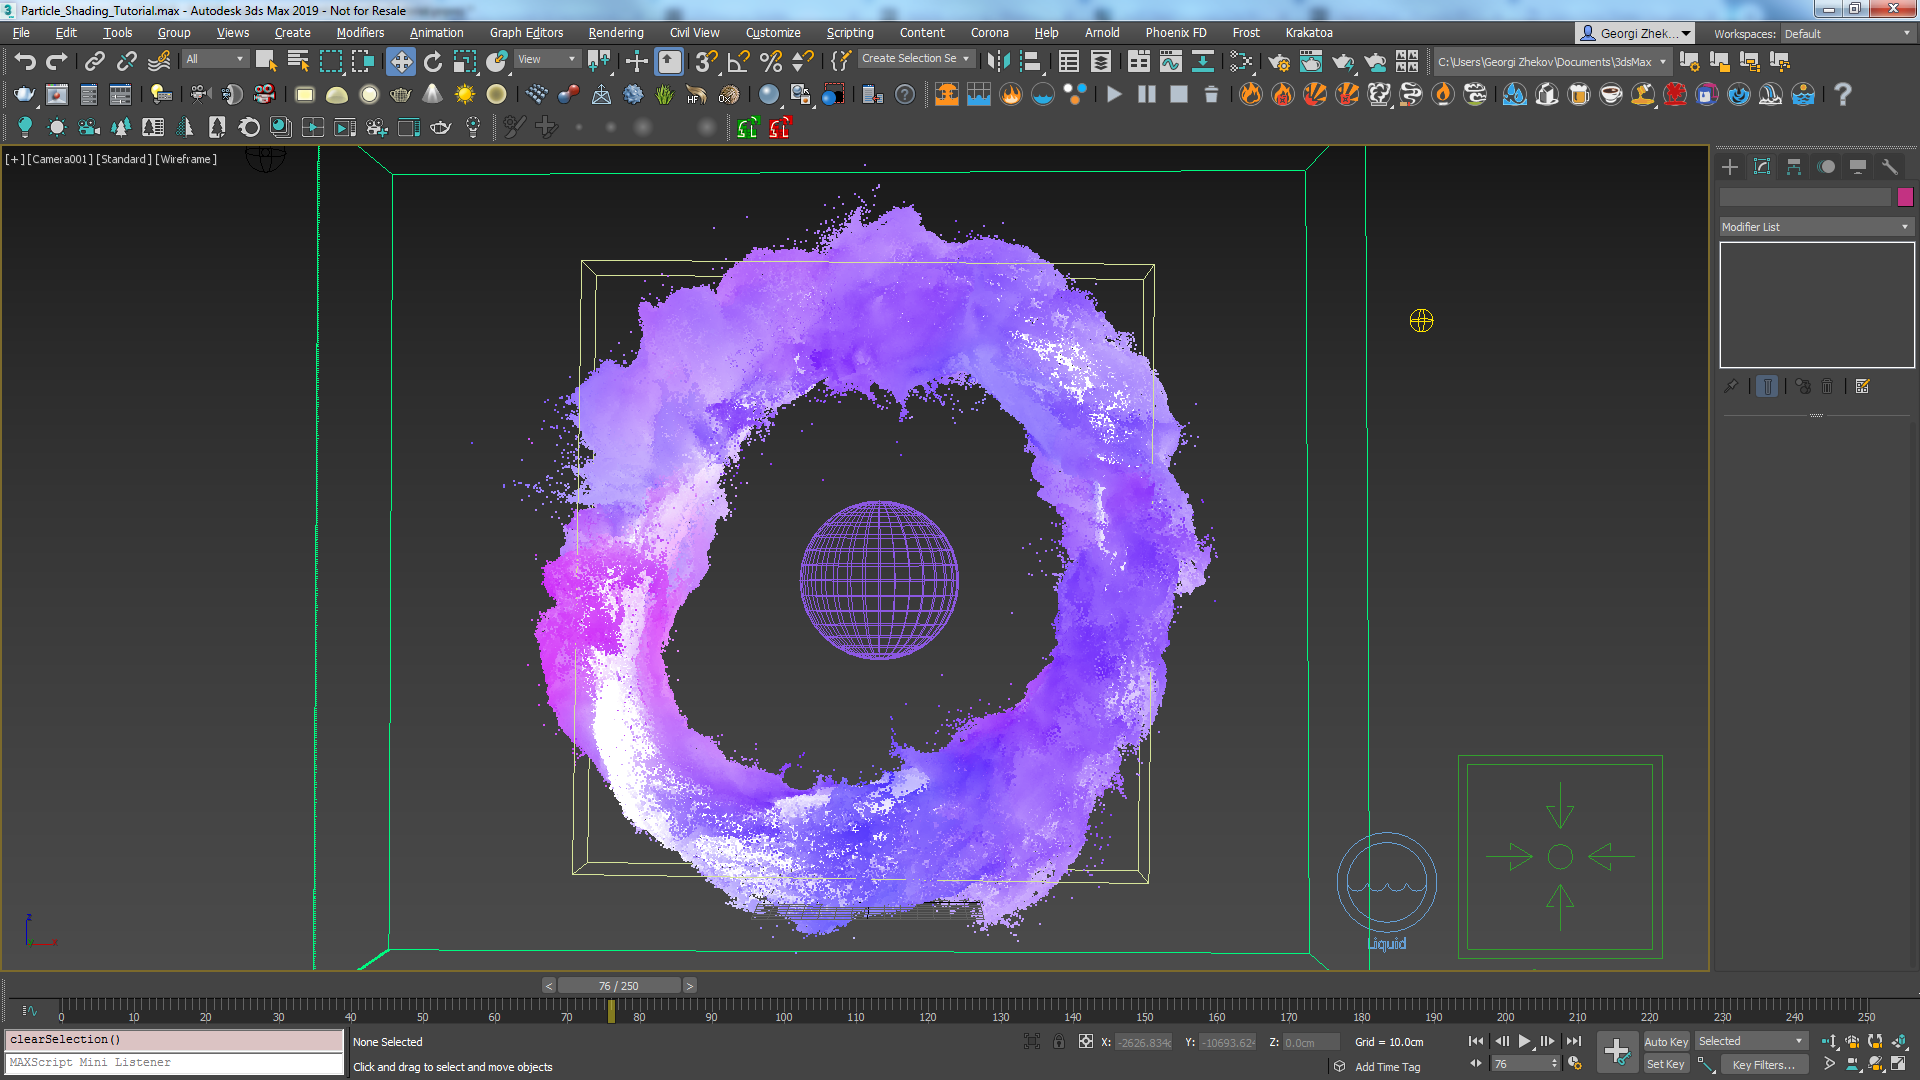
Now that our liquid is emitted and is no longer falling down we want it to follow the movement of the animated torus.

Create a Phoenix FD Body Force and set the Torus for the Body.

Set the Strength to 300 and animate its value from 300 at frame 140 to 100 at frame 145.

Column
width60%

...

Section
Column
width40%

Now the particles are rotating and follow the Torus, but that gets a bit boring after a while so we will create another object to attract the particles and make them disappear.

Create a Standard Primitives → Sphere. Set the Radius to 50.

Right-click with the Sphere selected and from the Chaos Phoenix FD Properties set it to Non-Solid so that particles can get inside of it.

Then Turn on the Clear Inside option - this way all the particles that get inside of the sphere's volume will be killed.

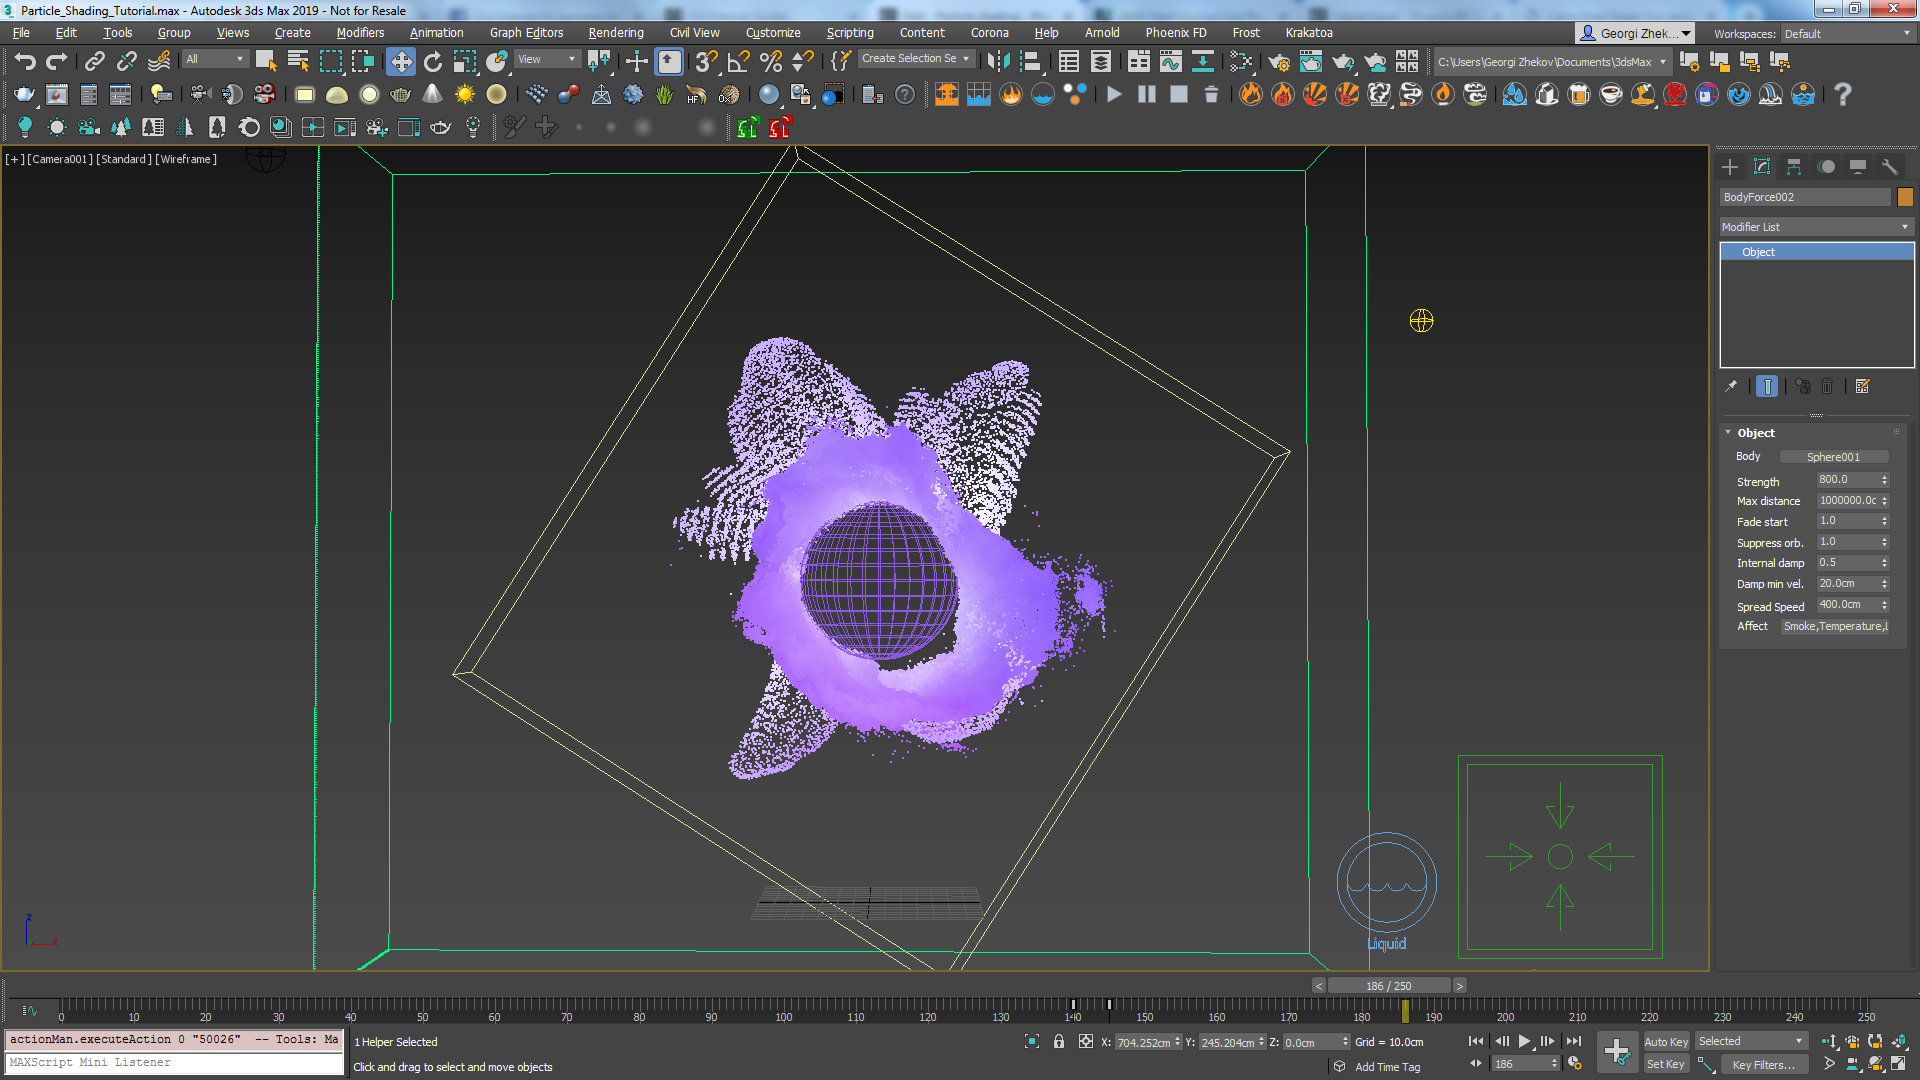
The only thing left is to add another Body Force that will pull the particles inside of the sphere.

Create a Phoenix FD Body Force and set the Sphere for the Body. As we don't want this force affecting the simulation from the start we will need to animate its Strength value.

Animate the Strength from 0 at frame 140 to 800 at frame 145.

Column
width60%

...

Section
Column
width40%

Now that we have the scene setup we need to render it out. By default the Phoenix FD Liquid Simulator will be rendered as mesh, though in this case we would like to render out the simulation as particles.

Select the Liquid Simulator, right-click and from the Object Properties disable Renderable.

Create a Phoenix Particle Shader and from the Add button select the Simulator and pick the Liquid particle group.

If we hit the render button now you will notice that the render is blank. In order to see something we will need some lights.

Create a V-Ray Ambient Light and then set the Color to 0, 0, 255 Hue, Saturation, Value and the Intensity to 2.

Column
width60%

...

Section
Column
width40%

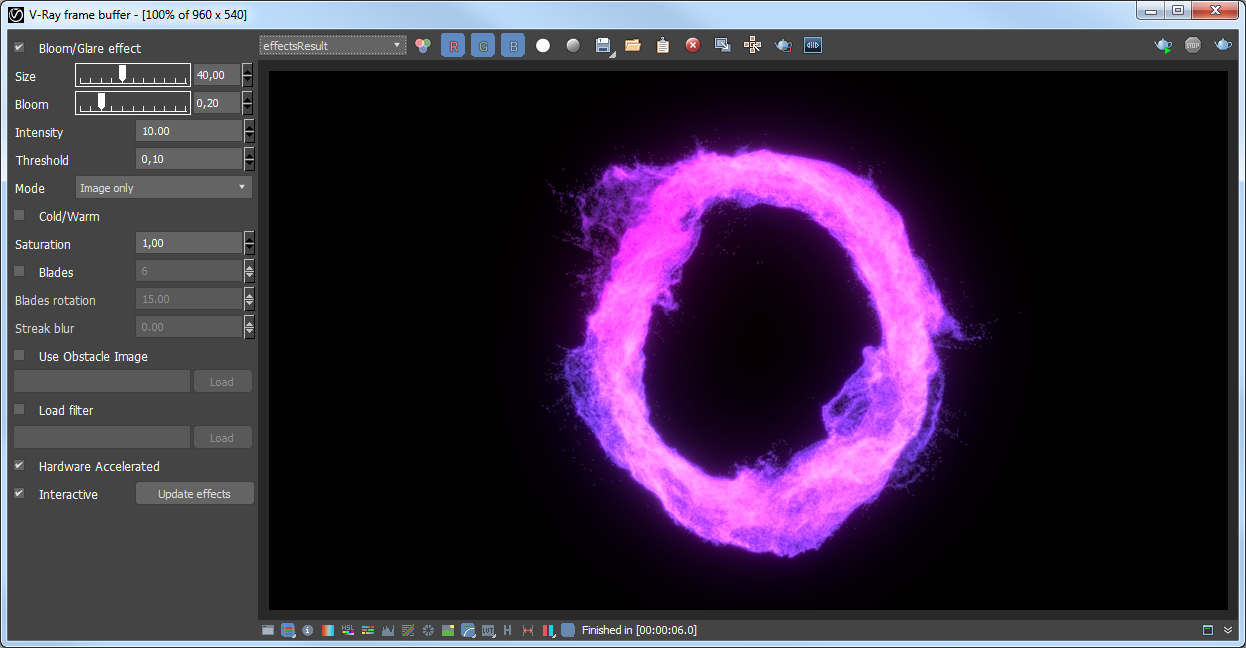
Now the particles look much better but still look too ordinary. Let's add some Bloom and Glare from the VFB Settings and spice up those particles.

Open the Bloom/Glare effect options and set the Size to 40, Bloom to 0.20, Intensity to 10 and the Threshold to 0.10.

medium
UI Text Box
size
typetip

We're using the updated V-Ray Frame Buffer coming with V-Ray Next for 3ds Max, update 1. You could achieve the same effect using the Exposure controls on the old Frame Buffer in addition to the Bloom effect, or any compositing package such as After Effects or Nuke.

Column
width60%

...