![]()
Page History
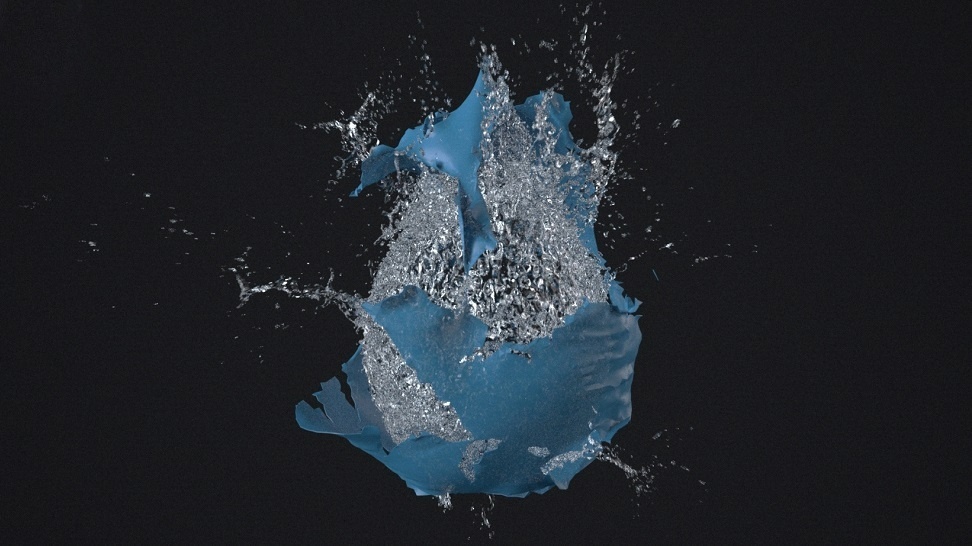
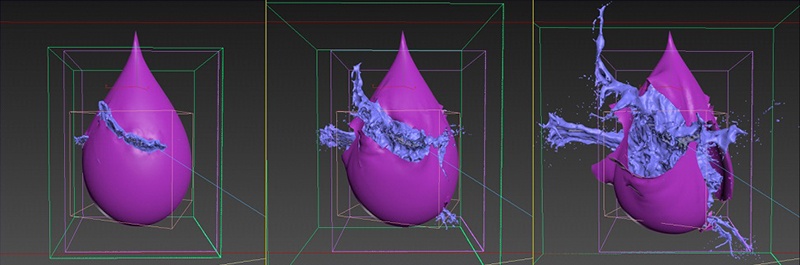
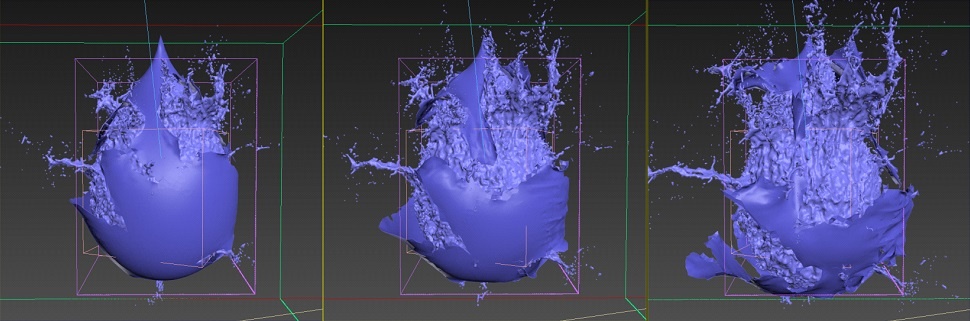
This page provides a tutorial on creating an Exploding Water Balloon simulation in 3ds Max.
Overview
...
| Section |
|---|
...
|
...
|
...
| ||||||||||||||||||||
| Section | ||||||||||||||||||||
|---|---|---|---|---|---|---|---|---|---|---|---|---|---|---|---|---|---|---|---|---|
|
...
|
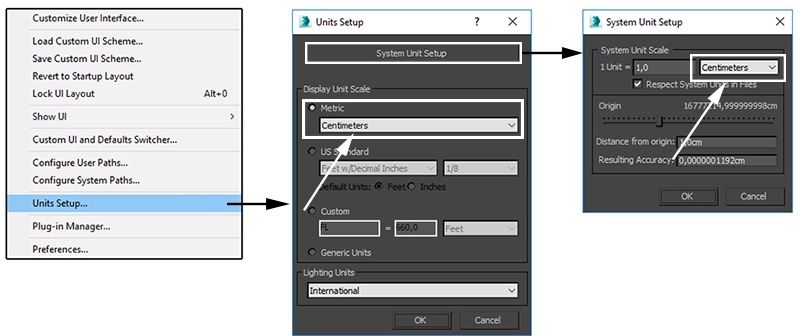
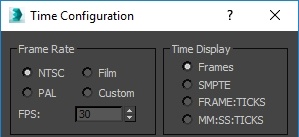
Units Setup
...
| Section | ||||||||||
|---|---|---|---|---|---|---|---|---|---|---|
|
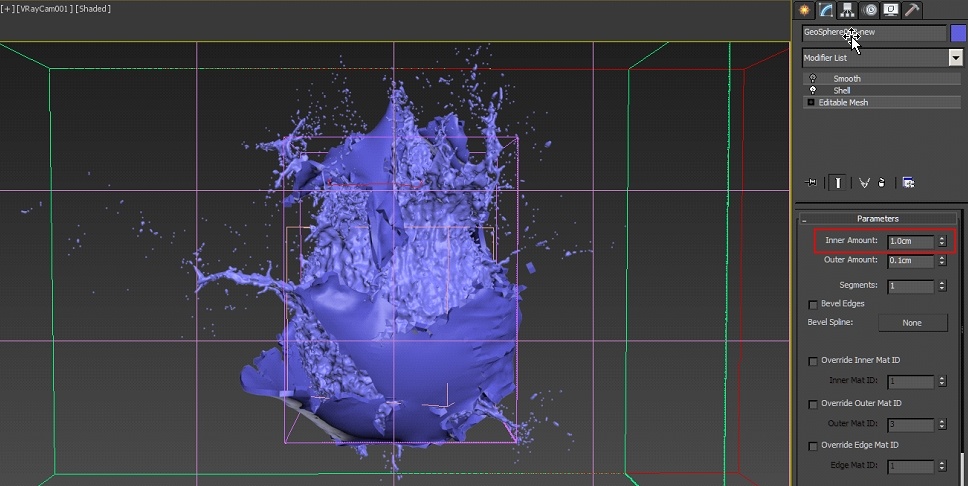
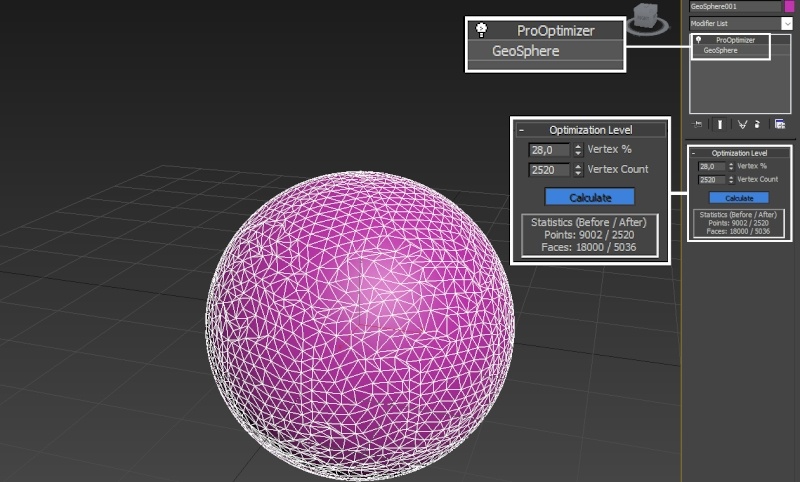
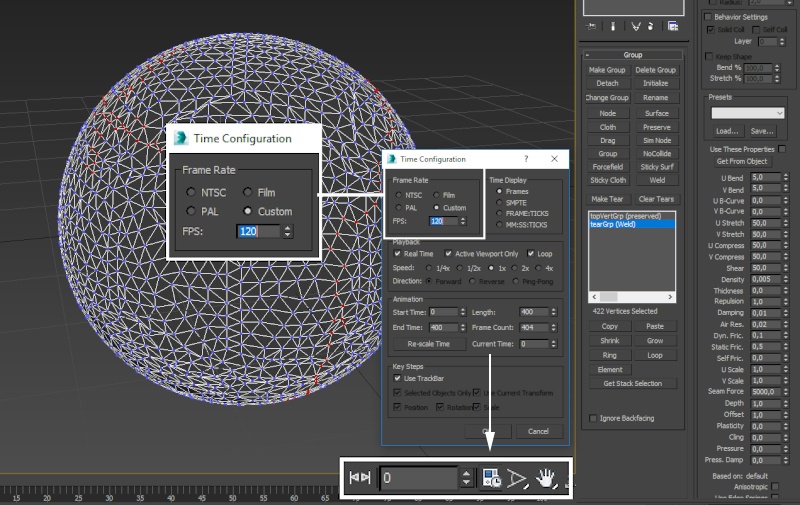
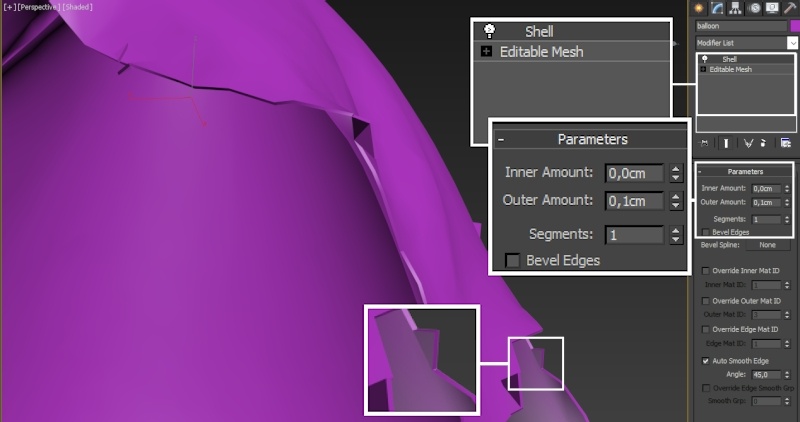
Cloth Preparation
...
...
| Section | ||||||||||
|---|---|---|---|---|---|---|---|---|---|---|
|
...
| Section | ||||||||||
|---|---|---|---|---|---|---|---|---|---|---|
|
...
| Section | ||||||||||
|---|---|---|---|---|---|---|---|---|---|---|
|
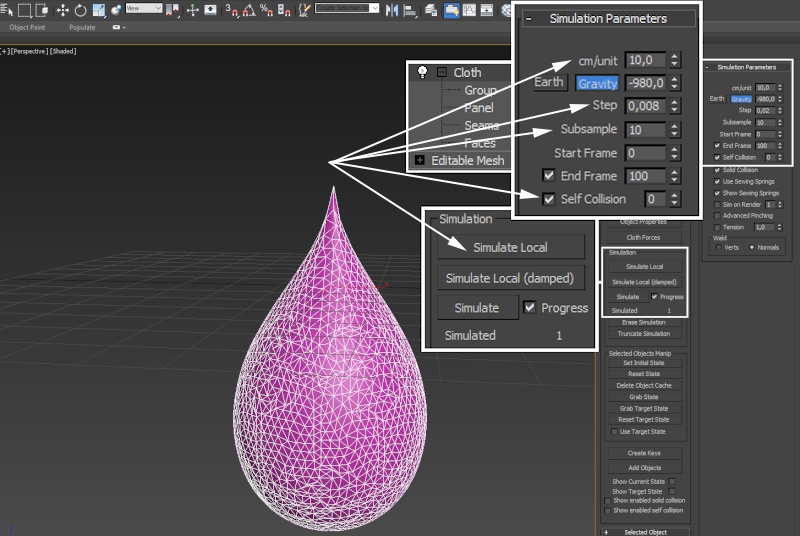
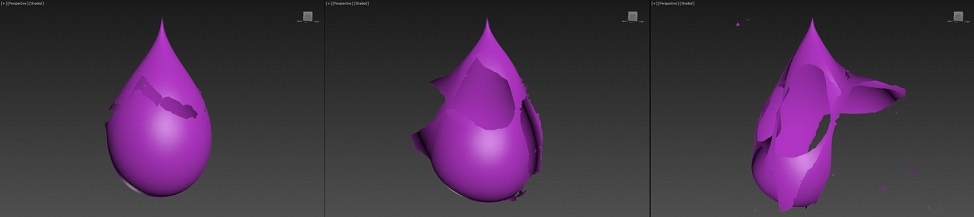
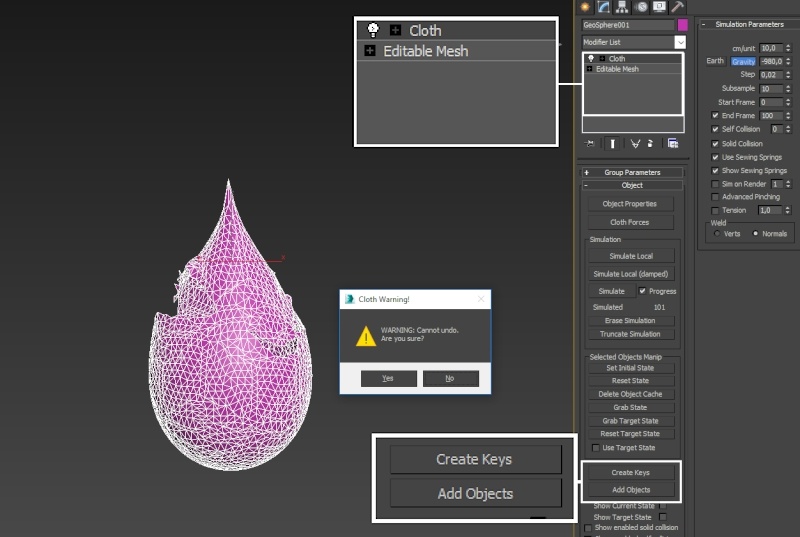
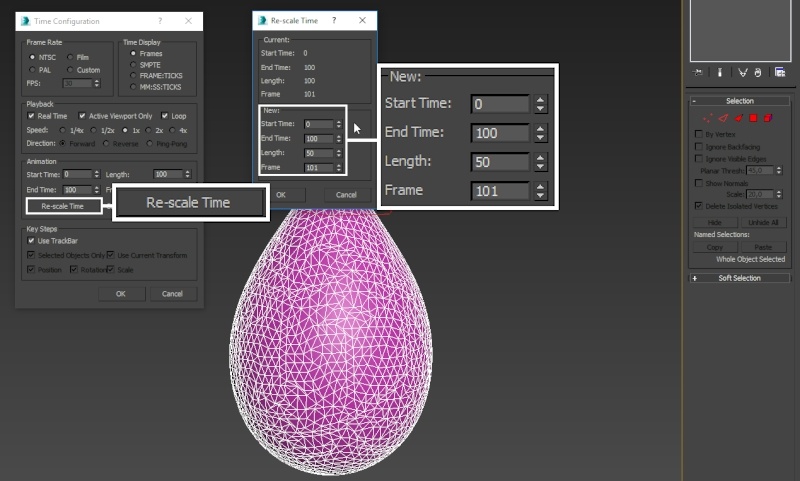
Cloth Simulation
...
...
| Section | ||||||||||
|---|---|---|---|---|---|---|---|---|---|---|
|
...
| Section | ||||||||||
|---|---|---|---|---|---|---|---|---|---|---|
|
...
| Section | |||||
|---|---|---|---|---|---|
|
...
| Section | |||||||||||||
|---|---|---|---|---|---|---|---|---|---|---|---|---|---|
|
...
| Section | ||||||||||
|---|---|---|---|---|---|---|---|---|---|---|
|
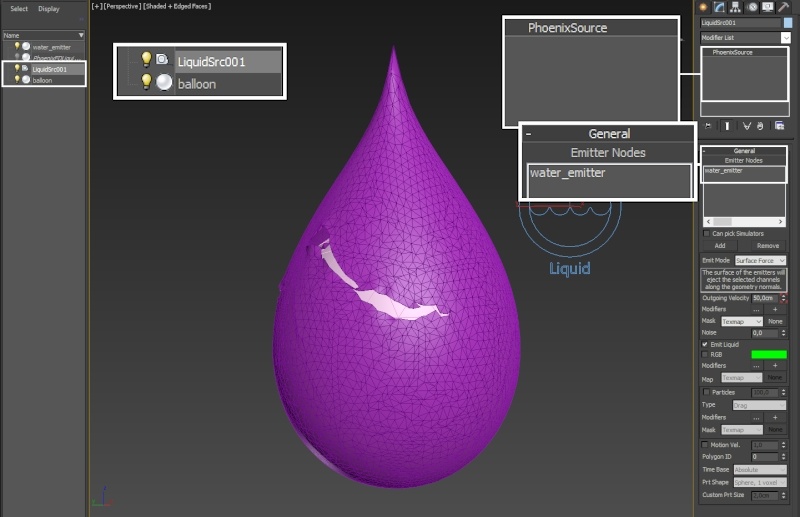
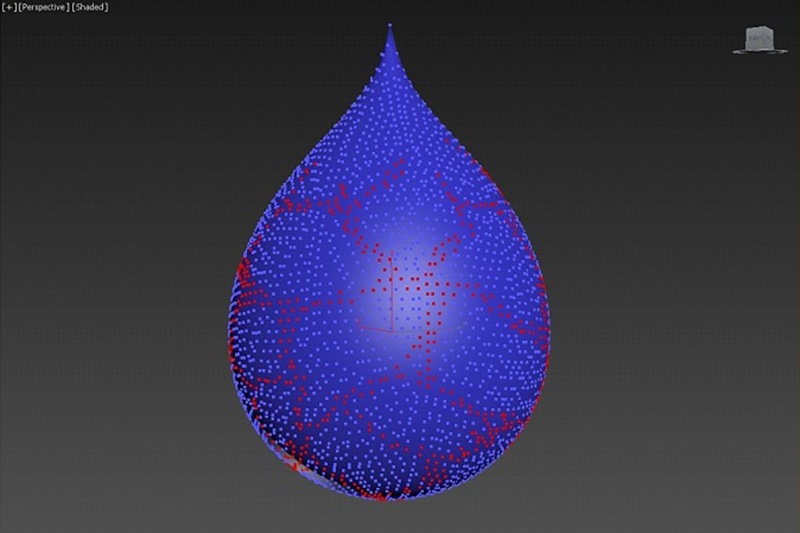
PhoenixFD Phoenix FD Liquid Simulation
...
...
| Section | |||||
|---|---|---|---|---|---|
|
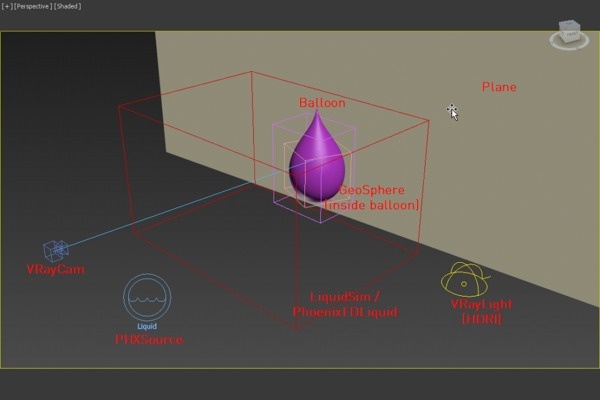
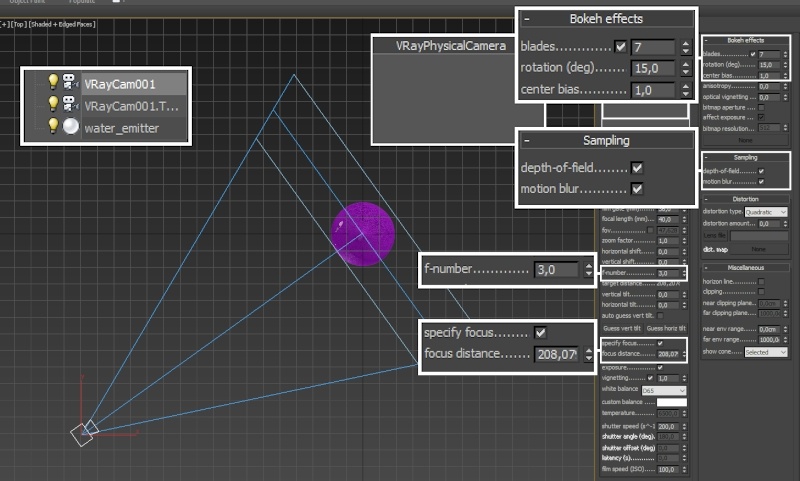
Scene Setup
...
...
| Section | ||||||||||
|---|---|---|---|---|---|---|---|---|---|---|
|
...
| Section | ||||||||||
|---|---|---|---|---|---|---|---|---|---|---|
|
...
| Section | ||||||||||
|---|---|---|---|---|---|---|---|---|---|---|
|
...
| Section | ||||||||||
|---|---|---|---|---|---|---|---|---|---|---|
|
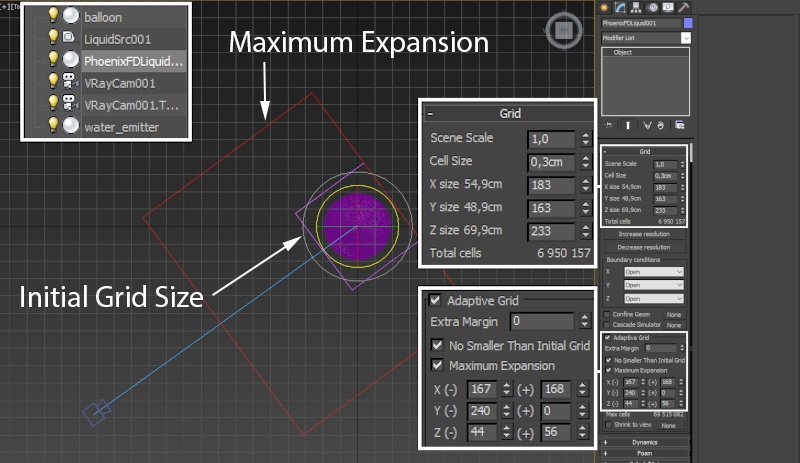
Simulator Properties
...
...
| Section | ||||||||||
|---|---|---|---|---|---|---|---|---|---|---|
|
...
| Section | ||||||||||
|---|---|---|---|---|---|---|---|---|---|---|
|
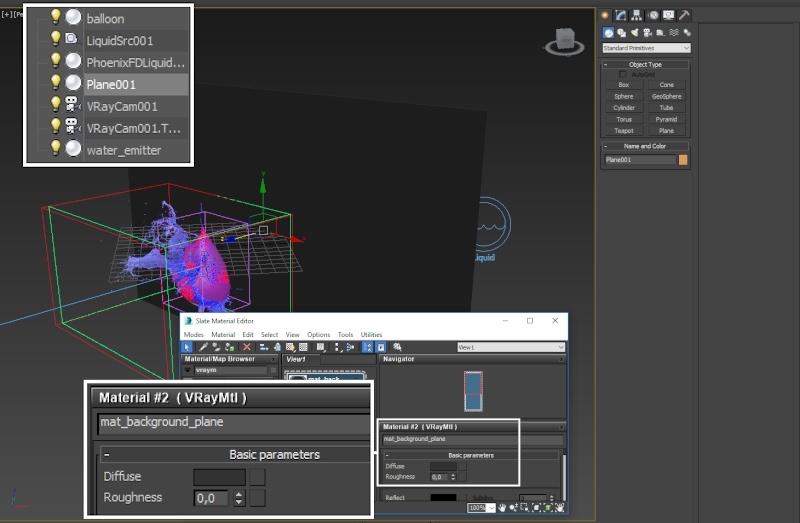
Materials and Lighting
...
...
| Section | ||||||||||
|---|---|---|---|---|---|---|---|---|---|---|
|
Balloon Material
...
...
| Section | ||||||||||
|---|---|---|---|---|---|---|---|---|---|---|
|
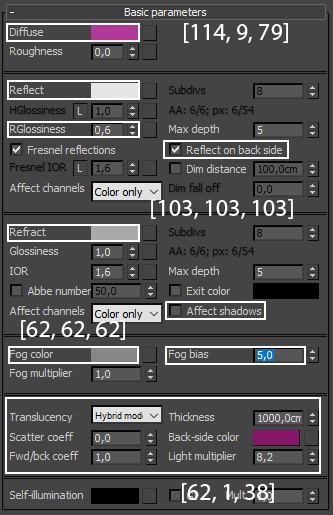
Water Material
...
...
| Section | ||||||||||
|---|---|---|---|---|---|---|---|---|---|---|
|

Extra: Instantaneous Burst Simulation
...
| Section | ||||||||||
|---|---|---|---|---|---|---|---|---|---|---|
|
...
| Section | |||||
|---|---|---|---|---|---|
|
Troubleshooting
...
| Section | ||||||||||
|---|---|---|---|---|---|---|---|---|---|---|
|