![]()
Page History
This page provides information on the Mapper (PhoenixFDMapper) component.
Overview
...
| Section | |||||||||||||||
|---|---|---|---|---|---|---|---|---|---|---|---|---|---|---|---|
|

...
Parameters
...
...
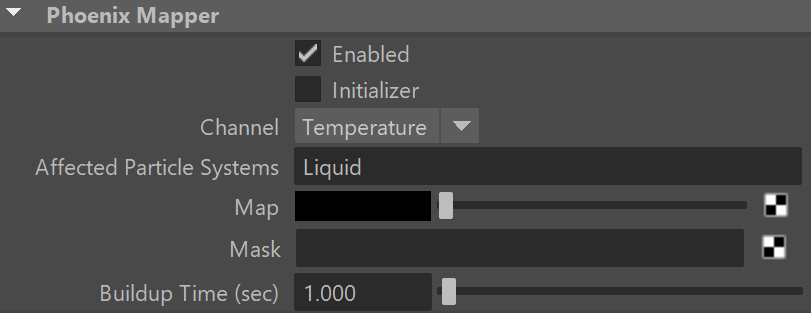
Enabled | enabled – Animatable checkbox that turns on and off the effect of the Mapper.
...
Disabled - Disables this node.
Temperature - Maps the voxels of the simulator for the Temperature channel to the texture values. Keep in mind that this channel should be mapped with a texture with a range that is typically [ 300, 2000 ] for Fire/Smoke simulations.
Smoke - Maps the voxels of the simulator for the Smoke channel to the texture values. This channel is typically in the range [ 0, 1 ].
Fuel - Maps the voxels of the simulator for the Fuel channel to the texture values. This channel is typically in the range [ 0, 1 ].
Velocity - Maps the voxels of the simulator for the Velocity channel to the texture values. This channel can take both positive and negative values, and its range is not limited. If your texture produces no result, try using a Multiply / Divide node to boost the values. Velocity is typically in the range of [ 10, 1000 ].
RGB - Maps the voxels of the simulator for the RGB channel to the texture values. Essentially, this will transfer the texture color to the RGB channel.
Viscosity - Maps the voxels of the simulator for the Viscosity channel. This channel is typically in the range [ 0, 1 ].
| UI Text Box | ||
|---|---|---|
| ||
You can find out more about Phoenix Grid Channel Ranges here. |
Affected Particle Systems | affectpartsys - Allows the Mapper to separately affect the Liquid, Foam, Splash or Mist particles. You can also affect Drag particles in a Fire/Smoke simulation, but note that you cannot change their Velocity channel - they are simply dragged by the fluid. You could affect any Drag particle system by typing Drag in the list, or you can affect specific Drag particle systems by using their exact names.
...
| UI Text Box | ||
|---|---|---|
| ||
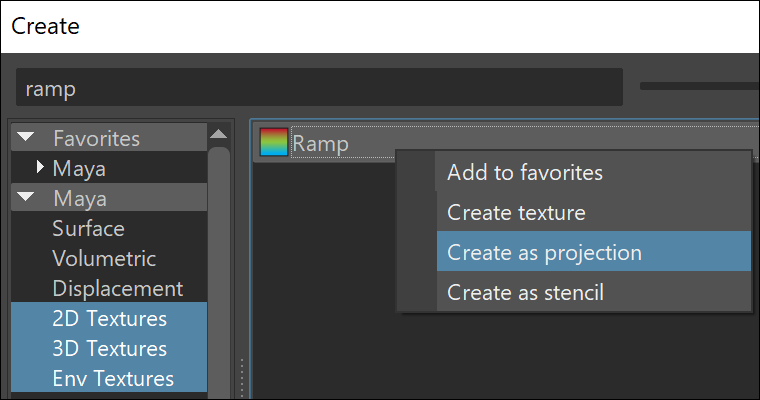
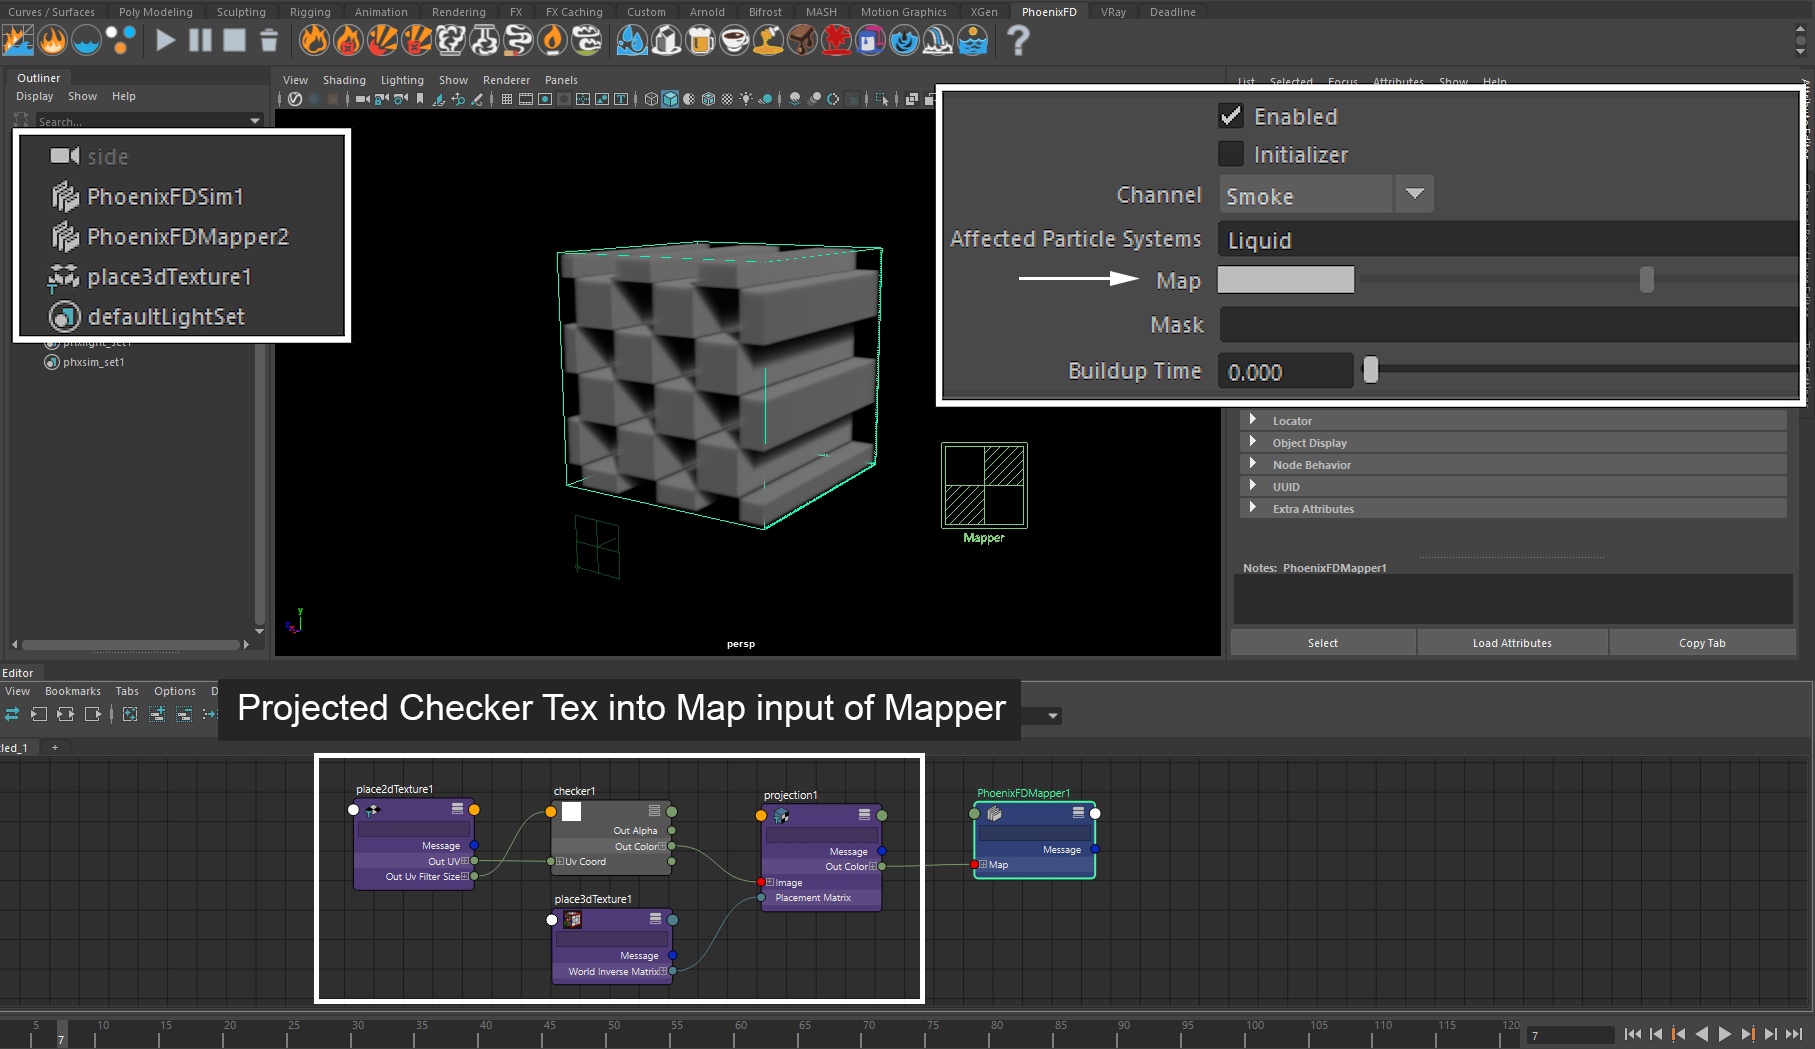
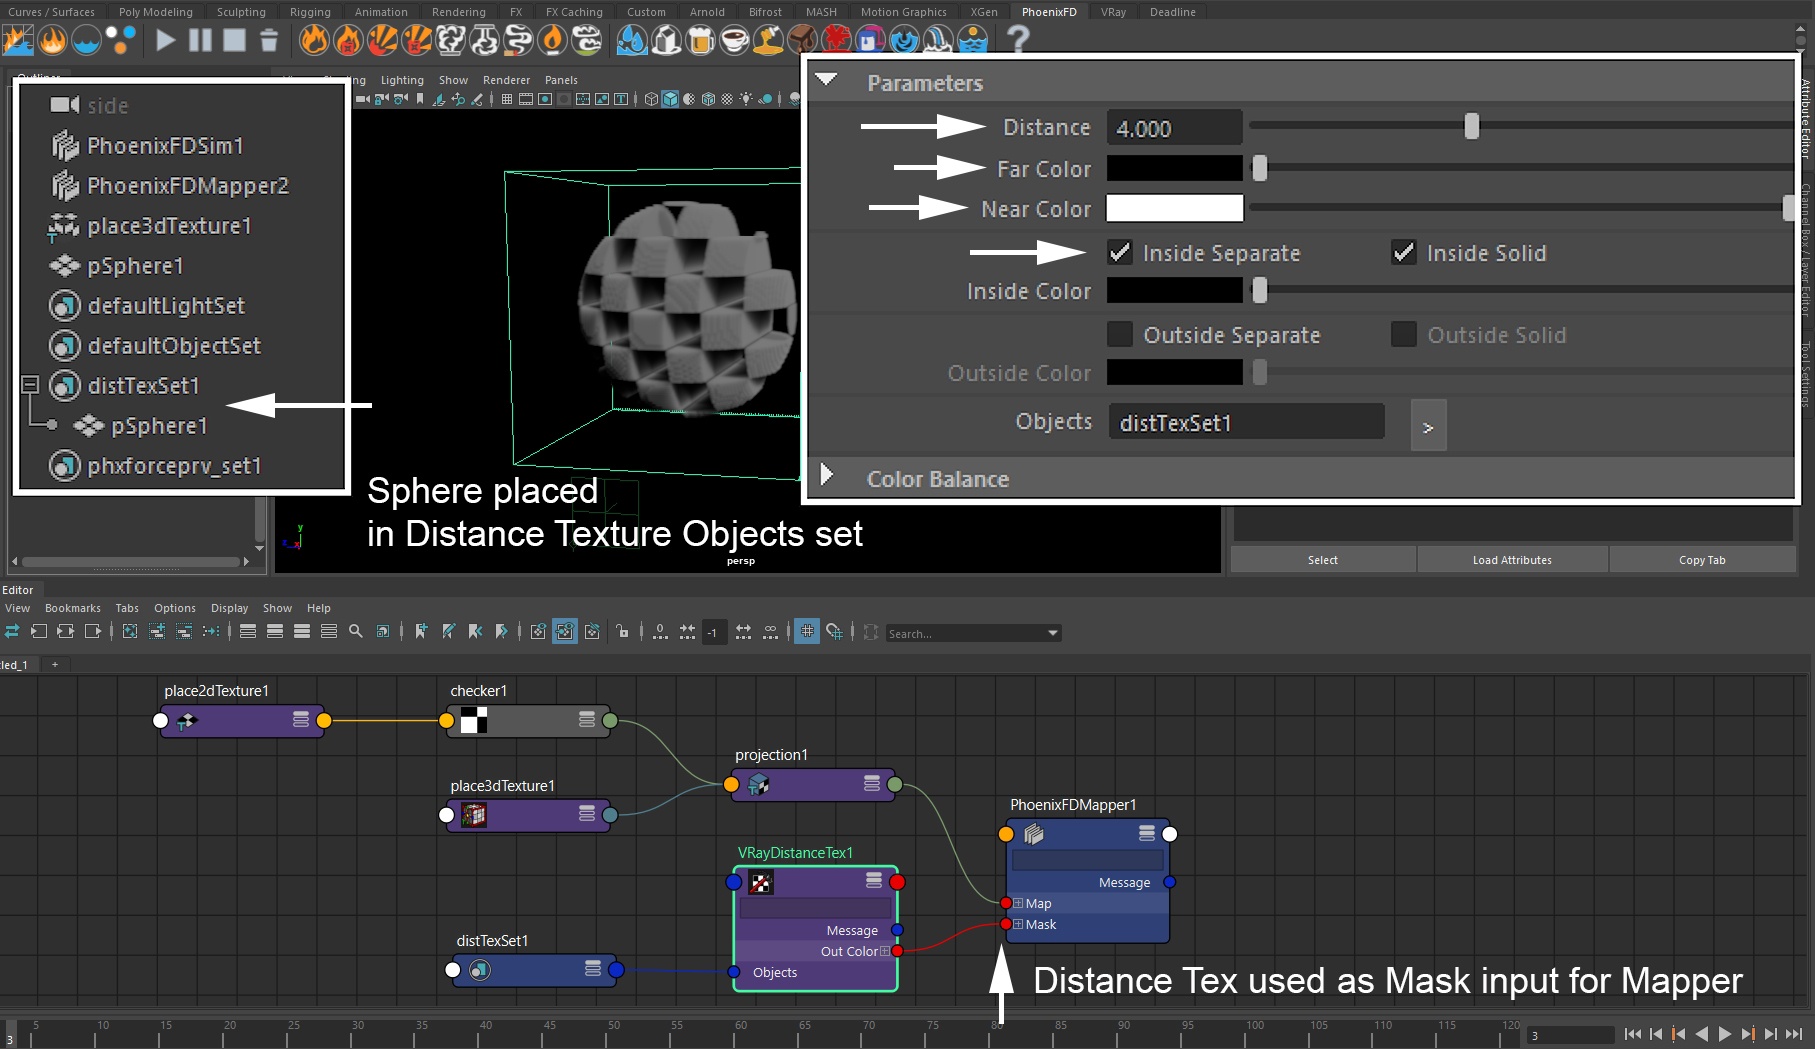
When using 2D Textures (such as Ramp for example) together with the Phoenix Mapper you will need to set up a Projection and adjust the 3D placement node in order to get correct mapping. While creating the texture, right-click over the Menu item in the Create panel and choose "Create as projection". Then select the projection node, press on the Interactive placement button and adjust your placement node.
|
...
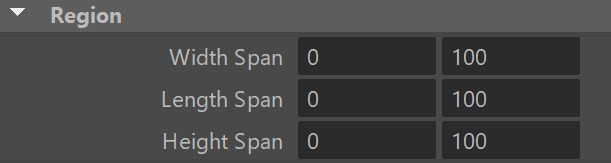
Region
...
...
Width/Length/Height Span spanX, spanY, spanZ – Specifies a rectangular region (as a % of the simulator along each axis) which will be affected by the Mapper.
How-To's
...
| Section | |||||
|---|---|---|---|---|---|
|
...
| Section | ||||||||||
|---|---|---|---|---|---|---|---|---|---|---|
|
...
...
| Section | ||||||||||
|---|---|---|---|---|---|---|---|---|---|---|
|

...
| Section | |||||||||||||||
|---|---|---|---|---|---|---|---|---|---|---|---|---|---|---|---|
|
...
...
| Section | ||||||||||||||||||||||||
|---|---|---|---|---|---|---|---|---|---|---|---|---|---|---|---|---|---|---|---|---|---|---|---|---|
|