Versions Compared

Key

  • This line was added.
  • This line was removed.
  • Formatting was changed.

...

Section
Column
width50%

In V-Ray, an image sampler refers to an algorithm for calculating a pixel's color based on the colors within and around it.

Each pixel in a rendering can have only one color. To get the color of a pixel, V-Ray calculates it based on the object's material, direct light striking the object, and indirect lighting in the scene. But within a single pixel there might be multiple colors, which may come from multiple objects whose edges intersect at the same pixel, or even difference in brightness on the same object due to changes in object shape or falloff and/or shadowing of light sources.

To determine the right color for such a pixel, V-Ray looks at (or samples) colors from different parts of the pixel itself as well as the pixels around it. This process is called image sampling. V-Ray includes two main image samplers, each with its own approach to sampling and its own parameters: Progressive and Bucket.


UI Paths:

||V-Ray Shelf|| > ROP Parm > Renderer tab > Sampler tab

||out Network|| > V-Ray > V-Ray Renderer > Renderer tab > Sampler tab

V-Ray menu > Render Settings > Sampler tab

Column
width5%


Column
width45%

Image Added Image Removed
Image courtesy of Tuna Unalan


Multiple colors within a single pixel. What color should the pixel be? 

...

Section
Column
width50%

This section covers common parameters for all sampler types. For parameters that are specific to each sampler, see the following sampler sections below.

Type – Specifies the image sampler type. Specific parameters for the selected type appear at the bottom of this rollout.

Progressive – Progressively samples the entire image. See the Progressive Sampler for additional parameters.
Bucket – Takes a variable number of samples per pixel depending on the difference in the intensity of the pixels. See the Bucket Sampler section for additional parameters. 

Min. Shading Rate – Controls the number of rays shot for AA versus rays for other effects like glossy reflections, GI, area shadows, etc. Higher values mean that less time is spent on AA and more effort is put in the sampling of shading effects.

Render Mask – Enables the render mask feature. The render mask allows you to define which pixels of the image are calculated. The rest of the pixels are left intact. This feature works best with the V-Ray frame buffer and the Bucket image sampler. The following types are available:

Disable – The render mask is not used.
Texture – Uses a black & white texture to limit rendering to the white areas of the texture only. You can also use animated texture sequences by specifying an Image File VOP using the op: synthax (e.g. /mat/imageFile). Note that the Type of Image File VOP's UV must be set to Environment, and the Mapping Type to Screen
Object – Only the specified objects are rendered.
Object ID – Only objects with the specified object IDs are rendered. You can list more than one object ID as a space-separated list. To add IDs to the Geometry nodes, add V-Ray Object Properties using the V-Ray menu.

For more information, see the Render Mask example below.

Clear Mask on Render Stat – Available when the Render Mask is enabled. When disabled, the masked region is overlaid on top of the previous image in the VFB. This can be used for draft renders or fast shader previews provided that the camera does not move. Note: When rendering an animation, the image clearing is forced on.

Object IDs – Specifies a list of object IDs to be used for the render mask, when the Render mask is set to Object ID.

AA Filter Type – Specifies the filter type to be used for anti-aliasing. V-Ray supplies eight types of Anti-aliasing filters: Box, Area, Triangle, Lanczos, Sinc, Catmull-Rom, Gaussian and Cook Variable. Each has advantages and disadvantages, which make them useful for different tasks. For more information, see the Anti-aliasing Filters example and the Anti-aliasing Filters and Moire Effects example below.

Size – Determines the size of the filter in pixels. Higher values yield blurrier results. For more information, see the Anti-aliasing Filters example and the Anti-aliasing Filters and Moire Effects example below.

Column
width5%


Column
width45%

Image RemovedImage Added


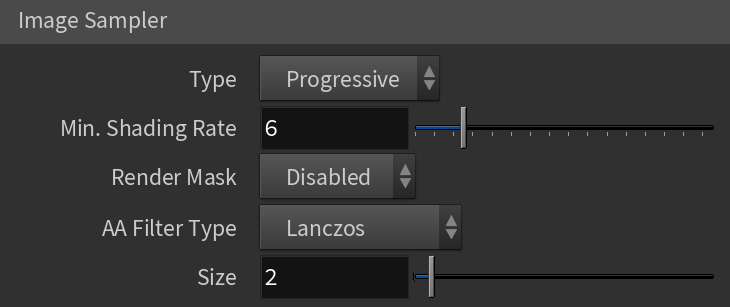
Anchor
antialiasingFilters
antialiasingFilters

...

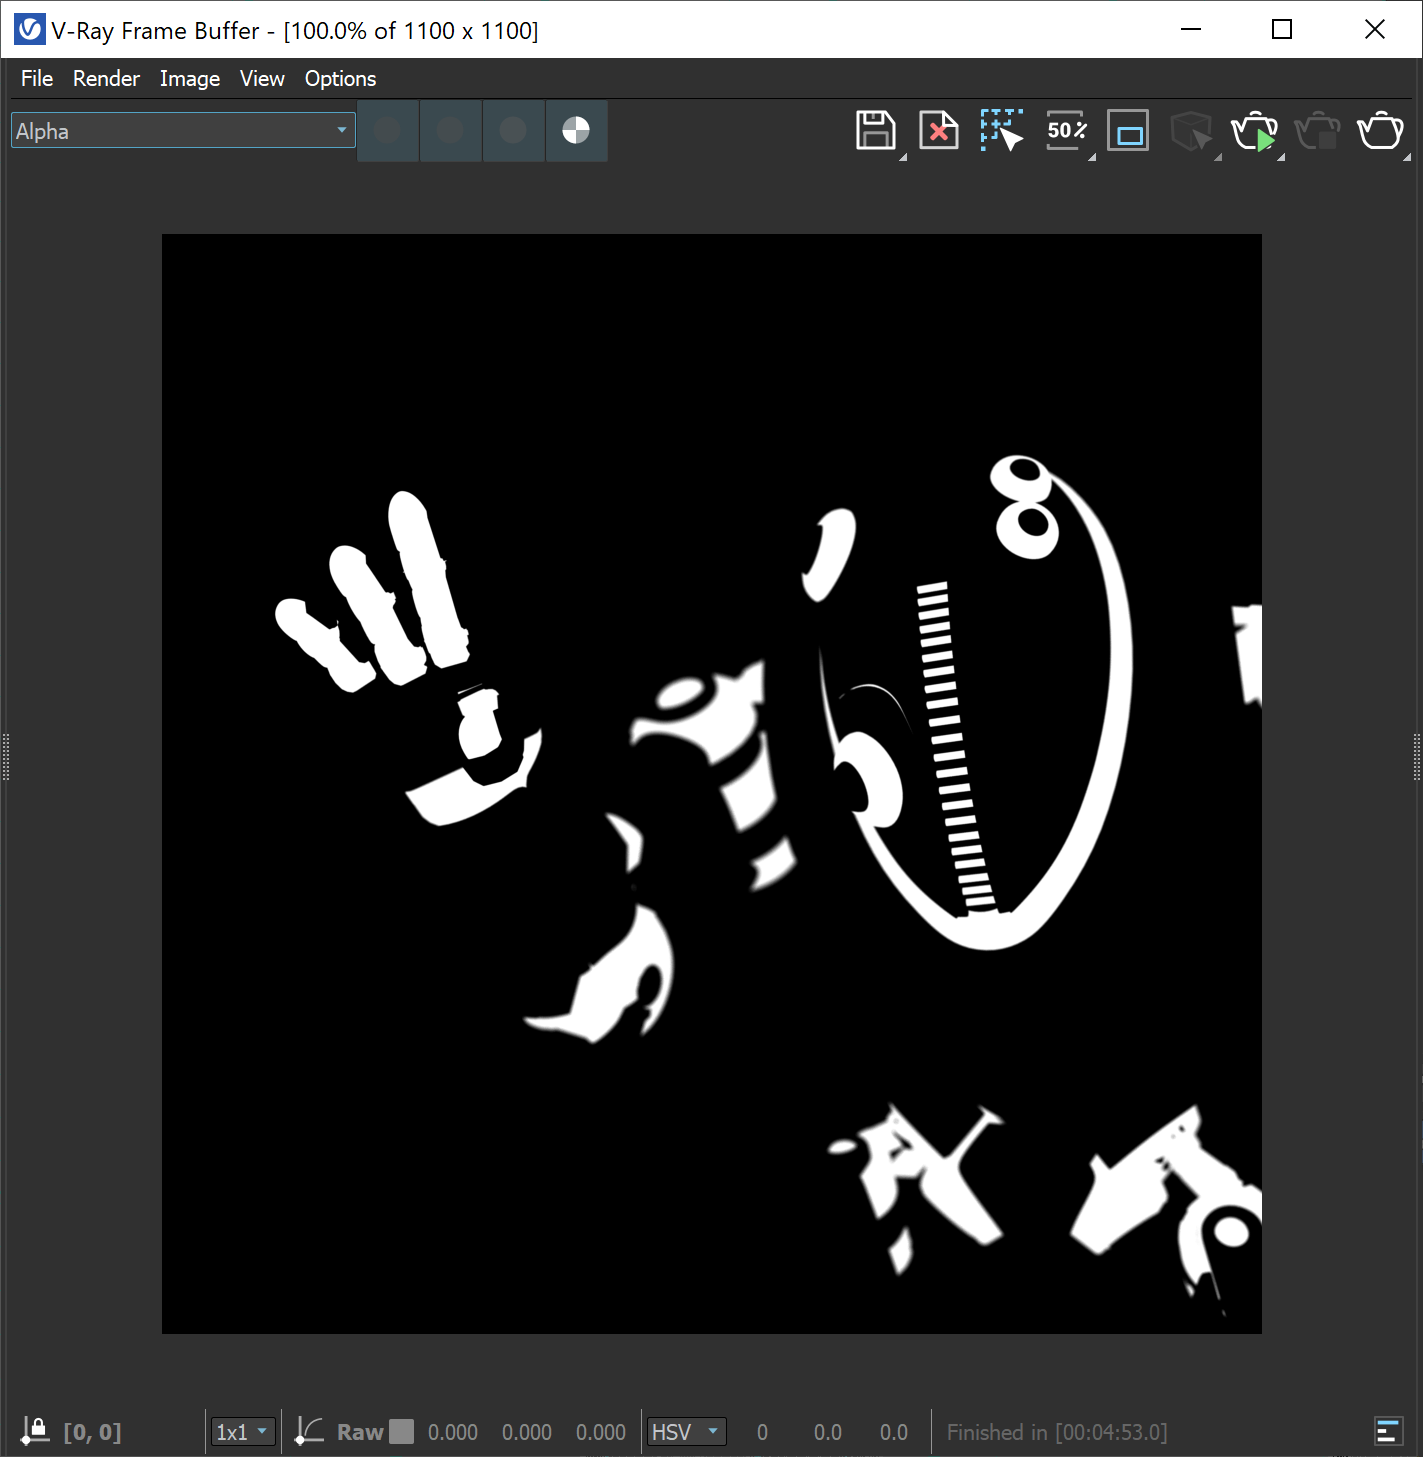
Example: Render Mask


Section
Column
width10%8%
 
Column
width40%

 Image Added

Image Removed The original image

Column
width4%


Column
width40%

 Image Added

Image Removed The same image, only objects with chrome material were re-rendered 

Column
width8%10%


Section
Column
width10%8%
 
Column
width40%

 Image Added

Image Removed The actual render mask image - RGB channels

Column
width4%


Column
width40%

 Image Added

Image Removed The actual render mask image - Alpha channel 

Column
width10%8%


Anchor
ProgressiveSampler
ProgressiveSampler

...

Section
Column
width50%

This section provides information specific to the Progressive Sampler Type. The Progressive sampler renders the entire image progressively in passes.

The advantage of this sampler is that you can see an image very quickly, and then let it refine for as long as necessary as additional passes are being computed. This is contrast to the bucket-based image samplers, where the image is not complete until the final bucket is done.

A disadvantage is that more data needs to be kept in memory, especially when working with render elements. Also, when using distributed rendering, because of the continuous refinement, frequent communication between the client machine and the render servers is required, which may reduce the CPU utilization on the render servers. This effect can be controlled to some extent using the Ray bundle size parameter.

Min Subdivs – Controls the minimum number of samples that each pixel in the image receives. The actual number of the samples is the square of the subdivs. Note: Not available when using a GPU-based Production engine.

Max Subdivs – Controls the maximum number of samples that each pixel in the image receives. The actual number of the samples is the square of the subdivs. If zero, the number of samples is not limited.

Noise Threshold – The desired noise level in the image. If this is 0.0, the entire image is sampled uniformly until either the Max. subdivs value is reached or the Render time limit is reached.

Max. Render Time (min) – The maximum render time in minutes. When this number of minutes is reached, the renderer stops. This is the render time for the whole frame; it includes any GI prepasses like light cache, irradiance map, etc. If this is 0.0, the render is not limited in time.

Ray Bundle Size (CPU) – Useful for distributed rendering to control the size of the chunk of work that is handed to each machine. When using distributed rendering, higher values may help to utilize CPUs on the render servers better.

Ray Bundle Size (GPU) – Controls the number of samples to transfer over the network for RT-GPU. Available when using RTX rendering. 

Rays Per Pixel – Controls the number of samples per pixel for RT-GPU. Available when using GPU/RTX rendering.

UI Text Box
typenote

Avoid using the Progressive sampler with sharpening image filters (Catmull-Rom, Mitchell-Netravali) as this may slow down the rendering - additional image samples are required to resolve sharpening filters properly. V-Ray prints a warning in this case in the V-Ray messages window.

Column
width5%


Column
width45%

Image RemovedImage Added


...


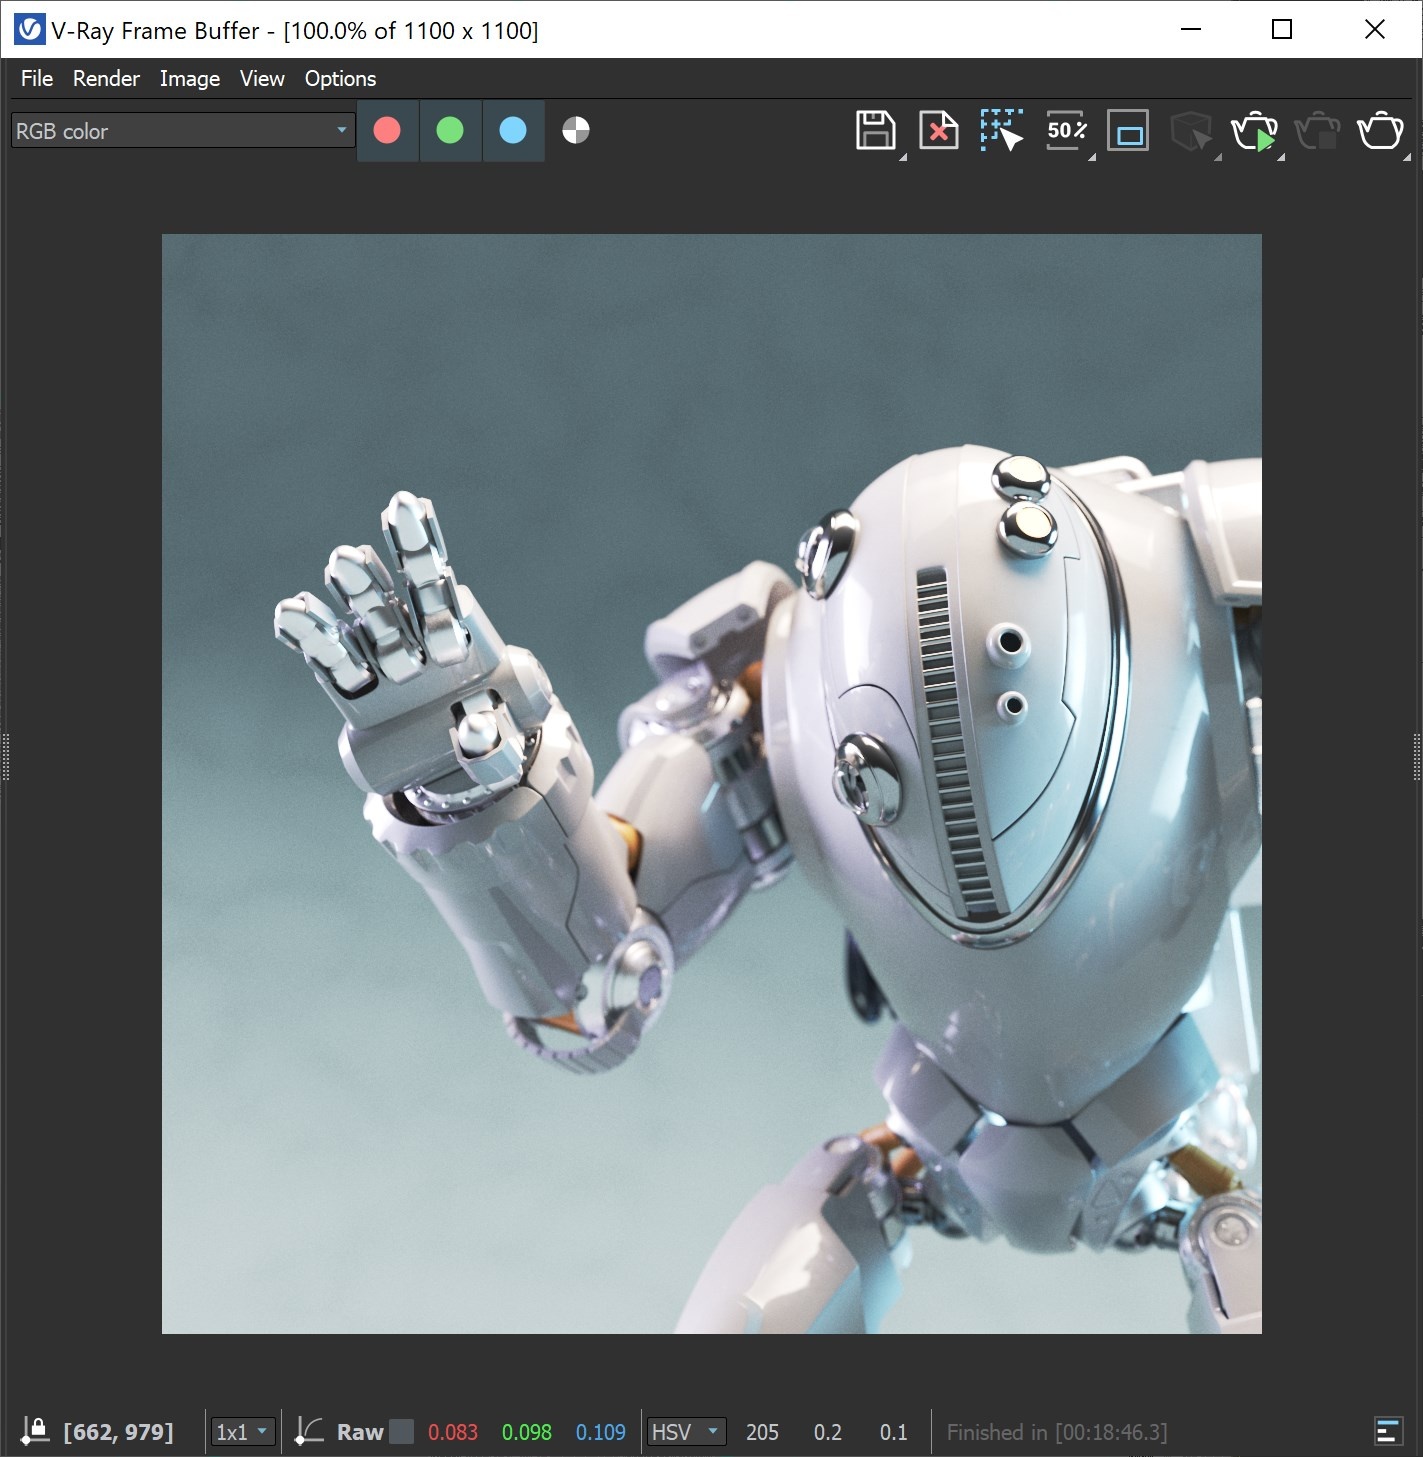
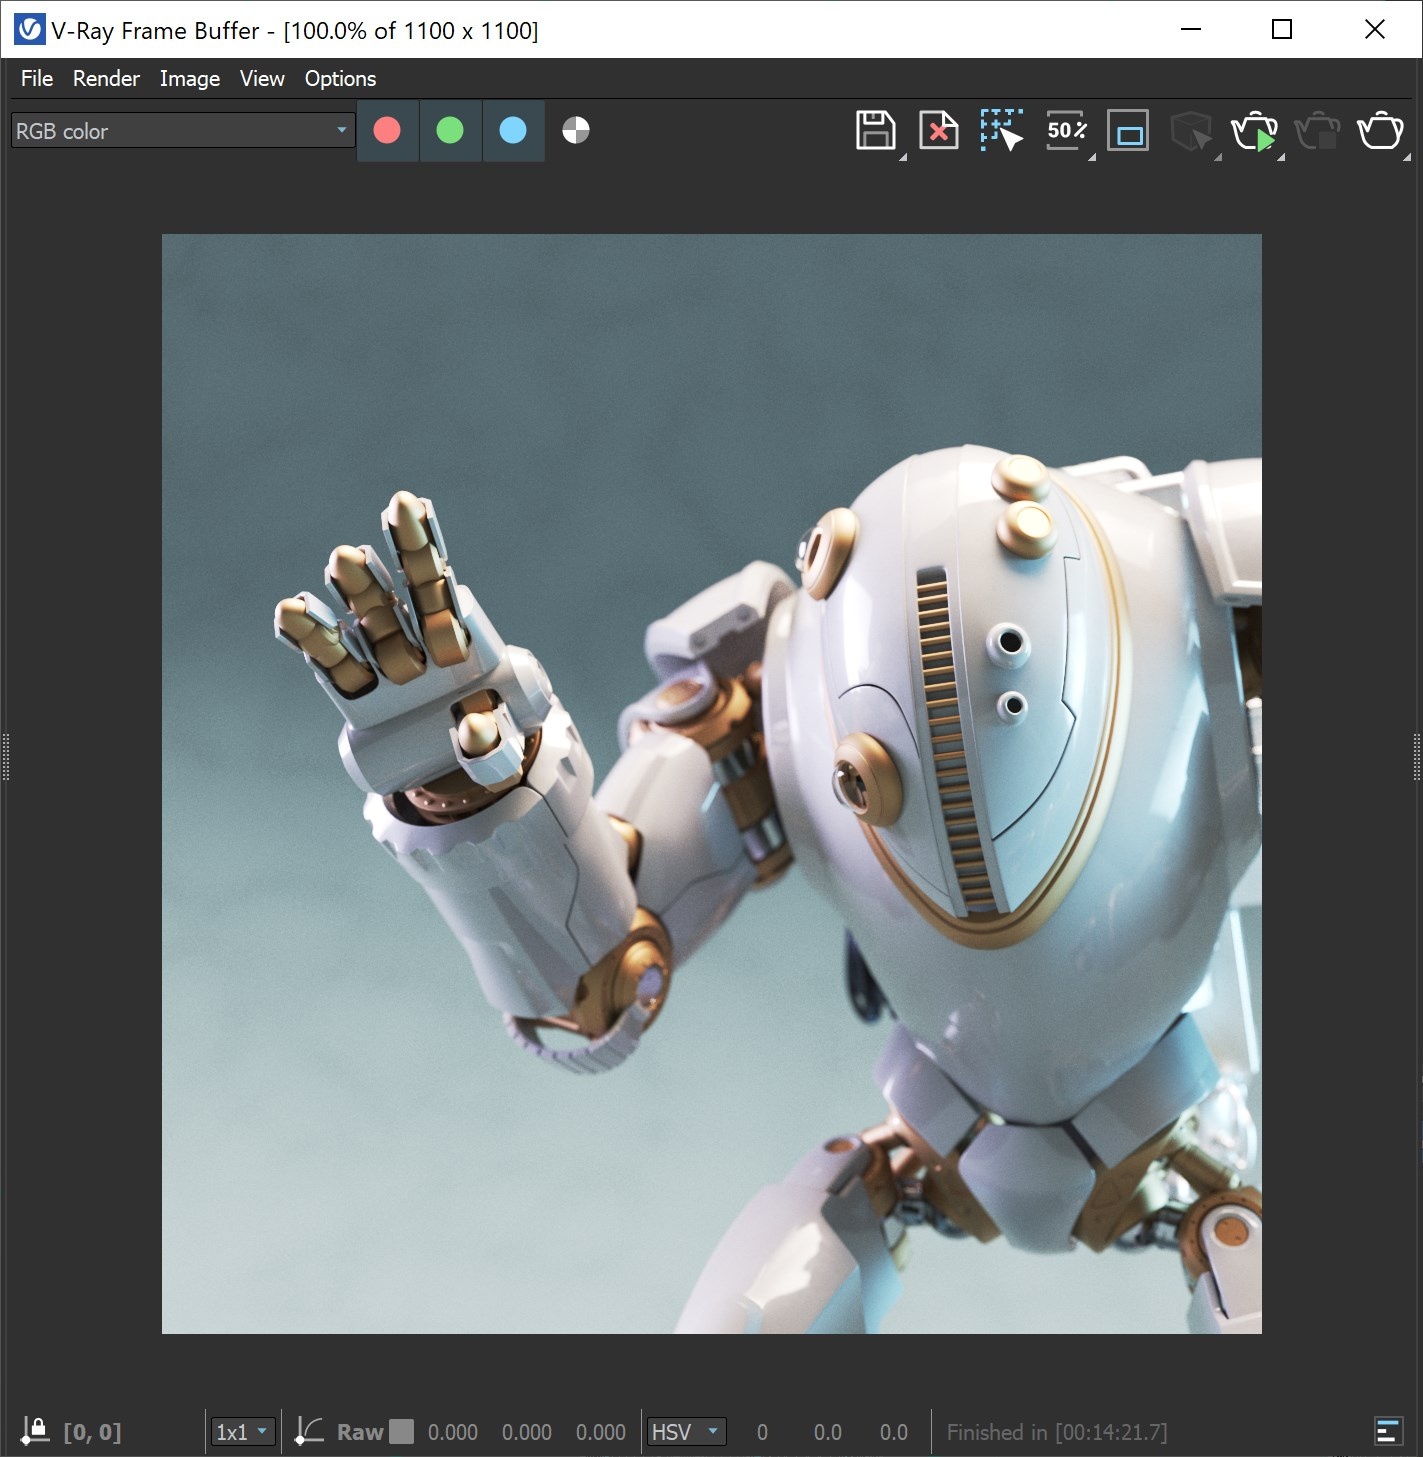
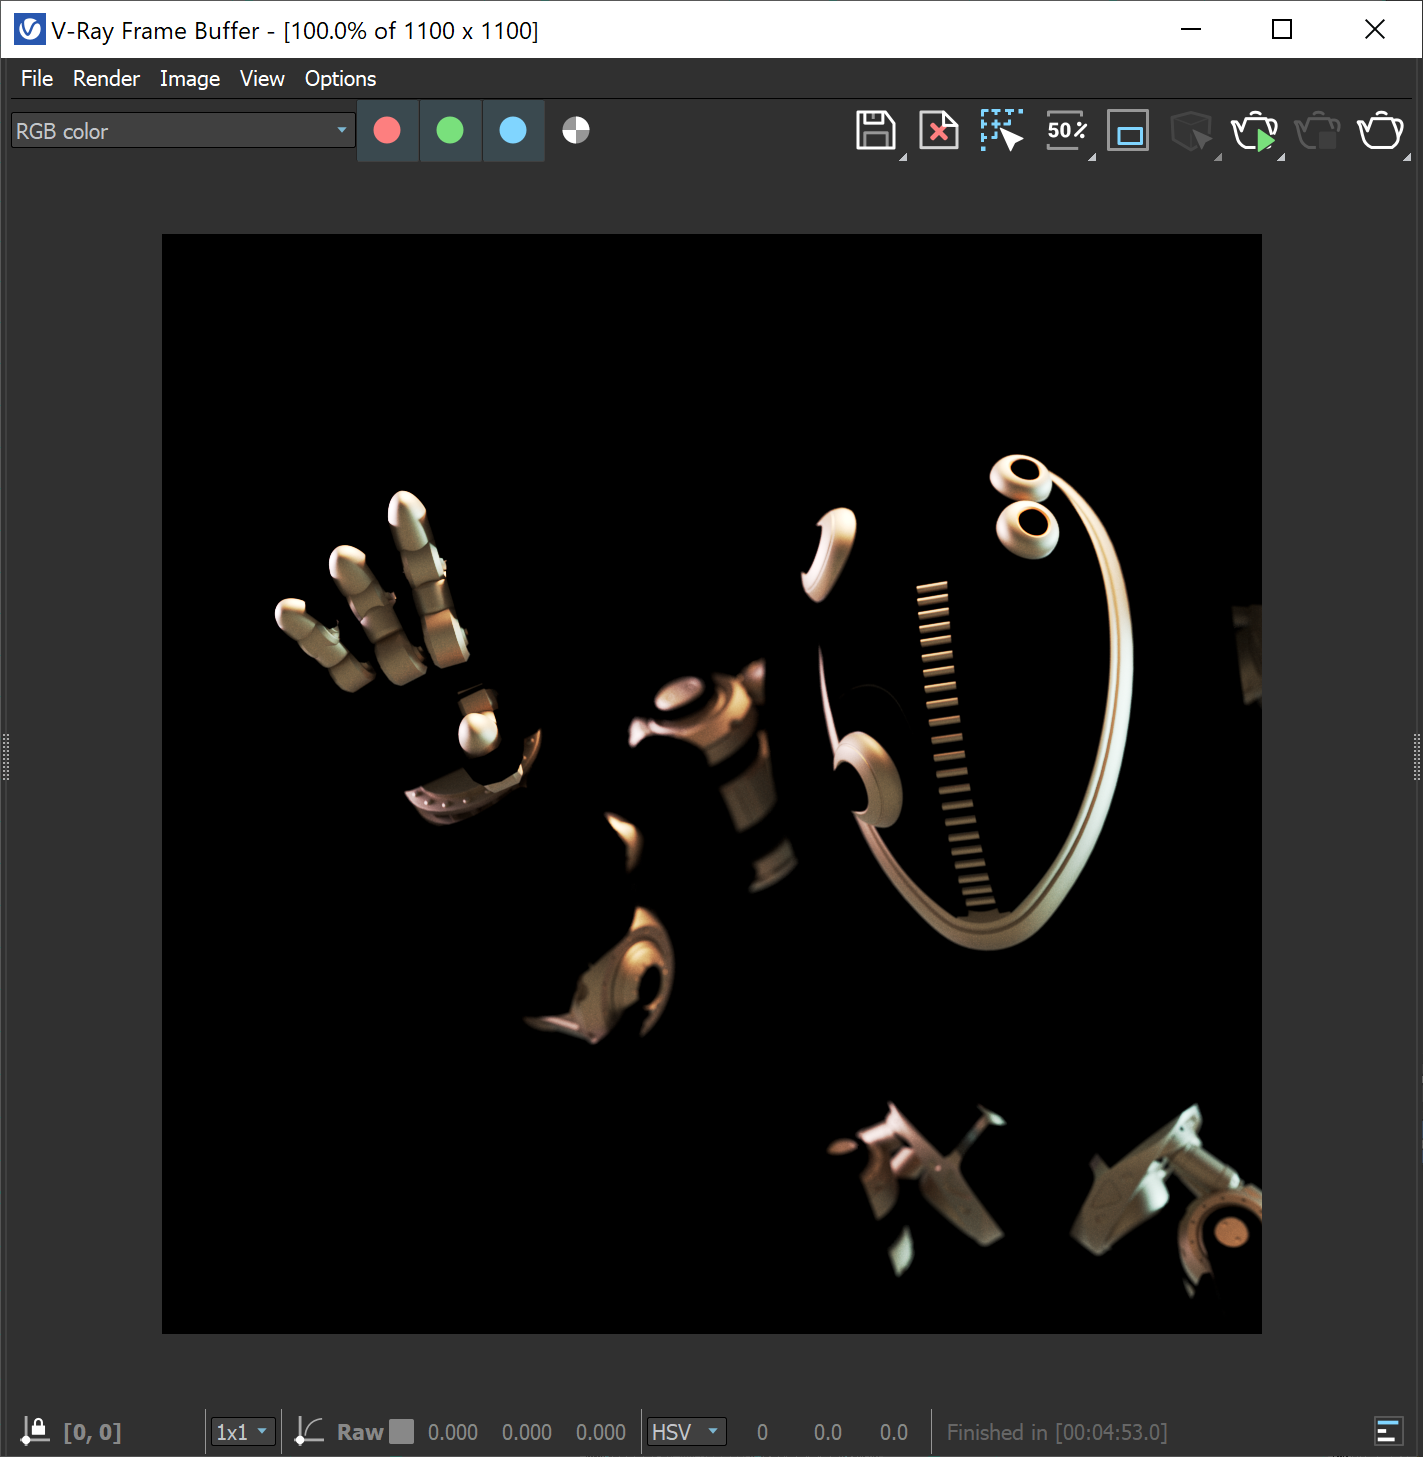
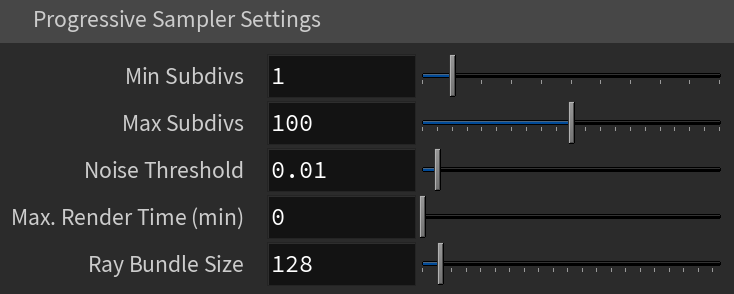
Example: Stages of Rendering with the Progressive Sampler

...

Section
Column
width50%

Lock Subdivs – Sets a fixed number of samples taken for each pixel.

Min Subdivs – Determines the initial (minimum) number of samples taken for each pixel. You will rarely need to set this to more than 1, unless you have very thin lines that are not captured correctly, or fast moving objects when using motion blur. The actual number of samples is the square of this number (e.g. 4 subdivs produce 16 samples per pixel).

Max Subdivs – Determines the maximum number of samples for a pixel. The actual maximum number of samples is the square of this number (e.g. 4 subdivs produces a maximum of 16 samples). Note that V-Ray may take less than the maximum number of samples, if the difference in intensity of the neighboring pixels is small enough.

Noise Threshold – The threshold that is used to determine if a pixel needs more samples. For more information, see The Threshold Parameter example below.

Column
width5%


Column
width45%

Image Removed


...

Example: The Threshold Parameter


This example deals with texture anti-aliasing and the effect of the color threshold for the Bucket sampler.

By default V-Ray anti-aliases everything in the image, including textures. This is especially useful for textures with small details or noisy bump maps. The Threshold parameter controls the extent to which texture anti-aliasing is performed. The effect of this parameter is most noticeable with low min rates. For the four images below, min/max rate of -3/2 was used:

Section
Column
width25%


Column
width50%
Image slider
minLabel0.1
maxLabel10
Panel
borderStylenone

Image Removed

Threshold 0.1

Panel
borderStylenone

Image Removed

Threshold 1.0

Panel
borderStylenone

Image Removed

Threshold 5.0

Panel
borderStylenone

Image Removed

Threshold 10.0

Column
width25%


Note that the edges of the object in those images are always sharp.

Image Added


If you set the Threshold to a high value, you are effectively telling V-Ray not to anti-alias textures. You can use this fact to speed up the rendering of complex materials. Note however, that this disables anti-aliasing of V-Ray shadows, reflections, etc. as well.
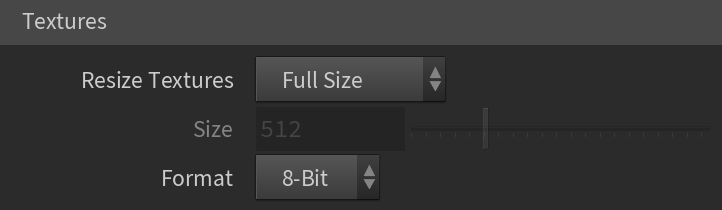
 

Textures

...

Section
Column
width50%

This rollout is active only when rendering on GPU/RTX.

Resize Textures – Determines how textures' resolution/size are handled to help optimize memory usage. The possible values are:

Full Size – Textures are loaded at their original size.
Resize – Adjusts the size of high-resolution textures to a smaller resolution to optimize render performance.
Mipmapping – Instead of loading all the texture files at their default resolution (original or resized), V-Ray loads the textures as needed and automatically create mip-map tiles for them (regardless of their texture type). As a result, the GPU memory consumption could be decreased; textures that are not visible are not loaded, and textures that are further away from the camera are loaded with a lower resolution. During the texture-detection process, V-Ray GPU renders slower. Once it detects that all textures are loaded, it switches automatically to the traditional, faster mode, and a message about modes changing displays in the V-Ray log. This option is only available in the Production Rendering Mode.

Size – When GPU Resize textures is enabled, this value specifies the resolution to which the textures are resized.

Format – The amount of bits per channel used to store the material texture information into memory. You can choose between 8 bit16 bit and 32 bit. This does not affect textures used for lights and displacement.

Column
width5%


Image Removed
Column
width45%

Image Added


Post Effects

...

Section
Column
width50%

Post Effect Rate – The regularity of updates during the progressive rendering; roughly the percentage of the time effects like denoising and/or lens effects are allowed to take compared to the frame render time. Zero disables updates during the progressive rendering, while larger values cause the effects to be updated more frequently; 100 causes updates as often as possible. Values ranging from 5 to 10 are usually sufficient.

Column
width5%


Column
width45%

Image RemovedImage Added

Anchor
Notes
Notes


Notes

...

Fancy Bullets
typecircle
  • A note on RAM usage: image samplers require substantial amount of RAM to store information about each bucket. Using large bucket sizes may take a lot of RAM.