Black box objects are imported completely, but they are closed for editing - the user cannot tweak their contents. Black Box Objects are displayed with the icon. For a list of the unsupported components, see the Limitations section.
Column
width
5%
Column
width
50%
Image RemovedImage Added
...
Section
Column
width
50%
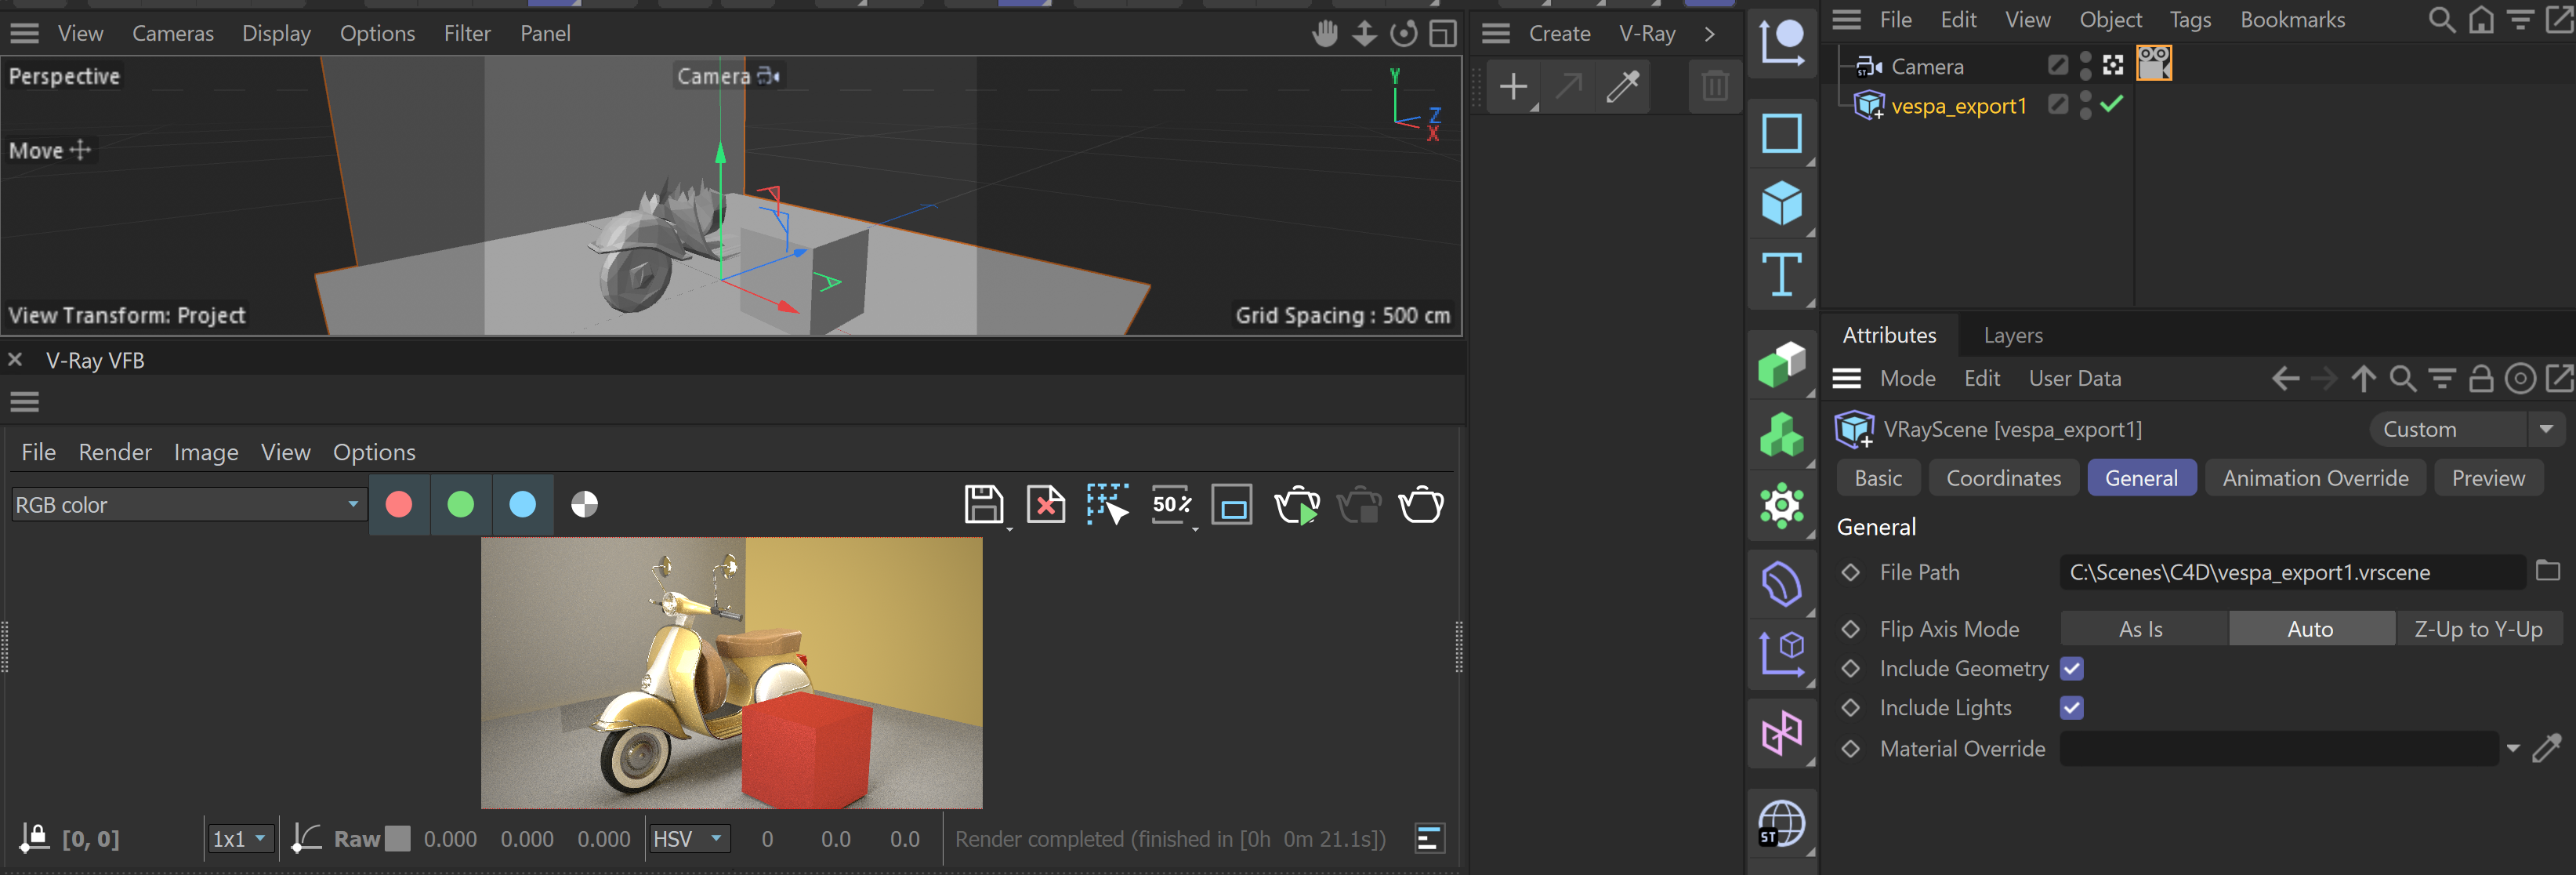
V-Ray Scene Reference
The V-Ray Scene Reference Import Type imports the V-Ray Scene file as a proxy - its components cannot be individually edited, but the proxy can be edited as a whole. This Import Type is more compact and saves processing power. If no further edits need to be made to the scene, we recommend using this method for transferring V-Ray scenes.
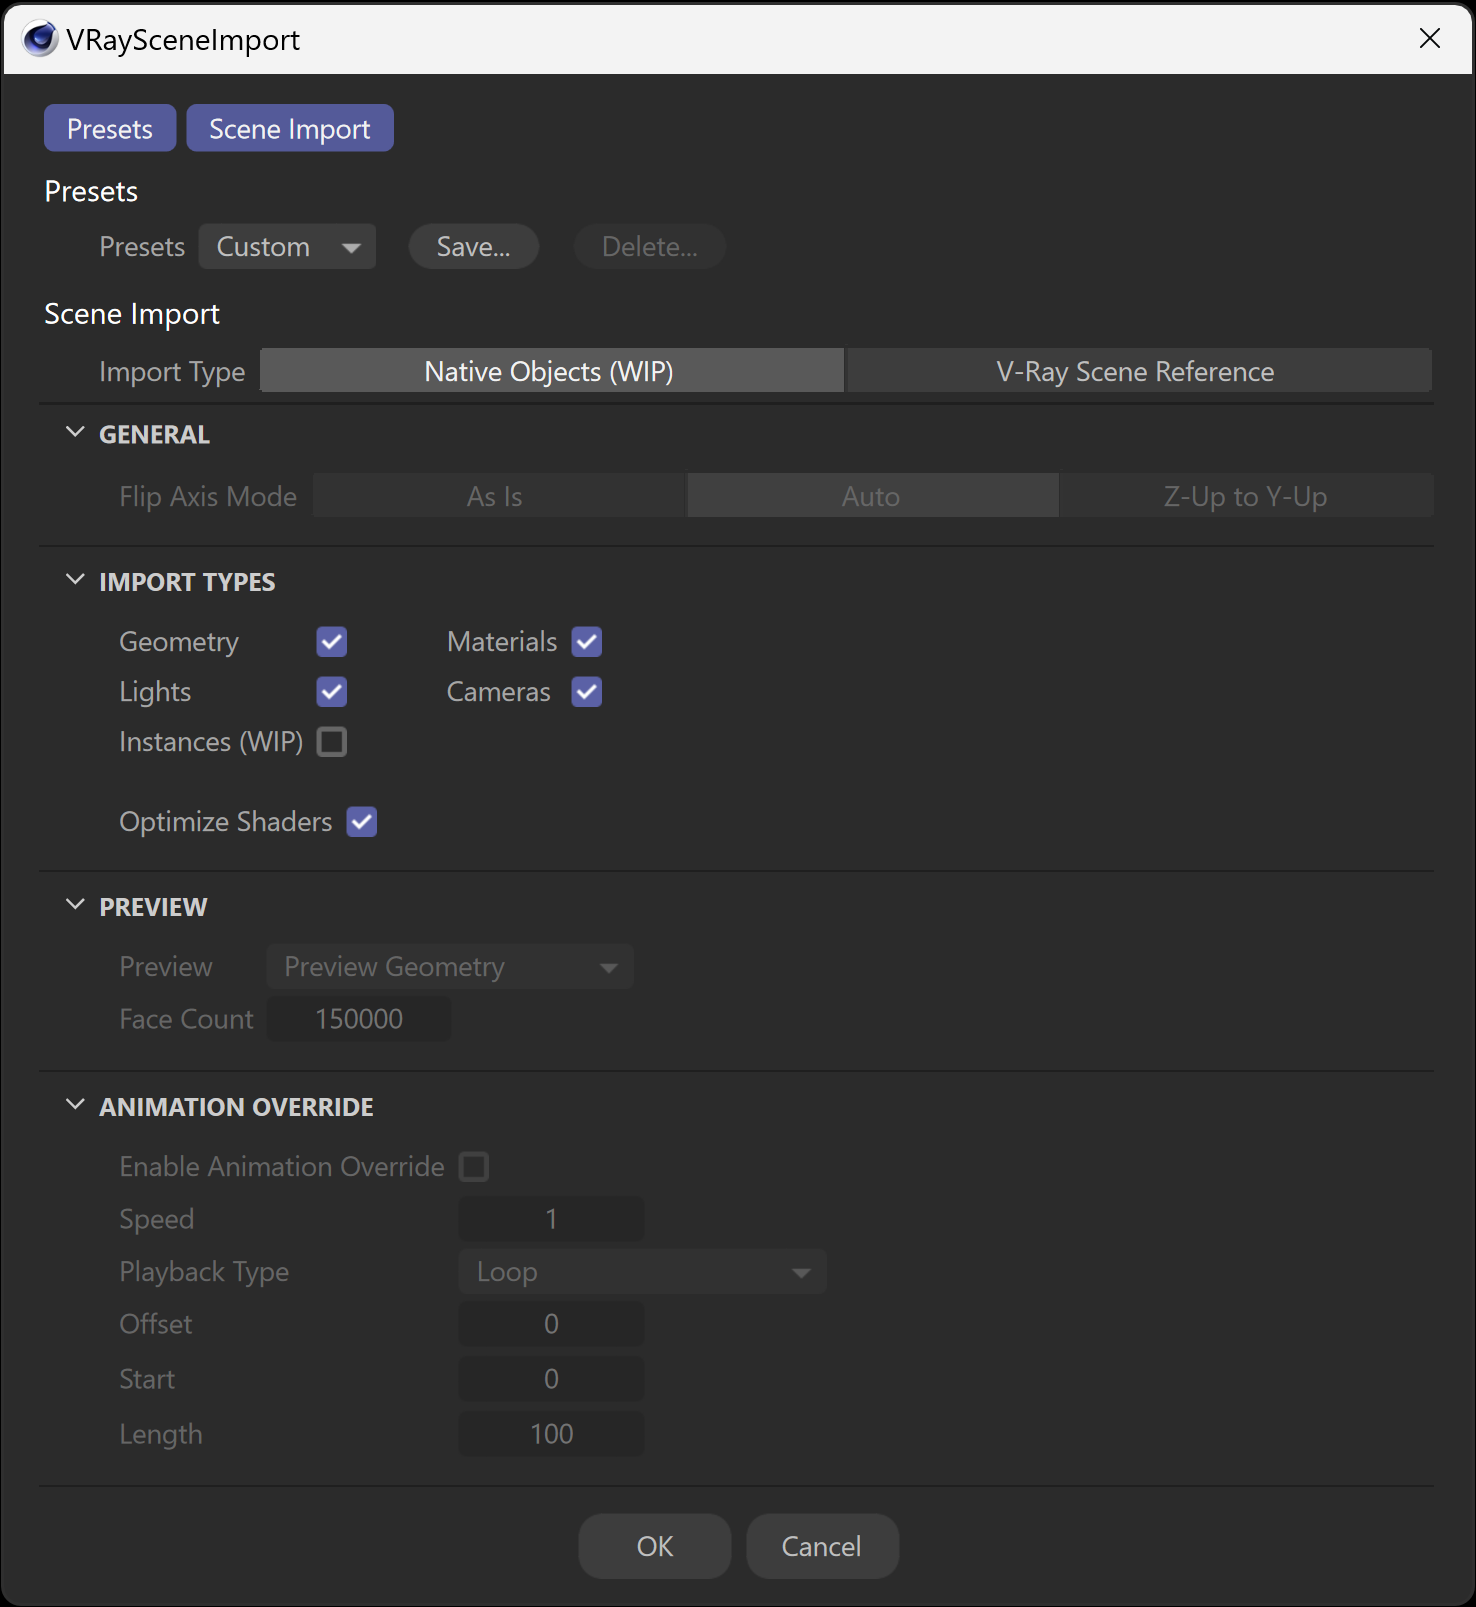
The VRaySceneImport window prompts you to select some import options for the .vrscene file. The Presets tab is a Cinema 4D tab that allows you to save and reuse settings as presets.
Import Type – Determines how the file is read when imported. See the Import Types section for more information.
Native Objects (WIP)* – The elements in the file are read and imported individually as separate native objects as if the scene was created locally. This allows for greater editability of the imported V-Ray scene. Keep in mind that not all assets will be imported properly due to their nature - elements that are not supported by V-Ray for Cinema 4D and elements that are not supported by V-Ray Scene, currently cannot be imported natively. V-Ray Scene Reference – The file is imported as a V-Ray Scene geometry. Edits to the scene are limited to the V-Ray Scene parameters.
GENERAL
Flip Axis Mode – Controls which axis is used as a vertical - the Y or Z axes for the loaded vrscene. You can choose between:
As Is– No changes in the axes are applied. Auto – It aligns the vertical axis of the vrscene with the vertical axis in the scene in cases where the vrscene was not exported from 3ds Max. Use the Auto mode when loading a USD file. Z-Up to Y-Up – Switches the Z and Y axes. Y-Up to Z-Up – Switches the Y and Z axes.
IMPORT TYPES
Geometry – Allows the import of all the geometry from the .vrscene file.
Lights – Allows the import of all the lights from the .vrscene file
Instances (WIP)* – Allows the import of Instance Objects that were exported using Render Instance mode.
Materials – Allows the import of all the materials from the .vrscene file as Classic or Node V-Ray materials. Scenes exported from Maya will have their place2dTexture replaced with the V-Ray for Cinema 4D equivalent, which is the UVW Place 2D node and classic textures.
Cameras – Allows cameras to be imported from the .vrscene file.
Optimize Shaders - Optimizes the shaders and textures without altering their look. We recommend keeping this option on.
PREVIEW
Preview – Specifies one of the following modes for previewing the selected .vrscene in the viewport:
Preview Geometry – Displays a preview of the .vrscene using the value of the Face Count parameter. Bounding Box – Displays a preview of the .vrscene using bounding boxes. Points – Displays the .vrscene using points. Disabled – Hides the .vrscene.
Face Count – Determines the number of faces that are used for previewing the .vrscene file.
ANIMATION OVERRIDE
Enable Animation Override – Enables the following parameters found in the Animation Overrides rollout.
Speed – Determines the pace at which the animation plays. The default of 1 plays at the speed for which the animation was created.
Playback Type – Specifies how to read the animation in the .vrscene.
Loop –Plays the entire animation, then restarts on the initial frame. Once –Plays the animation once, then displays the last frame of the animation for all further frames. Ping-pong–When the end of the animation is reached, the animation is reversed. Still– Displays only one frame.
Offset – Shifts the start frame.
Start – Determines which frame is considered the first frame of the animation.
Length – Sets the length of the animation. If this value is less than the total number of frames, the animation is clipped. If it is greater than the number of frames, the Playback Type option determines how the extra frames are interpreted.
Column
width
5%
Column
width
45%
Image RemovedImage Added
Transfer Enscape Scenes Using V-Ray Scene files
...
Section
Column
width
45%
V-Ray Toolbar
Go to the V-Ray menu > Tools > V-Ray Toolbar. The V-Ray Toolbar is a palette that can be docked anywhere in the interface. Select V-Ray Scene () and select a .vrscene file. The file is imported as a V-Ray Scene Reference.
Column
width
5%
Column
width
50%
Image RemovedImage Added
...
Section
Column
width
45%
Through V-Ray menu
You can import a .vrscene file using the V-Ray menu. Select Geometry > V-Ray Scene.
From Attributes, go to the General tab of the V-Ray Scene. From File Path, select the .vrscene file. It loads in the 0,0,0 coordinates in Cinema 4D. The file is imported as a V-Ray Scene Reference.
Column
width
5%
Column
width
50%
Image RemovedImage Added
...
Section
Column
width
45%
VRmat material import
If you only want to import the materials from a .vrscene file, you can use the VRmat material or material node to do so. Create a VRmat material or material node and attach your .vrscene file in the Material File field. You can then select a specific material from the file using the Material Name dropdown menu.